Sign In
Upload
Download
Table of Contents
Contents
Add to my manuals
Delete from my manuals
Share
URL of this page:
HTML Link:
Bookmark this page
Add
Manual will be automatically added to "My Manuals"
Print this page
×
Bookmark added
×
Added to my manuals
Manuals
Brands
Lowenstein Medical Manuals
Fan
prisma VENT30
Assembly and main instructions for use and maintenance
Lowenstein Medical prisma VENT30 Assembly And Main Instructions For Use And Maintenance
For use for patients for devices of type wm110td and wm120td
Hide thumbs
Also See for prisma VENT30
:
Instructions for use manual
(52 pages)
1
Table Of Contents
2
3
4
5
6
7
8
9
10
11
12
13
14
15
16
17
18
19
20
21
22
23
24
25
26
27
28
29
30
31
32
33
34
35
36
37
38
39
40
41
42
43
44
45
46
47
48
49
50
51
52
53
54
55
56
57
58
59
60
61
62
63
64
page
of
64
Go
/
64
Contents
Table of Contents
Troubleshooting
Bookmarks
Table of Contents
Table of Contents
Introduction
Intended Use
Description of Function
User Qualifications
Indications
Contraindications
Side Effects
Clinical Benefits
Safety
Safety Information
General Information
Warnings in this Document
Product Description
Overview Prisma VENT30, Prisma VENT30-C, Prisma VENT40, Prisma VENT40-C
Overview Prisma VENT50, Prisma VENT50-C
Operating States
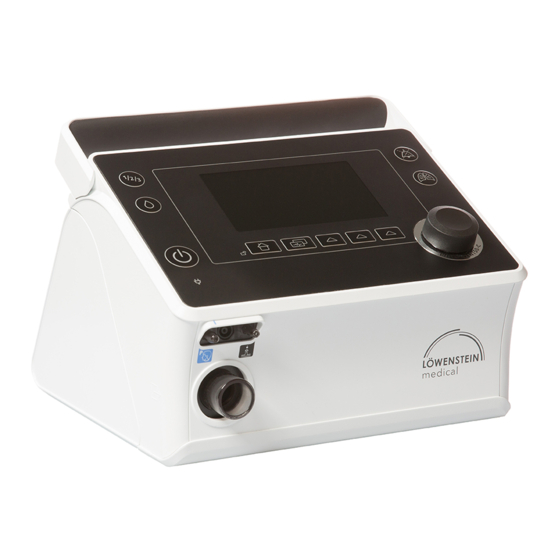
Control Panel
Symbols in the Display
Preparation and Operation
Set up the Device
Connecting Circuit
Before First Use
Start Therapy
End Therapy/Switch off Device
Set Humidifier
Select a Preconfigured Program
LIAM (Prisma VENT50, Prisma VENT50-C Only)
Switching Softstart on and off
Use SD Card (Optional)
Use Battery (Optional)
Settings in the Menus
Navigating in the Device
Patient Menu
Hygiene Treatment
General Information
Intervals
Hygiene Treatment for Device
Clean Air Filter (Gray Filter)
Replace Pollen Filter (White Filter)
Function Check
Alarms and Faults
Sequence for Display of Alarms
Deactivating Physiological Alarms
Muting Alarms
Physiological Alarms
Technical Alarms
Troubleshooting
Servicing
Safety Information
General Information
Transport and Storage
Disposal
Appendix
Technical Data
Emission of Electromagnetic Interference
Electromagnetic Interference Immunity
Electromagnetic Interference Immunity for ME Equipment and ME Systems
Markings and Symbols
Scope of Supply
Accessories and Replacement Parts
Advertisement
Quick Links
1
Table of Contents
2
Description of Function
3
Set up the Device
Download this manual
EN Instructions for use for patients for devices of type WM110TD and WM120TD
prisma VENT30
prisma VENT30-C
prisma VENT40
prisma VENT40-C
prisma VENT50
prisma VENT50-C
Ventilators
Table of
Contents
Previous
Page
Next
Page
1
2
3
4
5
Advertisement
Table of Contents
Need help?
Do you have a question about the prisma VENT30 and is the answer not in the manual?
Ask a question
Questions and answers
Related Manuals for Lowenstein Medical prisma VENT30
Medical Equipment Lowenstein Medical prisma VENT30 Instructions For Use Manual
Ventilators (52 pages)
Fan Lowenstein Medical prisma VENT50-C Assembly And Main Instructions For Use And Maintenance
For use for patients for devices of type wm110td and wm120td (64 pages)
Fan Lowenstein Medical LUISA Instructions For Use Manual
Ventilator for home environment (40 pages)
Fan Lowenstein Medical LUISA LM150TD Instructions For Use Manual
Ventilator for home environment (44 pages)
This manual is also suitable for:
Prisma vent30-c
Prisma vent40
Prisma vent40-c
Prisma vent50
Prisma vent50-c
Table of Contents
Print
Rename the bookmark
Delete bookmark?
Delete from my manuals?
Login
Sign In
OR
Sign in with Facebook
Sign in with Google
Upload manual
Upload from disk
Upload from URL


Need help?
Do you have a question about the prisma VENT30 and is the answer not in the manual?
Questions and answers