Table of Contents
Advertisement
Quick Links
Advertisement
Table of Contents

Related Manuals for Smeg DR72IN


Summary of Contents for Smeg DR72IN
- Page 1 DR72IN Dryer...
-
Page 2: Explanation Of Symbols
Read this manual prior to initial operation of the product! Dear Customer, We hope that your product, which has been manufactured in modern facilities and passed through a strict quality control procedure, will give you very good results. We advise you to read through this manual carefully before using your product and keep it for future reference. This User Manual will Explanation of symbols Caution;... -
Page 3: Important Safety Information
Important safety information This section includes safety information that will help protection from risks of personal injuries or materialistic the dryer. damages. Failure to follow these instructions shall cause any warranty and reliability commitment to become void. General safety oil, kerosene, stain remover, turpentine, paraffin and paraffin removers must be washed in hot water with otherwise, lack of airflow beneath the machine may plenty of detergent before being dried in the dryer. -
Page 4: Children's Safety
Children’s safety otherwise, you will be putting your life and others’ lives in danger. operating. Do not let them tamper with the machine. Turn off the machine, turn off and contact an the packaging materials out of reach of children authorised service agent. -
Page 5: Appropriate Installation Location
Installation installation of your product. the product for the first time. Do not leave any items the product is under customer’s responsibility. inside the drum. Under counter installation out by a qualified personnel. rear walls of the product and the walls of the counter/ cupboard when installing your product under a counter or in a cupboard. -
Page 6: Electrical Connection
First use its end. Do not use any tools to take out the hose. 2. Connect the special drain hose supplied with the calling the authorised service agent, make sure machine to the pipe fitting. that its location and power supply installations are 3. -
Page 7: Technical Specification
Technical specification 84.6 cm Width 59.5 cm Depth 53 cm 7 kg 36 kg Voltage See type label Type label is located behind the loading door. 7 EN... -
Page 8: Initial Preparations For Drying
Initial preparations for drying hings to be done for energy saving: A B C washing them. Thus, the drying time is shortened and energy consumption is decreased. programme selection. front and rear side of the dryer for air circulation. Do not block the grill at the front side of the product. -
Page 9: Preparing Laundry For Drying
materials with rubber reinforcement and rubber foam pads should not be dried in the dryer. 1500 unless they are recommended by the manufacturers 1000 of the fabric softener or the product. break during drying, they will damage your dryer. Preparing laundry for drying Small tablecloths Check all laundry items before loading them into the Tea napkins... -
Page 10: Loading The Laundry
Loading the laundry compressing. Ensure that no items are caught in the door. 10 EN... -
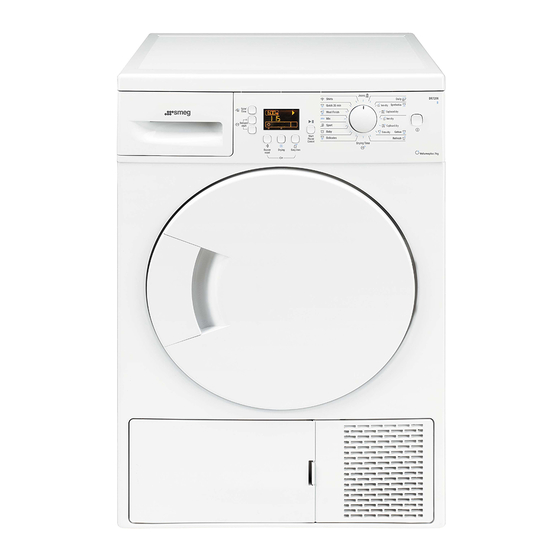
Page 11: Control Panel
Selecting a Programme and Operating Your Machine Control panel 1. Washing machine spin speed*/ Timer programme 5. On/Off button selection Spin speed used to spin the laundry in the washing 6. Anti-creasing 2. Display completes its programme. 7. Dryness level 3. -
Page 12: Preparing The Machine
Preparing the machine You can use this programme to dry your cotton laundry that you have spun at high speeds in your washing machine.This program dries 2 kg cotton laundry (2 Shirts To obtain better results from your dryer, your laundry must be washed at suitable programmes and spun at the recommended spin speeds in the washing programme. -
Page 13: Time Display
You can select one of the 10 min., 20 min., 30 min., 40 min., 50 min., 60 min., 80 min., 100 min., 120 min., 140 min. and 160 min. timer programmes to achieve the dries at the selected time regardless of the drying temperature. - Page 14 Programme selection and consumption table Programme table Spin speed in Drying time washing machine of remaining humidity Cottons / Coloreds 1000 % 60 Cupboard dry 1000 % 60 1000 % 60 Quick 35 min 1200 % 50 Shirts 1200 % 50 Jeans 1200 % 50...
-
Page 15: Auxiliary Function
Auxiliary function When the contrast is changed at the end of 3 seconds, all symbols on the display will become visible for 3 seconds Audio Warning in order to indicate that the process is complete. previous contrast setting. Warning indicators Your dryer will give an audio warning when the Warning indicators may differ according to the model of your machine. - Page 16 Progress of programme Time delay The progress of a running programme is shown through a With the “Time delay” function you can delay the number of symbols on the screen. programme start up to 24 hours. At the beginning of each programme step, the relevant symbol in the series of symbols will light up and thus, all 2.
-
Page 17: Childproof Lock
Adding/removing laundry in standby new programme information is displayed Ending the programme through canceling mode A new program can be selected and started after the programme; drying program. after adding or taking out laundry. light up and “End” label appears on the screen as a reminder at the end of this period. -
Page 18: Filter Cartridge / Door Inner Surface
Maintenance and cleaning Filter Cartridge / Door Inner Surface the drying cycle are collected in the “Filter Cartridge”. Sensor Such fibre and lint are generally formed during wearing and washing. Always clean the filter and the inner surfaces of the cover after each drying process. -
Page 19: For The Condenser
with a shower armature and wait until the water drains. tank, clean it under running water. and make sure that they are seated securely. For the condenser; cold air from the room. Thus, the humid air circulating in your dryer is condensed and then pumped into the tank. Clean the condenser after every 30 drying cycles or once a month. -
Page 20: Suggested Solutions For Problems
Suggested solutions for problems Drying process takes too much time Dryer does not switch on or the programme does not start. Dryer is not activated when set. drying in dryer after checking the labels on your clothes. Drum lightning does not come on. dryer and take out the laundry.