Table of Contents
Advertisement
Quick Links
Advertisement
Table of Contents

Subscribe to Our Youtube Channel
Related Manuals for Agrisem 3 Series


Summary of Contents for Agrisem 3 Series
- Page 1 One-Pass stubble Cultivators maximulch series 3 | series 5 | series 6 EN - Manual translated from French AGRISEM INTERNATIONAL S.A 535 Rue Pierre Levasseur CS 60263 44158 ANCENIS FRANCE Tel.: +33 (0)2.51.14.14.40 Fax: +33 (0)2.40.96.32.36 NOTT-GB-708-A 06/12/2019...
-
Page 3: Table Of Contents
User manual - Maximulch - Series 3 | Series 5 | Series 6 Contents FOREWORD ........................5 1. Introduction ........................6 1.1. Purpose of the user manual ........................6 1.2. Using the manual ..........................6 1.3. Ordering the manual ..........................7 1.4. Interpreting the version of the manual ....................7 1.5. - Page 4 User manual - Maximulch - Series 3 | Series 5 | Series 6 6.13. Adjusting the border spreading disc ....................78 6.14. Types of roller and applications ......................80 6.15. Accessories ............................81 6.16. Soft ground adjustment recommendations..................82 6.17. Firm ground adjustment recommendations ..................83 6.18.
-
Page 5: Foreword
User manual FOREWORD We thank you for the confidence you have shown in AGRISEM INTERNATIONAL by purchasing this item of equipment. This manual is provided with your machine to enable you to make best use of your equipment, and in particular in compliance with the safety requirements. -
Page 6: Introduction
This user manual is an integral part of the machine and must always accompany it, especially in the event of resale. AGRISEM INTERNATIONAL is constantly seeking to improve its products and reserves the right to modify or improve its products with no obligation to apply these modifications or improvements to products already on the market. -
Page 7: Ordering The Manual
User manual Introduction 1.3. Ordering the manual You can order the user manual by sending a request to: AGRISEM INTERNATIONAL S.A. 535 Rue Pierre Levasseur CS 60263 44158 ANCENIS - France Tel.: +33(0)2.51.14.14.40 – Fax: +33(0)2.40.96.32.36 1.4. Interpreting the version of the manual The version of the manual is indicated on the cover page and consists of the following. - Page 8 User manual Introduction NOTE This pictogram provides advice. Consequences: more efficient use. BARRED BIN Indicates that waste must not be disposed of in a conventional dustbin but collected through special channels. MOEBIUS LOOP The universal recycling symbol. It indicates that the product or its packaging is technically recyclable, not that it is or will be recycled.
-
Page 9: Presentation Of The Machine
2. Presentation of the machine 2.1. Intended use of the equipment The AGRISEM INTERNATIONAL Maximulch range of One-Pass stubble cultivators is exclusively designed for professional use in accordance with the recognised rules for the purposes of performing agricultural work. Maximulch stubble cultivators are designed and adapted to be connected to the hitching and towing system of a tractor for: carrying out shallow cultivation to bury stubble and leftover straw and assist their decomposition. -
Page 10: General View Of The Machine
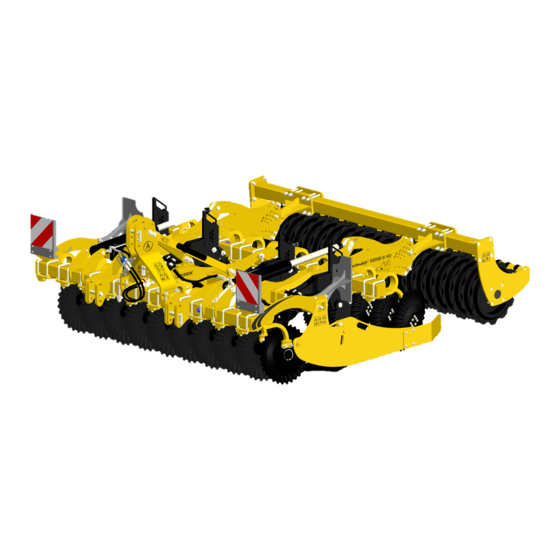
User manual - Maximulch - Series 3 | Series 5 | Series 6 Presentation of the machine 2.2. General view of the machine 2.2.1. Differences between Maximulch cultivator models Series 3 Series 3 Series 3 Model tractor- HD tractor- Series 5 Series 6 trailed mounted... - Page 11 User manual - Maximulch - Series 3 | Series 5 | Series 6 Presentation of the machine 2.2.2. Maximulch series 3 fixed tractor-mounted NOTT-0384 Fig. 1 Description Hitch 3D security Multistop depth adjustment system Blade security Blades Mulcher discs Rollers Signalling lights and panels NOTT-GB-708-A 06/12/2019...
- Page 12 User manual - Maximulch - Series 3 | Series 5 | Series 6 Presentation of the machine 2.2.3. Maximulch series 3 HD tractor-mounted NOTT-0414 Fig. 2 Description Hitch 3D security Multistop depth adjustment system Blades Mulcher discs Signalling lights and panels NOTT-GB-708-A 06/12/2019...
- Page 13 User manual - Maximulch - Series 3 | Series 5 | Series 6 Presentation of the machine 2.2.4. Maximulch series 3 folding trailed NOTT-0385 Fig. 3 Description Hitch 3D security Multistop depth adjustment system Blade security Blades Mulcher discs Rollers Deflectors Transport wheels Signalling lights and panels...
- Page 14 User manual - Maximulch - Series 3 | Series 5 | Series 6 Presentation of the machine 2.2.5. Maximulch series 5 fixed trailed NOTT-0386 Fig. 4 Description Hitch 3D suspension Blades Mulcher discs Rollers Transport wheels NOTT-GB-708-A 06/12/2019...
- Page 15 User manual - Maximulch - Series 3 | Series 5 | Series 6 Presentation of the machine 2.2.6. Maximulch series 5 folding trailed NOTT-0387 Fig. 5 Description Hitch 3D suspension Blades Mulcher discs Rollers Transport wheels Signalling lights and panels NOTT-GB-708-A 06/12/2019...
- Page 16 User manual - Maximulch - Series 3 | Series 5 | Series 6 Presentation of the machine 2.2.7. Maximulch series 6 folding trailed NOTT-0388 Fig. 6 Description Hitch 3D suspension Blades Mulcher discs Rollers Transport wheels Signalling lights and panels Parking support leg NOTT-GB-708-A 06/12/2019...
-
Page 17: Identification
User manual - Maximulch - Series 3 | Series 5 | Series 6 Identification 3. Identification 3.1. Validity of the user manual This user manual is valid for the following machines. Serial number Machine Type From Maximulch Series 3 folding trailed Maximulch Series 3 fixed tractor-mounted Maximulch... - Page 18 User manual - Maximulch - Series 3 | Series 5 | Series 6 Identification The data plate includes the following information: Description Model Serial or identification number Year of manufacture Empty weight of the equipment NOTT-0052 Fig. 8 3.2.2. Trailed machines type-approved for road use The data plate is located on the front frame.
- Page 19 User manual - Maximulch - Series 3 | Series 5 | Series 6 Identification Series 6 NOTT-0392 Fig. 11 The data plate includes the following information: Description Make Type / variant / version Serial or identification number Date of approval Issuing authority (DREAL) Gross vehicle weight Unladen weight...
- Page 20 Place of manufacture Manufacturing number Width of machine Incrementation NOTT-0394 The example opposite is therefore the identification Fig. 13 number of a Maximulch Series 3 trailed cultivator with hydraulic braking manufactured in 2018 by AGRISEM INTERNATIONAL and 4.5 m wide. NOTT-GB-708-A 06/12/2019...
-
Page 21: Identification Of The Machine
Dealer's address ..............................................................................Dealer's telephone number ....................AGRISEM INTERNATIONAL S.A. 535 Rue Pierre Levasseur CS 60263 44158 ANCENIS - France Tel.: +33(0)2.51.14.14.40 – Fax: +33(0)2.40.96.32.36 E-mail: agrisem@agrisem.com IMPORTANT This document should be kept inside this user manual. -
Page 22: Warranty
The parts alleged to be faulty must be returned to the Company's address for expert inspection: AGRISEM INTERNATIONAL S.A. – 535 Rue Pierre Levasseur – CS 60263 – 44158 ANCENIS - France Tel.: +33(0)2.51.14.14.40 – Fax: +33(0)2.40.96.32.36 The following shall be considered to constitute proof of the date of delivery of the equipment: the date of the delivery note and the purchaser invoice date. - Page 23 In the event that the machine is used with improperly attached or non-functioning protection and safety devices. If the machine has been modified without prior written permission from AGRISEM INTERNATIONAL, or if spare parts, accessories or equipment have been fitted to the machine which were not recommended by AGRISEM INTERNATIONAL.
- Page 24 1 - Returning by the dealer of the warranty certificate duly completed and signed by the dealer and the purchaser. 2 - Claims must be made without fail using an AGRISEM INTERNATIONAL "WARRANTY CLAIM FORM" (see appendix) and sent by registered letter with acknowledgement of receipt by the dealer to the company’s technical department within 10 days of the incident.
-
Page 25: Exclusive Liability Clause
Moreover, AGRISEM INTERNATIONAL cannot be held liable for injury to the owner or a third party or for the indirect consequences of such an injury, whether or not it results from a fault. You are also reminded that a safe distance of 50 m must be maintained around the machine. -
Page 26: Safety Instructions
Combining of the machine with other instruments or machines without the written agreement of AGRISEM INTERNATIONAL and/or without complying with the instructions given by the manufacturers of the tractor and the other instruments or machines. - Page 27 Fitting of spare parts, accessories or equipment on the machine which are not genuine or which have not been recommended by AGRISEM INTERNATIONAL. Spare parts are available via the online spare parts catalogue (accessible via http://parts.agrisem.com/) or through your approved customer service network.
- Page 28 Ensure good compatibility of the tractor-to-machine hitching device. Only combine equipment that is compatible (machine and tractor). If in doubt, contact the AGRISEM INTERNATIONAL customer service network . Check that the tractor has the characteristics necessary to hitch the machine (see “Characteristics”, page 118).
- Page 29 User manual Safety instructions Data needed for calculation NOTT-0222 Fig. 14 Unit Description Comment [kg] Empty weight of tractor see the tractor's user manual or registration papers [kg] Front axle load of the empty tractor [kg] Rear axle load of the empty tractor [kg] Total weight of rear-mounted machine or See technical characteristics of the...
- Page 30 User manual Safety instructions Unit Description Comment Spacing between the centre of the rear see the tractor's user manual or registration axle and the centre of lower arms’ hitch papers or measurement point Distance between the centre of the lower technical characteristics arms' hitch point and the centre of gravity...
- Page 31 User manual Safety instructions Calculation of the actual total weight of the combined tractor and machine Enter the value for the calculated actual total weight and the authorised total tractor weight specified in the tractor user manual in the table on page 31. NOTT-0225 Fig.
- Page 32 User manual Safety instructions NOTE Refer to the tractor's registration documents to obtain the authorised values for the total weight, axle loads and tyre load capacities. The calculated actual values must be less than or equal to (≤) the authorised values. WARNING Risk of crushing, cutting, entanglement, entrapment and impact through insufficient stability of the tractor under load and insufficient tractor manoeuvrability and braking power.
- Page 33 DSA: Disc-O-Mulch / Maximulch / Actimulch DS500/200: Disc-O-Mulch / Maximulch / Actimulch AGRISEM INTERNATIONAL accepts no liability in the event of damage resulting from a combination of machines that has not been authorised in writing by AGRISEM INTERNATIONAL. Accidents linked to the failure of components during operation may result from unauthorised combinations of hitching equipment.
- Page 34 User manual Safety instructions 5.1.4. Instructions to be followed when using the machine WARNING A failure to take movement or operating safety measures may result in accidents involving crushing, cutting, entanglement, entrapment or impact. Before start-up, check that the machine and the tractor are able to move and operate in complete safety. Never climb onto the machine or stand on it when it is moving.
- Page 35 AGRISEM INTERNATIONAL rear signalling lights and panels may be removed when working. Check that this signalling equipment has been correctly refitted before driving on the road.
- Page 36 All operations must be carried out by professionals trained to handle hydraulic technical equipment. Contact the AGRISEM INTERNATIONAL customer service department for the replacement of any hydraulic components. Mark the sockets and connectors of the hydraulic connections between the tractor and the machine to avoid handling errors.
- Page 37 When replacing hydraulic hoses, ensure that you only use hoses of the characteristics and quality recommended by the machine's manufacturer. If in doubt, contact the AGRISEM INTERNATIONAL customer service network After each use of the machine, clean the hydraulic quick connectors' end fittings and fit the protective caps.
- Page 38 (e.g. turbine stopped) and the rear window of the tractor must be shut, the tractor switched off and the ignition keys removed. Ensure that no one is on or near the seeder when the seed is being loaded. The AGRISEM INTERNATIONAL walkway must only be used when the seeder is stationary.
- Page 39 AGRISEM INTERNATIONAL. The user shall acknowledge receipt of the machine and the official documents once handed-over by the dealer. To do this, go to https://my.agrisem.com and follow the instruction given on the web site. 5.1.13. User's workstation The machine must be operated by one person only, from the tractor driver's seat. Before each use, check the area around the machine, no-one must be within 50 metres of the machine.
-
Page 40: Safety Symbols On The Machine
User manual - Maximulch - Series 3 | Series 5 | Series 6 Safety instructions 5.2. Safety symbols on the machine DANGER You are the sole guarantor of safety. Correctly applying the safety instructions will not only serve to protect you but also those around you. Before using the machine, carefully study the instructions given in this manual as well as all the safety and instruction stickers affixed to the machine: consider them as an integral part of your safety programme. - Page 41 User manual - Maximulch - Series 3 | Series 5 | Series 6 Safety instructions Reference Symbol Meaning RISK OF INFECTION BY INJECTION IN THE BODY ETIQ01-641 Follow the servicing and maintenance instructions in the user manual. RISK OF CRUSHING ETIQ01-609 Do not remain in the working area to avoid any risk of crushing.
- Page 42 User manual - Maximulch - Series 3 | Series 5 | Series 6 Safety instructions Reference Symbol Meaning RISK OF CRUSHING ETIQ01-627 Stay clear of swinging area of implements. RISK OF EXPLOSION ETIQ01-639 Pressure tank, do not service or repair. RISK OF ELECTROCUTION ETIQ01-643 Risk of electrocution, keep away from electric lines.
- Page 43 ETIQ01-623 RISK OF CRUSHING ETIQ01-649 Never climb on the machine while the tractor engine is running. IMPORTANT These safety symbols must be present on the machine and legible. If any symbols are missing or damaged, contact AGRISEM INTERNATIONAL. NOTT-GB-708-A 06/12/2019...
- Page 44 User manual - Maximulch - Series 3 | Series 5 | Series 6 Safety instructions 5.2.1. Series 3 fixed tractor-mounted 2 14 15 8 10 18 15 9 NOTT-0395 Fig. 19 NOTT-GB-708-A 06/12/2019...
- Page 45 User manual - Maximulch - Series 3 | Series 5 | Series 6 Safety instructions 5.2.2. Series 3 folding trailed 2 16 6 7 10 9 12 13 15 4 18 4 14 2 18 4 15 4 NOTT-0396 Fig. 20 NOTT-GB-708-A 06/12/2019...
- Page 46 User manual - Maximulch - Series 3 | Series 5 | Series 6 Safety instructions 5.2.3. Series 5 9 10 2 14 6 9 5 13 4 15 15 18 2 14 NOTT-0398 Fig. 21 NOTT-GB-708-A 06/12/2019...
- Page 47 User manual - Maximulch - Series 3 | Series 5 | Series 6 Safety instructions 5.2.4. Series 6 2 16 6 7 10 9 12 4 15 2 14 NOTT-0399 Fig. 22 NOTT-GB-708-A 06/12/2019...
-
Page 48: Operation
User manual - Maximulch - Series 3 | Series 5 | Series 6 Operation 6. Operation 6.1. Location and description of controls 6.1.1. Tractor-mounted machine coupling Description Top link coupling pin Lower link coupling pin Fixed top link pin position Floating top link pin position Fixed bottom link pin position NOTT-0415... - Page 49 User manual - Maximulch - Series 3 | Series 5 | Series 6 Operation 6.1.2. Trailed machine coupling Description Drawbar Towing bracket Drawbar coupling Ball head drawbar coupling Drawbar eye NOTT-0416 Fig. 24 NOTT-GB-708-A 06/12/2019...
- Page 50 The pictograms are located on the drawbar coupling hose support bracket. NOTE The pictograms are common to the entire AGRISEM INTERNATIONAL machine range, certain functions may not be available on your machine. NOTT-0250 Fig. 25...
- Page 51 User manual - Maximulch - Series 3 | Series 5 | Series 6 Operation Description Hose colour-code Raise / Lower axle Green NOTT-0254 Turbine NOTT-0255 Raise / Lower markers Black NOTT-0256 Strength adjustment of crossboards Orange NOTT-0259 Depth adjustment of blades or tines Black NOTT-0258 Fold / Unfold...
- Page 52 User manual - Maximulch - Series 3 | Series 5 | Series 6 Operation Description Hose colour-code Depth adjustment of discs Orange NOTT-0261 Depth adjustment of tines Black NOTT-0262 Depth adjustment of coulters Orange NOTT-0263 Raise / Lower seeding ramp Yellow NOTT-0264 Extend / Retract extensions...
- Page 53 User manual - Maximulch - Series 3 | Series 5 | Series 6 Operation 6.1.4. Pneumatic connectors Description Yellow hand Red hand NOTT-0329 Fig. 26 6.1.5. Hydraulic control valves According to the model, hydraulically-controlled elements are isolated and controlled by means of valves. Model: Series 3 tractor-mounted Description...
- Page 54 User manual - Maximulch - Series 3 | Series 5 | Series 6 Operation Models: Series 3 folding trailed Description Extension Axle Drawbar Folding speed NOTT-0323 Fig. 28 NOTT-0322 Fig. 29 Models: Series 5 trailed Description Axle Drawbar Depth of discs Depth of rollers Roller speed NOTT-0418...
- Page 55 User manual - Maximulch - Series 3 | Series 5 | Series 6 Operation Model: Series 6 Description Drawbar Depth of rollers or depth of levelling discs NOTT-0419 Fig. 31 6.1.6. Lighting system NOTT-0334 Fig. 32 Description Characteristics Headlight 12 V 55 W Indicator lamp 12 V 21 W Brake light...
-
Page 56: Start-Up
User manual - Maximulch - Series 3 | Series 5 | Series 6 Operation NOTE On certain models, the tool must be folded for the lights to be correctly positioned and in compliance with road traffic requirements. 6.2. Start-up 6.2.1. Foreword NOTE When accepting the machine, check that its has the required characteristics. - Page 57 User manual - Maximulch - Series 3 | Series 5 | Series 6 Operation The tractor is suitable for the machine to which it is to be hitched and has been tested accordingly (see “Characteristics”, page 118). The tractor's hydraulic, mechanical and electrical connections are suitable for the machine to which it will be hitched.
- Page 58 User manual - Maximulch - Series 3 | Series 5 | Series 6 Operation 6.3.3. Hitching a trailed machine 1 - Ensure that the machine is on stable ground. 2 - Bring the tractor up to the coupling on the machine. 3 - Hitch the machine to the coupling ring or the tractor's links depending on the type of drawbar fastening.
- Page 59 User manual - Maximulch - Series 3 | Series 5 | Series 6 Operation 6.3.4. Point of convergence The point of convergence can be adjusted to improve the tractor's traction, stability and grip. This also affects the tractor's lifting capacity. On a tractor with 2 drive wheels, the point of convergence must be located close to the centre of the tractor.
-
Page 60: Folding / Unfolding
User manual - Maximulch - Series 3 | Series 5 | Series 6 Operation 4 - Put the parking stands in place (if the machine is fitted with them). 5 - Lower the machine with the drawbar and the trailed or semi-mounted kit. 6 - Disconnect the hydraulic hoses if the machine is fitted with them. - Page 61 User manual - Maximulch - Series 3 | Series 5 | Series 6 Operation 2 - Fold the roller using the tractor's hydraulic control valve. NOTT-0268 Fig. 37 3 - Close the valve located under the hose support bracket. NOTT-0269 Fig.
- Page 62 User manual - Maximulch - Series 3 | Series 5 | Series 6 Operation 5 - Final position: roller folded NOTT-0271 Fig. 40 6.4.3. Unfolding the hydraulic roller Operations must be performed in the order indicated below to avoid damaging certain components of the Maximulch.
- Page 63 User manual - Maximulch - Series 3 | Series 5 | Series 6 Operation 3 - Open the valve located under the hose support bracket. NOTT-0272 Fig. 43 4 - Unfold the roller using the tractor's hydraulic control valve. NOTT-0268 Fig.
- Page 64 User manual - Maximulch - Series 3 | Series 5 | Series 6 Operation 6.4.4. Folding the extensions IMPORTANT To fold the extensions, ensure that the hydraulic sensors in the work, position are activated otherwise the folding system will not work. IMPORTANT The hydraulic sensors can only be activated if the roller arm cylinders are fully extended.
- Page 65 User manual - Maximulch - Series 3 | Series 5 | Series 6 Operation 5 - The hydraulic locking kits will be activated together with the safety systems via the hydraulic sensors. NOTT-0281 Fig. 47 On the mechanically locking version, manually install the locking bar.
- Page 66 User manual - Maximulch - Series 3 | Series 5 | Series 6 Operation 2 - Place the roller arms in the desired working MULTISTOP position two-part folding Maximulch versions (see “6.9.1. Roller MULTISTOP adjustment”, page 70). NOTT-0280 Fig. 50 3 - Operate the system in the folding position until the folding system unlocks.
- Page 67 User manual - Maximulch - Series 3 | Series 5 | Series 6 Operation 4 - Open the isolating valves. NOTT-0275 Fig. 53 5 - Actuate the tractor's folding hydraulic control valve up to the mechanical stop point. NOTT-0273 Fig. 54 6.4.6.
-
Page 68: When Driving On The Road
User manual - Maximulch - Series 3 | Series 5 | Series 6 Operation NOTT-0284 Fig. 56 6.5. When driving on the road When driving on the road the machine must be converted to the transport position. Raise the machine completely to prevent the working elements dragging on the ground. Road transport speed should not exceed 25 kph. -
Page 69: Single-Line Hydraulic Brake System
User manual - Maximulch - Series 3 | Series 5 | Series 6 Operation CAUTION It is forbidden to drive the Maximulch unless the brake couplings are connected to the tractor. 6.6.1. Coupling 1 - Reverse up to the machine and hitch the machine to the tractor. 2 - Connect the hoses: first the yellow line then the red line. -
Page 70: Mechanical Braking System
The working depth of the discs is affected by the roller setting. The roller also serves to level and compress the soil after it has been loosened by the discs. The roller setting is adjusted by means of the AGRISEM INTERNATIONAL MULTISTOP system. NOTT-GB-708-A... - Page 71 User manual - Maximulch - Series 3 | Series 5 | Series 6 Operation Description Upper stop setting Lower stop setting Min. spacing between rollers and discs Max. spacing between rollers and discs 1 to 15 Working depth adjustment range from 1 to 15 cm The lowest position - position (1) - corresponds to a minimum working depth.
- Page 72 User manual - Maximulch - Series 3 | Series 5 | Series 6 Operation An identical setting must be used to each of the blades. Mechanical adjustment of the depth of the bolt safety blades Description Max. depth Min. depth There are 6 different positions between the minimum and maximum height.
- Page 73 User manual - Maximulch - Series 3 | Series 5 | Series 6 Operation Mechanical adjustment of the depth of the spring safety blades NOTT-0425 Fig. 62 IMPORTANT Never remove the pin if the clip (1) is missing. 1 - Check that the beta clip (1) is present to prevent the blade falling when it is adjusted.
- Page 74 User manual - Maximulch - Series 3 | Series 5 | Series 6 Operation NOTE The MAXIMULCH can be used without the blades by simply removing the blades. To remove the blades, follow the procedure described above, lowering the blades as far as possible so that they come out of their rack and pinion housings.
- Page 75 User manual - Maximulch - Series 3 | Series 5 | Series 6 Operation 6.9.3. Drawbar adjustment The drawbar setting affects the working depth of the front discs. Adjust the drawbar to obtain an identical working depth on the 2 rows of discs. Adjust the drawbar setting so that it is tilted slightly towards the ground.
-
Page 76: Adjusting The Left-Hand Side Deflector
User manual - Maximulch - Series 3 | Series 5 | Series 6 Operation Adjusting the hydraulic drawbar Add or remove shims to increase or reduce the working depth of the front row of discs. To increase the number of shims, open valve (2) and actuate the corresponding auxiliary control valve to extend the drawbar cylinder. -
Page 77: Adjusting The Right-Hand Side Deflector
User manual - Maximulch - Series 3 | Series 5 | Series 6 Operation 6.11. Adjusting the right-hand side deflector The right-hand side deflector is designed to limit the spraying of soil from the second row of discs. The deflector must not be in contact with the ground during use. -
Page 78: Adjusting The Clod-Breaking Board
User manual - Maximulch - Series 3 | Series 5 | Series 6 Operation 6.12. Adjusting the clod-breaking board For Maximulch Series 3 machines only Some Maximulch models may be fitted with a clod- breaking board (1). The clod-breaking board is located between the two rows of discs. - Page 79 User manual - Maximulch - Series 3 | Series 5 | Series 6 Operation The border spreading disc is adjusted by means of screws (1). NOTT-0298 Fig. 78 The border spreading disc is adjusted by means of screws (1). NOTT-0299 Fig.
-
Page 80: Types Of Roller And Applications
User manual - Maximulch - Series 3 | Series 5 | Series 6 Operation 6.14. Types of roller and applications Roller Description Recommended use Type of soil Deep vertical consolidation V-Sem All types of soil Good level of consolidation and crumbling NOTT-0303 T-0303 Deep vertical consolidation... -
Page 81: Accessories
User manual - Maximulch - Series 3 | Series 5 | Series 6 Operation Roller Description Recommended use Type of soil High consolidation in difficult conditions Agrix Sticky and wet soils Good soil-seed contact NOTT-0310 T-0310 High consolidation in difficult conditions Steel-Pack High consolidation over entire... -
Page 82: Soft Ground Adjustment Recommendations
User manual - Maximulch - Series 3 | Series 5 | Series 6 Operation Accessories Description Information 45 x 6 mm Cleaner Reversible NOTT-0316 Ø 13 mm Levelling harrow Length: 510 mm NOTT-0317 6.16. Soft ground adjustment recommendations On soft ground, the pressure of the Maximulch on the tractor's top link can make the machine unstable. -
Page 83: Firm Ground Adjustment Recommendations
User manual - Maximulch - Series 3 | Series 5 | Series 6 Operation 6.17. Firm ground adjustment recommendations Under these conditions, it is recommended to use the tractor 3-point hitch in the floating position with no position control. For the adjustment of the working depth of the 1st row of discs, see “6.9. - Page 84 User manual - Maximulch - Series 3 | Series 5 | Series 6 Operation 6.18.3. Immobilisation in folded position 1 - Turn off the tractor. Swing the ¼ turn valve of the folding control hydraulic circuit from the transport position to the work position.
-
Page 85: Winter Storage - Handling - Transport
User manual - Maximulch - Series 3 | Series 5 | Series 6 Winter Storage - Handling - Transport 7. Winter Storage - Handling - Transport 7.1. Storage If the machine is not going to be used for an extended period: Perform the machine cleaning maintenance operation Store the machine away from moisture and bad weather. -
Page 86: Handling
User manual - Maximulch - Series 3 | Series 5 | Series 6 Winter Storage - Handling - Transport 7.2. Handling CAUTION Never stand in the handling area as this could result in serious or fatal injury. CAUTION The lifting points must be used simultaneously for the safety of handling. CAUTION During handling, some components may have sharp edges. - Page 87 User manual - Maximulch - Series 3 | Series 5 | Series 6 Winter Storage - Handling - Transport 7.2.1. Maximulch series 3 NOTT-0400 Fig. 85 NOTT-GB-708-A 06/12/2019...
- Page 88 User manual - Maximulch - Series 3 | Series 5 | Series 6 Winter Storage - Handling - Transport 7.2.2. Maximulch series 3 trailed NOTT-0433 Fig. 86 NOTT-GB-708-A 06/12/2019...
- Page 89 User manual - Maximulch - Series 3 | Series 5 | Series 6 Winter Storage - Handling - Transport 7.2.3. Maximulch series 5 NOTT-0401 Fig. 87 NOTT-GB-708-A 06/12/2019...
- Page 90 User manual - Maximulch - Series 3 | Series 5 | Series 6 Winter Storage - Handling - Transport 7.2.4. Maximulch series 6 NOTT-0402 Fig. 88 NOTT-GB-708-A 06/12/2019...
-
Page 91: Transport
User manual - Maximulch - Series 3 | Series 5 | Series 6 Winter Storage - Handling - Transport 7.3. Transport CAUTION Firmly secure the machine on the flat-bed using straps that are compliant and have been checked in accordance with the applicable regulations. Ensure that there are no unsecured items on the flat-bed which might be thrown against the machine during transport. - Page 92 User manual - Maximulch - Series 3 | Series 5 | Series 6 Winter Storage - Handling - Transport 7.3.1. Maximulch series 3 mounted NOTT-0430 Fig. 90 NOTT-GB-708-A 06/12/2019...
- Page 93 User manual - Maximulch - Series 3 | Series 5 | Series 6 Winter Storage - Handling - Transport 7.3.2. Maximulch series 3 trailed NOTT-0432 Fig. 91 NOTT-GB-708-A 06/12/2019...
- Page 94 User manual - Maximulch - Series 3 | Series 5 | Series 6 Winter Storage - Handling - Transport Maximulch series 5 7.3.3. NOTT-0431 Fig. 92 NOTT-GB-708-A 06/12/2019...
- Page 95 User manual - Maximulch - Series 3 | Series 5 | Series 6 Winter Storage - Handling - Transport 7.3.4. Maximulch series 6 NOTT-0405 Fig. 93 NOTT-GB-708-A 06/12/2019...
-
Page 96: Servicing - Maintenance
User manual - Maximulch - Series 3 | Series 5 | Series 6 Servicing - Maintenance 8. Servicing - Maintenance 8.1. Maintenance tips 8.1.1. Introduction Comply with the safety instructions regarding servicing and maintenance. The machine has been designed and built for maximum yield, profitability and comfort under many different usage conditions. It has been checked at the factory and by the dealer before its delivery to ensure that the machine is received in perfect condition. - Page 97 Go around the machine looking for any external damage and checking the condition of the protection devices. The protection devices must be clean, legible and in good condition. If this is not the case, contact the AGRISEM INTERNATIONAL customer service department in order to replace them.
- Page 98 User manual - Maximulch - Series 3 | Series 5 | Series 6 Servicing - Maintenance 8.1.8. Hydraulic system WARNING The machine is powered by pressurised hydraulic energy. Working on a pressurised circuit may give rise to risks of injury by contamination. All operations must be carried out by professionals trained to handle hydraulic technical equipment.
- Page 99 Replace damaged or worn hydraulic hoses. Only use genuine AGRISEM INTERNATIONAL hydraulic hoses. Nevertheless, the duration of use can be established in line with empirical values, in particular taking potential risks into account. Other reference values can be taken into consideration for thermoplastic hoses and pipes.
-
Page 100: Maintenance Consumables
/ Grade NLGI2 NOTE Only use the specified consumables. AGRISEM INTERNATIONAL may not be held liable if another type of grease is used. 8.3. Maintenance schedule NOTE The servicing frequency is determined by many factors. Thus, different conditions of use, the weather, driving and working speeds, dust generation and the type of soil, etc. -
Page 101: Maintenance Operations
"2004" the usage period will end in February 2010. Fitting and removing hydraulic hoses WARNING When fitting and removing hydraulic hoses, the following instructions must be strictly adhered Only use genuine AGRISEM INTERNATIONAL hydraulic hoses. Always ensure cleanliness. NOTT-GB-708-A 06/12/2019... - Page 102 User manual - Maximulch - Series 3 | Series 5 | Series 6 Servicing - Maintenance Always fit hydraulic hoses in such a way that in all operating conditions: • They are not subject to tension other than that caused by their own weight. •...
- Page 103 User manual - Maximulch - Series 3 | Series 5 | Series 6 Servicing - Maintenance 8.4.3. Clean the folding areas The folding areas must be cleaned each time before folding. The accumulation of earth, of stones or other obstacles may result in damage to the machine Failure to observe this requirement will void the warranty.
- Page 104 User manual - Maximulch - Series 3 | Series 5 | Series 6 Servicing - Maintenance NOTT-0406 Fig. 96 NOTT-GB-708-A 06/12/2019...
- Page 105 User manual - Maximulch - Series 3 | Series 5 | Series 6 Servicing - Maintenance Series 5 NOTT-0409 Fig. 97 NOTT-GB-708-A 06/12/2019...
- Page 106 User manual - Maximulch - Series 3 | Series 5 | Series 6 Servicing - Maintenance Series 6 NOTT-0410 Fig. 98 NOTT-GB-708-A 06/12/2019...
- Page 107 User manual - Maximulch - Series 3 | Series 5 | Series 6 Servicing - Maintenance 8.4.4. Check the tightness of the nuts and screws Refer to the table. NOTT-0229 Fig. 99 NOTT-GB-708-A 06/12/2019...
- Page 108 User manual - Maximulch - Series 3 | Series 5 | Series 6 Servicing - Maintenance 8.4.5. Check the hydraulic system (tightness and sealing) Check that all of the hydraulic circuit's components are sealed. If necessary, tighten screwed connectors. NOTT-0407 Fig.
- Page 109 User manual - Maximulch - Series 3 | Series 5 | Series 6 Servicing - Maintenance 8.4.9. Lubricate the joints with grease guns The lubrication points are identified by this pictogram. The machine must be lubricated regularly and after each pressure wash. NOTT-0231 Fig.
- Page 110 User manual - Maximulch - Series 3 | Series 5 | Series 6 Servicing - Maintenance NOTT-0406 Fig. 103 NOTT-GB-708-A 06/12/2019...
- Page 111 User manual - Maximulch - Series 3 | Series 5 | Series 6 Servicing - Maintenance Series 5 NOTT-0409 Fig. 104 NOTT-GB-708-A 06/12/2019...
- Page 112 User manual - Maximulch - Series 3 | Series 5 | Series 6 Servicing - Maintenance Series 6 NOTT-0410 Fig. 105 NOTT-GB-708-A 06/12/2019...
- Page 113 User manual - Maximulch - Series 3 | Series 5 | Series 6 Servicing - Maintenance 8.4.10. Replace the hydraulic hoses After replacing all the machine's hoses, check that all of the components of the hydraulic system are sealed, see “8.4.5. Check the hydraulic system (tightness and sealing)”, page 108. NOTT-0407 Fig.
- Page 114 User manual - Maximulch - Series 3 | Series 5 | Series 6 Servicing - Maintenance NOTT-0411 Fig. 108 8.4.12. Disc wear Discs must be replaced as soon as their diameters reach the values given below. Max. acceptable wear diameter Disc New disc diameter (mm) (mm)
- Page 115 It is the user who must decide on and take full responsibility for the risks linked to the use of wear parts fitted with carbide plates under these conditions. AGRISEM INTERNATIONAL cannot be held liable under any circumstances for the premature wearing or breaking of wear parts with carbide plates if these instructions are not complied with.
- Page 116 User manual - Maximulch - Series 3 | Series 5 | Series 6 Servicing - Maintenance 8.4.15. Braking system adjustment 1 - Lift the axle, the tyre must no longer be in contact with the ground 2 - Release the parking brake system. 3 - Turn the adjusting nut (1) clockwise to bring the brakes into contact and until the wheel no longer rotates.
-
Page 117: Faults, Causes And Remedies
User manual - Maximulch - Series 3 | Series 5 | Series 6 Faults, causes and remedies 9. Faults, causes and remedies Problem Point to be checked Remedial solution The Maximulch is veering to one Working depth Check that the working depth is side or the other. -
Page 118: Characteristics
User manual - Maximulch - Series 3 | Series 5 | Series 6 Characteristics 10. Characteristics 10.1. Series 3 Common characteristics Type of discs Independent Type and size of security system Individual rubber blocks Type of hubs SR 80 Front disc diameter 560 mm Side deflector As standard... -
Page 119: Series 5
User manual - Maximulch - Series 3 | Series 5 | Series 6 Characteristics 4.50 m Weight with spring safety 8272 8415 10140 10280 system and Ø526 cage roller (kg) Number of discs 36+1 36+1 48+1 48+1 Number of TCS blades 10.2. -
Page 120: Series 6
User manual - Maximulch - Series 3 | Series 5 | Series 6 Characteristics 10.3. Series 6 Common characteristics Type of discs Independent Type and size of security system Individual rubber blocks Type of hubs Front disc diameter 610 mm Blades AGM HD / TCS 550 / fissuring blade Side deflector... -
Page 121: Technical Terms And Abbreviations
User manual Technical terms and abbreviations 11. Technical terms and abbreviations Term Meaning ampere - unit of intensity of electrical current bar - unit of pressure centimetre - unit of length cubic centimetre - unit of volume personal protective equipment hectare - unit of area ISOBUS standard data transfer system... - Page 122 User manual - Maximulch - Series 3 | Series 5 | Series 6 NOTT-GB-708-A 06/12/2019...
-
Page 123: Appendices
User manual - Maximulch - Series 3 | Series 5 | Series 6 Appendices 12. Appendices DECLARATION OF CONFORMITY WITH THE “MACHINERY” DIRECTIVE The manufacturer referred to above certifies that the new equipment described below: MAXIMULCH Complies with the provisions of the amended "Machinery" directive (Directive 2006/42/EC) and with the applicable national legislation. - Page 124 User manual - Maximulch - Series 3 | Series 5 | Series 6 Appendices NOTT-GB-708-A 06/12/2019...
- Page 125 User manual - Maximulch - Series 3 | Series 5 | Series 6 Appendices DECLARATION OF CONFORMITY WITH THE “MACHINERY” DIRECTIVE The manufacturer referred to above certifies that the new equipment described below: MAXIMULCH Complies with the provisions of the amended "Machinery" directive (Directive 2006/42/EC) and with the applicable national legislation.
- Page 127 We acknowledge that we have read the whole of the user manual and the warranty terms to which we adhere. AGRISEM INTERNATIONAL SA - 535 rue Pierre Levasseur - CS 60263 - 44158 ANCENIS - FRANCE Tel.: +33(0)2.51.14.14.40 - Fax: +33(0)2.40.96.32.36...
- Page 129 Freight costs payable by the sender Result of inspection by AGRISEM INTERNATIONAL Comments Date Signature Technical manager agrisem@agrisem.com AGRISEM INTERNATIONAL SA - 535 rue Pierre Levasseur - CS 60263 - 44158 ANCENIS - FRANCE Tel.: +33(0)2.51.14.14.40 - Fax: +33 (0)2.40.96.32.36...
Need help?
Do you have a question about the 3 Series and is the answer not in the manual?
Questions and answers