Table of Contents
Advertisement
Quick Links
Return the warranty certificate within
15 days together with a copy of the
invoice (without these documents the
warranty
procedure
implemented).
Original Manual
AGRISEM INTERNATIONAL - 535 Rue Pierre Levasseur CS 60263
Tel.: +33 (0)2 51 14 14 40
–
NOTT-F-604-F
DISC-O-MULCH
Fixed and folding
cannot
be
Fax: +33 (0)2 40 96 32 36
1
–
44158 ANCENIS CEDEX
02/02/2015
Advertisement
Table of Contents

Related Manuals for Agrisem DISC-O-MULCH Series


Summary of Contents for Agrisem DISC-O-MULCH Series
- Page 1 (without these documents the warranty procedure cannot implemented). Original Manual AGRISEM INTERNATIONAL - 535 Rue Pierre Levasseur CS 60263 – 44158 ANCENIS CEDEX Tel.: +33 (0)2 51 14 14 40 – Fax: +33 (0)2 40 96 32 36 NOTT-F-604-F...
- Page 3 FOREWORD This manual is provided with your machine to enable you to make optimum use of your equipment, in particular under safe working conditions. All owners are reminded that the manual is an essential accessory which must remain with the machine at all times, and that in the event of resale, article 1615 of the Civil Code requires that as such it must be handed over to the new owner.
- Page 5 – AGRISEM INTERNATIONAL - 535 Rue Pierre Levasseur CS 60263 44158 ANCENIS CEDEX – Tel.: +33 (0)2 51 14 14 40 Fax: +33 (0)2 40 96 32 36...
- Page 7 DECLARATION OF COMPLIANCE WITH THE "MACHINERY" DIRECTIVE The manufacturer referred to above certifies that the new equipment described below: DISC-O-MULCH Complies with the provisions of the amended "Machinery" directive (Directive 2006/42/CE) and with the applicable national legislation. ANCENIS, 21 May 2013 Michal Guzowski Chief Executive Officer...
- Page 8 ............................ Name of the Dealer: ................Address: ................................................................. Telephone number: ................AGRISEM INTERNATIONAL 535 Rue Pierre Levasseur CS 60263 44158 ANCENIS CEDEX – Tel.: +33 (0)2 51 14 14 40 Fax: +33 (0)2 40 96 32 36 –...
-
Page 9: Table Of Contents
2.3.1.8. Instructions relating to the braking system ..............23 2.3.1.9. Instructions specific to AGRISEM seeders ..............24 2.3.1.10. Instructions relating to safety systems with spring assemblies ......... 25 2.3.1.11. Instructions relating to transmission shafts with universal joints ....... 25 2.3.1.12. Instructions relating to loading and transport ............25 2.3.1.13. -
Page 10: Introduction
The warranty certificate MUST be returned within 15 days of delivery of the machine to the final user. You have just taken ownership of your AGRISEM machine. It has been designed to give complete satisfaction. The equipment has been carefully designed using the latest technological solutions to reduce usage costs. -
Page 11: Warranty Conditions
• The warranty is void if any modifications have been made to the machine without the formal agreement of AGRISEM INTERNATIONAL or if parts other than those manufactured by the Company have been fitted (e.g. counterfeit wear parts). EXTENT OF THE WARRANTY •... - Page 12 If the machine is used with protection and safety devices that are incorrectly fitted or not working. If the machine has been modified without prior written permission from AGRISEM, or if spare parts, accessories or equipment have been fitted to the machine which were not recommended by AGRISEM.
- Page 13 RETURNING BY THE DEALER OF THE WARRANTY CERTIFICATE DULY COMPLETED AND SIGNED BY THE DEALER AND THE PURCHASER. Claims must be made without fail using an AGRISEM INTERNATIONAL"WARRANTY CLAIM FORM" (see appendix) and sent by registered letter with acknowledgement of receipt by the dealer to the company’s technical department within 10 days of the incident.
-
Page 14: Exclusive Liability Clause
Moreover, AGRISEM INTERNATIONAL cannot be held liable for injury to the owner or a third party or for the indirect consequences of such an injury, whether or not it results from a fault. You are reminded that a safe distance of 50 metres must be maintained around the machine. -
Page 15: Compliant Use Of The Machine
2.2. COMPLIANT USE OF THE MACHINE AGRISEM INTERNATIONAL products must only be used for the work for which they were designed: Work on arable land under normal conditions In the event of damage linked to the use of the machine other than for the purposes specified by the manufacturer, the manufacturer shall be entirely released from liability. -
Page 16: Safety Instructions
Combining of the machine with other instruments or machines without the written agreement of AGRISEM and/or without complying with the instructions given by the manufacturers of the tractor and other instruments or machines. -
Page 17: Instructions To Be Followed Before Using The Machine
Similarly, in addition to the other cases mentioned in this manual, any claim under the warranty linked to damage resulting from one or more of the above-mentioned causes is excluded. 2.3.1.2. Instructions to be followed before using the machine Wear close-fitting clothes. Loose clothing may become caught in moving parts. Wear individual protective equipment corresponding to the work you are planning to do (gloves, shoes, goggles, helmet, ear protection, etc.). -
Page 18: Instructions To Be Followed For Hitching And Unhitching
2.3.1.3. Instructions to be followed for hitching and unhitching Pay attention to the various possibilities permitted for the connecting of the tractor’s coupling equipment to that of the machine. Only combine equipment that is compatible (machine and tractor). Check that the tractor has the characteristics necessary to hitch the machine. WARNING: Non-compliant implementation may result in a risk of the tractor breaking during operation, being insufficiently stable when loaded and having insufficient manoeuvrability and braking... -
Page 19: Instructions To Be Followed Before Using The Machine
AGRISEM denies any liability in the event of damage resulting from a combination of machines that has not received written authorisation from AGRISEM. Accidents linked to the breaking of components during operation may result from unauthorised combinations of hitching equipment. - Page 20 Before setting off on the road, ensure that the hitched machine is fitted with the lighting and signalling devices required by the highway code and any other devices required by the current regulations. AGRISEM rear signalling lights and panels may be removed when working. Check that this signalling equipment has been correctly refitted.
-
Page 21: Instructions To Be Followed Before Carrying Out Any Operations On The Machine
Before travelling on the road, secure all of the machine's pivoting parts in their transport position to avoid dangerous changes of position. Also check that the screws, nuts and bolts are tightened and that all of the machine parts are correctly attached and cannot move or become detached. If your machine is a folding machine, the locking system must be engaged. -
Page 22: Instructions Regarding Installation
The machine must only be serviced and repaired by competent persons who are familiar with the machine's features and operating procedures. The machine must only be repaired with genuine AGRISEM International spare parts. For bare metal parts, use either an anti-rust product that leaves a greasy film or thick grease. -
Page 23: Instructions Regarding The Hydraulic System
Risk of explosion: avoid sparks and naked flames near the battery. 2.3.1.7. Instructions regarding the hydraulic system If your machine is fitted with a hydraulic circuit, you must comply with the following instructions: Warning! The hydraulic circuit is pressurised. When mounting cylinders and hydraulic devices, take particular care to ensure that the circuits are correctly connected, in accordance with the manufacturer's instructions. -
Page 24: Instructions Specific To Agrisem Seeders
(e.g. turbine stopped) and the rear window of the tractor must be shut, the tractor switched off and the ignition keys removed. Ensure that no one is on or near the seeder when the grain is being loaded. The AGRISEM walkway must only be used when the seeder is stationary. -
Page 25: Instructions Relating To Safety Systems With Spring Assemblies
Instructions relating to safety systems with spring assemblies Safety devices with pre-compressed spring assemblies are fitted on many AGRISEM tools. These can be very dangerous when performing technical operations on the machine if all of the necessary precautions are not taken. -
Page 26: Safety Symbols On The Machine
2.3.2. Safety symbols on the machine ETIQ-501 Keep a safe distance from the machine during work. Risk of serious injury. Ensure that no-one is in the danger zone around the machine when the tractor engine is running. ETIQ-502 Keep a safe distance from the machine when lowering it. Risk of serious injury. Ensure that no-one is under the machine when lowering it. -
Page 27: Technical Instructions
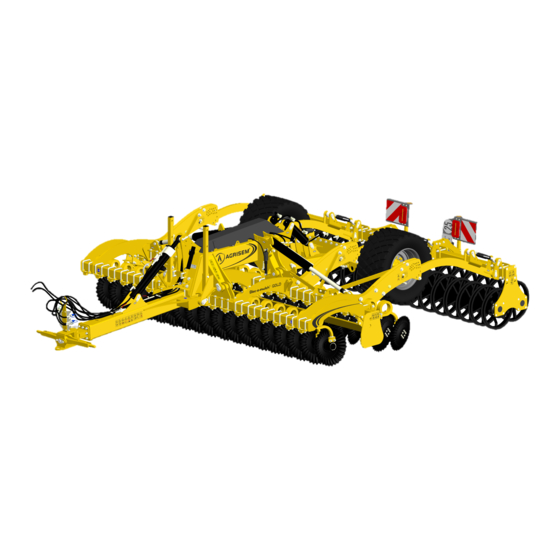
3. TECHNICAL INSTRUCTIONS 3.1. DISC-O-MULCH SETTINGS / USE FOREWORD: As far as possible, read this chapter while standing in front of the machine. The DISC-O-MULCH's frame may be fitted with a variable number of elements. Each element is fitted with a replaceable wear disk. The working depth of the disks is controlled by a depth control device in the form of a roller (e.g. - Page 28 => Disc-O-Mulch GOLD TRAINE Folding versions Working width 4.50 5.00 6.00 (in metres) Tractor power 110 kW 125 kW 147 kW minimum 150 hp 170 hp 200 hp Tractor power 155 kW 284 kW 206 kW maximum 210 hp 250 hp 280 hp Weight (variable 5,566 kg...
-
Page 29: Hitching - Unhitching
3.1.2. Hitching Unhitching – It is ESSENTIAL to read the safety instructions before reading the practical instructions for hitching and unhitching the machines No-one must be within 50 metres of the machine while it is being hitched or unhitched Before hitching or unhitching the Disc-O-Mulch, it is important to ensure that: - The tool is or will be on stable ground and no-one is within 50 metres of the machine. -
Page 30: Trailed Machine
12/ Ensure that everything is correctly connected and locked and that no there are no foreign bodies on the machine. Take into account the clearance, in particular to ensure that there is room to pass under bridges and low power lines ... - Page 31 4/ Connect the hydraulic hoses if the machine is fitted with them according to the colour marking. If you are using a towing hook, connect the hydraulic hoses first to be able to adjust the height of the drawbar. 5/ Connect the plug for the lighting equipment and check that it is operating. 6/ Remove the parking stands (if the machine is fitted with them).
-
Page 32: Folding And Unfolding The Roller On The Disc-O-Mulch Fixed
3.1.3. Folding and unfolding the roller on the DISC-O-MULCH FIXED If you have a folding Disc-O-Mulch, take care when folding or unfolding. Please refer to the chapter It is ESSENTIAL to read the safety instructions before reading the practical instructions for hitching and unhitching the machines Before folding or unfolding check that there are no foreign bodies that could hinder movement No-one must be within 50 metres of the machine while it is being folded or... -
Page 33: Folding And Unfolding The Extensions
b- Hydraulic unfolding of the roller The following procedure should be followed to unfold the roller hydraulically: The order below must be respected so as not to damage certain components of the Disc-O-Mulch. 1. Unfold the border spreading body. 2. Open the valve under the jib 3. - Page 34 a- Folding Follow the procedure below to fold your Disc-O-Mulch: - Place the folding extensions' roller arms in the highest MULTISTOP position (e.g. 15). This allows the rollers to be retracted within the machine as much as possible in their transport position (see section on adjusting the roller's height).
- Page 35 Some machines have extension adjustments. A regular residual check must be performed on the flatness of the machine during operation. If necessary, readjust the central stop screws using the lock nut. Central stop screws...
-
Page 36: Settings / Use
The roller also levels and compresses the soil after the seeds have been sown. Example: Several working depth settings are possible thanks to the Agrisem "MULTISTOP". The lowest position produces the minimum working depth, here position 1 The highest position produces the maximum working depth, here position 15 Position is the position of the roller in relation to the Disc-O-Mulch. -
Page 37: Adjusting The Working Depth Using The Drawbar
3.1.5.2. Adjusting the working depth using the drawbar The Disc-O-Mulch's working depth is adjusted using the drawbar for the front row of disks. During use, try to keep the same working depth between the first row of disks and the second row. Adjustment with a mechanical drawbar: The drawbar is used to adjust the working depth of the front row of disks. -
Page 38: Disc-O-Mulch Settings For Firm Ground
3.1.5.3. Disc-O-Mulch settings for firm ground Tractor 3-point hitch in floating position with no position control Adjusting the working depth of the 1st row of disks: Alter the length of the tractor's top link. Shortening the top link increases the depth of the first row of disks. -
Page 39: Adjusting The Side Deflectors On Mounted And Semi-Mounted Disc-O-Mulch Gold
3.1.5.5. Adjusting the side deflectors on mounted and semi- mounted Disc-O-Mulch GOLD machines The left-hand side deflector may be adjusted to limit the spraying of soil from the first row of disks during work. The following procedure must be followed: Loosen the lock nuts and screws "A"... -
Page 40: Adjusting The Border Spreading Disk
3.1.5.7. Adjusting the border spreading disk Mounting the Disc-O-Mulch SILVER: Adjustments may be made to the border spreading disk to avoid a ridge forming during work. The following procedure must be followed: - Loosen the 3 screws "D" and the lock nut - Adjust the border spreading disk using the oblong hole. -
Page 41: Operating Recommendations
3.1.6. OPERATING RECOMMENDATIONS Problems Point to be checked Solutions The Disc-O-Mulch is veering Working depth Check that the working to one side to the other depth is the same for both rows of disks. The Disc-O-Mulch is not working The tractor's top-links at the same depth The tractor's top-links must be adjusted... -
Page 42: Servicing - Maintenance
3.2. SERVICING - MAINTENANCE Comply with the safety instructions regarding servicing and maintenance. Your machine has been designed and built for maximum yield, profitability and comfort under many different usage conditions. Your machine has been checked at the factory and by your dealer before its delivery to ensure that you receive a machine in perfect condition. -
Page 43: Cleaning
Do not spray plastic and rubber parts with oil or an anti-corrosion agent or these parts may become fragile and break. 3.2.3. Cleaning Before folding the machine, the beam under the cylinder must always be cleaned. A build-up of soil, stones or other obstacles can damage the cylinder. Failure to comply with this instruction will invalidate the warranty. -
Page 44: Greasing
Use lithium grease reinforced with molybdenum disulphide / Grade NLG12. AGRISEM INTERNATIONAL may not be held liable if another type of grease is used. 3.2.6. Maintenance - Hydraulic maintenance Risk of infection caused by the oil in the hydraulic circuit penetrating the skin under high pressure. - Page 45 • Hydraulic hoses must not be painted. Wear ring maintenance: Some joints on AGRISEM tools have wear rings. These must be changed at the first sign of lateral play. Tyre maintenance: The tyres must always be inflated to a pressure appropriate to their use. The pressure may need to be changed when moving between the road and the field.
-
Page 46: Disks
Ø 520 Ø 610 Ø 610 AGRISEM INTERNATIONAL cannot be held liable if the DISC-O-SEM is used with disks presenting greater wear than that specified above. Hubs of discs : When wintering, if the machine is stored outside, it is important to put the machine in working position. -
Page 47: Lighting System
WORKING The lighting board must be removed when using the DISC-O-MULCH in the field. As the lighting board is designed solely for transport, AGRISEM INTERNATIONAL cannot be held liable if the lighting board breaks due to being used during work.
Need help?
Do you have a question about the DISC-O-MULCH Series and is the answer not in the manual?
Questions and answers