
Related Manuals for Canon imageCLASS MF4680


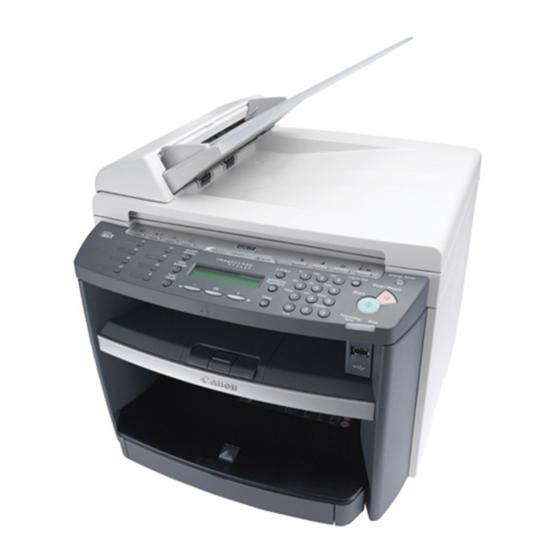
Summary of Contents for Canon imageCLASS MF4680
- Page 1 Starter Guide Please read this guide before operating this product. After you finish reading this guide, store it in a safe place for future reference.
-
Page 2: Set Up The Machine
Set Up the Machine Unpacking the Machine Before Setting Up the Machine ● Remove all shipping tape and packing material from the machine. ● When moving the machine, grip the handles on both left and right sides of the machine and lift it carefully, as shown in the illustration right. -
Page 3: Do You Have Everything
Do You Have Everything? ●Dust Cover ●Paper Cassette ●Toner Cartridge ●Document Feeder Tray ●Power Cord ●Machine ●Telephone Cable ●USB Cable ●Starter Guide (This Document) ●Basic Operation Guide ●User Software CD ●Limited Warranty Notice* ●Handset (optional) ●Handset Cradle (optional) ●Plugs with Pins (optional) ●Handset Clamps ●Destination Labels Not available depending on the country... -
Page 4: Install Toner Cartridge
Install Toner Cartridge Remove the toner cartridge from the bag. Gently rock the toner cartridge several times to Pull the seal completely out. CAUTION Keep the bag for future use. distribute toner inside. NOTE Do not open the drum protective shutter (A). Do not pull the seal out at an angle. - Page 5 CAUTION – Be careful not to get your fingers caught. – If you cannot close the toner cover, do not force it to close. Open the cover and make sure the toner cartridge is properly set in the machine Push the toner cartridge to make sure it is Close the toner cover using the tab.
- Page 6 Fan the paper stack and even the edges. Load the paper into the paper cassette with the Adjust the paper guide rail to match the size of Close the front panel of the paper cassette. print side up. Make sure the paper stack sits paper.
-
Page 7: Connect Telephone Cables
Connect the Power Cord, Turn On the Machine Connect Telephone Cables Connect the optional handset to the handset jack (A) on the back side of the machine. Connect your external telephone to the external device jack (B) on the back side of the machine if required. - Page 8 Install Handset (Optional) Use a screwdriver to remove the covers on the Insert the plugs with pins (A) into the holes on left side of the machine. the handset cradle. Insert the plugs (with the cradle) into the holes Carefully push the pins into the plugs as far as on the machine.
-
Page 9: Set The Date And Time
Set the Date and Time Set the Telephone Line Type ● Entering Information Press [Additional Press [ ] or [ ] to Press [ ] or [ ] to – Numeric keys: Enters numbers. Functions]. select <5. TX/RX select <2. FAX –... -
Page 10: Guidelines For Entering Information
Page number/ Date and time Unit name Number of pages 31/12 2007 10:50 FAX 123XXXXXXX CANON 0001/0001 NOTE PQRS pqrs Before sending a fax, you MUST register your fax number, unit name, and the current date and time in the machine. -
Page 11: Register Sender Information
Register Sender Information Press [Additional Press [ ] or [ ] to Press [ ] or [ ] to Press [ ] or [ ] to Press [ ] or [ ] to Use the numeric keys to Functions]. select <5. TX/RX select <2. -
Page 12: Select The Receive Mode That Suits Your Needs
Set the Machine for Receiving Faxes Select the Receive Mode that Suits Your Needs Set the Receive Mode Press [Additional Press [ ] or [ ] to Press [ ] or [ ] to Follow the chart below to determine the correct receive mode for your needs. Functions]. -
Page 13: Specify The Ip Address Settings
Set the Machine for Network Usage Connect the Machine to a Network Connect a Category 5 or greater twisted pair LAN cable to the 10Base-T/100Base-TX port on This machine has a USB connector and LAN connector. If the machine is connected to a network the back of the machine. - Page 14 Press [ ] or [ ] to Press [ ] or [ ] to Press [ ] or [ ] to Press [ ] or [ ] to Use the numeric keys to Press [ ] or [ ] to select <OFF>, then select <1.
-
Page 15: Installing/Uninstalling Software
Installing/Uninstalling Software Installation Procedure System Requirements Before Installation: • Do not connect the USB cable before installing the Microsoft Windows XP Microsoft Windows Vista Microsoft Windows 98/98SE (32bit Version) (32bit Version) CPU: Intel Pentium/90 MHz or faster software. If you connect the USB cable before CPU: Intel Pentium/Celeron series CPU: Intel Pentium 800 MHz or faster Memory: 128 MB or more... - Page 16 USB Connection If the MF4600 Series CD- NOTE ROM Setup screen is not If the disk space is insufficient displayed, click [start] on the to install the software, an error Windows task bar → [My message is displayed. Free Computer]. the disk space, and then try Windows Vista: click [Start] again.
- Page 17 After checking [Restart Computer Now (recommended)] button, you can restart your computer by clicking the [Restart] button. When you install Presto! PageManager, follow the on- screen instructions. NOTE If you are using Windows 98/ Me, Version Conflict messages may appear during the installation.
- Page 18 Network Connection If the MF4600 Series CD- Windows Vista: click [Start] on While installing the software the Windows task bar → ROM Setup screen is not on a computer running displayed, click [start] on the [Computer]. Windows Server 2003, the Windows task bar →...
- Page 19 You have now completed installation.
-
Page 20: Checking Installation
Windows Vista: Click [Start] on the Properties] dialog box). Windows task bar → select [Control If the [Canon MF Toolbox 4.9] icon Panel] → [Hardware and Sound] → is displayed on the Windows double-click → [Scanners and desktop, installation of the MF Toolbox 4.9 has been successful. -
Page 21: Uninstallation Procedure
If asked to confirm removal of an – For uninstallation in Windows 2000/XP/Server2003/Vista, you must be logged on as an administrator. [Canon] → [MF Toolbox application etc., click [Remove]. – For uninstallation, first uninstall the MF Toolbox, and then the MF drivers. - Page 22 Bundled Programs on the User Software CD To install the following programs, load the User Software CD into a computer, click on the [Easy Installation] or [Custom Installation] button on the CD-ROM Setup (Software Programs) screen, then follow the instructions that appear on the screen. If the CD-ROM Setup (Software Programs) screen is not displayed, click [Start] on the Windows task bar →...
-
Page 23: Using Help
Using Help The user software CD includes programs (driver software and application software) which the supplied instruction guides do not cover. When you utilize such programs, refer to online help and context sensitive help following the instructions below. Online Help You can locate additional help in the online help file provided with the driver software. - Page 24 Copyright uniform among participating nations. – Place the machine near a standard 220–240 V AC (50/60 Hz) power Copyright © 2010 by Canon Inc. All rights reserved. No part of this difficulties. outlet. publication may be reproduced, transmitted, transcribed, stored in a Laser Safety Information –...
- Page 25 A Tip for Saving Paper The machine comes with useful features that can be combined to reduce the volume of paper used when copying. Copying regularly Copying with features combined ■ Collate Copying (See the Reference Guide.) AAAA AAAA AAAA AAAA AAAA BBBB...
- Page 26 CANON INC. 30-2, Shimomaruko 3-chome, Ohta-ku, Tokyo 146-8501, Japan CANON U.S.A., INC. One Canon Plaza, Lake Success, NY 11042, U.S.A. CANON CANADA INC. 6390 Dixie Road Mississauga, Ontario L5T 1P7, Canada CANON EUROPA N.V. Bovenkerkerweg 59-61 1185 XB Amstelveen, The Netherlands CANON FRANCE S.A.S.
Need help?
Do you have a question about the imageCLASS MF4680 and is the answer not in the manual?
Questions and answers