Table of Contents
Advertisement
Quick Links
Advertisement
Table of Contents

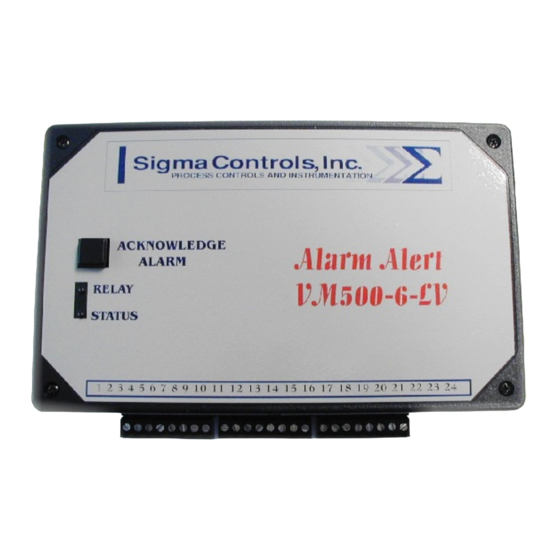
Summary of Contents for Sigma Controls VM500-6-LV-HV
- Page 1 ALARM ALERT VM500-6-LV-(HV) 8-CHANNEL VOICE OUTPUT AUTODIALER...
-
Page 2: Table Of Contents
Index Page General Description Wiring Diagram Installing the Alarm Alert Setting up the Alarm Alert Programming Input Parameters Program Menu Items Programming Telephone / Pager Numbers Programming a Local Identification Number for Pager Recording a Personal Identification Message Programming Number of Rings Programming the PIN Number Programming Reminder Calls Using the Alarm Alert... -
Page 3: General Description
General Description The Alarm Alert is a complete multi-input monitor and auto- dialer, which monitors up to eight (8) inputs. The Alarm Alert allows the user to program individual normal states and a time delay for each input. When an input goes into an alarm condition, the Alarm Alert will call up to four program- mable voice or pager numbers. -
Page 5: Wiring Diagram
Installing the Alarm Alert 1. Select a location with access to power and a telephone line. 2. Connect the phone line to an active phone jack. 3. Plug in the wall mount transformer into a power socket of which you want monitored. 4. -
Page 6: Setting Up The Alarm Alert
Setting up the Alarm Alert Programming is accomplished over the phone and only has to be done once, unless it is necessary to make a change. Before programming, do the following: 1 Connect a phone line and power, and then turn on the Alarm Alert 2 From another phone line dial the number where the Alarm Alert is located. -
Page 7: Program Menu Items
(i.e. 0 minutes) 7. You will hear “Press 1 to change” 8. Press 1 to change the delay or press any other button to not change the delay. (If you do not press one, go to step 12) 9. You will hear “Enter number then press pound” 10. -
Page 8: Programming Telephone/Pager Numbers
9. Program Reminder Call 0. Exit (return to Main Menu) Programming Telephone/Pager Numbers The Alarm Alert stores up to four (4) emergency telephone or pager numbers. The Alarm Alert will call each phone number until the PIN number is entered. If Alarm Alert reaches an answering machine, it will leave your personal identification message, and then the alarm condition, but will continue calling. -
Page 9: Programming A Local Identification Number For Pager
8 You will be automatically returned to the Program Menu To Delete a Phone Number: 1 Select the phone number to change from the Program Menu 2 You will hear the telephone number you selected 3 You will hear “Press one to change” 4 Press 1 to make a change 5 You will hear “Enter number then press pound”... -
Page 10: Programming Number Of Rings
end of your message 9 You will hear the message you recorded 10 You will be automatically returned to the Program Menu Programming the Number of Rings The Alarm Alert answers the telephone line after the programmed number of rings. Valid numbers of rings are 1 –... - Page 11 amount of time if inputs are still active after the PIN number has been entered. 1 From the Program Menu, press 9 2 You will hear “Reminder Call is Off,, press One to change” 3 Press 1 to enable Reminder Calls 4 You will hear “Reminder Call is On, Delay is 6-0- minutes, press One to Change”...
-
Page 12: Using The Alarm Alert
Using the Alarm Alert How does an input go into an alarm condition? An input is in an alarm condition when its current state (on or off) is the opposite of its programmed state for longer than the programmed time delay. For example: Input 1 is programmed as normally off with a time delay of 1 minute. -
Page 13: What Happens When The Alarm Alert Calls A Pager
“Alarm has been caused by Input 1, (Your prerecorded input ID message)” 3 The Alarm Alert will ask for the PIN number 4 Once a valid PIN number has been entered, the Alarm Alert will not call again because the current alarm condition has been acknowledged. For units with the -A option, the alarm buzzer will turn off and alarm relay will de-energize. -
Page 14: Connecting The Alarm Alert To A Phone Line With A Fax
Enter To check to status of the relay (Alarm AlertR only) From the main menu press 1 You will hear “Enter Input” Enter # You will hear the status of the relay Connecting the Alarm Alert to a Phone Line which has A fax or answering machine connected to it Program the Alarm Alert to answer after one more ring than the other device. -
Page 15: Trouble Shooting
the first phone number location. (See Programming Telephone Numbers) 8. Press ‘0’ twice to exit the Program Menu and hang up the Alarm Alert 9. Remove the terminal blocks to ensure input 1 will be open 10. The Alarm Alert will close the alarm relay, sound the buzzer, and call out because input 1 is programmed to be normally closed and is currently open If the Alarm Alert does not answer the phone Verify that the phone line is working. -
Page 16: Fcc Part 68 Information
FCC PART 68 INFORMATION This equipment complies with Part 68 of the FCC Rules. The FCC Part 68 Label is located on the bottom of the unit. This label contains the FCC Registration Number and Ringer Equivalence Number (REN) for this equipment. If requested, this information must be provided to your telephone company.

Need help?
Do you have a question about the VM500-6-LV-HV and is the answer not in the manual?
Questions and answers