Barreto 1324D Owner's Manual
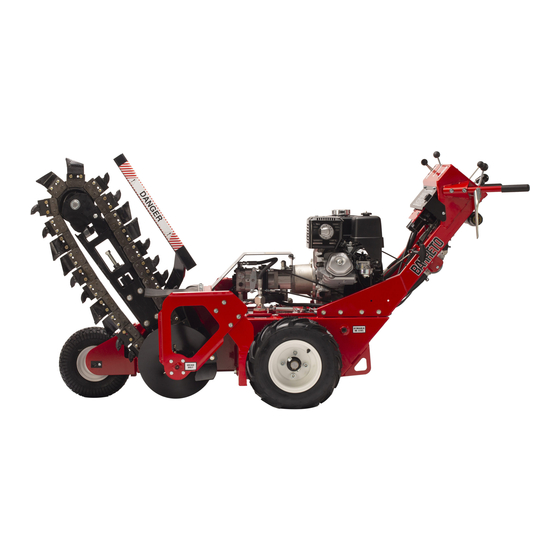
Hydraulic trencher
Source: barretomfg.com
Table of Contents
Advertisement
THE
MODELS 1324D – 1624D
HYDRAULIC TRENCHER OWNER'S MANUAL
CONGRATULATIONS!
You are now the proud owner of a BARRETO trencher. The OPERATOR'S MANUAL is attached to
the machine. Please study it and this manual to become familiar with the trencher, its characteristics,
and method of operation. Pay particular attention to the safety and operating instructions to prevent
personal injury or equipment damage.
If you have any questions or need replacement parts in the future, please contact us at your convenience.
Our toll-free phone number, fax and email are listed below.
THANK YOU for your patronage and confidence in BARRETO equipment.
Barreto Manufacturing, Inc.
Innovative Equipment Engineered to Last
66498 Hwy 203, La Grande, OR 97850
(800) 525-7348 (541) 963-7348
FAX (541) 963-6755
E-Mail:
info@barretomfg.com
Web Site:
http://www.barretomfg.com
Machine Identification Record
Machine model number
Machine serial number
Engine manufacturer
Engine model number
Engine serial number
1324D-1624D Owner's Manual
8/29/18
Page 1 of 19
Advertisement
Table of Contents

Related Manuals for Barreto 1324D


Summary of Contents for Barreto 1324D
- Page 1 HYDRAULIC TRENCHER OWNER’S MANUAL CONGRATULATIONS! You are now the proud owner of a BARRETO trencher. The OPERATOR’S MANUAL is attached to the machine. Please study it and this manual to become familiar with the trencher, its characteristics, and method of operation. Pay particular attention to the safety and operating instructions to prevent personal injury or equipment damage.
-
Page 2: Table Of Contents
SERVICE INFORMATION HOUR METER TRENCHER INTENDED USE CHAIN INSTALLATION OPERATOR TRAINING MAINTENANCE PREPARATION WARRANTY OF BARRETO MANUFACTURING EQUIPMENT ROUTINE MAINTENANCE WHEEL DRIVE VALVE CABLE ADJUSTMENT DIGGING CHAIN VALVE LEVER ADJUSTMENT AXLE LOCK ADJUSTMENT SPEED CABLE ADJUSTMENT SPEED CONTROL TENSION ADJUSTMENT ELECTRICAL SCHEMATIC –... -
Page 3: Trencher Assembly Instructions
ASSEMBLY INSTRUCTIONS Upon delivery, check for freight damage and any missing items. Notify the carrier and Barreto Manufacturing immediately of any damage so a claim can be filed. Remove trencher from shipping crate. When documentation refers to “right side” or “left side”, it is relative to the operator’s position with both hands on the handlebars. -
Page 4: Hour Meter
Your DGI® hour meter is pre-set at the DGI® factory to go into Flash Alert mode at 25-hour intervals. Although the engine manufacturer does not require changing engine oil this often, due to heavy-duty use and extreme conditions inherent to tiller use, Barreto Manufacturing strongly recommends frequent oil changes. -
Page 5: Chain Installation
Starting up the engine. • Loading the trencher onto the trailer and securing it for road transport. • Unloading the trencher from the trailer. • Trenching procedure - Operation of the trencher. 1324D-1624D Owner’s Manual 8/29/18 Page 5 of 19... -
Page 6: Maintenance Preparation
Barreto Manufacturing, Inc. warrants all BARRETO equipment to be free of defects in material and workmanship for a period of one (1) year. All BARRETO fuel components, fuel tank, cap, lines & fittings are warranted for two (2) years. Warranty period begins on date of delivery to the original user. -
Page 7: Routine Maintenance
Replacement parts and decals can be purchased from Barreto Manufacturing, Inc. When attaching decals, the temperature of the mounting surface must be at least 40°F (5°C) and must be clean and dry. -
Page 8: Wheel Drive Valve Cable Adjustment
3. Adjust the cable for 7/16” to 1/2" movement of the actuator arm at the pin. Do not include any lever free play in the measurements. 4. To see a video on how to do this adjustment, enter the following address in your browser URL window: https://www.youtube.com/watch?v=utUdozpYBcg&feature=youtu.be 1324D-1624D Owner’s Manual 8/29/18 Page 8 of 19... -
Page 9: Digging Chain Valve Lever Adjustment
1/16”. Re- tighten the bolts and check the lever stroke. Adjust so the valve lever comes to the end of its stroke just as the clutch lever touches the handgrip when chain valve control is in ON position. 1324D-1624D Owner’s Manual 8/29/18... -
Page 10: Axle Lock Adjustment
Measure the position of the lower lock lever. The movement of the lower lock lever should be 9/16" to 5/8" from the LOCK position to the UNLOCK position. 1324D-1624D Owner’s Manual 8/29/18 Page 10 of 19... -
Page 11: Speed Cable Adjustment
Loosen locknuts and adjust as needed. Adjustment may be made at both ends of cable housing. 1324D-1624D Owner’s Manual 8/29/18 Page 11 of 19... -
Page 12: Speed Control Tension Adjustment
4. If you tighten the socket head bolt (turn clockwise), the tension of the speed lever will increase. 5. If you loosen the socket head bolt (counter-clockwise), the tension will decrease. ADJUST HERE 1324D-1624D Owner’s Manual 8/29/18 Page 12 of 19... -
Page 13: Electrical Schematic - Honda Gx390
ELECTRICAL SCHEMATIC - HONDA GX390 TECHNICAL & CONSUMER INFORMATION Engine Types With Oil Alert® and Without Electric Starter 1324D-1624D Owner’s Manual 6/15/18 Page 13 of 19... -
Page 14: Electrical Schematic - Briggs Vanguard 16 Hp
ELECTRICAL SCHEMATIC – 16HP BRIGGS/VANGUARD 1324D-1624D Owner’s Manual 6/15/18 Page 14 of 19... -
Page 15: Hydraulic Schematic
HYDRAULIC SCHEMATIC 1324D-1624D Owner’s Manual 6/15/18 Page 15 of 19... -
Page 16: Specifications
Welded Shark Welded Shark OPTIONAL ACCESSORIES A1550 - Lift eye: for hoisting the trencher A1580 - Backfill blade: to fill in trenches A1390 - Crumber: provides more effective removal of dirt from trench 1324D-1624D Owner’s Manual 6/15/18 Page 16 of 19... -
Page 17: Troubleshooting
“FORWARD” position. Adjust the relief valve (on top of the chain valve) so relief is activated at 3000 psi, or engine stops. 1324D-1624D Owner’s Manual 6/15/18 Page 17 of 19... - Page 18 5. Low oil causing engine to shut down. This may occur when trenching on hills. Level trencher, check oil and allow oil alert to reset. See engine manual. 6. Engine losing power due to wear See engine manuals. 1324D-1624D Owner’s Manual 6/15/18 Page 18 of 19...
- Page 19 Install a 4000 psi pressure gauge and start the engine. Manually put the chain valve lever in the “FORWARD” position. The output pressure should be about 3000 psi. 1324D-1624D Owner’s Manual 6/15/18 Page 19 of 19...
Need help?
Do you have a question about the 1324D and is the answer not in the manual?
Questions and answers