Table of Contents
Advertisement
Quick Links
Advertisement
Table of Contents

Related Manuals for Holland Green Science Hephaestus V900

Summary of Contents for Holland Green Science Hephaestus V900
- Page 1 User Manual 10310003 Hephaestus V900 Vacuum Oven User Manual Version 1.0...
-
Page 2: Table Of Contents
User Manual Table of Contents Disclaimer & Warranty ....................3 Safety ..........................7 Vacuum Oven – Introduction ..................9 III. Technical Specifications ....................12 Standards and Conformity ...................13 Inspection ........................14 VII. Operating Instructions ....................15 VIII. Fault Diagnosis ......................21 Maintenance and Cleaning ..................23 Version 1.0... -
Page 3: Disclaimer & Warranty
User Manual Disclaimer & Warranty • The intellectual property rights for this manual belongs to Holland Green Science Corporation (hereinafter referred to as “the Company”). • Products of the company are under the patent protection of China and other countries and regions (inclusive of obtained patents and patents currently under application). - Page 4 User Manual will provide Buyer with service data and/or a Return Material Authorization ("RMA"), which may include biohazard decontamination procedures and other product-specific handling instructions, then, if applicable, Buyer may return the defective Products to the Company with all costs prepaid by Buyer.
- Page 5 User Manual OR IMPLIED, ORAL OR WRITTEN, WITH RESPECT TO THE PRODUCTS, INCLUDING WITHOUT LIMITATION ALL IMPLIED WARRANTIES OF MERCHANTABILITY OR FITNESS FOR ANY PARTICULAR PURPOSE OR USE. THE COMPANY DOES NOT WARRANT THAT THE PRODUCTS ARE ERROR-FREE OR WILL ACCOMPLISH ANY PARTICULAR RESULT. NOTHING IN THIS MANUAL OR IN THE TERMS AND AGREEMENT AGREED TO AT THE TIME OF PURCHASE SHALL BE CONSTRUED TO PROVIDE FOR THE TRANSFER, ASSIGNMENT OR ALIENATION OF THE LIMITED WARRANTIES PROVIDED BY THE...
- Page 6 User Manual WHICH SHALL BE AS PROVIDED UNDER THIS SECTION) SHALL NOT EXCEED AN AMOUNT EQUAL TO THE LESSER OF (A) THE TOTAL PURCHASE PRICE THERETOFORE PAID BY BUYER TO THE COMPANY WITH RESPECT TO THE PRODUCT(S) GIVING RISE TO SUCH LIABILITY OR (B) ONE HUNDRED THOUSAND DOLLARS ($100,000), WHICHEVER IS LESS.
-
Page 7: Safety
User Manual Safety IMPORTANT Safety Items to be Observed. Safety Warnings ! DANGER (may cause serious damage to property and or casualties) 1. The vacuum oven must be grounded reliably and away from any electromagnetic interference sources (cannot be grounded or neutral). 2. - Page 8 User Manual 14. When the vacuum oven is turned on, the upper deviation alarm function must be adjusted or confirmed. ! ATTENTION (may affect operational performance or service life) 15. Always place the vacuum oven on a hard, firm, and level surface. 16.
-
Page 9: Vacuum Oven - Introduction
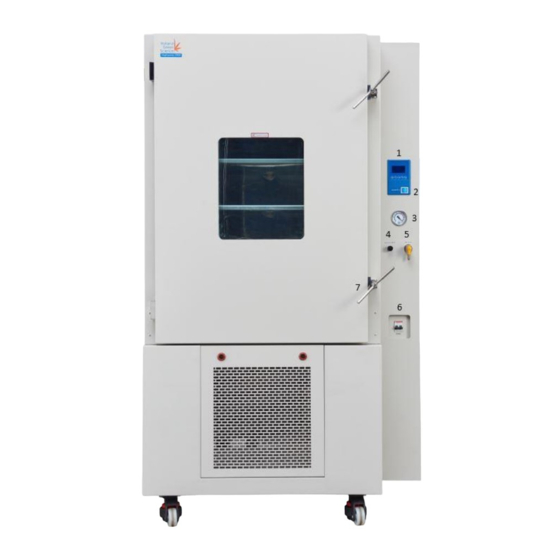
III. Vacuum Oven – Introduction 3.1 Overview The Hephaestus V900 vacuum oven is designed to efficiently process raw materials in a temperature controlled vacuum environment. It is ideal for research, pilot process development and production. This process has the following advantages: •... - Page 10 User Manual The power plug for the vacuum oven is shown below. The model of the power plug is L6-30P. Version 1.0...
- Page 11 User Manual 3.2 Cautions • The shell of the vacuum oven inner chamber should be grounded to ensure safety. • The vacuum oven should be placed in an environment with less than 85% humidity level. Ensure that there is no strong electromagnetic fields or vibration source nearby. •...
-
Page 12: Technical Specifications
User Manual IV. Technical Specifications Model 10310003 Parameters Power Supply AC 120V 60Hz (RT+10~200) ℃ Temperature Range Temperature Resolution 0.1℃ Fluctuating Degree (℃) ±1℃ Attainable Vacuum Degree 133Pa Input Power (W) 5800 Shelf (Layer) Bladder Material Stainless Steel 304 (1Cr~18Ni9Ti) Bladder Size (mm) 750 ×... -
Page 13: Standards And Conformity
User Manual Standards and Conformity Construction in Accordance with the following Safety Standards: UL 61010-1:2012 CSA C22.2#61010-1-12:2012 UL 61010-2-010:2015 CSA C22.2#61010-2- 010:2015 Construction in Accordance with the following EMC Standards: EN 61326-1 Version 1.0... -
Page 14: Inspection
User Manual VI. Inspection 6.1 Packing List Unpack the equipment carefully and check for any damages which may have arisen during transport. In the event of identified damage, please contact serviceusa@hollandgreenscience.com. The package includes the following items: Item Description. Quantity. Main Unit 1pcs Spanner... -
Page 15: Operating Instructions
User Manual VII. Operating Instructions 7.1 Command key instructions Description of Controller Panel Keys press hold the key for 3s or more to control the run/stop of the program in a mode of setup, click this key to add one number and press hold the key to increase successively in a mode of setup, click this key to decrease one number and press hold the key to decrease successively... - Page 16 User Manual 7.2 Functions • F1: first layer measurement temperature • F2: second layer measurement temperature • F3: third layer measurement temperature • F4: fourth layer measurement temperature • “RUN” display of running status. • “XX: XX” display of controller system. •...
- Page 17 User Manual 7.3 Temperature Setting 1) When the instrument is switched on, press the button one time, and the set temperature value will start to blink. Set the desired temperature value (in Celsius degrees) by pressing keys. 2) The button works for a quick movement between the digits. 3) Confirm the set value with another press of the button.
- Page 18 User Manual Setting the Deviation Alarm and Timer • On the controller panel, press and hold the key for 4-5 seconds. • Press key to confirm, press key to move, press key to return. • TIMER WAIT: ON/OFF of waiting temperature. When ‘ON’ the waiting temperature is available.
- Page 19 User Manual Press the key so, that Timer numerical value is backlit displayed, indicating the timer can now be set as required, by pressing either the key. NOTE: If no operation is performed for a long time, the system automatically returns to the home screen.
- Page 20 User Manual 7.7 Setting the ENGINEER SETUP • key, then shift the cursor to ‘ENGINEER Press and hold the key and press SETUP’, and press key, enter the password (The default is”0”), and press confirm. Press key to move, press key to confirm, and then press key to adjust.
-
Page 21: Fault Diagnosis
User Manual VIII. Fault Diagnosis Fault Possible Causes Solutions Check the lines are The external power supply outlet has no connected correctly and power. that the power outlet socket tests as operational. The power plug is not correctly inserted Re-insert the power plug into the socket or the line is cut off into the socket check switch ‘ON’... - Page 22 User Manual SV≥RT+10℃ Issues Not Qualified to Use * Out of control * Offset or overshoot Eliminate grounding Pt sensor not connecting well. * Error display resistance. tested temperature vs. teal temperature Re-set all relevant Relevant parameters are not correctly parameters, such as Ar, P, set.
-
Page 23: Maintenance And Cleaning
User Manual IX. Maintenance and Cleaning Proper maintenance and operation of the vacuum oven are required to ensure the good working condition and extend the oven’s service life. Keep the vacuum oven dry and clean in routine operations. Clean the exterior of the vacuum oven with a non-abrasive cleanser and only connect the power supply when the oven surface is dry.