Table of Contents
Advertisement
Quick Links
Advertisement
Table of Contents

Related Manuals for Curtiss-Wright DuraCOR 311

Summary of Contents for Curtiss-Wright DuraCOR 311
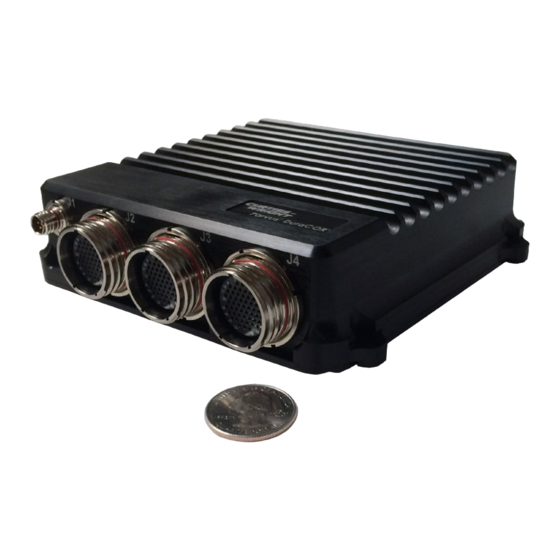
- Page 1 USER MANUAL DuraCOR 311 ® Intel Atom E3845 Mission Computer...
- Page 2 Curtiss-Wright reserves the right to change the contents and form of this document, as well as the features and specifications of its products, at any time without notice.
-
Page 3: Table Of Contents
Shared Resources and Connectors Location ..................13 Chapter 2 Operational Description ..................14 Mini-PCIe Expansion ........................... 14 Installing Mini-PCIe Cards into the DuraCOR 311 Mission Computer ..........15 Integrating Mini-PCIe Cards ......................... 15 Storage Options ............................16 mSATA ..............................16 2.5”... - Page 4 DuraCOR 311 Table of Contents Power-on Sequence ............................ 21 Chapter 4 Connector Description ..................23 Connector Identification ..........................23 Connector Pinouts ............................24 J1 Power Connector ..........................24 J2 I/O Connector........................... 25 J3 I/O Connector........................... 27 J4 Configurable I/O Connector ......................29 Configurable I/O Internal Connectors ....................
- Page 5 DuraCOR 311 Table of Contents Appendix C – BIOS Settings ....................46 BIOS Operation ............................46 Determining the BIOS Version ......................46 BIOS Update ............................46 Setup Guide ............................47 Menu Bar ............................47 Legend Bar ............................. 47 Selecting an Item ........................... 47 Displaying Submenus ........................
-
Page 6: List Of Figures
Figure 19: DuraCOR 311 Front View Dimensions ..................35 Figure 20: DuraCOR 311 Side View Dimensions ..................36 Figure 21: DuraCOR 311 with Removable SATA SSD Option Front View ..........36 Figure 22: DuraCOR 311 with Removable SATA SSD Option Side View ..........36 Figure 23: DuraCOR 311 Mounting Hole Locations ................... -
Page 7: List Of Tables
List of Tables List of Tables Table 1: DuraCOR 311 Configurations ....................... 10 Table 2: DuraCOR 311 Peripheral Chip List ....................12 Table 3: Stereo Connector Pinout ....................... 18 Table 4: DuraCOR 311 Connector IdentificationTable ................23 Table 5: J1 Connector Information ......................24 Table 6: J1 Pinout ............................ -
Page 8: Chapter 1 Introduction
DuraCOR 311 Chapter 1 Introduction Chapter 1 Introduction The DuraCOR 311 is an ultra-small form factor (SFF) tactical mission computer based on a low-power, four-core Intel ® Atom 3845 (Bay Trail-I) processor equipped with a rugged Flash disk and PCIe-Mini Card I/O expansion slots. -
Page 9: Functional Description
64-bit Intel Architecture (IA) CPU with integrated Intel HD Graphics. The ultra-reliable and modular design of the DuraCOR 311 features high mechanical robustness and I/O flexibility to meet the needs of civil and military aerospace platforms. The unit features an industrial-grade... -
Page 10: Configurations
CE Marking Configurations Due to the modularity of the DuraCOR 311 (mSATA / microSD/Removable SSD, pre-integrated Mini-PCIe cards, and operation system options), numerous configuration variants are possible. Please consult with your sales representative and application engineer to assess your technical requirements and recommended system configuration. -
Page 11: Base System With Removable Storage Bay Option
Base System with Removable Storage Bay Option Example ordering code C311-00R: DuraCOR 311, Intel 3845, 4 GB RAM, no mSATA, Removable 2.5” SATA SSD Storage Bay SSD31X-064S-L: 64 GB 2.5" SATA SSD, Industrial SLC NAND Flash -40/+85C, Mounting Tray,... -
Page 12: System Block Diagram
DuraCOR 311 Chapter 1 Introduction System Block Diagram The block diagram shows the DuraCOR 311 interfaces. Figure 3: DuraCOR 311 Block Diagram Table 2: DuraCOR 311 Peripheral Chip List Interface Description MFG Part Number E3845 – On SMARC ® Processor... -
Page 13: Shared Resources And Connectors Location
DuraCOR 311 Chapter 1 Introduction Shared Resources and Connectors Location To accommodate different configurations, the following shared resources are explained below: Mini-PCIe / mSATA Socket: This socket can be used either for an mSATA SSD or for a mini-PCIe card. -
Page 14: Chapter 2 Operational Description
The DuraCOR 311 Mission Computer provides a powerful and flexible platform to integrate a variety of devices based on Mini-PCIe. Without increasing the height of the base unit the DuraCOR 311 can support up to three (3) Mini-PCIe cards. Typical devices offered in the Mini-PCIe form factor that can be easily integrated into a DuraCOR 311 include: ... -
Page 15: Installing Mini-Pcie Cards Into The Duracor 311 Mission Computer
DuraCOR 311 Chapter 2 Operational Description Installing Mini-PCIe Cards into the DuraCOR 311 Mission Computer Caution! ESD Sensitive Components Follow standard ESD and FOD controls to avoid damage to the internal components. 1. Remove the 15x 2-56 bolts using a #1 Philips screwdriver and remove base. -
Page 16: Storage Options
Chapter 2 Operational Description Storage Options The DuraCOR 311 has a number of options for data storage. The system has ability to use either an mSATA or a 2.5” removable SSD. The DuraCOR 311 also has a microSD card slot. Support for an mSATA SSD and a microSD card within the base unit, and a 2.5”... -
Page 17: Microsd Card Expansion
Chapter 2 Operational Description MicroSD Card Expansion The DuraCOR 311 also has the ability to use a microSD card for storage. A microSD card may be used in conjunction with another storage device. All drives loaded are rated to the same or greater environmental specifications as the system. -
Page 18: Removal
(i.e. Loctite 222) Audio The DuraCOR 311 supports stereo audio. Audio can be used without any modification through the HDMI port. If audio, this includes microphone, line in, line out, and headphone, is required these signals can be accessed using the configurable I/O pins. A cable with the P2 connector pinout below will allow the system to breakout these signals. -
Page 19: Serial Configuration
Remote Off Remote Off may be used to hold the DuraCOR 311 in a powered off state until the user desires the unit to be powered. When Remote Off is enabled, no power is delivered to the system. Remote Off must be disabled in order for the system to draw power. -
Page 20: Write Protect
Power Hold Up The DuraCOR 311 has the option of 50 ms hold up at 40W. Hold up may be incorporated into the system without any size increase to the system. Hold up is not a standard feature; please contact your sales representative for system part numbers containing hold up. -
Page 21: Chapter 3 Quick Start Guide
Power-on Sequence To install the DuraCOR 311, follow these steps: 1. Connect a power cable to port J1 on the DuraCOR 311 (use the cable from the breakout cable set or an equivalent power cable) 2. Connect the other end of the power cable to the unpowered DC power source Caution! Ensure that the DC power source is set to provide 9 to 36VDC (28 nominal) prior to attaching DuraCOR 311. - Page 22 DuraCOR 311 Chapter 3 Quick Start Guide 7. If the DuraCOR 311 was purchased with a pre-installed operating system (Linux or Windows), once the system is fully booted enter the following password Password: parvus Page 22 of 72 MNL-0667-01 Rev B2...
-
Page 23: Chapter 4 Connector Description
DuraCOR 311 Chapter 4 Connector Description Chapter 4 Connector Description This chapter identifies the pinouts and signal descriptions for the DuraCOR 311. It also provides connector part numbers along with suggested mating connector details as necessary. Connector Identification Table 4: DuraCOR 311 Connector IdentificationTable... -
Page 24: Connector Pinouts
Connector Pinouts This section provides the pinouts necessary for creating cables to connect to this assembly. If custom cabling is not designed and built by Curtiss-Wright, all EMI and EMC consideration must be handled by the customer. There are four internal connectors for configurable I/O. Each internal connector is labeled as P4, P5, P6, or P7. -
Page 25: J2 I/O Connector
14x configurable I/O pins. The configurable I/O pins do not have any ESD protection. Caution! ESD Sensitive Components Follow standard ESD and FOD controls to avoid damage to the internal components. Figure 12: DuraCOR 311 J2 Front Pinout Table 7: J2 Connector Information Amphenol (Glenair) Jam... - Page 26 DuraCOR 311 Chapter 4 Connector Description J2_5 GBE_CPU_D_P J2_33 GBE_PORT2_D_P J2_6 CONFIGURABLE_IO_77 P7_12 J2_34 GBE_PORT2_C_N J2_7 CONFIGURABLE_IO_76 P7_11 J2_35 CONFIGURABLE_IO_69 P7_4 J2_8 USB_3_N USB 3 J2_36 ZEROIZE_IN# J2_9 USB_3_P USB 3 J2_37 WRITE_PROTECT_IN# J2_10 GBE_CPU_C_N J2_38 SYSTEM_GND J2_11 GBE_CPU _A_N...
-
Page 27: J3 I/O Connector
I/O pins do not have any ESD protection. Caution! ESD Sensitive Components Follow standard ESD and FOD controls to avoid damage to the internal components. Figure 13: DuraCOR 311 J3 Front Pinout Table 9: J3 Connector Information Amphenol (Glenair) Jam... - Page 28 DuraCOR 311 Chapter 4 Connector Description J3_6 HDMI_CLK_P HDMI J3_34 HDMI_CEC HDMI J3_7 GPIO3 J3_35 SYSTEM_GND HDMI CTRL GND J3_8 GPIO2 J3_36 RESERVED J3_9 RS485_TX1_N RS485_1 J3_37 RESERVED J3_10 HDMI_D1_N HDMI J3_38 RESERVED J3_11 SYSTEM_GND HDMI DO GND J3_39 RS485_TX2_N...
-
Page 29: J4 Configurable I/O Connector
J4 contains 55x configurable IO pins. The configurable IO pins do not contain any ESD protection. Caution! ESD Sensitive Components Follow standard ESD and FOD controls to avoid damage to the internal components. Figure 14: DuraCOR 311 J4 Front Pinout Table 11: J4 Connector Information Amphenol (Glenair) Jam... - Page 30 DuraCOR 311 Chapter 4 Connector Description J4_7 CONFIGURABLE_IO_7 P4_17 J4_35 CONFIGURABLE_IO_35 P5_9 J4_8 CONFIGURABLE_IO_8 P4_13 J4_36 CONFIGURABLE_IO_36 P4_27 J4_9 CONFIGURABLE_IO_9 P4_15 J4_37 CONFIGURABLE_IO_37 P4_25 J4_10 CONFIGURABLE_IO_10 P5_24 J4_38 CONFIGURABLE_IO_38 P4_14 J4_11 CONFIGURABLE_IO_11 P5_12 J4_39 CONFIGURABLE_IO_39 P4_10 J4_12 CONFIGURABLE_IO_12 P5_21 J4_40...
-
Page 31: Configurable I/O Internal Connectors
DuraCOR 311 Chapter 4 Connector Description Configurable I/O Internal Connectors Figure 15: P2 – Audio Connector Figure 16: P4-P6 – Configurable I/O Table 13: Configurable I/O Internal Connector Part Numbers Connector Location Manufacturer Connector Mating Connector Molex 5011902017 5011892010 Molex... -
Page 32: Test Cable Set - Cbl-C31X-01
DuraCOR 311 Chapter 4 Connector Description Test Cable Set – CBL-C31X-01 A test cable set with the IO broken out to commercial connectors for a base DuraCOR 311 is available for purchase. Figure 17: CBL-C31X-01 Starter Cable Set Table 14: CBL-C31X-01... -
Page 33: Chapter 5 Specifications
DuraCOR 311 Chapter 5 Specifications Chapter 5 Specifications Technical Specifications Energy Efficient CPU/GPU Low-power Intel Atom 3845 (Bay Trail-I) processor with 4-cores @ 1.91 GHz (one thread per core), Silvermont microarchitecture, 2 MB L2-cache, low-power ultra-mobile class 22 nm System... -
Page 34: Standard I/O Interfaces
Enclosure/Finish: corrosion resistant, aluminum alloy with black anodize per MIL-A-8625 and Chemical Conversion per MIL-DTL-5541 Dimensions Figures 18-22 provide the physical dimensions of the DuraCOR 311 Dimensions (HxDxW): 1.46” x 5.19” x 5.36” (3.71 cm x 13.18 cm x 13.61 cm) excluding... -
Page 35: Figure 18: Duracor 311 Top View Dimensions
DuraCOR 311 Chapter 5 Specifications Figure 18: DuraCOR 311 Top View Dimensions Figure 19: DuraCOR 311 Front View Dimensions MNL-0667-01 Rev B2 ECO-5941 Effective: 17 Mar 20 Page 35 of 72... -
Page 36: Figure 20: Duracor 311 Side View Dimensions
Optional removable SSD SATA Dimensions (HxDxW): 2.14” x 5.19” x 5.36” (5.44 cm x 13.18 cm x 13.61 cm) excluding connectors and mounting features Figure 21: DuraCOR 311 with Removable SATA SSD Option Front View Figure 22: DuraCOR 311 with Removable SATA SSD Option Side View... -
Page 37: Mounting The System
DuraCOR 311 Chapter 5 Specifications Mounting the System The DuraCOR 311 is mounted using 4x #10 hardware. Mounting hole locations: Figure 23: DuraCOR 311 Mounting Hole Locations Power Power input: 28 VDC nominal steady state: input range 9-36VDC ... -
Page 38: Shock/Vibration
DuraCOR 311 Chapter 5 Specifications Shock/Vibration Operating Shock: 40g, 11ms, 3 pos/neg per axis, total 18 terminal peak sawtooth pulses Crash Hazard Shock: 75g, 11ms, 2 pos/neg per axis, total 12 sawtooth pulses Random Vibration: 3 Axes, 1 Hour/Axis (per Jet-Helo and Tracked Vehicle Profiles) -
Page 39: Other Specifications
18,428 Hours Export Jurisdiction ITAR-free: U.S. Commerce Export Administration Regulations (EAR) controlled CE Marking The DuraCOR 311 meets the requirements of the applicable directives for European Conformity MNL-0667-01 Rev B2 ECO-5941 Effective: 17 Mar 20 Page 39 of 72... -
Page 40: Chapter 6 Troubleshooting
DuraCOR 311 Chapter 6 Troubleshooting Chapter 6 Troubleshooting Product Identification The product is labeled with the Parvus P/N and serial number. Please refer to this information when communicating with Technical Support. Technical Assistance If you have a technical question or if you cannot isolate a problem with your product, please call or e-mail... -
Page 41: Chapter 7 Contact Info
DuraCOR 311 Chapter 7 Contact Info Chapter 7 Contact Info Company contact info: Curtiss-Wright Defense Solutions Division 3222 S. Washington St. Salt Lake City, Utah, USA 84115 T: +1.801.483.1533 F: +1.801.483.1523 www.curtisswrightds.com Sales: T: +1.800.483.3152 or +1.801.483.1533 slp_sales@curtisswright.com Product Technical Support: T: +1.801.433.6322... -
Page 42: Appendix A Onboard Microcontroller Functions
Appendix A Onboard Microcontroller DuraCOR 311 Functions Appendix A Onboard Microcontroller Functions The onboard microcontroller provides low level logic for monitoring and configuring the system independent of the main CPU. It is connected to the main processor internally via USB, and exposes a USB Serial adapter to the CPU. -
Page 43: Serial Configuration Via Protocol Buffers
Appendix A Onboard Microcontroller DuraCOR 311 Functions Serial Configuration via Protocol Buffers The serial ports are configured in a similar way to how BIT is statused. To configure or query the serial configuration, send a “Message” with the “has_serial_config” field asserted, and the “serial_config.do_config”... -
Page 44: Apendix B Gpio Configuration
DuraCOR 311 Apendix B GPIO Configuration Apendix B GPIO Configuration GPIO The C31x provides GPIO via USB to ensure maximum compatibility across multiple operating systems. The chip which provides GPIO is an FTDI FT4232h, which is a multi-function quad USB to serial chip capable of many protocols. -
Page 45: Gpio Example Code
DuraCOR 311 Apendix B GPIO Configuration GPIO Example Code #include <stdlib.h> #include <stdio.h> #include <mpsse.h> static const int FTDI_DID = 0x6011; static const int FTDI_INTERFACE = INTERFACE_C; int main(int argc, char **argv) struct mpsse_context *ctx; ctx = Open(0x0403, FTDI_DID, BITBANG, 0, 0, FTDI_INTERFACE, NULL, NULL);... -
Page 46: Appendix C - Bios Settings
Appendix C – BIOS Settings DuraCOR 311 Appendix C – BIOS Settings This section shows and describes the settings available in the BIOS. The content for this section comes from the manufacturer of the SMARC module. BIOS Operation The BIOS (Basic Input and Output System) or UEFI (Unified Extensible Firmware Interface) records hardware parameters of the system in the CMOS on the Computer-on-Module. -
Page 47: Setup Guide
Appendix C – BIOS Settings DuraCOR 311 Setup Guide The Setup Utility changes system behavior by modifying the Firmware configuration. The setup program uses a number of menus to make changes and turn features on or off. Functional keystrokes in POST:... -
Page 48: General Help Window
Appendix C – BIOS Settings DuraCOR 311 General Help Window Pressing <F1> on a menu brings up the General Help window that describes the legend keys and their alternates. Press <Esc> to exit the General Help window. BIOS Setup Main... -
Page 49: System Information
Appendix C – BIOS Settings DuraCOR 311 System Information Boot Features Feature Options Description NumLock Selects Power-on state for NumLock Timeout Number of seconds that P.O.S.T will wait for the user input before booting CSM Support Enables or Disables the UEFI CSM (Compatibility Support Module)to support legacy PC boot process. - Page 50 Appendix C – BIOS Settings DuraCOR 311 Quick Boot Disabled Enable or Disable Quick Boot Enabled Dark Boot Disabled Enable or Disable Dark Boot Enabled Diagnostic Splash Screen Disabled Enable or Disable the Diagnostic Splash Screen Enabled Diagnostic Summary Disabled...
-
Page 51: Platform Information
Appendix C – BIOS Settings DuraCOR 311 Platform Information Advanced Feature Options Description Select Language0 English Select the language of the BIOS setup German screen Chinese Windows OS Selection Select the Operating System family to be Linux booted Android MNL-0667-01 Rev B2... -
Page 52: Miscellaneous
Appendix C – BIOS Settings DuraCOR 311 Miscellaneous Feature Options Description Disabled Smart Battery Configuration Enable/Disable Smart Battery Auto System Support (e.g. Kontron Charger M.A.R.S.) Manager Chipset Reset Button Behavior Select the system behavior on reset Reset Power button event... -
Page 53: H/W Monitor
Appendix C – BIOS Settings DuraCOR 311 Feature Options Description Auto-reload Disabled Enable automatic reload of watchdog Enabled timers on timeout Global Lock Disabled If set to enabled, all Watchdog Enabled registers (except WD_KICK) become read only until the board is reset... - Page 54 Appendix C – BIOS Settings DuraCOR 311 Feature Value/Options Description PCB Temperature xx°C Shows the measured temperature of the printed circuit board NCT782Y Temperature xx°C Shows the measured temperature of the NCT782Y Hardware monitor CPU FAN xxxx rpm Shows the fan speed of onboard FAN...
-
Page 55: Cpu Configuration
Appendix C – BIOS Settings DuraCOR 311 CPU Configuration Feature Options Description Enable Execute Disable Bit Execute Disable Bit prevent certain Disable classes of malicious buffer overflow attacks when combined with a supporting OS Enable AESNI Enables or Disables the Advanced... -
Page 56: Cpu Power Management
Appendix C – BIOS Settings DuraCOR 311 CPU Power Management Feature Options Description Enabled Intel® SpeedStep(TM) Enable/Disable processor Disabled performance states (PStates) Boot Performance Mode Select the performance state that the Performance BIOS sets before OS hand-off Max Battery Intel® Turbo Boost Technology... -
Page 57: Uncore Configuration
Appendix C – BIOS Settings DuraCOR 311 Uncore Configuration Feature Options Description Integrated Graphics Device Disable Enable: enable Integrated Graphics Enable Device (IGD) when selected as the Primary Video Adaptor. Disable: Always disable IGD Primary Display Auto Select which of IGD/PCIe Graphics... -
Page 58: Igd - Lcd Control
Appendix C – BIOS Settings DuraCOR 311 IGD Turbo Auto Select the IGD Turbo feature Enable Disable Spread Spectrum clock Disable Enable or Disable clock chip Spread Enable Spectrum feature IGD - LCD Control Feature Options Description IGD - Boot Type... - Page 59 Appendix C – BIOS Settings DuraCOR 311 LFP Type AUTO Select LFP used by Internal Graphics VGA 640×480 1×18 Device by selecting the appropriate WVGA 800×480 1×18 panel setup item SVGA 800×600 1×18 XGA 1024×768 1×18 XGA 1024×768 1×24 WXGA 1280×768 1×24 WXGA 1280×800...
-
Page 60: South Cluster Configuration
Appendix C – BIOS Settings DuraCOR 311 South Cluster Configuration PCI Express Configuration Feature Options Description Auto PCIe Speed Select PCIe Speed to Gen1 or Gen2 Gen1 Gen2 PCI Express Root Port Disable Control the PCI Express Root Port Enable... -
Page 61: Usb Configuration
Appendix C – BIOS Settings DuraCOR 311 USB Configuration Feature Options Description xHCI Mode Smart Auto Mode of operation of xHCI controller. Enable This will also influence EHCI Disable controller settings since certain combinations of those modes are not allowed. 'SMART Auto' Mode is requied for OS with external Driver (e.g. -
Page 62: Audio Configuration
Appendix C – BIOS Settings DuraCOR 311 USB 0 Host/Client mode Host mode Selects the USB mode for USB 0 Client mode Audio Configuration Feature Options Description Audio Controller Enable Enable / Disable High Definition Audio Disable interface - HDAudio VCi Enable... -
Page 63: Sata Drives
Appendix C – BIOS Settings DuraCOR 311 SATA Drives Feature Options Description Enable Chipset SATA Enables or Disables the Chipset Disable SATA Controller. The Chipset SATA controller supports the 2 internal SATA ports (up to 3Gb/s supported per port) Disable... -
Page 64: Lpss & Scc Configuration
Appendix C – BIOS Settings DuraCOR 311 LPSS & SCC Configuration Feature Options Description LPSS & SCC Devices Mode ACPI Select operation mode for Low Power Mode Super Speed LPSS devices eMMC/SDCard. For eMMC full speed Mode operation the LPSS mode should be set to “ACPI”... -
Page 65: Miscellaneous Configuration
Appendix C – BIOS Settings DuraCOR 311 SCC SD Card Support Disable Enable / Disable SD Card Support Enable SD SDR 25 Support Disable Enable bus speed operation up to Enable 25MB/s for SDCard (High Speed). Disable limits bus speed to 12.5MB/s (normal speed) -
Page 66: Smbios Event Log
Appendix C – BIOS Settings DuraCOR 311 State After G3 Specify what state to go to when State power is re-applied after a power failure (G3 state). S0 = Power on, S5 State = Stay off Disable Clock Spread Spectrum... -
Page 67: Memory Ecc Error Logging
Appendix C – BIOS Settings DuraCOR 311 Memory ECC Error Logging Feature Options Description Disabled Error Logging Enable Memory ECC Error Logging to Enabled SMBIOS Event Log. Please note that enabling ECC error logging is only useful on systems equipped with ECC memory. -
Page 68: Kontron Board
Appendix C – BIOS Settings DuraCOR 311 Kontron Board Feature Options Description Wake on LAN Disabled Enable or Disable Wake on LAN Enabled S5 Eco Disabled Enable or Disable S5 Eco Enabled SMB S0-S5 Disabled Enable or Disable SMB S0-S5... -
Page 69: Security
Appendix C – BIOS Settings DuraCOR 311 Security Feature Options Description Set Supervisor Password Enter Set or clear the Supervisor account's password Supervisor Hint String Press Enter to type Supervisor Hint String Min. password length Set the minimum number of... -
Page 70: Exit
Appendix C – BIOS Settings DuraCOR 311 Exit Content for Appendix C taken from Kontron User’s Guide, Sep 11, 2017. www.kontron.com Page 70 of 72 MNL-0667-01 Rev B2 ECO-5941 Effective: 17 Mar 20... -
Page 71: Glossary
Mini PCI express form factor card [30 mm × 50.95 mm] that can be added to the DuraCOR 311 Base Unit to add I/O without increasing the size of the system. The Mini PCIe I/O Cards / mPCIe base unit supports up to three Mini PCIe I/O cards. - Page 72 DuraCOR 311 Glossary {Parvus back cover, 8.5 x 11 picture inserted in front of text. DO NOT DELETE THE COMMENTS OR THIS PAGE. These comments are only visible in Normal view. The picture hides the header and these comments when you print the manual or view it in Print Layout or Print Preview.}...
Need help?
Do you have a question about the DuraCOR 311 and is the answer not in the manual?
Questions and answers