Makita DGA417 Repair Manual
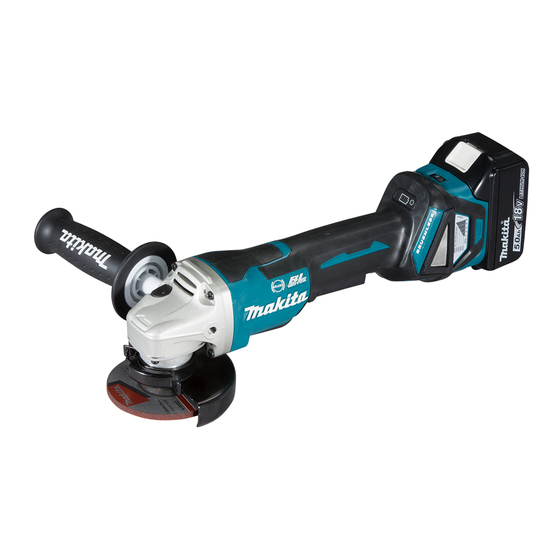
Cordless angle grinder
Hide thumbs
Also See for DGA417:
- Instruction manual (216 pages) ,
- Instruction manual (180 pages) ,
- Instruction manual (28 pages)

Related Manuals for Makita DGA417


Summary of Contents for Makita DGA417
- Page 1 CORDLESS ANGLE GRINDER DGA417/ DGA467/ DGA517/ DGA418/ DGA468/ DGA518 REPAIR MANUAL November 2017 Ver.1...
-
Page 2: Table Of Contents
CONTENTS CONTENTS ....................................2 CAUTION ....................................3 NECESSARY REPAIRING TOOLS ............................3 TIGHTENING TORQUE SPECIFICATIONS ..........................3 LUBRICANT AND ADHESIVE APPLICATION ........................4 REPAIR ......................................5 Rotor , Ball bearings 629LLB / 607LLB, Spiral bevel gear 10 .................... 5 6-1-1 Disassembly ................................ -
Page 3: Caution
CAUTION Repair the machine in accordance with “Instruction manual” or “Safety instructions”. Follow the instructions described below in advance before repairing: ・ Wear gloves. ・ In order to avoid wrong reassembly, draw or write down where and how the parts are assembled, and what the parts are. It is also recommended to have boxes ready to keep disassembled parts by group. -
Page 4: Lubricant And Adhesive Application
LUBRICANT AND ADHESIVE APPLICATION Item of Lubricant Amount of Grease MAKITA Grease R No.00 9 g to Gear room, and a little to O ring 26 Fig. 1 4 / 23... -
Page 5: Repair
REPAIR Caution: Battery has to be removed, before repairing for your safety. Rotor , Ball bearings 629LLB / 607LLB, Spiral bevel gear 10 5-1-1 Disassembly Fig. 2 Unscrewing four 4x30 Tapping screws [1], separate Gear housing [2]. Fig. 3 Fitting slotted head screwdriver [3] to the notch [2] of Gear housing cover [1], remove Gear housing cover [1], twisting the screwdriver [3]. - Page 6 Fig. 5 Applying 1R045 to Gear housing cover [1] and 1R045 shaft of Rotor [2], turn the handle. Now, Rotor [2] is separated from Gear housing cover[1]. Fig. 6 Ball bearing 629LLB [2] can be removed from Gear housing cover [1], by pushing it with finger. Fig.
-
Page 7: Assembly
5-1-2 Assembly Fig. 8 Rotor When handling or storing Rotors, therefore, protect Rotors from deterioration due to the magnetic force as follows. Be sure to provide a proper distance between Rotors to protect from: • Demagnetization by contact of Rotors •... - Page 8 Fig. 11 Fixing Rotor with 1R038 and vise, set Spiral bevel 1R254 1R220 gear 10 [2] to Rotor, passing shaft of Rotor [1] through Spiral bevel gear 10 [2]. 1R222 Pre-setting fastening torque of 1R254 to 4.9~5.9N.m, attach 1R220, 1R222, Bit adapter assembly and Socket bit 10 to 1R254.
-
Page 9: Spiral Bevel Gear 37, Bearing Box Section
Spiral bevel gear 37, Bearing box section 5-2-1 Disassembly ※No need to disassemble Motor section to repair Spiral bevel gear 37, Bearing box section. Fig. 13 Unscrewing four M4 x 14 Pan head screws, separate Bearing box from Gear housing. Fig. - Page 10 Fig. 16 Put Bearing box [1] on 1R258, paying attention to the following points. 1R032 Note ・ The protrusion, circled with red dot line, has to be positioned, keeping distance from both of 1R258. ・ Lead flange/A/B [3] has not to contact to 1R258 when it is pushed out together with Spindle/A [2].
- Page 11 Fig. 19 Applying 1R026 to Ball bearing 6201DDW [1], press 1R026 with Arbor press, so, Ball bearing 6201DDW [1] is removed from Bearing box. 1R026 Tips Do not reuse the Ball bearing 6201DDW [1], because it has been damaged in the step of Fig. 16. Fig.
-
Page 12: Assembly
5-2-2 Assembly Fig. 22 Pass Spindle/A [2] through Lead flange/A/b [1]. 1R291 And then, secure Lead flange/A/B [1] with Retaining ring R-26 [3]. Fig. 23 Push Felt ring 16 [1] with 1R252 and Arbor press, until it stops. 1R252 Fig. 24 When using 1R164, apply its small diameter (30mm) side, marked with to Ball bearing... - Page 13 Fig. 25 Mount Retaining ring R-32 [1] with 1R291. 1R291 Fig. 26 Accepting Ball bearing 6201DDW, assembled in the step of Fig. 24, with 1R028, stand Spindle/A[1] inserting into the Ball bearing 6201DDW. Press Spindle/A [1] with Arbor press. So, the Spindle has been mounted to Bearing box section.
- Page 14 Fig. 28 Attaching 1R212-B and 1R212-A to 1R003, mount 1R212-B Ring spring 11 [1] with the 1R003. 1R212-A 1R003 Fig. 29 Press fit Ball bearing 696ZZ with Arbor press. Now, Gear and Bearing box section has been assembled. 14 / 23...
-
Page 15: Shaft Lock Mechanism
Shaft lock mechanism 5-2-3 Disassembly Separate Gear housing from Motor housing. as shown in Fig. 2. Fig. 30 Disassemble Bearing box [2] unscrewing four M4x14 Pan head screws [1]. Fig. 31 Applying 1R268 to Shoulder pin 4 [1], strike 1R268 with Hammer. Now, Shoulder pin 4 [1] has Now, Shoulder pin 4 [1] has been removed. -
Page 16: Assembly Of Stator Complete
Assembly of Stator complete Fig. 33 Fitting two Notches [2] of Stator complete [1] to rib formed protrusions [4] of Motor housing L [3], assemble Stator complete. Tips Stator complete [1] has to be so mounted that its Terminal portion [5] is located to the position shown in the photograph to left. -
Page 17: Circuit Daigram
CIRCUIT DAIGRAM Flag receptacle (with lock#187,t=0.8) Switch unit white (AWG: #14) ② Red (AWG: #14) C NO + ③ Red (AWG: #22) Switch Yellow (AWG: #22) Black Connector - (AWG: #14) Terminal Blue, black Blue, black (AWG: #28 for each) (AWG: #24 for each) Flag receptacle (with lock #250, t=0.8)... -
Page 18: Wiring Diagram
WIRING DIAGRAM Wiring in Motor housing L before setting Dial section Facing sleeve portion for connecting Lead wires, to the opposite side of flat surface of Switch, connect Non insulated terminal to Switch. < Correct Connection > <Wrong Connection> Sleeve portion Switch Switch Non insulated terminal... -
Page 19: Wiring In Motor Housing L
Wiring in Motor housing L Auto-start wireless *After setting dial section and system Dial section Rib G Lead wires of Controller, connected to Dial section, have to be put between Rib G and Rib H. Rib H Put Connectors to this place positioning their pieces as follows. *Connector pieces , put on the Controller side: Connector pieces with Controller’s lead wires ( The product equipped with Auto start wireless system, has two connector pieces.. -
Page 20: Troubleshooting
TROUBLESHOOTING Whenever you find any trouble in your machine, first, refer to this list to check the machine for solution. Note in Repairing Use a full charged battery that has the star mark. When Housing is disassembled, check the conditions of the electrical parts (Connectors, Lead wires, Switches, etc.), Rotor, Stator, Gear section, etc. -
Page 21: Flowchart Of Troubleshooting
Flowchart of Troubleshooting Check the items from the top of the following list. (Description of the item is referred to CIRCUIT DIAGRAM on page 17/23) After corrective action, return to the start of Troubleshooting and re-check again. Symptom Cause Corrective action Does Tester indicate 0.8V±... -
Page 22: Wireless Activation (For Model Dga418/ Dga468/ Dga518)
Wireless activation (for model DGA418/ DGA468/ DGA518) When checking the wireless activation, be sure to prepare an our wireless supported tool (Circular saw, etc.). Check Step 1 (9-4-1) to Step 3 (9-4-3) in order and if some troubles happen, refer to 9-4-4 Tool side Vacuum cleaner side... -
Page 23: Step3 : Checking Wireless Activation
8-4-3 Step3 : Checking wireless activation The tool and cleaner should be separated about 5m each other. Vacuum cleaner Supported tool When the tool is activated, the wireless activation lamps When the tool is activated, the wireless activation lights up in blue. Wireless activation works properly. lamps lights up in blue.
Need help?
Do you have a question about the DGA417 and is the answer not in the manual?
Questions and answers