
Related Manuals for Advent Q1435A


Summary of Contents for Advent Q1435A
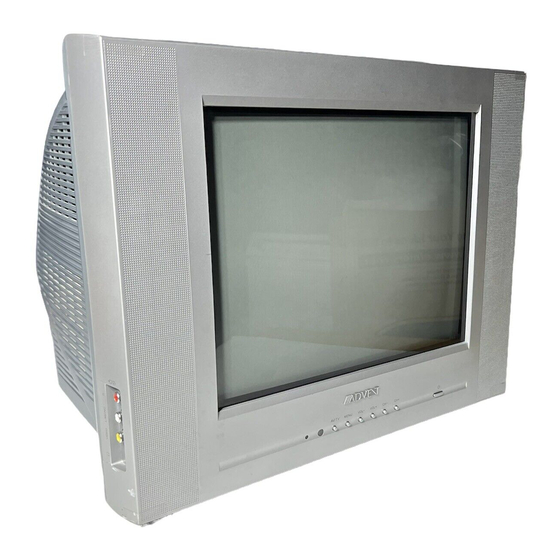
- Page 1 COLOR TELEVISION RECEIVER INSTRUCTION MANUAL Q1435A Before operating the unit, please read this manual thoroughly.
-
Page 2: Table Of Contents
Contents Important safety instructions-1 Timer Setting ----------------------16 To enter the TIMER menu--------------------------16 Identification of Controls-------3 Setting the Clock -------------------------------------16 Front ------------------------------------------------------3 Setting the On Time ---------------------------------16 Back-------------------------------------------------------4 Setting Sleep timer ----------------------------------16 Remote Controller -------------------------------------5 System Setting -------------------17 Installing batteries -------------------------------------6 Effective range of the Remote----------------------6 To enter the EXTRA menu -------------------------17 Selecting OSD language ---------------------------17... -
Page 3: Important Safety Instructions-1
Important safety instructions The lightning flash with arrowhead symbol, within an equilateral triangle is intended to CAUTION alert the user to the presence of uninsulated dangerous voltage within the product's RISK OF ELECTRIC SHOCK enclosure that may be of sufficient magnitude DO NOT OPEN to constitute a risk of electric shock to persons The exclamation point within an equilateral... - Page 4 Important safety instructions(continued) 13. LIGHTNING To protect your product from a lightning storm, or when it is left unattended and unused for long periods of time, unplug it from the wall outlet and disconnect the antenna or cable system. This will prevent damage to the product due to lightning and power-line surges.
-
Page 5: Identification Of Controls
Introduction Identification of Controls Front Indicator Power button Remote Sensor AV/TV MENU VOL- VOL+ Earphone Jack AV2 input terminals (VIDEO, AUDIO L/MONO,R) 2. AV/TV button: Video input select. 3. MENU button: To enter into menu operation. 4. VOL- button: volume down adjust; menu item adjust. 5. -
Page 6: Back
Back VIDEO L/MONO L/MONO S-VIDEO AUDIO AUDIO VIDEO L/MONO L/MONO S-VIDEO AUDIO AUDIO 1. Antenna input 2. DVD input (Y, C , C , AUDIO L/MONO, R) 3. AV1 input (VIDEO, AUDIO L/MONO, R) 4. S-VIDEO input Notes: The S-VIDEO terminal overrides the VIDEO terminal, if you want to watch a video program from the VIDEO input terminal, please disconnect the S-VIDEO first. -
Page 7: Remote Controller
Introduction Identification of Controls (continued) Remote Controller Power On/Off To mute the sound Direct channel selector To view program from external Quickly returns to previous video equipment selected channel On-screen display Closed caption decoder Channel up; Access the main menu Menu item select Volume down;... -
Page 8: Installing Batteries
Installing batteries Effective range of the Remote Open the battery cover. Install two "AAA" batteries matching the +/- polarities of the battery to the +/- marks inside the battery compartment. MENU SLEEP PIC MODE Notes: Replace the battery cover. When there is an obstacle between the TV Notes: and the transmitter, the transmitter may not operate. -
Page 9: Installation
INSTALL the unit in a room where direct light will not fall upon the screen. Total darkness or a reflection on the picture screen may cause eyestrain. Installation Soft and indirect lighting is recommended for comfortable viewing. Antenna installation Optimum reception of colour requires a good signal and will generally mean that an outdoor antenna must be used. -
Page 10: Connecting Video And Audio Equipment
Connecting video and audio equipment This TV set provides 2 groups of AV input terminals and one group of DVD input terminals for your convenient connection to VCR, DVD or other video equipment to enjoy the high quality picture. Please refer to the owner's manual of the equipment to be connected as well. -
Page 11: Turning On/Off
Operations Turning on/off Turning on AC Outlet Insert the AC plug (with the 2 blades) into a conveniently located AC outlet having 120V, 60Hz. AC Plug If no picture appears and the red indicator lights up, then the TV set is in STANDBY mode. -
Page 12: Select Input Signal
Operations Select Input Signal Watching AV program This TV set provides 2 groups of AV input terminals and one group of DVD input terminals for your convenient connection to VCR, DVD or other video equipments. To watch a video program from AV inputs, Press AV button repeatedly until you see the appropriate input indicator on the screen. -
Page 13: Tuning
Operations Tuning in To enter the PRESET menu PICTURE P.LOCK TIMER PRESET Press MENU button. CH NO. EXTRA ADDED ANTENNA MENU AUTO PROGRAM Press CH+ or CH- button to select PRESET item. Press VOL+ or VOL- button to enter PRESET menu. AV/TV MENU VOL- VOL+... -
Page 14: Skipping An Unnecessary Channel
Skipping an unnecessary channel PICTURE P.LOCK TIMER Please enter the PRESET menu first. PRESET CH NO. EXTRA DELETED ANTENNA AUTO PROGRAM Press CH+ or CH- button repeatedly to select CH NO. item. Press VOL+ or VOL- button to select a channel number (for example, channel10). -
Page 15: Channel Selection
Operations Channel Selection Before you select a channel, please select AIR or CABLE input signal. Please see the section of "Setting AIR/CABLE option ". When you select AIR, only channels received on antenna can be selected; When you select CABLE, channels received on cable can be selected. Use Direct Channel Selector (0-9 buttons) To select one-digit channel: Press 0-9 digit buttons and wait for 3 seconds. -
Page 16: Sound Control
Operations Sound Control Use VOL+ or VOL- button. Press VOL+ button, the volume increases; Press VOL- button, the volume decreases. The minimum volume is 0 and the maximum volume is 60. VOLUME Use MUTE( ) button. AV/TV MENU VOL- VOL+ If you want to mute the sound, press MUTE button on the remote. -
Page 17: Adjusting Picture
Operations Adjusting Picture Adjusting picture PICTURE CONTRAST P.LOCK BRIGHT TIMER COLOR Press MENU button. PRESET TINT EXTRA SHARPNESS CONTRAST Press VOL+ or VOL- button to enter PICTURE menu. Press CH+ or CH- button to select item. Press VOL+ or VOL- button to adjust. AV/TV MENU VOL- VOL+... -
Page 18: Timer Setting
Operations Timer Setting Auto search/Manual search/Channel skip/Fine tuning To enter the TIMER menu PICTURE P.LOCK Press MENU button. TIMER ON TIMER --:--AM PRESET ON CH EXTRA CLOCK 12:59PM MENU Press CH+ or CH- button to select TIMER item. Press VOL+ or VOL- button to enter TIMER menu. -
Page 19: System Setting
Operations System Setting To enter the EXTRA menu PICTURE P.LOCK TIMER Press MENU button. PRESET EXTRA LANGUAGE ENGLISH BACKGROUND MENU Press CH+ or CH- button to select EXTRA item. Press VOL+ or VOL- button to enter AV/TV MENU VOL- VOL+ EXTRA menu. -
Page 20: Setting Closed Caption(Ccd)
Setting Closed Caption(CCD) PICTURE P.LOCK Please enter the EXTRA menu first. TIMER PRESET EXTRA LANGUAGE ENGLISH Press CH+ or CH- button to select CC item BACKGROUND Press the VOL+ or VOL- button to select. You can select the caption data channel ( C1/C2/C MUTE ), the text service channel (... -
Page 21: Parental Control
Operations Parental Control Setting Child Lock To enter the P.LOCK menu PICTURE P.LOCK ENTER CODE TIMER Press MENU button. PRESET EXTRA Press CH+ or CH- button to select P.LOCK item. Press VOL+ or VOL- button. Input the password to enter the P.LOCK menu. The password to enter P.LOCK is "1111". -
Page 22: Setting V-Chip
V-Chip enables parents to prevent their children from watching inappropriate material on TV. V-Chip reads the ratings for programming (except for news, sports, unedited movies on premium cable and Emergency System signals ), then denies access to programming if the program's rating meets the limitations you select. In this case, the program will be blocked. -
Page 23: Tv Rating Set
Operations Parental Control (continued) Setting V-chip TV RATING SETUP PICTURE P.LOCK V-CHIP TV Parental Guidelines may have one or more letters added to TIMER MPAA RATING PRESET TV RATING the basic rating to let parents know when a show contains higher EXTRA CANADA ENGLISH levels of violence, sex, adult language or suggestive dialogue:... -
Page 24: Canada English Rating Set
CANADA ENGLISH RATING SETUP PICTURE P.LOCK V-CHIP Please enter the V-CHIP menu first. TIMER MPAA RATING PRESET TV RATING EXTRA CANADA ENGLISH Press CH+ or CH- button to select CANADA ENGLISH CANADA FRENCH item Press the VOL+ or VOL- button to enter CANADA ENGLISH sub- menu. -
Page 25: Changing The Password
Operations Parental Control (continued) Changing password Changing password PICTURE P.LOCK ENTER CODE TIMER PRESET Press MENU button. EXTRA Press CH+ or CH- button to select P.LOCK item. Press VOL+ or VOL- button. Press SLEEP button. AV/TV MENU VOL- VOL+ The characters of "ENTER CODE" displays in red now. Enter the OLD password. -
Page 26: Troubleshooting Guide
Others Troubleshooting Guide Check the following before requesting service. SYMPTOM POSSIBLE CAUSE POSSIBLE SOLUTION Connect the AC power cord No power The AC power cord is not connected. to the AC outlet TV station experiencing problems. Try another channel. Picture control is not adjusted. Check picture control adjustments. - Page 27 Others Troubleshooting Guide (Continued) RECEPTION DISTURBANCES Most types of television interference can be remedied by adjusting the height and position of the VHF/UHF antenna. Outdoor antennas are recommended for best results if not using cable or a satellite. The most common types of television interference are shown below.
-
Page 28: Specifications
Others Specifications Power Supply: AC 120V, 60Hz Power Consumption: 60 W Dimensions: 17.2(W) 13.4(H) 15(D) inch Weight(kg/lb): 12 kg/27 lb CRT: 14" SCREEN Audio Output: 2.5W Receiving channel: 2-13 14-69 CATV 2-69, (A-6)-(A-1), A-W, (W+1)-(W+28) Total 181 channels Color System: Television: NTSC-M AV: NTSC3.58/4.43, PAL 4.43 Antenna Impedance:...
Need help?
Do you have a question about the Q1435A and is the answer not in the manual?
Questions and answers