Advertisement
Quick Links
Advertisement

Related Manuals for LG 28MQ780


Summary of Contents for LG 28MQ780
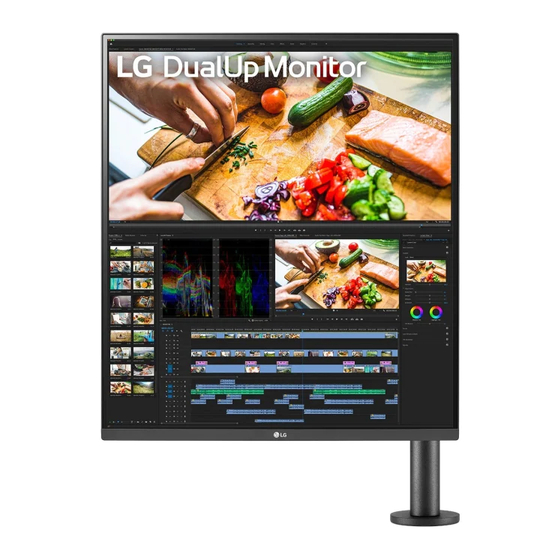
- Page 1 Owner’s Manual LED LCD MONITOR (LED Monitor*) * LG LED Monitor applies LCD screen with LED backlights. Please read this manual carefully before operating your set and retain it for future reference. 28MQ780 www.lg.com Copyright 2021 LG Electronics Inc. All Rights Reserved.
-
Page 2: Table Of Contents
TABLE OF CONTENTS LICENSE ............3 OPEN SOURCE SOFTWARE NOTICE INFORMATION ..........4 ASSEMBLING AND PREPARING .....4 USING THE MONITOR ........16 USER SETTINGS ...........20 TROUBLESHOOTING ........27 PRODUCT SPECIFICATION ......29... -
Page 3: License
LICENSE Each model has different licenses. Visit www.lg.com for more information on the license. The terms HDMI, HDMI High-Definition Multimedia Interface, and the HDMI Logo are trademarks or registered trademarks of HDMI Licensing Administrator, Inc. The SuperSpeed USB Trident logo is a registered trademark of USB Implementers Forum, Inc. -
Page 4: Open Source Software Notice
Illustrations in this document represent typical procedures, so they may look different from the actual product. LG Electronics will also provide open source code to you on CD-ROM for a charge covering the cost of performing such distribution (such as the cost of media, shipping, and handling) upon email request to opensource@lge. - Page 5 • The power cord provided may differ depending upon the region. Supported Software You can download and install the latest version from the LGE website (www.lg.com). • OnScreen Control/ Dual Controller/ LG Calibration Studio NOTE •...
- Page 6 Moving and Lifting the Monitor How to Use the Joystick Button You can easily control the functions of the monitor by pressing the joystick button or moving it left/right/up/ When moving or lifting the monitor, follow these instructions to prevent the monitor from being scratched or down with your finger.
- Page 7 Installing on a Table CAUTION • • Lift the monitor and place it on the table in an upright position. Place the monitor at least 100 mm away from Avoid touching the monitor screen as much as possible. the wall to ensure sufficient ventilation. - This may result in damage to the screen or some of the pixels used to create images.
- Page 8 How to fix a clamp CAUTION • Unplug the power cord before moving or installing the monitor. There is risk of electric shock. After positioning the stand on the table, secure it by turning the handle. • Make sure to use the power cord that is provided in the product package and connect it to a grounded power •...
- Page 9 CAUTION • Stands that are not fully engaged to the table may allow the monitor to wobble or fall over. • Make sure the table is solid and stable enough to fully support installation of the monitor. Tables made of fragile materials such as glass may break.
- Page 10 Swivel stand Pivot Feature Your monitor mount lets you adjust the monitor viewing angle. The pivot feature allows the monitor to rotate 90 ° counter-clockwise. Table Monitor’s head ±335° ±335° Table WARNING • When using the Pivot function, do not rotate the monitor too fast or with excessive force. The table may be scratched by contact with the monitor’...
- Page 11 Raise the monitor up to the maximum height. Rotate the monitor counter-clockwise as shown in the figure. Adjust the angle of the monitor in the direction of the arrow as shown in the figure. Complete the installation by rotating the monitor 90 ° as shown in the figure.
- Page 12 Leveling the Screen Adjusting the Stand Height If the screen appears crooked to one side after the product has been placed in position, straighten the angle Make sure to hold and move the monitor with both hands. horizontally as follows. Max.
- Page 13 Adjusting the Angle Using the Kensington Lock For more information on installation and usage, refer to the Kensington lock owner’ s manual or visit the website Adjust the angle of the screen. at http://www.kensington.com. The angle of the screen can be adjusted forward or backward from -25 ° to 25 ° Connect the monitor to a table using the Kensington security system cable.
- Page 14 Installing on the Wall CAUTION • Leave enough slack in cable to allow full range of motion. This monitor meets the specifications for the wall mount plate or other compatible devices. • To avoid the potential to pinch cables it is important to follow the routing instructions in this manual. Failure Install the monitor at least 100 mm away from the wall and leave about 100 mm of space at each side of the to follow these instructions may result in equipment damage or personal injury.
- Page 15 Installing the monitor on the ceiling or on a slanted wall may result in the monitor falling off, which could lead to injury. Use an authorised LG wall mount and contact the local dealer or qualified personnel. Wall Mount (mm) 100 x 100 •...
-
Page 16: Using The Monitor
Press the joystick button, go to [Settings] > [Input], and then select the input option. CAUTION • If you use generic cables not certified by LG, the screen may not display or there may be image noises. • Do not press the screen for a prolonged time. This may cause image distortion. - Page 17 Connecting to a PC DisplayPort Connection Transmits digital video and audio signals from your PC to the monitor. • This monitor supports the feature. NOTE : A feature that allows you to add a device to your computer without having to reconfigure anything or install any manual drivers.
- Page 18 Connecting AV Devices Connecting Peripherals HDMI Connection USB Device connection HDMI transmits digital video and audio signals from your AV device to the monitor. The USB port on the product functions as a USB hub. CAUTION NOTE • • Using a DVI to HDMI / DP (DisplayPort) to HDMI cable may cause compatibility issues. It is recommended you install all Windows Updates to keep your Windows up-to-date before connecting to the product for use.
- Page 19 Headphones Connection HDMI/DP (DisplayPort) Input Peripheral devices connected to the USB IN port can be controlled from the PC. Connect peripherals to the monitor via the headphones port. NOTE To use USB C-A cable • Peripheral devices are sold separately. To use USB 3.0, connect the USB C-A cable from the monitor to your PC.
-
Page 20: User Settings
USER SETTINGS Main Menu Features NOTE • Your monitor’ s OSD (On Screen Display) may differ slightly from that shown in this manual. Activating the Main Menu Press the joystick button on the bottom of the monitor. Move the joystick up/down and left/right to set the options. Press the joystick button once more to exit the main menu. - Page 21 Menu Settings [Quick Settings] [Settings] > [Quick Settings] To view the OSD menu, press the joystick button at the bottom of the monitor and then enter the [Settings]. • [Brightness]: Adjusts the brightness of the screen. • Move the joystick up/down and left/right to set the options. [Auto Brightness]: Optimizes the brightness automatically for surrounding illuminance.
- Page 22 [Input] • [PBP]: Displays the screens of two input modes on one monitor. - [Input List] [Settings] > [Input] • [Input List]: Selects the input mode. Sub Screen (Right) PBP Connection • [Auto Input Switch]: When [Auto Input Switch] is set to [On], display will automatically switch to new input HDMI 1 HDMI 2 USB-C...
- Page 23 [Picture] NOTE • The [Picture Mode] that can be set depends on the Input signal. [Settings] > [Picture] > [Picture Mode] • If the [Picture Mode] is changed in the DP (DisplayPort) input, the screen may flicker or the resolution of your •...
- Page 24 [Settings] > [Picture] > [Picture Adjust] • [Black Level]: Sets the offset level (for HDMI only). • - Offset: as a reference for a video signal, this is the darkest colour the monitor can display. [Brightness]: Adjusts the brightness of the screen. •...
- Page 25 [Settings] > [Picture] > [Game Adjust] [Settings] > [Picture] > [Color Adjust] • • [Response Time]: Sets a response time for displayed pictures based on the movement of the picture on the [Gamma] screen. For a normal environment, it is recommended that you use [Fast]. When there is a lot of motion, it is - [Mode 1], [Mode 2], [Mode 3]: The higher the gamma value, the darker the image becomes.
- Page 26 [General] • [Input Compatibility Version] : Set Input Compatibility Version to the same version as the connected external device. [Settings] > [General] - In case of DisplayPort and USB-C set to 1.4 or over to use the HDR function. • [Language]: Sets the menu screen to the desired language. - In case of HDMI input, set to 2.0 or over to use the HDR function.
-
Page 27: Troubleshooting
TROUBLESHOOTING NOTE • [SMART ENERGY SAVING] - The value of energy saving data may differ depending on panel and panel suppliers. - If you select the option of [SMART ENERGY SAVING] is [High] or [Low], monitor luminance become higher Nothing is displayed on the screen. or lower depend on source. - Page 28 • Have you installed the display driver? - To extend the lifetime of the monitor, use a screensaver. - Be sure to install the display driver from our web site: https://www.lg.com. • Are there spots on the screen? - Make sure to check if the graphics card supports function.
-
Page 29: Product Specification
PRODUCT SPECIFICATION Dimensions: Monitor Size (Width x Height x Depth) • With Stand (mm): 481.5 x 843.2 x 461.3 • Without Stand (mm): 481.5 x 549.5 x 44.9 Specifications are subject to change without notice. Weight (Without Packaging) The symbol means alternating current, and the symbol means direct current. - Page 30 Support Mode (Preset Mode, DisplayPort / USB-C) Resolution Horizontal Frequency (kHz) Vertical Frequency (Hz) Polarity (H/V) Remarks 640 x 480 31.469 59.94 800 x 600 37.879 60.317 1024 x 768 48.363 1920 x 1080 66.587 59.934 2560 x 1440 88.79 59.95 PBP mode 2560 x 2880...
- Page 31 (Preset Mode, HDMI) Resolution Horizontal Frequency (kHz) Vertical Frequency (Hz) Polarity (H/V) Remarks 640 x 480 31.469 59.94 800 x 600 37.879 60.317 1024 x 768 48.363 1920 x 1080 66.587 59.934 2560 x 1440 88.79 59.95 PBP mode 2560 x 2880 87.59 29.99 2560 x 2880...
- Page 32 HDMI Timing (Video) Resolution Horizontal Frequency (kHz) Vertical Frequency (Hz) 480p 31.5 720p 1080p 67.5 2160p...
- Page 33 The model and serial number of the product are located on the back and on one side of the product. ® This Product qualifies for ENERGY STAR Record them below in case you ever need service. Changing the factory default configuration and settings or enabling certain optional features and functionalities may increase energy consumption beyond the limits required for ENERGY Model ®...
Need help?
Do you have a question about the 28MQ780 and is the answer not in the manual?
Questions and answers