Advertisement
Quick Links
ASSEMBLY & INSTALLATION INSTRUCTIONS • INSTRUCTIONS POUR L'ASSEMBLAGE ET L'INSTALLATION • INSTRUCCIONES PARA LA INSTALACION
BEFORE BEGINNING ASSEMBLY
– READ DIRECTIONS THOROUGHLY
– ASSEMBLE NEAR DESIRED LOCATION
– TWO-PERSON ASSEMBLY IS RECOMMENDED
AVANT DE COMMENCER L'ASSEMBLAGE
– LISEZ COMPLÈTEMENT LES INSTRUCTIONS
– ASSEMBLEZ À PROXIMITÉ DE L'EMPLACEMENT SOUHAITÉ
– IL EST RECOMMANDÉ DE SE METTRE À DEUX PERSONNES
POUR L'ASSEMBLAGE
ANTES DE COMENZAR AL ENSAMBLAJE
– LEE LAS INSTRUCCIONES MINUCIOSAMENTE
– ENSAMBLA CERCA DE LA UBICACIÓN FINAL
– SE RECOMIENDAN DOS PERSONAS PARA ENSAMBLAR
TOOLS NEEDED FOR ASSEMBLY*
OUTILS REQUIS POUR L'ASSEMBLAGE*
HERRAMIENTAS NECESARIAS PARA LA
INSTALACIÓN*
*TOOLS NOT INCLUDED
*OUTILS NON COMPRIS
*HERRAMIENTAS NO INCLUIDAS
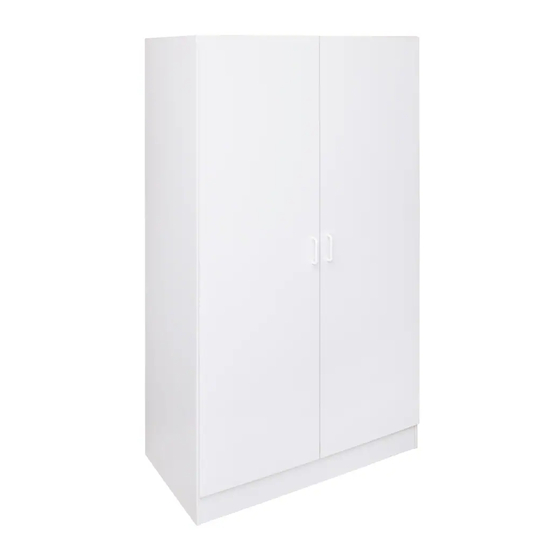
39" MULTI-PURPOSE CABINET
39" ARMOIRE POLYVALENTE
39" GABINETE MULTIUSO
U180422 / 0522
Model Number(s):
N
o
de modèle:
Numero(s) de:
WS39MP
STUD FINDER
DÉTECTEUR DE
MONTANTS
DETECTOR DE VIGAS
Advertisement

Related Manuals for Stor-It-All WS39MP


Summary of Contents for Stor-It-All WS39MP
- Page 1 U180422 / 0522 ASSEMBLY & INSTALLATION INSTRUCTIONS • INSTRUCTIONS POUR L’ASSEMBLAGE ET L’INSTALLATION • INSTRUCCIONES PARA LA INSTALACION Model Number(s): de modèle: Numero(s) de: WS39MP BEFORE BEGINNING ASSEMBLY – READ DIRECTIONS THOROUGHLY – ASSEMBLE NEAR DESIRED LOCATION – TWO-PERSON ASSEMBLY IS RECOMMENDED AVANT DE COMMENCER L’ASSEMBLAGE...
- Page 2 HELPFUL TIPS SUGGESTIONS UTILES SUGERENCIAS ÚTILES TO CALL FROM THE UNITED STATES: PARA LLAMAR DE MEXICO: 888-774-8062 001-714-578-2525 6AM-4PM PST LUNES-VIERNES 6AM-4PM PST MONDAY-FRIDAY DO NOT RETURN PRODUCT TO THE STORE! If you have any problems or missing parts, please contact American Woodmark Corporation Customer Care at the number provided. NE PAS RETOURNER LE PRODUIT AU MAGASIN! En cas de problèma ou de pièces manquantes,veuillez contacter le service clientèle d’American Woodmark Corporation au numéro indiqué.
- Page 3 HARDWARE QUINCAILLERIE HERRAJES CAM LOCK CAM BOLT DOWEL #6 x ½" SCREW (QTY. 16) (QTY. 16) (QTY. 20) (QTY. 18) VERROUILLAGE À CAME BOULON À CAME GOUJON CIERRE DE LEVA PERNO DE LEVA CLAVIJA TORNILLO HINGE PLATE HINGE #6 X 1B\," SCREW #10 x 1"...
- Page 4 EXPLODED VIEW VUE ÉCLATÉE VISTA AMPLIADA Panels are identified on edges. Les panneaux sont identifiés sur les bords. Los paneles están marcados en los bordes.
- Page 5 PANELS PANNEAUX PANELES LEFT SIDE PANEL RIGHT SIDE PANEL (QTY. 1) (QTY. 1) PANNEAU LATÉRAL GAUCHE PANNEAU LATÉRAL DROIT PANEL DEL LADO IZQUIERDO PANEL DEL LADO DERECHO TOP PANEL BOTTOM PANEL / FIXED SHELF (QTY. 1) (QTY. 2) PANNEAU SUPÉRIEUR PANNEAU INFÉRIEUR / ÉTAGÈRE FIXE PANEL SUPERIOR PANEL INFERIOR / ESTANTE FIJO TOP RAIL...
- Page 6 ATTACH HARDWARE TO PANELS A2 & B2 Attacher la quincaillerie aux panneaux A2 et B2 Sujeta los herrajes a los paneles A2 y B2 CAM BOLT #6 x ½" SCREW HINGE PLATE HANG ROD CUP (QTY. 16) (QTY. 2) (QTY. 6) (QTY.
- Page 7 INSTALL CAM LOCKS & DOWELS INTO PANELS C2, D2, F2 & G Installer les verrouillages à came et goujons sur des panneaux C2, D2, F2 et G Como instalar el cierre de leva y las clavijas en los paneles C2, D2, F2 y G CAM LOCK DOWEL (QTY.
- Page 8 INSTALL HARDWARE TO PANEL E2 Attacher la quincaillerie au panneau E2 Sujeta los herrajes al panel E2 DOWEL HANG ROD CUP #6 x ½" SCREW (QTY. 4) (QTY. 2) (QTY. 2) GOUJON COUPELLE DE SUPPORT DE TRINGLE CLAVIJA SOPORTE DE LA BARRA PARA COLGAR TORNILLO Notes/Remarques/Notas: •...
- Page 9 ATTACH PANEL D2 TO PANEL A2 Attacher le panneau D2 au panneau A2 Une el panel D2 al panel A2 LOCKED Holes should be facing the bottom Les trous doivent être orientés vers le bas Los agujeros deben estar mirando hacia abajo Bottom Raw unfinished edges should be facing up.
- Page 10 ATTACH PANEL C2 TO PANEL A2 Attacher le panneau C2 au panneau A2 Une el panel C2 al panel A2 LOCKED Raw unfinished edges should be facing up. Finished edges should be facing down. Les bords bruts non finis doivent regarder vers le haut. Les bords finis doivent regarder vers le bas. Las bordes sin terminar deben mirar hacia arriba.
- Page 11 ATTACH PANEL E2 Attacher le panneau E2 Une el panel E2 Notes/Remarques/Notas: • Raw unfinished edges should be facing up. Finished edges should be facing down. • Les bords bruts non finis doivent regarder vers le haut. Les bords finis doivent regarder vers le bas. •...
- Page 12 ATTACH PANEL D2 Attacher le panneau D2 Une el panel D2 LOCKED Raw unfinished edges should be facing up. Finished edges should be facing down. Les bords bruts non finis doivent regarder vers le haut. Les bords finis doivent regarder vers le bas. Las bordes sin terminar deben mirar hacia arriba.
- Page 13 ATTACH PANEL G Attacher le panneau G Une el panel G LOCKED...
- Page 14 ATTACH PANEL F2 Attacher le panneau F2 Une el panel F2 #6 x 1-5/8" SCREW (QTY. 1) TORNILLO Support panel (F2). Soutenez le panneau (F2). Sostenga el panel (F2).
- Page 15 ATTACH PANEL B2 Attacher le panneau B2 Une el panel B2 LOCKED Raw unfinished edges should be facing up. Finished edges should be facing down. Les bords bruts non finis doivent regarder vers le haut. Les bords finis doivent regarder vers le bas. Las bordes sin terminar deben mirar hacia arriba.
- Page 16 MARK FIXED SHELF AND PARTITION LOCATION Marquez l'emplacement d'étagère fixe sur et emplacement du panneau de séparation Marque la ubicación del estante fijo y localización de la partición Notes/Remarques/Notas: • Mark the location of the fixed shelf on the edge of the side panels. •...
- Page 17 SECURE BACK PANEL H Fixez le panneau arrière H Asegura el panel posterior H NAIL GUIDE NAIL (QTY. 1) (QTY. 2) SERRURE DE CAME CLOU BLOQUEO DE LA LEVA CLAVO Notes/Remarques/Notas: • Ensure cabinet is square and secure top two corners first. Mark the position of the fixed shelf and partition across the back panel.
- Page 18 SECURE BACK PANEL H Fixez le panneau arrière H Asegura el panel posterior H #6 x ½" SCREW “L” BRACKET NAIL GUIDE NAIL (QTY. 2) (QTY. 1) (QTY. 1) (QTY. 38) SUPPORT EN «L» SERRURE DE CAME CLOU TORNILLO SOPORTE EN L BLOQUEO DE LA LEVA CLAVO Notes/Remarques/Notas:...
- Page 19 SECURE CABINET TO THE WALL Fixer l'armoire au mur Asegura el gabinete a la pared WARNING! Failure to properly secure the cabinet to the wall can result in serious injury or death. AVERTISSEMENT! Un manque à fixer correctement l'armoire au mur peut entraîner de graves blessures, voire la mort.
- Page 20 INSTALL HINGES Installer les charnières Como instalar las bisagras HINGE #6 x ½" SCREW (QTY. 6) (QTY. 12) CHARNIÈRE BISAGRA TORNILLO...
-
Page 21: Hinge Adjustment
INSTALL DOORS Installer les portes Como instalar las puertas IMPORTANT! Cabinet MUST be secured to the wall before installing doors. IMPORTANT! L'armoire DOIT être solidement fixée au mur avant l'installation des portes. ¡IMPORTANTE! El gabinete DEBE estar asegurado antes de instalarle las puertas. Slide hinge onto hinge plate and secure all screws. - Page 22 INSTALL HANDLES, SHELVES & HANGRODS Installer les poignées, étagères et tringles Instala los mangos, estantes y barras para colgar (12) SCREWS (#10 x 1") BUMPER HANDLE SHELF CLIP HANG ROD BUTÉE POIGNÉE TAQUET POUR ÉTAGÈRE TRINGLE TORNILLO PROTECTOR GANCHO PARA ESTANTE BARRA PARA COLGAR Bore the handle holes through the...
- Page 23 LOADING LIMITATIONS* Limites de charge* Limitaciones de carga* CAUTION! Do not exceed the maximum weight limitations. Doing so can result in damage, serious 30 lbs (13 kg) injury, or death. ATTENTION! Ne dépassez pas les limitations de poids maximum. Faire ainsi peut avoir comme conséquence les dommages, les dommages sérieux, ou la mort.
- Page 24 AMERICAN WOODMARK CORPORATION LIMITED WARRANTY/GARANTÍA LIMITADA DE AMERICAN WOODMARK CORPORATION What this warranty covers: American Woodmark Corporation (AWC) warrants its parts and products to be free of substantial defects in materials and workmanship from the original date of purchase under normal home use. This warranty is offered only to the original consumer purchaser and may not be transferred. How long the warranty lasts: coverage for finished kitchen cabinets, vanity cabinets, and vanity tops lasts for the life of the product.
Need help?
Do you have a question about the WS39MP and is the answer not in the manual?
Questions and answers