Table of Contents
Advertisement
Quick Links
Advertisement
Table of Contents

Related Manuals for POL-EKO SMART PRO ILP 53


Summary of Contents for POL-EKO SMART PRO ILP 53
- Page 1 Instruction manual SMART PRO Laboratory incubators with a cooling system based on Peltier effect models: ILP 53, ILP 115, ILP 240, ILP 750 Before using the equipment, please read carefully this instruction manual! Version 1.29 Issued 12.05.2022...
- Page 2 Instruction manual ILP SMART PRO Manufacturer's address: POL-EKO-APARATURA sp. j. ul. Kokoszycka 172 C 44-300 Wodzisław Śląski Country of origin: Polska As a manufacturer, we inform you that we took the necessary measures to ensure that this device fully meets your expectations and is reliable for a long period of use.
-
Page 3: Table Of Contents
Instruction manual ILP SMART PRO Contents: INTENDED USE AND IMPORTANT INFORMATION FOR THE USER ............6 PACKAGE CONTENTS ..........................7 BEFORE THE FIRST USE ..........................7 3.1. Installation of shelves ........................... 10 3.2. Condensation in the chamber ....................... 11 3.3. Remarks on the placement of samples .................... - Page 4 Instruction manual ILP SMART PRO 6.8. Starting the program ..........................34 6.8.1. The first way ............................. 34 6.8.2. The second way ..........................36 6.9. Quick Change of parameters ........................ 37 6.9.1. Quick change of set temperature ..................... 37 6.9.2. Quick change of set time ........................38 6.10.
- Page 5 Instruction manual ILP SMART PRO 11.2. Interior cleaning ............................ 71 11.3. Cleaning the touch screen ........................72 11.4. Consumables ............................73 12. ADVICE ON HOW TO SAFELY STORE THE DEVICE ................73 13. TROUBLESHOOTING ..........................73 13.1. Possible defects ............................ 74 14.
-
Page 6: Intended Use And Important Information For The User
Instruction manual ILP SMART PRO 1. INTENDED USE AND IMPORTANT INFORMATION FOR THE USER ILP incubators are laboratory devices designed for incubation and storage of samples at temperature range from 0°C to +70°C (maximum 20°C below ambient temperature). Incubators have both heating and cooling system based on Peltier modules and forced air convection. -
Page 7: Package Contents
Instruction manual ILP SMART PRO 2. PACKAGE CONTENTS Incubators with Peltier modules (ILP) in SMART PRO version are delivered with: Device Capacity Shelves [pcs.] Slides [pcs.] Power cord [pcs.] Rubber cap [pcs.] Key for door lock [pcs.] Wrench (13mm) for wheels adjustment [pcs.] Lab Desk program (in the internal memory of the equipment) LAN cable [pcs.] Quality Control Certificate [pcs.]... - Page 8 Instruction manual ILP SMART PRO • the height of the room must be at least 300mm greater than the height of the unit, • the unit is not designed to be built-in, • the place of installation of the device should be equipped with a socket with parameters suitable for the device.
- Page 9 Instruction manual ILP SMART PRO Leveling wheels are ONLY for positioning the device at its destination. They can not be used to transport the device! If the device is to be placed on a table (option) or base (option) which is equipped with the wheels with a lock, the wheels MUST be locked after placing the table / base in its final destination.
-
Page 10: Installation Of Shelves
Instruction manual ILP SMART PRO 3.1. Installation of shelves In the ILP models To install the shelf or to change its position, follow these steps: Install the shelf slide at the selected height by inserting it into perforations on the wall of the device. Do the same with the slide on the opposite wall. -
Page 11: Condensation In The Chamber
Instruction manual ILP SMART PRO 3.2. Condensation in the chamber If the set temperature is much lower than the ambient temperature, condensation may occur, which will cause accumulation of the water at the bottom of the chamber. The amount of accumulated water depends on the following factors: •... -
Page 12: Description Of The Device
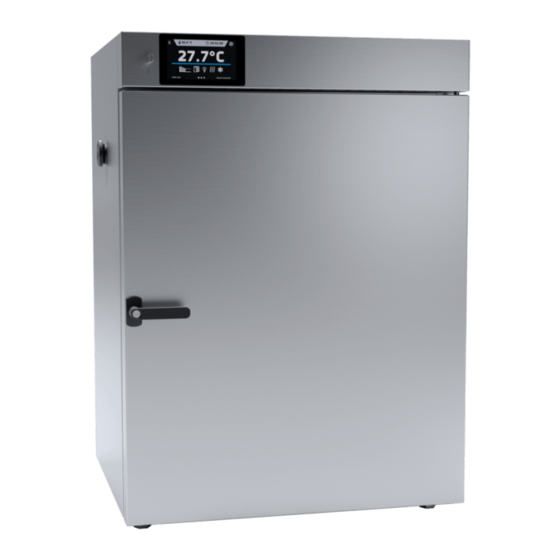
Instruction manual ILP SMART PRO 4. DESCRIPTION OF THE DEVICE SMART PRO models are equipped with a PID microprocessor temperature controller and a 7 inch colour touch screen with a resolution of 800x480. 4.1. Design of ILP devices Below there’s a picture of ILP 53 model (exemplary photo) with a description of the important components of the device. - Page 13 Instruction manual ILP SMART PRO Rear view main switch spacer frame external fans of the Peltier module LAN port fuse main power socket c20...
-
Page 14: Device Equipment (Standard And Optional)
Instruction manual ILP SMART PRO 5. DEVICE EQUIPMENT (STANDARD AND OPTIONAL) 5.1. Internal glass door (standard) Internal glass door is a standard equipment in ILP cooled incubators. To open and close the door use the plastic handle attached to the glass. During operation, when the temperature inside the chamber is high, do not touch the internal components and glass doors, as there is a risk of burns. -
Page 15: Door Lock (Standard)
Instruction manual ILP SMART PRO Always make sure that the safety rules for working with electrical devices are followed! 5.4. Door lock (standard) All devices have a key lock. The key lock is situated in the door handle. Two keys are supplied with the device (hung on the back of the device). -
Page 16: Internal Led Light (Optionally)
Instruction manual ILP SMART PRO 5.7. Internal LED light (optionally) All ILP incubators can be optionally equipped with LED interior lighting integrated with an open door sensor (Philips Corepro LEDspot 3.5-35W GU10 827 36D). When the light switches on, the icon . -
Page 17: Display Battery Backup (Optionally)
Instruction manual ILP SMART PRO 5.9. Display battery backup (optionally) Units in the SMART PRO version can be optionally equipped with a battery backup of the display. The power loss and switching to the battery backup display mode is signaled by a pulsating red frame around the display and a sound signal (if it is turned on). -
Page 18: First Boot
Instruction manual ILP SMART PRO 6.2. First boot During the first boot, the screen Figure ) will display information about saving the "Download" folder (with instruction manual in pdf format) on the USB flash drive. In order to do it, insert the USB flash drive and wait a second to detect the hardware, then press If you press you quit downloading the folder. -
Page 19: User Logging In
Instruction manual ILP SMART PRO 6.4. User logging in Setting device parameters is only possible by the logged in user. To log in, press in the main screen. The login window will appear (Figure login: from 1 to 10 characters password: from 1 to 10 characters Factory default login parameters:... -
Page 20: Information Panel
Instruction manual ILP SMART PRO From this point, any action requires logging in. Figure 7 Main screen – running program in ILP main segment turning off alarm start/stop menu temperature duration time sound program current temperature in the chamber (main sensor) alarm bar side-scrolling information... - Page 21 Instruction manual ILP SMART PRO Figure 9 Icon: Alarms panel alarms panel In the alarms panel there’s a list with active alarms or the alarms that have occurred but have not been confirmed. When the alarm is active, the alarm bar is red and the alarm event is displayed in the list with the status "active". When the alarm event stops, the state changes to "inactive".
-
Page 22: The Meaning Of Icons And Symbols
Instruction manual ILP SMART PRO Figure 2 Status - description program name the name of running program user name of the user to whom the program is assigned priority of time or parameters current segment currently running segment / total number of segments in the program current loop currently performing cycle/ total number of cycles to perform status... - Page 23 Instruction manual ILP SMART PRO Automatic screen lock. Factory setting: disabled. Unmounting the USB flash drive before removing it from the USB socket. Internal light is switched on. It’s automatically turned on when the door is opened and turned off when it is closed. By clicking the icon on the status panel you can manually turn on / off the light (applies to devices with the door with viewing window).
-
Page 24: Upper Expandable And Configurable Menu
Instruction manual ILP SMART PRO Removing selected program from the list. Going to the menu to create, edit, delete and start programs. Canceling adding or editing of the program. Canceling changes. Editing individual program segments (the program can have max. 6 segments). Immediate start of the program selected from the program list. - Page 25 Instruction manual ILP SMART PRO set temperature Figure 4 Upper expandable menu when the program is running Figure 6 Upper expandable menu when the program is stopped Positions available on the upper bar can be personalized. Just drag the selected icon to a new location (Figure 15).
-
Page 26: Quick Note - User's Message
Instruction manual ILP SMART PRO 6.5.4. Quick Note – user’s message During equipment’s operation, the user can save messages in unit’s memory with information about: the date of inserting a new sample, observed changes in the samples, the place of sampling, etc. To enter a message you must in the main screen in upper menu. - Page 27 Instruction manual ILP SMART PRO Figure 8 Quick program In order to go to Quick program, first you have to log in (if none of the users is logged in, the icon of Quick program will be inactive - grayed out). Then click the icon in the main screen.
-
Page 28: Programs
Instruction manual ILP SMART PRO keep pressing STOP button for 5 seconds. After configuriation of the Quick Program, it appears in the programs list (Figure 19). Quick Program is displayed at the top of the list by default. Moreover, it cannot be deleted and cannot be assigned to a user of the User type. Figure 10 Quick program on programs list In Quick Program editing mode, you can change: •... -
Page 29: Creating / Editing A Program
Instruction manual ILP SMART PRO Download program from USB flash drive. Share the selected program with the user type account. Figure 20 List of programs Information on the number of created programs / the maximum number of programs that the user can create is at the top of the screen (programs: 1/10). -
Page 30: Segments Edition
Instruction manual ILP SMART PRO Cancels adding or editing of the program Going to the edition of program segments With more parameters, the window can be scrolled up and down. 6.7.2. Segments edition For each program, you can set maximum 100-segment time-temperature profiles that allow you to gradually increase or decrease the incubation temperature of the samples. - Page 31 Instruction manual ILP SMART PRO The fan efficiency set to 100% is the factory set value and it cannot be changed. Ramp time - setting a short time will not accelerate reaching the ramp, but the ramp will be reached in the shortest possible time depending on the set temperature, ambient conditions and the possibilities of the cooling or heating system in the device.
-
Page 32: Summary Of Segments
Instruction manual ILP SMART PRO Figure 13 6.7.3. Summary of segments In the segments summary (Figure 24) all segments can be seen along with introduced parameters: • number of segments, • temperature, duration time, target time of reaching temperature of a given segment, •... -
Page 33: Protection Class
Instruction manual ILP SMART PRO 6.7.4. Protection class The device is factory-equipped with a protection class 3.3 according to DIN 12880 – over and under temperature protection – combination of classes 3.1 and 3.2. - the user programs the protection temperature (over and under) and once it’s exceeded, the heating or cooling system will be cut off. -
Page 34: Defrosting Program
Instruction manual ILP SMART PRO carried out once (loop: 1) or multiple times (loop: 2 to 255). In order to set the program to be carried out continuously, tick the „∞” option. If the time of the last segment is set to infinity, it will be treated as infinite only in the last cycle. In other cycles it will be treated as 0. - Page 35 Instruction manual ILP SMART PRO Figure 17 Main menu Figure 18 Program management menu If the program is running, the symbol appears next to the program name on the list. The symbol means that the program has been edited, but the changes have not been confirmed (Figure 29).
-
Page 36: The Second Way
Instruction manual ILP SMART PRO Figure 19 List of programs with the selected status Start the program 6.8.2. The second way • In the main screen (Figure ) press the icon in the upper right corner • Select the program you want to start (Figure 20). -
Page 37: Quick Change Of Parameters
Instruction manual ILP SMART PRO Figure 20 Selection from the program list A delayed start of backdated program is possible (up to 7 days back). This is possible for the programs with time priority. Program segments that would last from the back date to the current date will be skipped. If the program is running, the symbol appears next to the program name on the list. -
Page 38: Quick Change Of Set Time
Instruction manual ILP SMART PRO Figure 21 Quick change of set temperature Figure 22 Quick change of set temperature 6.9.2. Quick change of set time In order to quickly change the duration time of a running program, press the icon in the main screen (Figure 34). -
Page 39: Schedules
Instruction manual ILP SMART PRO Figure 23 Quick change of set time Figure 24 Quick change of set time 6.10. Schedules The option allows creating a list of programs to be implemented in a given time. You can create several independent schedules. -
Page 40: Creating / Editing A Schedule
Instruction manual ILP SMART PRO Figure 25 List of schedules Start the schedule Stop the schedule Add the schedule Edit the schedule Delete the schedule 6.10.1. Creating / editing a schedule To create / edit a schedule, press the button . - Page 41 Instruction manual ILP SMART PRO Add a new program to the queue (program must be previously created) Edit and make changes to the selected position Delete the selected position from the list Save the schedule Cancel instroduced changes After pressing (Figure 37) a window appears allowing you to select the program and the date and time of its start and end...
- Page 42 Instruction manual ILP SMART PRO Figure 40 Information about the program Press the 'start date' field and then set the date and time of program start. Press the 'stop date' field and then set the date and time of the program end.
-
Page 43: Starting A Schedule
Instruction manual ILP SMART PRO You can assign up to 10 programs to one schedule. In total you can create ten schedules. When creating a schedule, consider the following restrictions: • the start time of the first program on the list cannot be earlier than the current date and time, •... - Page 44 Instruction manual ILP SMART PRO Figure 30 List of schedules Start the schedule 6.10.2.2. The second way • In the main screen press the icon (Figure 31), then press the SCHEDULE inscription. The schedule se- lection window will be displayed (Figure 44).
- Page 45 Instruction manual ILP SMART PRO Figure 32 Selection of the schedule...
-
Page 46: Statistics
Instruction manual ILP SMART PRO 6.11. Statistics Go to the main menu and press the icon . This panel (Figure 45) displays statistics of the currently running program or program that has ended. Statistics are calculated separately for each segment. Data logging for calculation starts after 30 seconds from reaching the set temperature in the segment. - Page 47 Instruction manual ILP SMART PRO When opening the data record, all data is downloaded. If the data download is interrupted by the user, press to continue downoading of the rest of the data. Figure 34 Data record Press to continue downloading data Recording data onto the USB flash drive.
-
Page 48: Graph
Instruction manual ILP SMART PRO 6.12.1. Graph A graph can be generated from the data stored in the data register (Figure 48). The time during which the graph opens depends on the number of saved samples data. If the unit is equipped with additional sensors, press the selected graph twice. -
Page 49: Data Storage Directly On A Usb Flash Drive
Instruction manual ILP SMART PRO 6.12.2. Data storage directly on a USB flash drive The saved data (temperature and / or humidity, date and time) can be saved directly on a connected USB flash drive. To do this, enable the option of saving data, see point 6.16 Figure 62. - Page 50 Instruction manual ILP SMART PRO Figure 38 Event log (Super Admin view) Recording data onto the USB flash drive. .csv files are available - separated by semicolon when opening e.g. with a spreadsheet, .plkx - opening with the LabDesk application Before removing the USB flash drive from the USB port, it must be unmounted, see Section 5.8.
- Page 51 Instruction manual ILP SMART PRO Information signs in the event log: Information event Message entered by the user Alarm event Error Warning Possible events: Program Start starting the program Program Stop stopping the program Program Edit changing the program parameters Program End program is completed DeviceOn...
-
Page 52: Info
Instruction manual ILP SMART PRO User logout date and time of logout Quick note To view message details, click . In this window (Figure 52) you can see the content of the message, the name of the user who entered it and the name of the program during which the message was written. Figure 39 Details of user’s message 6.14. -
Page 53: Users
Instruction manual ILP SMART PRO to save the “Download” folder (with instruction manual) on the USB flash drive. After inserting the flash Press icon drive into USB port wait few seconds until the information “Flashdrive connected” will appear on the display - for more to write the service data on the USB flash drive –... -
Page 54: Creating / Editing A User
Instruction manual ILP SMART PRO Figure 42 Users list Adding a new user Editing selected user Deleting selected user - his programs and data register will be deleted with the user. At the top of the screen (Figure 55) you can see information about: •... -
Page 55: Account Types And Their Limits
Instruction manual ILP SMART PRO Figure 43 Editing a user Confirms and saves the user Cancels introduced changes and returns to the users list The device can have maximum 5 users. There are 40 programs available which can be freely distributed among users. - Page 56 Instruction manual ILP SMART PRO ✘ ✘ Enabling / disabling the sound ✔ Saving a Quick Note ✔ ✔ ✔ Creating users accounts ✔ ✘ ✘ Changing user's settings ✔ ✘ ✘ Changing equipment's name ✔ ✘ ✘ Setting a time zone ✔...
- Page 57 Instruction manual ILP SMART PRO Admin account Has access to programs menu and has rights and limitations in accordance with Table Figure 45 Menu available for Admin User account: • has access to programs menu , where User can start programs previously assigned to him, check their statistics (statistics, data register), check events history of the equipment (event log) and the information about the system (info), •...
-
Page 58: User Settings Panel
Instruction manual ILP SMART PRO 6.16. User settings panel Go to the main menu and press the icon . In this panel (Figure ) you can: Change the name of the equipment – by default, the device serial number is entered. Change the language in the equipment´s menu. -
Page 59: Unlocking The Touch Screen
Instruction manual ILP SMART PRO 6.16.1. Unlocking the touch screen When the automatic touch screen lock is enabled (Section 6.16), slide the blue circle into the white circle to unlock the screen. Figure 47 Unlocking the touch screen 6.17. Time Go to the main menu and press the icon . - Page 60 Instruction manual ILP SMART PRO If the unit is permanently connected to the internet, the time will be synchronized with the time server. Time synchronization is performed: • manually using the button • while enabling the automatic synchronization option and then every 12 hours ( •...
-
Page 61: Alarms
Instruction manual ILP SMART PRO 6.18. Alarms Go to the main menu and press the icon . You can set parameters related to alarms. • lower alarm – an alarm will be activated if the temperature drops below the value given in this field, •... - Page 62 Instruction manual ILP SMART PRO Figure 65 Option enabled, the program is stopped The function status is signaled with the following colors: • no STM on the display - option disabled, • white color - option enabled, the program is stopped, •...
-
Page 63: Mute Option
Instruction manual ILP SMART PRO Figure 67 Option enabled, warning about problems with reaching / maintaining the temperature Possible causes: damaged heater, the sample inserted into the chamber absorbs / dissipates too much energy. If the color was red before opening the door, the color changes to blue after opening the door. In case of activation of the function (detection of problems with reaching / maintaining the temperature): •... -
Page 64: Network
Instruction manual ILP SMART PRO 6.19. Network Go to the main menu and press the icon . In this panel you can change the settings for LAN or WiFi. Switch between LAN / WiFi network by pressing LAN settings: • IP –... -
Page 65: E-Mail Reports
Instruction manual ILP SMART PRO • MAC – physical address of the network card, read-only. Figure 70 WiFi settings Confirms changes Cancels the entered changes 6.20. E-mail reports Go to the main menu and press the icon . In this window you can set the parameters needed to activate e- mail notifications. - Page 66 Instruction manual ILP SMART PRO Figure 71 E-mail: events Confirms changes Cancels the entered changes If the "activate" option at the top of the panel is not enabled, emails will not be sent! Sender and recipients (Figure ) • Sender – sender’s e-mail address •...
-
Page 67: Temperature - Additional Temperature Sensor Pt 100 (Option)
Instruction manual ILP SMART PRO Configuration of the sender's e-mail account (Figure ) In this window, enter your e-mail account details: • SMTP server user ID • SMTP server password • SMTP server host • SMTP server port You can also choose the TLS or SSL encryption method (get more information from your email account provider). Figure 73 E-mail: email account configuration Connection test Confirms changes... -
Page 68: Corrections
Instruction manual ILP SMART PRO • rate [C°/min] – determines how fast the equipment is to respond to differences in temperature indications between the additional temperature sensor and the main sensor (higher value = faster response of the equipment, can affect the stability of temperature maintenance), •... -
Page 69: Interface
Instruction manual ILP SMART PRO Figure 54 User’s correction Confirms changes Cancels the entered changes 7. INTERFACE 7.1. MODBUS TCP The device allows status monitoring using the MODBUS TCP communication interface. Connection parameters: • IP address: same as device’s (set in the panel Section 6.19.) •... -
Page 70: Temperature Protection
Instruction manual ILP SMART PRO 8. TEMPERATURE PROTECTION The device is factory fitted with sample protection - temperature protection. If any of the elements responsible for maintaining the set temperature is damaged or the user sets the temperature unconsciously, the set protection will work. -
Page 71: Cleaning And Maintenance Of The Device
Instruction manual ILP SMART PRO 11. CLEANING AND MAINTENANCE OF THE DEVICE Disconnect the device from the power supply before carrying out any activities related to the cleaning! In the case of the battery back-up of the controller, also turn it off. On the internal walls of the device (in particular the new one) made of stainless steel, discoloration (spots) may appear - which are not caused by factory defects, but only by the steel production process. -
Page 72: Cleaning The Touch Screen
Instruction manual ILP SMART PRO At least one a month clean the radiator and external fans with a vacuum cleaner. The radiator and external fans are located at the back of ILP incubator. 11.3. Cleaning the touch screen The touch screen is exposed to dirt, so it must be cleaned regularly. To clean the touch screen, use a clean and dry microfiber cloth. -
Page 73: Consumables
Service Visit the POL-EKO-APARATURA website at: www.pol-eko.com.pl in order to: • get full contact details of technical service • access to POL-EKO-APARATURA online catalogue, and information about accessories and related products • receive additional product information and special offers... -
Page 74: Possible Defects
Instruction manual ILP SMART PRO To receive information or technical assistance, contact the Service Department or visit the website: www.pol- eko.com.pl 13.1. Possible defects Malfunction What to check? What to do? The unit is not working Check if the unit is plugged in correctly Plug in the unit correctly Check if the circuit-breaker has tripped Press the circuit breaker on the... -
Page 75: Warranty Conditions
POL-EKO-APARATURA warrants that this product will be free from defects in material and workmanship for a period of two (2) years from date of the invoice. If a defect is present, POL-EKO-APARATURA will, at its option and cost, repair, replace, or refund the purchase price of this product to the customer, provided it is returned during the warranty period. -
Page 76: Rating Plate
Instruction manual ILP SMART PRO 15. RATING PLATE The rating plate is located on the left side wall in the upper left corner. Below there is an example of a rating plate: Manufacturer’s data Type of device Serial number (the two marked digits indicate the year of manufacture of the device) Temperature protection class according to DIN 12880 Degree of protection against electric shock (class I: protection against indirect contact) and IP enclosure protection rating... -
Page 77: Technical Data
Instruction manual ILP SMART PRO 16. TECHNICAL DATA Technical data are given with a tolerance of ± 5%, the working capacity of the chamber is always smaller. All the below technical data refers to standard units (without optional accessories). Parameter ILP 53 ILP 115 ILP 240... -
Page 78: Declaration Of Conformity
Instruction manual ILP SMART PRO 17. DECLARATION OF CONFORMITY... - Page 79 ❑ warranty and post-warranty service ❑ consultancy in the selection, maintenance and operation of laboratory equipment POL-EKO LAB is Accredited by the Polish Centre for Accreditation (a member of ILAC) and provides accredited calibration of: ❑ thermostatic and climatic chambers (incubators, drying ovens, thermostatic cabinets, climatic chambers, freezers) ❑...
- Page 80 Instruction manual ILP SMART PRO...
Need help?
Do you have a question about the SMART PRO ILP 53 and is the answer not in the manual?
Questions and answers