
Subscribe to Our Youtube Channel
Related Manuals for JUMO TDA-300


Summary of Contents for JUMO TDA-300
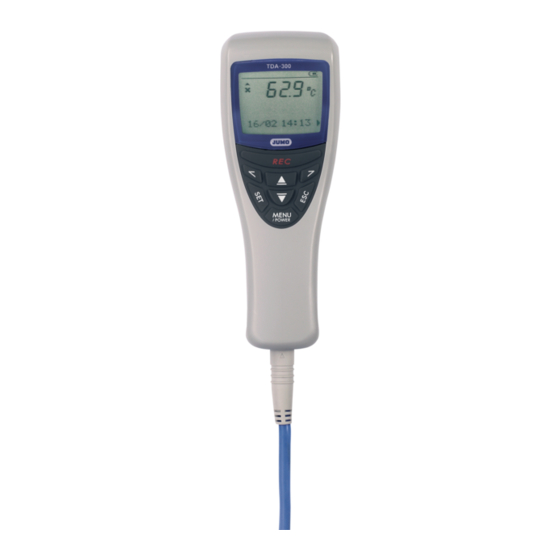
- Page 1 All manuals and user guides at all-guides.com JUMO TDA-300(0) Handheld Thermometer with data logger B 702540.0 Operating Manual 2013-12-03/00448127...
- Page 2 All manuals and user guides at all-guides.com...
-
Page 3: Table Of Contents
All manuals and user guides at all-guides.com Contents Introduction Preface ......................7 Typographical conventions ................. 8 Instrument features ..................9 Checking the delivery ................10 Instrument description ................10 1.5.1 LCD display ....................11 1.5.2 Operating keys ..................... 12 Function menu .................... 14 Preparation Inserting the battery ................... - Page 4 All manuals and user guides at all-guides.com Contents Automatic logging ..................33 5.2.1 Activating the interval ................... 33 5.2.2 Starting data logging ..................34 5.2.3 Canceling data logging ................34 5.2.4 Checking data ....................35 Searching recorded data ................35 5.3.1 Searching data with a specific TAG name (TAG filter) ........
- Page 5 All manuals and user guides at all-guides.com Contents Disconnecting ..................... 58 Opening CSV data on the PC ..............59 Appendix 10.1 Replacing the battery ................. 61 10.2 Cleaning ...................... 63 10.3 Fault finding ....................64 10.3.1Error messages .................... 64 10.3.2Problems and solutions ................66 10.4 Technical data .....................
- Page 6 All manuals and user guides at all-guides.com Contents...
-
Page 7: Introduction
All manuals and user guides at all-guides.com 1 Introduction 1.1 Preface Please read this Operating Manual before commissioning the instrument. Keep the manual in a place that is accessible to all users at all times. Please assist us to improve this operating manual, where necessary. Your comments will be appreciated. -
Page 8: Typographical Conventions
All manuals and user guides at all-guides.com 1 Introduction 1.2 Typographical conventions Warning signs Caution This symbol is used when there may be damage to equipment or data if the instructions are ignored or not followed accurately! Note signs Note This symbol is used when your special attention is drawn to a remark. -
Page 9: Instrument Features
With the TDA-3000, you can enter 99 user names with up to 11 characters. The instrument itself will automatically assign a sequential number to each name. The TDA-300 does not have a user management – there is only one user. Limit function With this function, you can immediately detect whether the measured temperature is above, below, or within the limits (the upper and lower limits must be set up). -
Page 10: Checking The Delivery
- Check that the housing is undamaged - Check that all the accessories are present (see Accessories) Order details Order details Instrument description 702540/... TDA-300 no USB interface, 99 data sets 702541/... TDA-3000 incl. USB interface, 9999 data sets Accessories... -
Page 11: Lcd Display
All manuals and user guides at all-guides.com 1 Introduction 1.5.1 LCD display The following details are shown in the LCD display. While data is being recorded, or during standby for data recording, the number Number of the measurement point or the user is shown here. If stored data are displayed, the memory number for the measurement being displayed appears in front of the “/”... -
Page 12: Operating Keys
All manuals and user guides at all-guides.com 1 Introduction Indicates whether the measured temperature is within the selected range Limit value limits. Caution: The limit values (upper and lower limits) must be set up. Temperature above the limit temperature. Temperature within the limits. Temperature below the limit temperature. - Page 13 All manuals and user guides at all-guides.com 1 Introduction LEFT and You can use the keys to select details on the screen when it is in the ( , ) RIGHT keys normal display mode. You can move to the next or previous function, while a function menu (Fn0 to Fn9) is displayed.
-
Page 14: Function Menu
All manuals and user guides at all-guides.com 1 Introduction 1.6 Function menu The TDA-300(0) has a function menu for running the functions that are required for temperature measurement and recording (data logger). First select the required function. Additional details about the individual menus can be found on later pages in the operating instructions. - Page 15 All manuals and user guides at all-guides.com 1 Introduction Memory v See Chapter 5 “Data logger” TAG Setup v See Chapter 4 “Temperature measurement” Fn 3 Logging v See Chapter 5 “Data logger” Peak/Bottom v See Chapter 6 “Peak/Bottom value storage” User Name v See Chapter 7 “User names”...
- Page 16 All manuals and user guides at all-guides.com 1 Introduction...
-
Page 17: Preparation
All manuals and user guides at all-guides.com 2 Preparation This section describes the preparation that is required for operation of the instrument. 2.1 Inserting the battery h Undo the screw for the battery cover h Turn the screw with a suitable screwdriver or coin. Unscrew, e.g. -
Page 18: Setting The Date And Time
All manuals and user guides at all-guides.com 2 Preparation 2.2 Setting the date and time Year setup h Press the LEFT or RIGHT key to move the position where the digit is blinking. h Press the UP or DOWN key to set the “Year”. h Press the SET key to save the new value. -
Page 19: Connecting The Temperature Sensor
All manuals and user guides at all-guides.com 2 Preparation 2.3 Connecting the temperature sensor h Attach the temperature sensor to the instrument. v An overview of the available temperature sensors can be found in the Data Sheet 702540. - Page 20 All manuals and user guides at all-guides.com 2 Preparation...
-
Page 21: Operation & Normal Display
All manuals and user guides at all-guides.com 3 Operation & normal display 3.1 Switching on the instrument h To switch on the instrument, press the MENU/POWER key. If user management is active (a user name has been entered), then the next step must be to select a user. - Page 22 All manuals and user guides at all-guides.com 3 Operation & normal display...
-
Page 23: Temperature Measurement
All manuals and user guides at all-guides.com 4 Temperature measurement This chapter describes the entering of TAG names (measurement point designations), setting up the limits and the evaluation of the measured temperature. The entering of the TAG names and the limits is a precondition for “Evaluation of the measured temperatures”. -
Page 24: Registering Tag Names
All manuals and user guides at all-guides.com 4 Temperature measurement 4.1 Registering TAG names Each of the 5 to 99 TAG names can be used as a measurement point designation, and be up to 11 characters long. The TAG name is shown in the LCD display. -
Page 25: Character Entry With Selection List
All manuals and user guides at all-guides.com 4 Temperature measurement 4.1.2 Character entry with selection list Example Alter TAG name for No. 2 from “TAG02” to “PAN02”. h Press the SET key in the menu “TAG Setup (Fn2)” to show the TAG name on the screen. h Press the UP key ( ). - Page 26 All manuals and user guides at all-guides.com 4 Temperature measurement h Press the SET key to save the new character. The screen returns to the TAG name screen for TAG No. 2, the cursor moves to “A”. h Press the RIGHT key ( ) to move the cursor to “G”.
-
Page 27: Character Entry Without Selection List
All manuals and user guides at all-guides.com 4 Temperature measurement To return to normal display, press the ESC key 3 times. 4.1.3 Character entry without selection list You can also alter the TAG name without the selection list. Altering h Use the LEFT or RIGHT key ( to move the cursor to the position of the characters character you want to alter. - Page 28 All manuals and user guides at all-guides.com 4 Temperature measurement h Press the UP key to set h Press the SET key to save the new value. The display moves to the next screen (lower limit). h Press the LEFT key ( ) twice to alter the tens digit.
-
Page 29: Evaluating Measured Temperatures
All manuals and user guides at all-guides.com 4 Temperature measurement 4.3 Evaluating measured temperatures The following example shows how measured temperatures can be evaluated. Example Measured medium: hot water TAG number: 2 (TAG name: PAN02) Upper limit: 90.0°C Lower limit: 50.0°C Sequence h Switch the instrument on and select a user name, if required (... - Page 30 All manuals and user guides at all-guides.com 4 Temperature measurement Measurement The water temperature is measured. - The measured temperature rises above the upper limit (90.0 °C). high limit measured temp. (95.0 °C) evaluated range symbol displayed low limit TAG name screen - The measured temperature drops below the lower limit (50.0 °C).
-
Page 31: Data Logger
Max. number of stored data: TDA-300: 99 measurements TDA-3000: 9999 measurements Data security: In a TDA-300 the data will be lost if the battery is empty. If SET is pressed while YES is being displayed, After defragmentation, then the entire memory will be cleared and the the latest memory contents normal display will appear. -
Page 32: Manual Logging
All manuals and user guides at all-guides.com 5 Data logger 5.1 Manual logging With manual logging (interval = off), you can record the measurement in the memory by using the REC key. REC will appear in the LCD display only when the REC key is pressed. -
Page 33: Automatic Logging
All manuals and user guides at all-guides.com 5 Data logger 5.2 Automatic logging The measured data are recorded in the memory at the preset interval. For automatic data logging, you must first set the interval. The following can be logged: - the measured temperature, - the date (without “year”), - the TAG name and... -
Page 34: Starting Data Logging
All manuals and user guides at all-guides.com 5 Data logger How can I cancel the interval setting? Press the ESC key during setting, not the SET key. The display returns to the data logging screen (Fn3). 5.2.2 Starting data logging h Press the REC key. -
Page 35: Checking Data
All manuals and user guides at all-guides.com 5 Data logger 5.2.4 Checking data v See “Checking the logged data” on Page 32. It is possible to check the measured data on the memory screen (Fn1) during automatic data logging. The total number increases with each new measurement. - Page 36 All manuals and user guides at all-guides.com 5 Data logger h Press the MENU/POWER key to display the TAG filter screen. h Press the UP key to change the setting to “ON”. h Press the SET key to activate the TAG filter. The TAG name is again displayed on the screen.
-
Page 37: Searching Data With A Specific Log No. (Log Jump)
All manuals and user guides at all-guides.com 5 Data logger 5.3.2 Searching data with a specific LOG No. (LOG jump) The more data you have, the more difficulties you will have in finding the required data. Using the LOG jump function you can search the required data number and display it readily on the screen. -
Page 38: Deleting Recorded Data
All manuals and user guides at all-guides.com 5 Data logger 5.4 Deleting recorded data There are two ways of deleting the measured data in the memory. Delete? “Delete” means that only individual data will be deleted from the memory. v Chapter 5.4.1 “Deleting individual data only (delete?)” Clear all? “Clear all”... -
Page 39: Deleting All Data (Clear All?)
All manuals and user guides at all-guides.com 5 Data logger h Press the SET key to delete the measurement. The total number is decreased by 1. How can I cancel the “Delete” function? Press ESC when you are asked “Delete?”. The memory screen (Fn1) is displayed again. -
Page 40: Optimizing Recorded Data (Defragmenting)
All manuals and user guides at all-guides.com 5 Data logger During deletion of the memory, a progress indication appears. If automatic data logging was active when the “Delete” function was started, it is ended. The instrument is “ready to measure” (REC blinks in the display). - Page 41 All manuals and user guides at all-guides.com 5 Data logger h Press the SET key and the memory is automatically optimized. If you press the MENU/POWER key, the function is not executed. While defragmenting is in progress, it cannot be canceled.
- Page 42 All manuals and user guides at all-guides.com 5 Data logger...
-
Page 43: Peak/Bottom Value Storage
6 Peak/Bottom value storage The minimum temperature (Bottom) and maximum temperature (Peak) can be stored by the TDA-300(0). Each of these two values is updated when the measured temperature is higher or lower than the stored value. Performing any of these functions will re-initialize peak/bottom storage and set the current temperature as the peak/bottom value: - when the battery has been replaced;... -
Page 44: Resetting The Peak Value
All manuals and user guides at all-guides.com 6 Peak/Bottom value storage 6.2 Resetting the peak value h Press the MENU/POWER key in the peak value display; The “Peak reset?” message is shown on the screen. h If you press the SET key, the peak value is reset. h If you press the ESC key, the current peak value is retained. -
Page 45: User Names
All manuals and user guides at all-guides.com 7 User names This chapter describes how to handle user names. Different user names can only be implemented with the handheld TDA-3000. This enables different users (persons) to acquire data at the same or at different measurement points using the same instrument. - Page 46 All manuals and user guides at all-guides.com 7 User names A list of characters is shown, including the one selected at the moment. The cursor (blinking) indicates the present position. Use the UP/DOWN keys to select a list. Use the LEFT/RIGHT keys to select a character.
-
Page 47: Configuration
All manuals and user guides at all-guides.com 8 Configuration This chapter deals with the possibilities provided by the configuration menu “Setup (Fn9)”. From normal display, start the configuration menu as follows: h Press the MENU/POWER key until “Fn9” and “Setup” are displayed and then press the SET key. -
Page 48: Sensor Type
All manuals and user guides at all-guides.com 8 Configuration 8.3 Sensor type Type Select the sensor type connected. Select between: Pt100 (RTD), TC-K (thermocouple K), TC-J (thermocouple J) and TC-T (thermocouple T) factory-set: Pt100 h Press the UP ( ) or DOWN ( ) key to change between the individual sensor types. -
Page 49: Decimal Point (Decimal Place)
All manuals and user guides at all-guides.com 8 Configuration 8.5 Decimal point (decimal place) Select the position of the decimal point. Select between: 0.1 = one decimal place and 1 = no decimal place factory-set: h Press the UP ( ) or DOWN ( ) key to change between the formats. h Press the SET key to activate the selected format. -
Page 50: Digital Filter
All manuals and user guides at all-guides.com 8 Configuration 8.7 Digital filter D filter The TDA-300(0) has an integrated first-order digital filter. This filter is used to eliminate display flickering. You can set the filter time constant through this parameter. Select between:... -
Page 51: Locking
All manuals and user guides at all-guides.com 8 Configuration If switch-off is not active (OFF), then press the UP key once to activate it. Afterwards, you can alter the time as described. 8.9 Locking Lock Different menus and individual parameters can be protected against accidental alteration through this parameter;... - Page 52 All manuals and user guides at all-guides.com 8 Configuration...
-
Page 53: Evaluating Data With A Pc
All manuals and user guides at all-guides.com 9 Evaluating data with a PC With the handheld TDA-3000, it is possible to evaluate the measured data using a personal computer (PC). The data are transferred via the USB interface. ® System PC compatible computer with operating system Windows 2000, XP, Vista or requirements... -
Page 54: Stored Data
All manuals and user guides at all-guides.com 9 Evaluating data with a PC 9.2 Stored data Three files are created in the TDA and are ready for readout. - LOG_M0507066.CSV: recorded temperature data - TAG_M0507066.CSV: TAG names and limits - SETUP_M0507066.CSV: user name and configuration data The files - in CSV format (Comma Separated Values) - are only created when the TDA is connected to a PC. - Page 55 All manuals and user guides at all-guides.com 9 Evaluating data with a PC TAG_*.CSV The file contains the TAG names and the limits. As standard, it is available in the write/read mode and can be edited directly on the TDA. Writing directly to the file on the TDA can be prevented through the parameter (3) “Lock menu Fn2”.
- Page 56 All manuals and user guides at all-guides.com 9 Evaluating data with a PC SETUP_*.CSV The file contains the user names and configuration data. As standard, it is available in the write/read mode and can be edited directly on the TDA. Writing directly to the file on the TDA can be prevented through the parameter (2) “Lock menu Fn3, Fn8 and Fn9”.
- Page 57 All manuals and user guides at all-guides.com 9 Evaluating data with a PC...
-
Page 58: Disconnecting
All manuals and user guides at all-guides.com 9 Evaluating data with a PC 9.3 Disconnecting Disconnect the TDA from the PC after the PC has been shut down and switched off or observe the following instructions: - Do not disconnect when the files are open or being stored at the moment. This may result in a malfunction. -
Page 59: Opening Csv Data On The Pc
All manuals and user guides at all-guides.com 9 Evaluating data with a PC 9.4 Opening CSV data on the PC Processing in h Start EXCEL (e.g. EXCEL 97). EXCEL h From the File menu, select the function Open. h Switch the file type over to Text files. h Open the corresponding CSV file. - Page 60 All manuals and user guides at all-guides.com 9 Evaluating data with a PC...
-
Page 61: Appendix
Battery life With a battery, the TDA-300(0) can measure temperatures continuously for about 400 hours (ambient temperature 23 °C). The effective battery life depends on the operating and ambient conditions. When the battery is replaced, the instrument is started in the RESET condition. - Page 62 Replacing the h Press the MENU/POWER key for more than two seconds to switch the battery TDA-300(0) off. h Undo the screw for the battery cover. h Turn the screw with a suitable screwdriver or coin. Unscrew, e.g. with a coin.
-
Page 63: Cleaning
Do not use a volatile solvent, such as a paint thinner, for cleaning. Deformation or discoloration could occur. The TDA-300 can be washed in running water, since it is protected to IP67 against water and dust. The TDA-3000 must not be washed in running water, since it is protected to... -
Page 64: Fault Finding
All manuals and user guides at all-guides.com 10 Appendix 10.3 Fault finding Always switch the instrument off when replacing the sensor. 10.3.1 Error messages Display Description Solution Battery is Fit a new battery. nearly discharged. v Chapter 10.1 Battery is discharged. Fit a new battery at once. - Page 65 All manuals and user guides at all-guides.com 10 Appendix Display Description Solution Internal error Remove the battery, wait a few seconds, then re-insert If the fault does not disappear, contact the supplier. EEPROM error - Response signal from EEPROM is faulty.
-
Page 66: 2Problems And Solutions
All manuals and user guides at all-guides.com 10 Appendix 10.3.2 Problems and solutions Problem Possible cause Solution Instrument cannot be No battery fitted or v Chapter 2.1 “Inserting switched on (no battery is discharged or the battery” display) voltage too low. v Chapter 10.1 “Replacing the battery”... - Page 67 All manuals and user guides at all-guides.com...
- Page 68 All manuals and user guides at all-guides.com JUMO GmbH & Co. KG JUMO Instrument Co. Ltd. JUMO Process Control, Inc. Street address: JUMO House 6733 Myers Road Moritz-Juchheim-Straße 1 Temple Bank, Riverway East Syracuse, NY 13057, USA 36039 Fulda, Germany...
Need help?
Do you have a question about the TDA-300 and is the answer not in the manual?
Questions and answers