Table of Contents
Advertisement
Advertisement
Table of Contents

Related Manuals for SharkRF openSPOT


Summary of Contents for SharkRF openSPOT
-
Page 2: Table Of Contents
Button usage Power button 1.5.1 Wi-Fi button 1.5.2 Web interface Opening the web interface About the web interface Status page Connectors page Modem page Settings page Configuration profile 2.6.1 Firmware upgrade 2.6.2 SharkRF Network 2.6.3 Voice announcements 2.6.4 Location settings 2.6.5... - Page 3 DMR transceiver DMR settings 2.6.6 D-STAR® settings 2.6.7 C4FM/Fusion® settings 2.6.8 NXDN® settings 2.6.9 P25 settings 2.6.10 POCSAG settings 2.6.11 Transcode gain settings 2.6.12 Lock settings 2.6.13 Call mute settings 2.6.14 Beeper settings 2.6.15 RTC settings 2.6.16 Call audio settings 2.6.17 Miscellaneous settings 2.6.18...
- Page 4 DMR transceiver NXDNReflector P25Reflector DAPNET 3.10 APRS® 3.11 SharkRF IP Connector Client 3.12 SharkRF IP Connector Server 3.13 AutoCal 3.14 Advanced usage Control calls Local echo service 4.1.1 Configuration profile query 4.1.2 Change configuration profile 4.1.3 Connector status query 4.1.4 Active IP address query 4.1.5...
- Page 5 DMR transceiver openSPOT4 and openSPOT4 Pro user manual This user manual is for the stable firmware version v5. It's updated with new information when a new stable firmware is released. The PDF version is available here, however we recommend using the online manual, as it gets updated when a new stable firmware is released.
- Page 6 DMR transceiver Package contents The openSPOT4 package contains a USB cable for charging its battery. You will need a web browser on a computer, tablet or mobile phone for setting up the openSPOT4 through its web interface, but after that, the device can work standalone.
-
Page 7: First Steps
DMR transceiver First steps Charging the battery Connect the openSPOT4 to a USB power supply to start charging the battery. The openSPOT4 is fully functional while it is charging. Powering up Power up the openSPOT4 by pressing the power button for at least 1 second. If the device is running with the factory default configuration, then there's an initialization running for about 5 seconds and the status LED is flashing white:... - Page 8 DMR transceiver After this, the LED will be slowly flashing white indicating that the device has entered access point (AP) mode and it's broadcasting its own Wi-Fi network called openSPOT4 AP: The AP mode is the openSPOT4's default mode of operation if no Wi-Fi networks are configured.
- Page 9 DMR transceiver Select which Wi-Fi network the openSPOT4 will use (usually your own Wi- Fi network) by clicking on the Connect button in the row of the desired Wi- Fi network. Enter the Wi-Fi network password in the Network key dialog (make sure you enter the password case sensitive), then click on the dialog's Connect button: The openSPOT4 starts connecting to the selected Wi-Fi network:...
- Page 10 If the openSPOT4 is connected to the Wi-Fi network (indicated by green or green/orange) flashing LED, then open SharkRF Link in your web browser. Enter the openSPOT4's device UID (you can find this ID on the sticker at the bottom of the openSPOT4), then click on the Connect button.
-
Page 11: Quick Setup
DMR transceiver Quick Setup The Quick Setup helps you to configure the openSPOT4 with your transceiver and connect to the preferred network. Select the type of your transceiver Set some basic settings like the frequency, and select the network you want to connect (this will set which connector will be used) Select the server to connect, set the needed network parameters (like your callsign, IDs, etc.), and click on the Connect button... -
Page 12: Setting Up Your Transceiver
DMR transceiver Setting up your transceiver Here are some tips on setting up different types of transceivers. DMR radio setup Set up a simplex channel (with the same RX and TX frequencies). You can set the timeslot to any value, as it is not used in simplex mode. Set the channel's color code to the openSPOT4's color code (by default it's 1, it can be changed on the Settings page, DMR settings... -
Page 13: C4Fm/Fusion® Radio Setup
DMR transceiver C4FM/Fusion® radio setup Set the radio to single frequency mode. Use digital narrow (DN) mode. Voice wide (VW) mode does not support late entry. If your radio has half deviation mode turned on, make sure you use the C4FM Half Deviation modem mode on the openSPOT4. - Page 14 DMR transceiver normal. The openSPOT4's POCSAG frequency and other settings can be changed on the Settings page, POCSAG settings section. Make sure you set the RIC(s) in your pager's configuration to the address(es) you want to receive messages on. See the DAPNET Wiki for more information about POCSAG and DAPNET.
- Page 15 DMR transceiver Example DMR radio channel configurations Hytera Motorola...
- Page 16 DMR transceiver...
- Page 17 DMR transceiver...
- Page 18 DMR transceiver DMR usage notes There are two basic types of DMR calls your transceiver can transmit or receive: private and group. The openSPOT4 forwards what it receives from your radio to the network, or from the network to your radio. The network may forward your calls to its other connected stations (hotspots/repeaters/gateways) or calls from other connected stations to you based on linked talkgroups and reflectors.
- Page 19 DMR transceiver Static talkgroups on DMRplus/IPSC/other networks You can define what TGs to link statically at the DMRplus options section at the bottom of the Homebrew/MMDVM® connector settings page.
- Page 20 DMR transceiver Reflectors Reflector IDs are between DMR ID 4000 and 5000. To link a reflector, start a short private call to the reflector ID. To unlink the reflector, start a short private call to DMR ID 4000. Only 1 reflector can be linked at a time. To talk on the linked reflector, send your calls to DMR ID 9 with a group call (TG9).
- Page 21 DMR transceiver To unlink the currently linked module, call DMR ID 4000. To connect to module A, call DMR ID 4001, for module B call DMR ID 4002 and so on. Example If you have TG969 linked either dynamically or statically, then the server will forward group calls (coming from other stations (repeaters, hotspots, gateways)) going to DMR ID 969 to your openSPOT4.
- Page 22 DMR transceiver D-STAR® APRS® You can set up the openSPOT4 to forward your D-STAR® transceiver's location information to the APRS® network, so it will be visible on APRS® maps like aprs.fi Setting up the APRS® connection First you have to set up the APRS® special connector using the openSPOT4's Quick Setup.
- Page 23 DMR transceiver The following setup is described using the Icom ID51's menu structure. The menu structure of your transceiver may be different, but the names of the settings should be the same or similar. Enabling the GPS receiver Go to Menu > GPS > GPS Set > GPS Select and select Internal GPS. Selecting the position data format Go to Menu >...
-
Page 24: Using The Wires-X® Button
Note that the transceiver on the animations shown on this user manual page display the device as "openSPOT 2". Everything described here apply both to the openSPOT2 and openSPOT4. The openSPOT4 displays the currently active configuration profile number at the bottom right corner of the FT2D's display. - Page 25 DMR transceiver The first 5 entries will be your openSPOT4's configuration profiles. The list will contain the servers of the currently active connector. In case the currently active connector does not have a server list (ex. the Null connector), YSFReflector servers will be listed.
- Page 26 DMR transceiver You can enter a part of the server name. All matching servers will be listed. To switch to a server, select it using the dial and press PTT for a short time (or just tap on it in case you have a touch display). Direct ID entry You can connect to YSFReflector servers directly if you know the desired server's ID.
- Page 27 DMR transceiver Categories You can save your favorite servers by adding them to categories. The openSPOT4 will automatically switch to the saved server's connector in case it's needed. Adding a server Select the server name on the main Wires-X screen (the option at the bottom). This will load the station information screen.
- Page 28 DMR transceiver Recalling a server Select the Search & Direct option, then select a category to list its saved servers. To switch to a server, select it using the dial and press PTT for a short time (or just tap on it in case you have a touch display). Deleting/renaming You can delete a server from a category in your radio's main settings menu.
- Page 29 DMR transceiver You can rename a category also in this Wires-X menu.
-
Page 30: C4Fm/Fusion® Aprs
DMR transceiver C4FM/Fusion® APRS® You can set up the openSPOT4 to forward your C4FM/Fusion® transceiver's location information to the APRS® network, so it will be visible on APRS® maps like aprs.fi Setting up the APRS® connection First you have to set up the APRS® special connector using the openSPOT4's Quick Setup. - Page 31 DMR transceiver The following setup is described using the Yaesu FT2D's menu structure. The menu structure of your transceiver may be different, but the names of the settings should be the same or similar. Enabling the GPS receiver Go to DISP > APRS® > GPS POWER and select ON. Enabling GPS data sending during voice calls Go to DISP >...
-
Page 32: Led States
DMR transceiver LED states The openSPOT4 has two LEDs: one Status LED and one Power LED. Note that the appearance of the LEDs may differ from what is displayed below. Status LED Factory default configuration, access point (AP) mode initializing: This LED state is shown when the openSPOT4 is running with the factory default configuration. - Page 33 DMR transceiver AP mode is the openSPOT4's default mode of operation if no Wi-Fi networks have been configured. The LED will show this state if the openSPOT4 is broadcasting its own Wi- Fi network called openSPOT4 AP. See the Connecting the openSPOT4 to a Wi-Fi network section for information on how to connect to this access point and set up the openSPOT4.
- Page 34 DMR transceiver Connecting to a server should only take a few seconds. If the LED is showing this state for too long, then please see more information in the Troubleshooting section. openSPOT4 is connected to the Wi-Fi network and a special connector is active (ex.
-
Page 35: Power Led
DMR transceiver A brief yellow LED during transmission signals an invalid received packet sequence number (which means network packet loss). Modem trying to transmit, but an active BCLO is preventing it: Modem transmitting, packet with invalid sequence number received (indicating packet loss): Modem receiving: Hardware error: If you see this LED state then please refer to the... -
Page 36: Button Usage
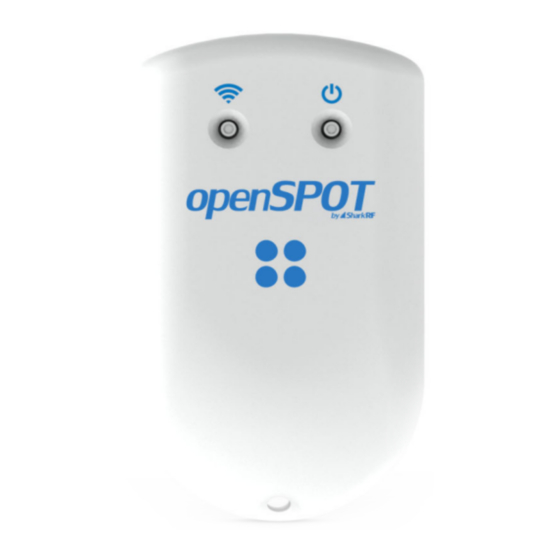
DMR transceiver Button usage Please only use your fingers, or a ballpoint pen to press the buttons. Don't use sharp items like a needle! Power button You can turn on/off the device by pressing the power button for a few seconds. The device reboots if the power button is held more than about 7 seconds (hard reset) If the openSPOT4 is turned on, then the power LED will blink white while the... -
Page 37: Wi-Fi Button
DMR transceiver Note that about 3 seconds have to pass after turning off the device before it can be turned on again. Press the Power button 3 times quickly and the openSPOT4 will beep the letter P followed by the currently active profile number and the profile's name in Morse code. -
Page 38: Opening The Web Interface
DMR transceiver Opening the web interface You can use SharkRF Link to easily open the web interface of the openSPOT4. Enter the device UID (you can find this ID on the sticker at the bottom of the openSPOT4), then click on the Connect button. - Page 39 Tools. Notes: Android phones do not support LLMNR or MDNS name resolving so http://openspot4/ http://openspot4.local/ won't work. Use SharkRF Link enter the IP address of the openSPOT4 into the browser to open the web interface. http://openspot4/ http://openspot4.local/ do not work on your non- Android device then make sure multicast data is not disabled on your Wi-Fi network.
-
Page 40: About The Web Interface
DMR transceiver About the web interface Header The openSPOT4's hostname is displayed at the right of the page header. The device's IP address is displayed by hovering the mouse above the hostname. The hostname will be hidden on small displays (mobile phones). In this case, you can get the current IP address on the Network page, Network settings section. - Page 41 DMR transceiver The currently active configuration profile number and name is displayed at the left of the footer. You can also switch between configuration profiles there. Please see the Notes on configuration profiles section for more information about configuration profile switching. The openSPOT4's current status is displayed at the middle of the footer.
-
Page 42: Status Page
DMR transceiver Status page On the status page, you can see information about the openSPOT4, the ongoing calls, the device's current status, log, and (in case the device is an openSPOT4 Pro) listen to call audio. Call log The call log displays all calls coming from the network, from the modem, or from the openSPOT4 itself (voice announcements). - Page 43 DMR transceiver You can toggle call audio playback by clicking on the speaker icon under the call log, or with the keyboard shortcut . There's a small oscilloscope view Ctrl+M which shows call audio being played. Note that the oscilloscope view's signal levels does not actually represent the volume of the played back audio, as the openSPOT4 uses audio dynamic range compression.
- Page 44 DMR transceiver You can export the log lines to a .txt file by clicking on the Export log button. openSPOT4 info You can see basic information about the device in this section. USB current limit shows the used USB port current limit based on the connected port's detected capabilities.
- Page 45 DMR transceiver (only shown if Advanced mode is enabled) shows the number of packets waiting in the dejitter queue. About the dejitter queue All packets received from the network will go to this queue to eliminate network jitter. If the dejitter queue length is too short, the graph's line can touch zero during a call and the audio can stop for a moment as the modem runs out of frames to transmit.
-
Page 46: Connectors Page
DMR transceiver Connectors page In openSPOT4 terms, a connector is the protocol which you use to connect the openSPOT4 to a server. The easiest way to choose which connector to select is using the Quick Setup. You can activate a connector by selecting it from the Edit connector list and clicking on the Switch to selected button. - Page 47 DMR transceiver This section is only available if Advanced mode is enabled. By setting the Change to Null connector after last call other than 0 will change the active connector to the Null connector after the last received call (minimum timeout value is 5 minutes). For example, if you set a timeout of 600 seconds, openSPOT4 will change to the Null connector if there is no call received in the last 10 minutes.
-
Page 48: Modem Page
DMR transceiver Modem page You can change the modem settings on this page. If Advanced mode is turned off, both RX and TX frequencies will be automatically set to the same value (the separate RX and TX frequency fields will be hidden). If the Idle modem mode is activated then the openSPOT4's modem won't transmit and will ignore all received transmissions. - Page 49 DMR transceiver You can set a CW ID which the openSPOT4 will transmit at the specified interval with the specified speed. You can use letters, numbers, slash (/) and space characters in the ID. The openSPOT4 transmits an unmodulated carrier wave by default, so you'll only be able to hear it using a radio which is capable of CW/SSB demodulation.
- Page 50 DMR transceiver The Ignore RX after TX setting specifies a time for which all received frames by the modem will be ignored after the last TX has ended. This is useful if you want to use the openSPOT4 to link a repeater to the internet through RF and the repeater has a lengthy internal buffer and it is still transmitting even after the openSPOT4 has finished transmitting (which means the openSPOT4 will start receiving its own stream again).
-
Page 51: Settings Page
DMR transceiver Settings page You can change the general settings of the openSPOT4 on this page. Configuration profile The openSPOT4 stores all its configuration in individual profiles. There are 5 of them, and profile #1 is active by default. Initially all configuration profiles have the factory default settings. -
Page 52: Firmware Upgrade
DMR transceiver By setting the Change after last call setting to non-zero (this setting is available if Advanced mode is enabled), the openSPOT4 will switch to the specified profile slot after a timeout since the last call was received. If the Always use profile #1 on power on setting is enabled, then the profile #1 will always be loaded when powering on the device. -
Page 53: Location Settings
DMR transceiver Modem mode notes: DMR: voice announcements are sent to TG9, so to hear them, make sure you have TG9 in your radio's RX group list. NXDN®: voice announcements are sent to TG0. P25: voice announcements are sent to TG9. If the battery charge percentage is 15% or below, and the Enable battery low announcement is turned on, then the openSPOT4 transmits battery charge status voice announcements every 5 minutes. -
Page 54: Dmr Settings
DMR transceiver Setting location data is optional. It is used by some connectors like the Homebrew/MMDVM® to report the location of the openSPOT4 to the connector's network. The Fill with GeoIP button queries a GeoIP database to fill the location information based on the current external IP address of the browser. -
Page 55: D-Star® Settings
DMR transceiver If the Send no in-band data to network setting is enabled, then in-band data coming from the modem (like the talker alias or in-band GPS position information) won't be sent to the network. If the Force talker alias to DMR network is set, then this talker alias will be sent for all calls coming from the modem. -
Page 56: C4Fm/Fusion® Settings
DMR transceiver If the Ignore DTMF commands after 10 secs checkbox is checked, then all DTMF commands will be ignored after 10 seconds have elapsed since call start. This is useful to avoid any mistakenly entered and decoded DTMF commands. C4FM/Fusion®... -
Page 57: Nxdn® Settings
DMR transceiver Cross mode group call DTMF code: if a connector is active which supports group calls and C4FM cross mode, then this code can be used to start group calls to the ID entered after this code. If Transmit RX confirmation is checked, then the openSPOT4 will transmit a short call confirmation after the PTT is released on the C4FM radio. -
Page 58: P25 Settings
DMR transceiver If the Allow only IDs as cross mode callsigns setting is enabled, and the source callsign of a cross mode call has no associated ID in the database, and also it can't be parsed into an NXDN® ID, then the call will be ignored. P25 settings The modem will only process P25 calls with a matching Network Access Code (NAC). -
Page 59: Transcode Gain Settings
DMR transceiver This section is only available if Advanced mode is enabled. If the modem is transmitting POCSAG messages then it will switch to the POCSAG frequency. The TX delay in other modem modes setting specifies how many seconds the openSPOT4 should wait after the last call has been finished to switch to POCSAG mode and start transmitting the queued messages. -
Page 60: Call Mute Settings
DMR transceiver This section is only available if Advanced mode is enabled. These settings allows you to lock the openSPOT4 to the given IDs and/or callsigns. If lock is enabled, the openSPOT4's modem will only allow calls originating from the given IDs or callsigns. Call mute settings This section is only available if Advanced mode is enabled. -
Page 61: Rtc Settings
DMR transceiver This section is only available if Advanced mode is enabled. If the Beep profile number on startup setting is enabled, then the openSPOT4 will beep the letter P followed by the currently active profile number on startup in Morse code. If the Beep profile number on startup setting is enabled, then the profile's name will also be played in Morse code. -
Page 62: Miscellaneous Settings
This prevents the openSPOT4 from trying to get a callsign for an ID or vice versa from the SharkRF callsign-ID database. If the Unlink when power button pressed 3 times setting is enabled (this is... -
Page 63: Network Page
DMR transceiver Network page You can change the network settings of the openSPOT4 on this page. The Network status section shows current network status. The Wi-Fi RSSI graph can be shown by clicking on the little arrow next to the RSSI value. The Internet connection quality is determined by the openSPOT4 by periodically measuring the network latency. -
Page 64: Network Settings
DMR transceiver The traffic graph can be shown by clicking on the arrow at the top of the Traffic section. Values displayed are rough estimates, and are based on the currently active connector's traffic. The openSPOT4 uses very little internet traffic. Depending on the active connector, the data rate estimates are as follows: Quiet channel is 36-180 kB / hour Active channel is 3-6 MB / hour... -
Page 65: Ntp Settings
DMR transceiver Please see the About the dejitter queue section of the user manual for more information on the Dejitter queue length setting. The openSPOT4 can send its log to a syslog server set by the Syslog server field. Check the Send log to syslog server checkbox to enable using the syslog server. - Page 66 DMR transceiver If Advanced mode is enabled, you can define up to 5 Wi-Fi networks (per configuration profile) to connect. If the first configured Wi-Fi network is not available, then the openSPOT4 will try connecting to the second one. If it's not available either, then it'll try the third one and so on.
-
Page 67: Ip Settings
DMR transceiver The AP mode SSID can be set in the AP SSID input field. By default there's no Wi-Fi password set for the openSPOT4's AP mode, but you can set one at the AP key input field. The AP mode Wi-Fi channel can be set in the Channel number input field. - Page 68 DMR transceiver Set the captive portal Wi-Fi network's SSID and key at the Wireless settings section. Click on the Clone button at the MAC settings section (make sure Advanced mode is enabled so the MAC settings section is visible). Disable the openSPOT4's AP mode by holding the button for 3 seconds, or by clicking the Disable Wi-Fi AP button at the top of the Network page.
-
Page 69: Side Panels / Tools Page
DMR transceiver Side panels / Tools page If you are using a computer, or a screen width enough width, the Tools page gets hidden and side panels will show up on the web interface. On small screens they are hidden, and their contents can be found on the Tools page. Quick call The quick call feature is available when the Homebrew/MMDVM®... -
Page 70: Brandmeister Manager
DMR transceiver Reflector and talkgroup linking (and unlinking) is done by the network, not the openSPOT4. The openSPOT4 has to make quick calls, which are the same as pressing PTT for a short time on a radio (kerchunking). These empty calls will also show up on the BrandMeister Network's dashboard. -
Page 71: Dmr Sms Chat
DMR transceiver The BrandMeister Manager (BMM) is available when the Homebrew connector is active. With BMM, you can link/unlink static and dynamic talkgroups and reflectors, and you can interrupt the currently ongoing call. A BrandMeister API key is needed to use the BMM. You can get the API key by clicking on the Get key button, and logging into the BrandMeister SelfCare. - Page 72 DMR transceiver This feature is available when the modem is in DMR mode, or the currently active connector supports DMR SMS sending. Sent messages are displayed on the right, received messages are displayed on the left of the chat box. You can click on each message for additional information.
-
Page 73: Pocsag/Dapnet
DMR transceiver If you want to send received DMR SMS messages as POCSAG messages, check the Handle messages to/from source ID checkbox, and set a POCSAG RIC to send messages to. You can simply use the ETSI format if you want to send messages through the network. -
Page 74: Aprs® Chat
DMR transceiver Note that the displayed current timeslot number and time is calculated by the browser and is not equal to the openSPOT4's internal device time and timeslot framing which is more precise. If the Send to radio button is set to Modem then you can directly add messages to the queue which will be transmitted by the openSPOT4. -
Page 75: Id Database Lookup
DMR transceiver If a message bubble is clicked then its callsign will be set as the message send destination callsign. ID database lookup You can look up IDs or callsigns and display information about them. If the Auto match ID and callsign fields checkbox is checked, then all callsigns and IDs will be matched when saving connector settings, and a warning will be displayed if the entered callsign does not match the entered ID according to the database. -
Page 76: Login Page
DMR transceiver Login page This is the page where you can log in to the web interface. The openSPOT4 does not have a web interface password by default, so the login page is not displayed initially. You can set a login password on the Network page, Network settings section. -
Page 77: Null
DMR transceiver Null connector The Null connector is a special connector - as its name says - it does not connect anywhere. This is the default active connector when the openSPOT4 is unconfigured. - Page 78 DMR transceiver Homebrew/MMDVM® connector You can use this connector to connect to a network which supports the Homebrew or the MMDVM® protocol, like BrandMeister, TGIF, DMRplus, Phoenix, DMR-MARC, XLX etc. The easiest way is to use the Quick setup to connect to these networks. This connector supports 2 protocols: Homebrew and MMDVM®.
- Page 79 DMR transceiver In cross modes, you can set the Route cross mode calls to ID to the talkgroup ID you want to talk to (set the call type to Group call). If you use a cross mode which is ID-based (like NXDN®), then this ID (and call type) will be automatically updated based on what ID you call on your radio.
- Page 80 DMR transceiver servers this way changes the openSPOT4's active connector to the Homebrew/MMDVM connector. FCS: set the URCALL to the FCS server and room number. Example: starting a call to destination callsign (URCALL) switches to FCS00199 FCS001 room 99. Switching to FCS servers this way changes the openSPOT4's active connector to the connector.
- Page 81 DMR transceiver You can set the DMO mode TDMA channel for the network. DMO mode is enabled if the connector's RX and TX frequencies match. This setting specifies which TDMA channel is used for sending calls to the server. On the BrandMeister network the DMO mode links the two timeslots together, so this setting is irrelevant.
- Page 82 DMR transceiver You can optionally use SSIDs to connect multiple hotspots to the BrandMeister network. For example, if your DMR ID is 2161005, and you have 2 hotspots, use SSID 01 and 02 for them. Append the number to your DMR ID in the Homebrew connector settings DMR ID field like this: 216100501 and 216100502 on the other hotspot.
- Page 83 DMR transceiver DMRplus dongle connector You can use this connector to connect to a network which supports the DMRplus dongle protocol like DMRplus, Phoenix, DMR-MARC, XLX. The easiest way is to use the Quick setup to connect to these networks. You can change the used reflector ID by starting a short private call on your radio to the desired reflector ID (between 4000 and 5000).
- Page 84 DMR transceiver DCS/XLX connector You can use this connector to connect to a network which supports the DCS protocol like DCS or XLX. The easiest way is to use the Quick setup to connect to these networks. DCS and XLX servers usually do not need a valid D-STAR® registration, but you can check your callsign's registration by clicking on the Check D-STAR®...
- Page 85 DMR transceiver switches to BrandMeister server 2162 (Hungary). Switching to BrandMeister servers this way changes the openSPOT4's active connector to the Homebrew/MMDVM connector. FCS: set the URCALL to the FCS server and room number. Example: starting a call to destination callsign (URCALL) switches to FCS00199 FCS001 room 99.
- Page 86 DMR transceiver You can change servers by entering the Special command/cross mode private call DTMF code (by default it's *) or the Cross mode group call DTMF code] default it's #) followed by the special ID described below. You can also use the Wires-X® button menu of your radio to select/search for servers.
- Page 87 DMR transceiver REF/XRF connector You can use this connector to connect to a network which supports the Dplus protocol like REF or XRF. The easiest way is to use the Quick setup to connect to these networks. If you want to use a reflector, set the URCALL on your radio to CQCQCQ, and the local module to D in the openSPOT4.
-
Page 88: Homebrew/Mmdvm
DMR transceiver Try remote module E on any reflector for the REF/XRF echo service (may not enabled on some servers). Switching reflectors/gateways using your radio URCALL/your call method You can switch reflectors using your radio by starting a short call to their names as the destination callsign (URCALL), like , or . - Page 89 DMR transceiver connects to XRF008 module B. B08B B008B Switching to XLX servers: will change the active connector to the DCS/XLX C502 C0502 connector and connects to XLX005 module B. will change the active connector to the DCS/XLX C904 C0904 connector and connects to XLX009 module D.
- Page 90 DMR transceiver 4: DCS Module number is the remote module, and it is always 2 digits long. 01 is module A, 02 is module B, 03 is module C and so on. Some examples: ID 4901 will connect to DCS009A (server type 4 (DCS), number 9 and module 01 which is A) ID 4812 will connect to DCS008L (server type 4 (DCS), number 8 and module 12 which is L)
- Page 91 DMR transceiver FCS connector You can use this connector to connect to a network which supports the FCS protocol like the FCS network. The easiest way is to use the Quick setup to connect to these networks. You can change rooms with your C4FM radio by entering the Special command/cross mode private call DTMF code DTMF code (by default it's *) or...
-
Page 92: Dcs/Xlx
DMR transceiver Server and room change using a D-STAR® radio (openSPOT4 Pro only) DTMF method Enter DTMF code * followed by the special ID described below. URCALL/your call method Set the URCALL to the FCS server and room number. Example: starting a call to destination callsign (URCALL) switches to FCS001 room 99. - Page 93 DMR transceiver Some examples: ID 5 will connect to the current server's room 5 ID 99 will connect to the current server's room 99 ID 205 will connect to FCS002 room 5 ID 314 will connect to FCS003 room 14...
- Page 94 DMR transceiver YSFReflector connector You can use this connector to connect to a network which supports the YSFReflector protocol, like YSFReflector servers. The easiest way is to use the Quick setup to connect to these networks. Advanced settings If you enter IDs into the DGID list, then they will be sent to the server. The server will link the specified DGIDs/rooms if it supports this functionality.
-
Page 95: Fcs
DMR transceiver You can switch YSFReflector servers using a D-STAR® transceiver by entering DTMF code * followed by the desired server's ID (5 digits). You can also use the URCALL/your call method. This lets you change to the following server types: REF/XRX/Gateway: set the URCALL to for example . - Page 96 DMR transceiver NXDNReflector connector You can use this connector to connect to a network which supports the NXDNReflector protocol, like NXDNReflector servers. The easiest way is to use the Quick setup to connect to these networks. Talkgroup handling NXDNReflector servers handle only one talkgroup. You can find each server's talkgroup ID in the server list, or if you enable Advanced mode , then the talkgroup ID setting will be shown.
-
Page 97: Ysfreflector
DMR transceiver The NXDNReflector connector is an NXDN® connector, but it supports DMR and C4FM cross modes, and D-STAR® with the openSPOT4 Pro. Using a DMR transceiver You can switch NXDNReflector servers with your DMR transceiver by calling the desired server's ID with a private call. Using a D-STAR®... -
Page 98: P25Reflector
DMR transceiver P25Reflector connector You can use this connector to connect to a network which supports the P25Reflector protocol, like P25Reflector servers. The easiest way is to use the Quick setup to connect to these networks. Talkgroup handling P25Reflector servers handle only one talkgroup. You can find each server's talkgroup ID in the server list, or if you enable Advanced mode , then the talkgroup ID setting will be shown. - Page 99 DMR transceiver Cross mode usage The P25Reflector connector is an P25 connector, but it supports C4FM cross modem mode. Make sure you use VW (Voice Wide) mode on your C4FM radio, otherwise your calls sent to the server will be silent. You can switch P25Reflector servers with your C4FM radio by entering the Special command/cross mode private call DTMF code DTMF code (by default it's...
-
Page 100: Dapnet
DMR transceiver DAPNET connector You can use this connector to connect to a network which supports the DAPNET protocol. The easiest way is to use the Quick setup to connect to these servers. This connector supports the POCSAG modem protocol which is the protocol used by pagers. - Page 101 DMR transceiver This connector can stay active in the background if Stay connected in background is checked, which means you can use the openSPOT4 the same way as before with other active connector, but it will function also as a personal DAPNET/POCSAG transmitter.
-
Page 102: Aprs
DMR transceiver APRS® connector You can use this connector to connect to the APRS® network. The easiest way is to use the Quick setup to set up the connection. This connector can stay active in the background if the Enable in background checkbox is checked, which means you can use the openSPOT4 the same way as before with another active connector, but it will function also as an APRS®... - Page 103 DMR transceiver You can also enable forwarding incoming APRS® chat messages to your POCSAG receiver by setting a RIC at Send incoming messages to POCSAG RIC. If Advanced mode is enabled, then you can set forced a SSID, symbol and APRS®...
-
Page 104: Sharkrf Ip Connector Client
DMR transceiver SharkRF IP Connector Client connector You can use this connector to directly connect to another openSPOT device, or a server which supports the SharkRF IP Connector protocol, or our open source SharkRF IP Connector Protocol Server. The protocol's documentation can be found on GitHub, so you can also develop your own application for the openSPOT4. -
Page 105: Sharkrf Ip Connector Server
SharkRF IP Connector Server connector You can use this connector to accept connections from another openSPOT device. This connector only supports 1 active connection, so if you want to link more than 1 device, you can use our open source... -
Page 106: Autocal
DMR transceiver AutoCal connector AutoCal is a special connector - it does not connect to anywhere. It analyzes an incoming transmission from the modem and tries to find out the frequency difference (RX offset) between the openSPOT4 and the transmitter. openSPOT4's oscillator has a frequency stability of 0.5ppm, and every openSPOT4 is factory calibrated during the assembly process, so you'll only need to use this special connector if your transceiver's transmit frequency is... -
Page 107: Control Calls
DMR transceiver Control calls There are some special IDs and callsigns which trigger built-in services and actions when a call is received to them from your radio. Local echo service If the local echo service's ID or callsign is called, the openSPOT4 records the voice transmission and plays it back after the call from the radio is finished. -
Page 108: Connector Status Query
DMR transceiver D-STAR®: call is sent to (7 spaces and the configuration profile ..1 number, replace dots with spaces), or DTMF code A is entered followed by the configuration profile number. C4FM: Special command/cross mode private call DTMF code (by default it's *) is entered followed by DTMF code A, then the desired configuration profile number. -
Page 109: Time Query
DMR transceiver Time query The current device time can be queried by calling the following IDs/callsigns: DMR, NXDN® and P25: ID 9995. Both private and group calls are interpreted. D-STAR®: call is sent to (7 spaces and an T, replace dots with ..T spaces), or DTMF codes CD is entered. -
Page 110: Cross Modes
DMR transceiver Cross modes Both the openSPOT4 and the openSPOT4 Pro have a very powerful, yet easy to use cross mode system. openSPOT4 Pro The openSPOT4 Pro has onboard transcoding hardware with a genuine AMBE® vocoder chip: The openSPOT4 Pro has the best voice quality in cross mode operation Supports D-STAR®... - Page 111 DMR transceiver Cross modes using a DMR transceiver Using a D-STAR® network (openSPOT4 Pro only) After you've set up and activated the D-STAR® connector, switch the modem to DMR mode. Your outgoing callsign will be the callsign associated with the DMR source ID. If there's no callsign associated to the ID, then the callsign will be the Default callsign for cross mode...
- Page 112 DMR transceiver The source NXDN® ID of your DMR calls will be set to the same value as the DMR call unless the Always use this ID in cross mode setting is enabled for the Default cross mode source ID on the Settings page, NXDN®...
- Page 113 DMR transceiver Cross modes using a D-STAR® transceiver (openSPOT4 Pro only) Using a DMR network After you've set up and activated the DMR connector, switch the modem to D- STAR® mode. The source DMR ID of your calls from the D-STAR® radio will be set to the ID associated with the source callsign.
- Page 114 DMR transceiver source NXDN® ID as text.
- Page 115 DMR transceiver Cross modes using a C4FM transceiver Using a D-STAR® network (openSPOT4 Pro only) After you've set up and activated the D-STAR® connector, switch the modem to C4FM mode (or C4FM Half Deviation mode, if your radio needs that). Only calls in DN (Digital Narrow) mode will be converted, if you transmit in other modes, D-STAR®...
- Page 116 DMR transceiver will be used. The default ID will be used if the Always use this ID in cross mode setting is enabled for the Default cross mode source ID on the Settings page, NXDN® settings section. The callsign of incoming NXDN® calls will be set to the callsign associated with the NXDN®...
- Page 117 DMR transceiver Cross modes using an NXDN® transceiver Using a D-STAR® network (openSPOT4 Pro only) After you've set up and activated the D-STAR® connector, switch the modem to NXDN® mode. Your outgoing callsign will be the callsign associated with the NXDN® source ID. If there's no callsign associated to the ID, then the callsign will be the Default callsign for cross mode...
- Page 118 DMR transceiver After you've set up and activated the C4FM connector, switch the modem to NXDN® mode. Only calls in DN (Digital Narrow) mode will be converted to your NXDN® radio. If someone transmits in other modes on the C4FM network, you will hear silence on your NXDN®...
- Page 119 DMR transceiver Cross modes using a P25 transceiver Using a C4FM network After you've set up and activated the C4FM connector, switch the modem to P25 mode. Only calls in VW (Voice Wide) mode will be converted to your P25 radio.
-
Page 120: Usb Serial Console
DMR transceiver USB serial console The openSPOT4 shows up as a USB serial port (COM port) when plugged into a computer. You can reach the serial console by opening this USB serial port with serial terminal software like PuTTY, RealTerm, TeraTerm, minicom etc. To find out which is your openSPOT4's serial port device path (COM port number), look at the device list of your computer (in your operating system's control panel for example). -
Page 121: Factory Reset
DMR transceiver Factory reset Hold the Wi-Fi button for 30 seconds to perform a full factory reset. In this case all configuration profiles will be cleared. Please only use your fingers, or a ballpoint pen to press the buttons. Don't use sharp items like a needle! Factory reset using the web interface The openSPOT4 can be reset to factory defaults if you click on the Reset all... -
Page 122: Troubleshooting
The web interface can't be opened SharkRF Link to open the web interface. SharkRF Link does not open the openSPOT4 web interface Make sure your web browser device (phone/tablet/computer) is connected to the exact same Wi-Fi network the openSPOT4 is using. - Page 123 DMR transceiver After you've chosen the Wi-Fi network and entered the password, the openSPOT4 starts connecting to the selected network, and indicates the result of the process on the web interface. If it has been connected, click on the Next button on the Connected page. At that moment, your browser device (phone/tablet/computer) will disconnect from the openSPOT4's Wi- Fi AP network.
- Page 124 What you have to do is to connect your browser device (phone/tablet/computer) to the exact same Wi-Fi network as you've configured for the openSPOT4 and SharkRF Link to open its web interface. If it does not work, then make sure Wi-Fi client isolation is turned off in your Wi-Fi router's settings.
- Page 125 DMR transceiver 2. In this mode, the openSPOT4 broadcasts its own Wi-Fi network called openSPOT4 AP, indicated by white LED. You can connect to this network using your browser device (phone/tablet/computer). 3. Make sure you place your browser device close to the openSPOT4 during this time.
- Page 126 DMR transceiver Note that servers nowadays usually require a hotspot security password to be set and enabled. I'm not hearing anything on my radio Please read the Setting up your transceiver section. Check if your radio's LED is on when the openSPOT4 is transmitting. The openSPOT4 is transmitting if its status LED is blinking red: If it's blinking alternating red/orange, then BCLO is on: If this is the case then make sure it's turned off by setting it to 0 at the...
- Page 127 DMR transceiver NXDN® radio: the radio access number (RAN) match in your radio and the openSPOT4 (example: set it to the default 0). Make sure the talkgroup you want to hear is in your NXDN® radio's contact list, or it is set as the TX contact of the currently active channel.
- Page 128 The server's internet connection (most amateur radio servers are running on unstable home internet connections not suitable for international links) The link between the server and your Wi-Fi router, or your internet connection Your Wi-Fi router The Wi-Fi link between your openSPOT and your Wi-Fi router...
- Page 129 DMR transceiver These issues cause dropped packets, which are indicated on the Dejitter queue graph on the openSPOT4's Status page as "invalid seqnum errors". They may cause dropouts in the voice transmissions. If there are no invalid seqnum errors, but the dejitter queue graph shows that the queue gets empty during a call, then you can try increasing the dejitter queue length at the Network settings...
- Page 130 DMR transceiver Upgrade downloads are slow Downloading upgrades is a low priority task so it won't interfere with normal operation and also the device won't consume much power during the download. The device does not turn on If pressing and holding the power button for 1-2 seconds does not turn on the device, then press and hold the power button for at least 7 seconds to do a hard reboot.
- Page 131 DMR transceiver Web interface call audio playback is choppy Note that smooth call audio playback requires a Wi-Fi connection with a good signal quality. If you have issues with call audio playback, then please try using different browsers and make sure they are updated to the latest version. Browsers reduce CPU allowance on non-active tabs after a while.
-
Page 132: Specifications
DMR transceiver Specifications Specifications are not finalized yet and are subject to change until the product launches. Dimensions: 100 x 58 x 18.5 mm Weight: 76 grams Operating temperature range: During battery charge: 0 - +30 °C During normal operation: -10 - +45 °C Battery: Polymer Lithium-Ion 1300 mAh Power supply: 5 V DC through the USB-C port Recommended power supply current rating: 2000 mA... -
Page 133: Acknowledgement
Lajos Horváth HA5OGR István Száraz HA7PTY Everyone who use beta firmwares and help us finding bugs by reporting them in email or on our community forum To the SharkRF Team �� And to the SharkRF wives for their endless patience ��... -
Page 134: Open Source Licences
DMR transceiver Open source licences Here are the licences for various open source software used in the openSPOT4. alertify.js The MIT License Copyright (c) 2009-2014 Stuart Knightley, David Duponchel, Franz Buchinger, António Afonso Permission is hereby granted, free of charge, to any person obtaining a copy of this software and associated documentation files (the “Software”), to deal in the Software without restriction, including without limitation the rights to use, copy, modify, merge, publish, distribute, sublicense, and/or sell copies of the Software,... - Page 135 DMR transceiver ladda.js Copyright (C) 2016 Hakim El Hattab, http://hakim.se Permission is hereby granted, free of charge, to any person obtaining a copy of this software and associated documentation files (the “Software”), to deal in the Software without restriction, including without limitation the rights to use, copy, modify, merge, publish, distribute, sublicense, and/or sell copies of the Software, and to permit persons to whom the Software is furnished to do so, subject to the following conditions:...
- Page 136 DMR transceiver js-sha256.js Copyright (c) 2015 Chen Yi-Cyuan MIT License Permission is hereby granted, free of charge, to any person obtaining a copy of this software and associated documentation files (the “Software”), to deal in the Software without restriction, including without limitation the rights to use, copy, modify, merge, publish, distribute, sublicense, and/or sell copies of the Software, and to permit persons to whom the Software is furnished to do so, subject to the following conditions:...
- Page 137 DMR transceiver Permission is hereby granted, free of charge, to any person obtaining a copy of this software and associated documentation files (the “Software”), to deal in the Software without restriction, including without limitation the rights to use, copy, modify, merge, publish, distribute, sublicense, and/or sell copies of the Software, and to permit persons to whom the Software is furnished to do so, subject to the following conditions: The above copyright notice and this permission notice shall be included in all...
- Page 138 DMR transceiver The above copyright notice and this permission notice shall be included in all copies or substantial portions of the Software. THE SOFTWARE IS PROVIDED "AS IS", WITHOUT WARRANTY OF ANY KIND, EXPRESS OR IMPLIED, INCLUDING BUT NOT LIMITED TO THE WARRANTIES OF MERCHANTABILITY, FITNESS FOR A PARTICULAR PURPOSE AND NONINFRINGEMENT.
Need help?
Do you have a question about the openSPOT and is the answer not in the manual?
Questions and answers