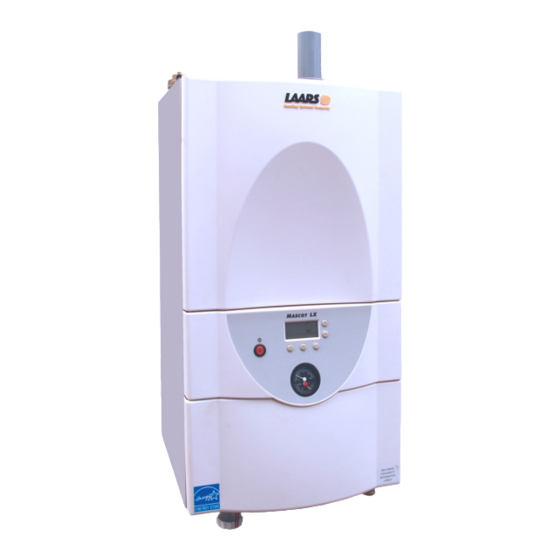
Laars Mascot LX Service Manual
Hide thumbs
Also See for Mascot LX:
- Installation and operation instructions manual (56 pages) ,
- User manual (8 pages)
Table of Contents
Advertisement
Mascot LX Service Manual
Service
Service
Manual
Manual
for
for
Mascot LX
Mascot LX
Modulating Boilers
Modulating Boilers
Sizes 50, 75, 100, 150, 175, and 220 MBTU/h
Sizes 50, 75, 100, 150, 175, and 220 MBTU/h
Water Heaters - Model MLXC
Water Heaters - Model MLXC
Sizes 125, 150, and 175 MBTU/h
Sizes 125, 150, and 175 MBTU/h
-
-
Model MLXH
Model MLXH
Document 1371
Advertisement
Table of Contents
Troubleshooting

Subscribe to Our Youtube Channel
Related Manuals for Laars Mascot LX


Summary of Contents for Laars Mascot LX
- Page 1 Mascot LX Service Manual Document 1371 Service Service Manual Manual Mascot LX Mascot LX Modulating Boilers Model MLXH Modulating Boilers Model MLXH Sizes 50, 75, 100, 150, 175, and 220 MBTU/h Sizes 50, 75, 100, 150, 175, and 220 MBTU/h...
-
Page 3: Table Of Contents
Changing Setpoints ............16 Installer and Service Mode Displays ......... 17 Section A - Troubleshooting Instructions Sect. Title Page Quick Checkout Procedure ..........19 Lockout Codes ..............22 Notification Codes ............. 27 Unit is Running, but Building is Still Cold ......29 Short-Cycling ..............30 Unit is Noisy ............... 31 Mascot LX Service Manual... - Page 4 DHW Problems - Indirect Tank with Aquastat (MLXH) ..63 DHW Problems - Indirect Tank with Sensor (MLXH) ..64 Cascade Setup ..............65 External Modulation Control (BMS) ........66 Replacing the SIT Control Board ........67 Annual Service Procedure ..........69 Mascot LX Service Manual...
- Page 5 Page App1 SIT Parameter Codes ............77 Lockout Codes ..............77 Blocking Codes ..............77 Notification Codes ............. 78 Installer Mode Parameters ..........79 App2 Ignition and Firing Sequence ..........82 App3 Wiring Diagrams ..............83 App4 Gas Conversion Procedure ..........86 Mascot LX Service Manual...
- Page 6 Mascot LX Service Manual...
-
Page 7: How To Use The Troubleshooting Information
• The “Combi” unit (MLXC), which also produces domestic hot water using a built-in heat exchanger. Contact Laars Technical Support if you can’t diagnose the problem using the information in this manual: LAARS Product Support Phone:... -
Page 8: Finding Information In This Pdf File
You can read a PDF file using the Adobe Acrobat PDF Reader. You will find that the Reader has already been installed on most computers. You can also download a free copy at this address: https://get.adobe.com/reader/ l Mascot LX Service Manual... -
Page 9: Safety Notes
Do not use any phone in your building. • Immediately call your gas supplier from a nearby phone. Follow the gas supplier’s instructions. • If you cannot reach your gas supplier, call the fire department, your heating contractor, gas company, or factory representative. Mascot LX Service Manual... - Page 10 Instruct all users to feel the water temperature before getting into the bath or shower. The Mascot LX unit is protected against over-pressurization. A pressure relief valve is included with each Mascot LX unit. The condensate water can be hot, and is also slightly acidic.
- Page 11 2) CSA B149.1 “Natural Gas and Propane Installation Code” and with the requirement of the local utility or other authorities having jurisdiction. Such applicable requirements take precedence over the general instruc- tions contained in this manual. Mascot LX Service Manual...
-
Page 12: Removing The Covers
The upper and lower covers can be removed by pulling the part straight out and away from the unit. The center control panel cannot be re- moved. Upper inner panel - 2 screws Center panel - not removed Lower inner panel - 2 screws Mascot LX Service Manual... -
Page 13: Part Locations
Gas inlet pipe (top) Water outlet pipe Water inlet (top) pipe (top) Pressure switch Gas valve Venturi Blower Burner (inside heat Heat exchanger exchanger) Transformer Three-way valve (Combi units only) Water outlet pipe (bottom) Condensate trap Circulator pump Mascot LX Service Manual... -
Page 14: Sensor And Switch Locations
Water outlet temp. sensor and safety limit Low water cutoff switch (optional) Air pressure switch Three-way valve - Combi units only Inlet water temp. sensor Combi units only DHW water temp. sensor DHW flow sensor (Hall sensor) Mascot LX Service Manual... -
Page 15: Access To Control Board
Access to Control Board Lower metal panel folds down High voltage terminal strip The controller circuit board is located behind this cover. Mascot LX Service Manual... -
Page 16: Control Panel
Use this to return to the previous function without saving a new value. Temperature and pressure gauges - These indicate the temperature and pressure at the water outlet. (The values shown here are not calculated by the SIT controller.) Mascot LX Service Manual... -
Page 17: Control Display
** If both arrow symbols are filled in, the unit is reporting “Delta T” - the difference between the outlet and the inlet temperatures. Mascot LX Service Manual... -
Page 18: Operating Displays
Appendix. Service Mode - This mode should only be used by technicians who have been trained in service procedures on the Mascot LX. For details, see Section C - “Combustion.” Operating Mode Displays - When the unit is operating normally, use the Up and Down buttons to rotate through the following functions: •... -
Page 19: Operating Displays - Examples
Flue temp. sensor Domestic hot water temp. = 80°F DHW temp. sensor Central heat demand, temp. is 180°F at outlet sensor Outlet sensor Central heat demand - or - System temp. display, temp. is 188°F System temp. sensor Mascot LX Service Manual... -
Page 20: Notifications, Blocking, Lockout, And Error Displays
A “lockout” is a serious condition that will prevent the unit from operat- ing. Usually the code will give you a good idea of the cause of the problem. Section App1 lists some troubleshooting suggestions based on the Lockout codes. Mascot LX Service Manual... - Page 21 Notification, Blocking, Lockout, and Error Displays (continued) Error - An “Error” display indicates a problem with the SIT control board. For instructions on replacing the board, see Section B30. Mascot LX Service Manual...
-
Page 22: Changing Setpoints
2. Press the OK/Select button for one second to indicate that you want to change the set- point. 3. Use the Up and Down buttons to change the setpoint. 4. Press the OK/Select button to accept the new setpoint, or press Cancel to keep the old setpoint. Mascot LX Service Manual... -
Page 23: Installer And Service Mode Displays
Service Mode - The Service mode should only be used by a technician who has been trained by Laars. Service mode is used to set the “high fire” and “low fire” conditions during CO testing. For details, see Section C2. - Page 24 Mascot LX Service Manual...
-
Page 25: Quick Checkout Procedure
Check the 24V power supply. panel lighted? See Section B2. Does the display Replace the SIT controller say “Error”? board. See Section B30. Are there any See Section App1. lockout or notification messages? Continued next page Mascot LX Service Manual... - Page 26 The unit should try to fire. The smallest segment in the flame display should blink. Boiler Check the direct spark fires? ignition. See Section B16. Does the See Section B17 - “Pump Problems.” pump start? Continued next page Mascot LX Service Manual...
- Page 27 Programming See “Operating Displays” and is correct? “Changing Setpoints” Unit has Warm weather shutdown is outdoor sensor always active when the installed? outdoor sensor is installed. Last resort - Replace the SIT controller. See Section B30. Mascot LX Service Manual...
-
Page 28: A2 Lockout Codes
There has been a lockout because the fan did not reach normal speed. • Check for a blockage in the vent. • Check the wiring to the blower. Disconnect the signal connection to the blower - the blower should run at full speed. See Section B11. If the blower reaches full speed, the blower itself is probably OK. • If the blower does not reach full speed, remove the blower and check for free movement of the fan. Replace the blower if necessary. • If the blower moves freely, replace the SIT control board. See Section B30. Mascot LX Service Manual... - Page 29 E006 – Safety switch – not used E007 – Low water cutoff error There has been a lockout because the optional low water cutoff switch reported a low-water condition or is open. • Check the water supply. • Check the LED’s on the front of the optional low water cutoff switch. See Section B19. The system will present this error if the switch is open (low water condition.) • Check the wiring to the low water cutoff switch. Mascot LX Service Manual...
- Page 30 E010 – Blocked vent/ fan proving switch error There has been a lockout because the controller did not detect a normal airflow through the system. • Check for a blockage in the vent. • Check the wiring to the air pressure switch. See Section B12. • Check the function of the switch. The system will present this error if the switch is open (not enough air moving through the unit.) See Section B12 for instruc- tions. Replace the switch if necessary. • If this does not restore normal operation, replace the SIT control board. See Section B30. E011 – Flame loss lockout There has been a lockout because the controller detected three consecutive flame losses while the unit was trying to run. • Check the wiring to the flame sensor. See Section B16. • Remove and clean the flame sensor. Replace it if necessary. See Section B16. • Check the wiring to the gas valve. See Section B13. • Check for possible problems with the gas supply. • If this does not restore normal operation, replace the SIT control board. See Section B30. Mascot LX Service Manual...
- Page 31 E014 – Outlet high temperature (manual reset high limit) • Check for a blocked flue. • Check the wiring to the outlet water temperature sensor. See Section B4. • An E014 error indicates that the system has reached the high limit and locked out. Did the system actually get that hot, or is there a problem with the sen- sor? Replace the sensor if necessary. • If this does not restore normal operation, replace the SIT control board. See Section B30. E015 – Flue sensor drift too high The sensor used here is a dual sensor. The controller compares the signals from both sensors, and triggers an error if the difference between the two (the “drift”) is too great. • Check the wiring to the sensor. See Section B8. • Replace the sensor if necessary. Mascot LX Service Manual...
- Page 32 Check the sensor function and replace the sensor if necessary. E017 – Flue sensor error • Check the wiring to the sensor. See Section B8. • Replace the sensor if necessary. E018 – Outlet sensor error • Check the wiring to the water outlet temperature sensor. See Section B4. An E018 error indicates that the sensor has failed. • Check the sensor function and replace the sensor if necessary. E019 – Inlet sensor error • Check the wiring to the inlet water temperature sensor. See Section B3. • Replace the sensor if necessary. DU IN LOCKOUT - You will see this if the system is in lockout, and you try to go to the Installer mode. • Press the Reset button to exit from the lockout. Mascot LX Service Manual...
-
Page 33: Notification Codes
Fig. A3-1 Example of Notification Screen N01 - Fan speed limited due to flue gradient not detected. The flue sensor includes two sensor elements. The controller looks for the same reading from both. If the sensor readings are different, beyond a pre-set limit, the controller will present this Notification code. The boiler will continue to run at Low Fire. If this condition continues, the controller will present a Lockout message. • Once the problem has been corrected, press Reset to remove the limitation. N02 - Fan speed limited due to high temperature at outlet This refers to a high water temperature at the water outlet.. The controller watches this input. If the sensor reading reaches a pre-set limit, the controller will present this Notification code. The boiler will continue to run at Low Fire. If this condition continues, the controller will present a Lockout message. • Once the problem has been corrected, press Reset to remove the limitation. N03 - Fan speed limited due to excessive delta T This refers to a large difference between the water inlet and outlet temperatures. The controller watches these inputs. If the difference between the sensor readings reaches a pre-set limit, the controller will present this Notification code. The boiler will continue to run at Low Fire. If this condition continues, the controller will pres- ent a Lockout message. • Once the problem has been corrected, press Reset to remove the limitation. N04 - Fan speed limited due to high flue temperature This refers to a high exhaust temperature in the flue.. The controller watches this input. If the sensor reading reaches a pre-set limit, the controller will present this Notification code. The boiler will continue to run at Low Fire. If this condition con- tinues, the controller will present a Lockout message. • Once the problem has been corrected, press Reset to remove the limitation. Mascot LX Service Manual... - Page 34 See Section B6. N06 - Outdoor temperature sensor not present This may mean that the sensor is disconnected or not working. If this condition continues, the controller will operate at a setpoint of 140°F or the value of Installer Parameter P62 (High Setpoint for Heat Curve), whichever is lower. • Check for an input on terminals 1 and 2 on the low voltage terminal. • If there is no input, check the outdoor temperature sensor and replace it if nec- essary. See Section B7. Mascot LX Service Manual...
-
Page 35: Unit Is Running, But Building Is Still Cold
(Gas/air mixture is correct, but not enough gas/air mixture is supplied.) Pump(s) working See “Pump Problems” - correctly? Section B17. Burner and/or See “Cleaning the Burner heat exchanger and Heat Exchanger” - plugged? Section C4. Mascot LX Service Manual... -
Page 36: Short-Cycling
A similar situation can occur if the boiler is connected to an indirect DHW tank. If the output of the boiler is too large in relation to the size of the tank, the system may short-cycle. You may be able to correct this without changing the tank or piping. Be sure to use the aquastat on the indirect tank to provide the “call for heat.” You can also try lowering the DHW setpoint. If this does not work, you may have to change the DHW tank. The tank should be large enough to accept the output of the boiler when it is running at 20% of the maximum firing rate. The piping between the tank and the boiler must also be large enough to allow for adequate flow. Here’s the rule – The pipe diameter for the loop running to the tank must always be larger than the fittings on the tank. For example, if the fittings on the tank are ½” dia., you must use ¾” dia. or larger piping for the loop. To check the control setting for “Anti-Cycling:” • Press and hold the OK/Select and Down buttons for 5 seconds to go to Installer mode. • Use the Up and Down buttons to go to P23 - Anti-Cycling Time. The default setting is 30 seconds. • To make a change, press the OK/Select button. Use the Up and Down buttons to change the value. Press and hold the OK/Select button to save the new setting and leave Installer mode. Mascot LX Service Manual... -
Page 37: Unit Is Noisy
Unit is Noisy On systems using anti-freeze – This can occur if the concentration of anti-freeze is too high. At concen- trations above 35%, localized boiling can occur, and this can produce noise. Mascot LX Service Manual... - Page 38 Mascot LX Service Manual...
-
Page 39: Troubleshooting The 120V Ac Power Supply
- and on “Combi” units (including Domestic Hot Water) - • Domestic Hot Water pump • Three-way valve Figure B1-1 is a circuit diagram. Some of the parts inside the power box can carry full line voltage. This voltage can cause death or serious personal injury. Do not open this box or work inside unless you have been trained in safe electrical service techniques. Important note: The maximum combined load on terminals PWB 4, 6, and 8 (the pump outputs) must not exceed 5 Amps. Fig. B1-1 - 120V AC Power Distribution Mascot LX Service Manual... - Page 40 6. Remove the two screws that hold the metal cover in place. Disconnect these wires F1 - 5A 120V AC F2 - 5A 120V AC F3 - 800mA 24V AC Fig. B1-4 - Removing the Metal Cover Fig. B1-5 - Fuses on Back of Control Board Mascot LX Service Manual...
-
Page 41: Troubleshooting The 24V Dc Power Supply
Many of the controls in the boiler operate on 24V, including: • The SIT controller and display panel • Most of the sensors and switches that provide inputs for the controller. Figure B1-1 in the last section shows the power distribution system. A transformer develops 24V AC, which is later rectified to produce 24V DC. There are two safety devices we should point out: • A 2A circuit breaker for the 24V DC supply. This is mounted behind the lower front cover. See Fig. B2-1 • F3, an 800 mA fuse, located on the back of the control board. The instructions in Section B1 explain how to reach this fuse. Some of the parts inside the power box can carry full line voltage. This voltage can cause death or serious personal injury. Do not open this box or work inside unless you have been trained in safe electrical service techniques. 2A circuit breaker for 24V DC power supply Fig. B2-1 - Circuit breaker for 24V DC (Shown with lower front cover removed) Mascot LX Service Manual... -
Page 42: Inlet Water Temperature Sensor
4. The sensor is held next to the exterior of the water pipe by a spring clip. 5. To test the sensor for accuracy, see Section B9. 6. To reassemble, reverse the process we have just described. Mascot LX Service Manual... -
Page 43: Outlet Water Temperature Sensor
3. Drain the boiler. 4. Remove the upper front cover. The outlet water temperature sensor is mounted in the upper left corner of the unit. See Fig. B4-1. 5. Unplug the wiring connector (four wires). The connector is locked in place by a “squeeze tab.” Press on the tab to release the connector. 6. Unscrew the sensor using the 17 mm wrench. Turn counter-clockwise to unscrew the part. 7. To test the part for accuracy, see Section B9. 8. To reassemble, reverse the process we have just described. Be sure to use pipe dope or Teflon tape on the threaded part of the sensor. Mascot LX Service Manual... -
Page 44: System Sensor
For more information on Outdoor Reset, see Section B18. To check the sensor for ac- curacy, see Section B9. Note - By default, the warm weather shutdown feature is always active when the out- door sensor is installed. Mascot LX Service Manual... -
Page 45: Flue Temperature And Flue Safety Sensors
Check the wiring at the sensor Wiring to and connector X4 on the control sensor is correct? Good board. (Insert a probe inside the connections? terminal.) Replace the sensor. Fault disappears? Replace the SIT control module. See Section B30. Mascot LX Service Manual... - Page 46 4. The sensor assembly is held in place by a “press fit” into a rubber grommet. Pull the sensor assembly straight out. Flue temperature 5. Unplug the wiring connector (four wires). The con- and flue safety nector is locked in place by a “squeeze tab.” Press sensors on the tab to release the connector. 6. To test the part for accuracy, see Section B9. Fig. B8-1 - Flue Temperature and Flue Safety Sensors 7. To reassemble, reverse the process we have just described. Mascot LX Service Manual...
-
Page 47: Testing The Temperature Sensors
Note the temperature of the part, and check the resistance against the table. If there is an open- circuit or no resistance at all, replace the part. The connector for a “duplex” sensor will include four pins. Two of these run to one thermistor, and two go to the other. You should see the same resistance reading on both of the thermistors in the assembly. Mascot LX Service Manual... -
Page 48: Water Pressure Switch
Water Pressure Switch The water pressure switch will not allow the Mascot LX unit Water pressure switch to operate unless the water pressure is at least 5 p.s.i. Tools and Equipment Required: • 14 mm wrench • Teflon® tape or pipe dope Replacement Procedure: 1. Turn off power to the unit. Use the main disconnect switch on the front panel. -
Page 49: Blower Problems
Replace the bad switch. is OK? See Section B12. Mechanical problem Remove the blower and with blower? check it. See the instructions in this section. Heat exchanger Clean the heat exchanger. is plugged? See Section C4. Mascot LX Service Manual... - Page 50 8. Loosen the union nut between the gas inlet pipe and the gas valve. Be careful not to drop the O-ring. 9. Remove the four nuts connecting the bottom of the blower to the combustion chamber. There are two sets of nuts here - remove the smaller (inner) ones. 10. At this point, you should be able to “roll” the blower assembly forward and out of the front of the unit. Note that the Venturi and gas valve remain connect- ed to the blower. 11. To reassemble, reverse the steps listed above. After re-tightening the union in the gas line, check for gas leaks using a leak detection solution. Flame Nuts for mount- Spark rod sensor ing to burner Fig. B11-2 - Detail view - Bottom of blower Mascot LX Service Manual...
-
Page 51: Air Pressure Switch
Replace the bad switch. is OK? See Section B12. Mechanical problem Remove the blower and with blower? check it. See the instructions in this section. Heat exchanger Clean the heat exchanger. is plugged? See Section C4. Mascot LX Service Manual... - Page 52 Venturi and the flue collector. Because the switch is normally open (N.O.), you should see continuity across the switch contacts when the boiler is running, and no continuity when it is off. Fig. B12-1 - Air pressure switch Mascot LX Service Manual...
-
Page 53: Gas Valve
Fig. B13-1 - Upper part of cabinet 2. Remove the upper front panel. (typical installation, front cover removed) 3. Turn off all manual gas valves connecting the boiler to the main gas supply line. 4. Disconnect the wiring harness for the gas valve. It is held in place by a small Phillips-head screw. 5. Undo the two cap-head screws that support the end of the air line. This assembly hangs from the end of the Venturi. The air line runs to the air pressure switch. Once the assembly is free, swing the end of the air line out of the way to the left. 6. Loosen the union nut between the gas inlet pipe and the gas valve. Be careful not to drop the O-ring. 7. Separate the Venturi from the blower. Use an Allen wrench to remove the cap screws on the Venturi mounting plate. This will allow you to remove the gas valve and Venturi together. 8. You can separate the gas valve from the Venturi by pulling them apart while twisting slightly. 9. To reassemble, reverse the steps listed above. After re-tightening the union in the gas line, check for gas leaks using a leak detection solution. Mascot LX Service Manual... -
Page 54: Condensate Trap
Some operating conditions can cause small particles Inlet - from of mineral material to be formed in the heat exchanger boiler and collect in the condensate trap. The drain can also be blocked if it is frozen or plugged with debris. If the water cannot drain freely, it can back up into the heat exchanger. The trap on the Mascot LX has a removable cap, so it is easy to clean. Remove the cap and flush out this area at least once a year. Outlet to On a Mascot LX unit, the condensate trap is installed drain outside of the cabinet, so it should be easy to reach. Note that the condensate water can be hot. The water is also acidic, and can damage metal pipes. The center of the assembly includes a Nylon ball, which acts as a one-way Remov- check valve. If you remove the threaded part at the bot- able cap tom of the assembly, be careful not to lose this ball. for easy cleanout Fig. B14-1 - Condensate trap assembly (typical) Mascot LX Service Manual... -
Page 55: Pressure Relief Valve
5. The replacement valve must be the correct size and capacity to match the size of the Mascot LX unit. Check the old valve for two important numbers: Always re-install the drain pipe. If the pressure relief valve were to open without the drain pipe in place, •... -
Page 56: Direct Spark Ignition
Trying to light burner T2 on SIT High voltage, see next page for test procedure Flame sensor rod Burner is lit #10 on X3 on SIT to ±30 microamps ground Table B16-1 - Normal voltages in ignition system Mascot LX Service Manual... - Page 57 “call for heat”. 4. Carefully disconnect the large red wire running to the flame sensor. See Fig. B16-1. 5. Remove the two screws holding the flame sensor assembly in position. Now you can remove the as- sembly. Stand back and do not touch the spark rod assembly during this test - it will carry a dangerous high voltage. 6. The best way to clean the sensor is to use a dol- lar bill. The paper used in the bill is just abrasive enough to clean the sensor correctly, without remov- 7. When you power up the boiler you should see a bright ing the protective coating. blue spark between the spark rod and the ground rod. This indicates that the spark rod, ground rod, SIT con- 7. To reassemble, reverse the instructions listed earlier. troller, and gas pressure are all OK. Be sure to insert the mounting gasket correctly. 8. Power down the boiler again and check the clearance between the spark rod and the ground rod. See Fig. B16-3. The clearance should be 3/16” (5 mm). 9. If the assembly is damaged, replace it by reversing the instructions listed above. Remember to remove the jumper you installed to create the “call for heat.” Mascot LX Service Manual...
-
Page 58: Pump Problems
#6 - 7 DHW pump #8 - 9 Pump is Replace pump running? Bad bearings? Pump sounds Disassemble and/or replace pump different? Pump is Blocked pump or damaged impeller? moving some Disassemble and/or replace pump water? Mascot LX Service Manual... -
Page 59: Outdoor Reset
“Outdoor sensor not present”? Connections Check and tighten to outdoor sensor connections are OK? Replace sensor. OK now? Check the programming for Outdoor Reset. Go to Installer Mode. Check P61 through P64. See the instructions which follow. Mascot LX Service Manual... - Page 60 End Point for Outdoor Reset Correction - The SIT controller in the Mascot LX allows you to set the starting and stopping points for the Outdoor This is shown as point “B” on the chart.
-
Page 61: Low Water Cutoff Switch
Blink- Control failure Reset the Low Water Cutoff. See the procedure on the next page. If necessary, replace the Low Water Cutoff. No power to Low Water Cutoff Check the power source and connections Mascot LX Service Manual... - Page 62 The Low Water Cutoff can be reset without removing it • Hand-tighten only. Do not use a wrench. from the Mascot LX. • Be sure the wiring connector is seated firmly. 1. Remove the upper front panel on the Mascot LX. 2. Unplug the connector on the front of the Low Water Procedure - Cleaning the probe Cutoff.
-
Page 63: Dhw Problems - Combi Units (Mlxc)
DHW setpoint Reset DHW setpoint - P51 is correct? DHW priority time Check DHW priority time is correct? P49 and P50 Heat exchanger Flush the heat exchanger. is OK? Replace it if necessary. See Section B24. Mascot LX Service Manual... -
Page 64: Dhw Temperature Sensor
Fig. B21-1 - DHW High Temperature Limit Sensor Replacement procedure: 1. Turn off power to the system. Use the main disconnect switch mounted on the front panel. 2. Isolate the boiler. Turn off the water shutoff valves located upstream and downstream of the unit. 3. Drain the DHW piping. 4. Remove the rear cover. The DHW high temperature limit sensor is mounted in the lower right corner of the rear of the unit. See Fig. B21-1. 5. Unplug the wiring connector (two wires). The connector is locked in place by a “squeeze tab.” Press on the tab to release the connector. 6. Unscrew the sensor using a wrench. Turn counter-clockwise to unscrew the part. 7. To reassemble, reverse the process we have just described. Be sure to use pipe dope or Teflon® tape on the threaded part of the sensor. Mascot LX Service Manual... -
Page 65: Dhw Flow Sensor (Hall Sensor)
Tools and equipment required: • Adjustable wrench or combination wrench set • Pipe dope or Teflon® tape Replacement procedure: 1. Turn off power to the system. Use the main disconnect switch mounted on the front panel. 2. Isolate the boiler. Turn off the water shutoff valves located upstream and downstream of the unit. 3. Drain the DHW piping. 4. The DHW flow sensor is mounted in the lower rear of the unit. See Fig. B22-1. 5. Unplug the wiring connector (two wires). The connector is locked in place by a “squeeze tab.” Press on the tab to release the connector. 6. Unscrew the sensor using a wrench. Turn counter-clockwise to unscrew the part. 7. To reassemble, reverse the process we have just described. Be sure to use pipe dope or Teflon® tape on the threaded part of the sensor. Mascot LX Service Manual... -
Page 66: Three-Way Valve
Normally the valve is operated by a solenoid controlled by the SIT board. However, the valve also includes a 2. Shut off the gas supply to the unit. manual actuating arm which can be helpful during trou- 3. Isolate the boiler and drain it. bleshooting. The table below outlines the valve function. 4. Disconnect the two wires running to the back of the unit. Valve position Sends water to Arm position 5. Using the wrench, undo the unions on each side of Not energized Down the valve. Energized 6. Undo the union at the center of the assembly. At this To test the valve, move the actuator arm to check for point you will be able to remove the valve. free motion. Insert a jumper between terminals 8 and 7. To reassemble, reverse the instructions listed above. 9 on the high-voltage terminal strip. The valve should Check for leaks after assembly. actuate, and you should see the arm move. Mascot LX Service Manual... -
Page 67: Flat Plate Heat Exchanger
In some cases it is possible to pump a cleaning solution through the exchanger and revive it. (Laars recommends straight white vinegar for this purpose.) If this does not improve the performance, the exchanger must be replaced. Replacement Procedure: Fig. B24-1 - Flat Plate Water Heat Exchanger The heat exchanger on this unit has been designed to be easy to replace. At each end of the assembly, the piping is connected by quick-disconnects. See Fig. B24-2. To remove one of the fittings, first cut the black Ty-Wrap. Next, pull out the metal locking pin. To recon- nect, insert the locking pin, then install a new Ty-Wrap. Fig. B24-2 - Quick-Disconnects for Heat Exchanger Mascot LX Service Manual... -
Page 68: Hot Water Problems - Indirect Tank (Mlxh)
Hot Water Problems - Indirect Tank (MXLH) The Mascot LX can be set up to service an “indirect” hot water tank. The heat for the indirect tank is supplied by a loop off of the main central heat loop, as shown in Fig. B25-1. The DHW loop has its own DHW pump. The control input can be provided by an aquastat (see Sec- tion B26) or a DHW sensor (see Section B27). Fig. B25-1 - Arrangement for Indirect DHW Tank Mascot LX Service Manual... -
Page 69: B26 Dhw Problems - Indirect Tank With Aquastat (Mlxh)
Replace SIT control board - Section B30 DHW setpoint Reset DHW setpoint - P51 is correct? DHW priority time Reset DHW priority time is correct? P49 and P50 DHW pump See “Pump Problems” is OK? Section B17 Mascot LX Service Manual... -
Page 70: B27 Dhw Problems - Indirect Tank With Sensor (Mlxh)
Section B30 Some hot water DHW setpoint Reset DHW setpoint - P51 is correct? DHW priority Reset DHW priority time - time settings P49 and P50 are correct? DHW pump See “Pump Problems” is OK? Section B17 Mascot LX Service Manual... -
Page 71: Cascade Setup
Modbus Address Auto Configuration - Cascade Setpoint To configure the control system, identify which boiler is P08 Cascade Off Hysteresis going to be the “master” for the cascade. Go to Installer mode. Go to parameter P06 - “Cascade Address.” Set P09 Cascade On Hysteresis the address to “0”, and press and hold the OK/Select button. When “Auto Cfg” appears on the display, press Be sure that the value for P09 is always higher than the OK/Select to start the auto configuration process. The value for P08. controller will find all of the boilers connected to the system and assign Modbus addresses. When the auto configuration is complete, the display will say “boilr #”, where “#” is the number of boilers found on the cascade system. Fig. B28-1 - Modbus Connections Mascot LX Service Manual... -
Page 72: External Modulation Control (Bms)
Installer mode: P34 BMS Demand Off Differential Voltage P31 BMS Voltage at Minimum This arrangement eliminates the need for a separate T-T call. This allows a heat demand to be created ev- P32 BMS Voltage at Maximum ery time the 0 - 10V signal exceeds the value set for P33. The heat demand will remain until the 0 - 10V signal drops below the value set for P33 minus P34. BMS Controls Modulation (Fan Speed) - P25 0 - 10V to Power (enabled) P33 On Threshold Voltage P34 Off Hysteresis Voltage P35 BMS Rate at Minimum Voltage P36 BMS Rate at Maximum Voltage This is the default 0 - 10VDC configuration. The external signal directly corresponds to fan speed or boiler power. In this mode, the call is initiated by the 0- 10V input based on parameters P33 and P34. The modulation power can also be scaled using P35 and P36. Mascot LX Service Manual... -
Page 73: Replacing The Sit Control Board
2. Shut off all manual gas valves to the unit. 3. Remove the lower front panel. 4. Remove the two screws shown in Fig. B30-1. Fig. B30-3 - Standoffs Supporting Control Board 5. The front panel is hinged. Swing it down. Mascot LX Service Manual... - Page 74 8. The control board is supported on a set of six stand- offs. See Fig. B30-3. The easiest way to release the board is to work with the lower part of each standoff first - the part below or behind the board. With a pair of needle-nose pliers, press the two tabs together to release each standoff. After you have done this for all six standoffs, you will be able to remove the board. Once the board is free, you can use the pliers to squeeze the top of each standoff so you can remove it from the board. 9. To replace the board, repeat the steps listed above in the reverse order. Replace all of the connectors in their proper locations. Replace the standoffs on the new board. The connectors are keyed, so you cannot insert them backwards.) Mascot LX Service Manual...
-
Page 75: Annual Service Procedure
Annual Service Procedure The Mascot LX should be inspected at least once a year 3. Clean the condensate trap. See Section B14. If the by a qualified service technician. unit has a condensate neutralizer, be sure it is working. 1. Clear the area around the unit. Remove anything 4. - Page 76 Mascot LX Service Manual...
-
Page 77: Section C - Combustion Setup
CO , and the minimum amount of CO. To do this, you use two adjustments on the gas valve: the high- and low- fire CO adjustment screws. Mascot LX Service Manual... -
Page 78: Combustion Adjustment Procedure
Fig. C2-2 - Control display during “high fire” flue products at High Fire. To do this, the Mascot LX must be forced go to High Fire. Use the Up arrow 5. Next you need to measure the CO... - Page 79 OK/ Select button for 5 seconds. 9. Remember to remove the “call for heat” jumper from the low-voltage terminal strip. High-fire adjustment Low-fire adjustment Fig. C2-3 - High- and low-fire adjustments on gas valve Mascot LX Service Manual...
-
Page 80: Troubleshooting Combustion Problems
Gas supply problem. pressure OK? Check with gas company. Any gas leaks Check all gas connections. inside the unit? Interior of burner Clean burner and heat exchanger. is clean? See Section C4. Replace gas valve. See Section B13. Mascot LX Service Manual... -
Page 81: Cleaning The Burner And Heat Exchanger
Laars recommends the unit be inspected once a year, and cleaned if necessary. If a condensing boiler is oper- ated consistently at high temperatures, it may need to be cleaned more often. - Page 82 Be careful not to damage the white refractory material at 11. Remove the temporary hose connected to the con- the top and bottom of the heat exchanger. densate trap, and re-connect the condensate drain line. Mascot LX Service Manual...
-
Page 83: Appendix Sect. Title Page App1 Sit Parameter Codes
Inlet sensor error BLOCKING CODES Code Description General - setpoint reached, etc. Anti short cycling Outlet temperature too high Delta T (inlet to outlet) temperature differ- ence too high Flue temperature too high Line voltage too low Mascot LX Service Manual... -
Page 84: Notification Codes
Fan speed limited due to Delta T (inlet to outlet temperature difference) Fan speed limited due to flue tempera- ture Domestic hot water sensor not present (Combi boiler only). Hot water call will be blocked. Outdoor sensor not present Mascot LX Service Manual... -
Page 85: Installer Mode Parameters
Enabled 0 - 10V to outlet setpoint Disabled Alarm contact configuration Enabled Domestic hot water demand blocks system pump enable/ Disabled disable System pump always on enable/ disable Disabled 0 - 10V input enable/ disable Enabled Mascot LX Service Manual... - Page 86 Start hot water tank demand offset 6°F Block hot water demand offset (Combi units only) 12°F Unblock hot water demand offset (Combi units only) 20°F Minimum user setting hot water setpoint 60°F Maximum user setting hot water setpoint 140°F Mascot LX Service Manual...
- Page 87 Boost function time 0 sec. Boost function temperature step per period 0°F Minimum user setting central heat setpoint 32°F Maximum user setting central heat setpoint 190°F Block offset central heat demand 10°F Block hysteresis central heat demand 20°F Mascot LX Service Manual...
-
Page 88: App2 Ignition And Firing Sequence
It will modulate based on the system load and the control setpoints. 6. When the call for heat ends, or the set point is reached, the gas valve closes, and the flame goes out. 7. The fan continues to run in post-purge for 11 seconds. Mascot LX Service Manual... -
Page 89: App3 Wiring Diagrams
App3 Appendix 3 - Wiring Diagrams Mascot LX Service Manual... - Page 90 App3 Appendix 3 - Wiring Diagrams (continued) cont. Fig. App3-2 - 120V Wiring Diagram Mascot LX Service Manual...
- Page 91 Appendix 3 - Wiring Diagrams (continued) cont. High voltage field connections - Low voltage field connections - (located behind the inside lower panel) (located on the front of the inside lower panel) Fig. App3-3 - Terminal Connections Mascot LX Service Manual...
-
Page 92: App4 Gas Conversion Procedure
The qualified service agency is responsible for the proper and complete installation. The installa- tion is not proper and complete until the opera- tion of the converted appliance is checked as specified in the manufacturer’s instructions. Mascot LX Service Manual... - Page 94 20 Industrial Way, Rochester, NH 03867 • 800.900.9276 • 603.335.6300 • Fax 603.335.3355 1869 Sismet Road, Mississauga, Ontario, Canada L4W 1W8 • 905.238.0100 • Fax 905.366.0130 www.Laars.com Printed in U.S.A. © Laars Heating Systems 2014 Document 1371...
Need help?
Do you have a question about the Mascot LX and is the answer not in the manual?
Questions and answers