Table of Contents
Advertisement
Advertisement
Table of Contents

Related Manuals for Asus VA329HE


Summary of Contents for Asus VA329HE
- Page 1 VA329HE LCD Monitor User Guide...
- Page 2 Product warranty or service will not be extended if: (1) the product is repaired, modified or altered, unless such repair, modification of alteration is authorized in writing by ASUS; or (2) the serial number of the product is defaced or missing.
-
Page 3: Table Of Contents
Contents Contents ..............iii Notices ...............iv Safety information ............vi Care & Cleaning ............vii Takeback Services ............viii Welcome! ............1-1 Package contents ..........1-1 Monitor introduction ......... 1-2 1.3.1 Front view ..........1-2 1.3.2 Back view ..........1-3 Assembling the monitor base ......2-1 Detaching the arm/base (for VESA wall mount) .. -
Page 4: Notices
All ASUS products with the ENERGY STAR logo comply with the ENERGY STAR standard, and the power management feature is enabled by default. The monitor and computer are automatically set to sleep after 10 and 30 minutes of user inactivity. - Page 5 NOTE: Energy Star is NOT supported on FreeDOS and Linux-based operating system. Canadian Department of Communications Statement This digital apparatus does not exceed the Class B limits for radio noise emissions from digital apparatus set out in the Radio Interference Regulations of the Canadian Department of Communications.
-
Page 6: Safety Information
Safety information • Before setting up the monitor, carefully read all the documentation that came with the package. • To prevent fire or shock hazard, never expose the monitor to rain or moisture. • Never try to open the monitor cabinet. The dangerous high voltages inside the monitor may result in serious physical injury. -
Page 7: Care & Cleaning
Care & Cleaning • Before you lift or reposition your monitor, it is better to disconnect the cables and power cord. Follow the correct lifting techniques when positioning the monitor. When lifting or carrying the monitor, grasp the edges of the monitor. Do not lift the display by the stand or the cord. -
Page 8: Takeback Services
These documents are not part of the standard package. Takeback Services ASUS recycling and takeback programs come from our commitment to the highest standards for protecting our environment. We believe in providing solutions for our customers to be able to responsibly recycle our products, batteries and other components as well as the packaging materials. -
Page 9: Welcome
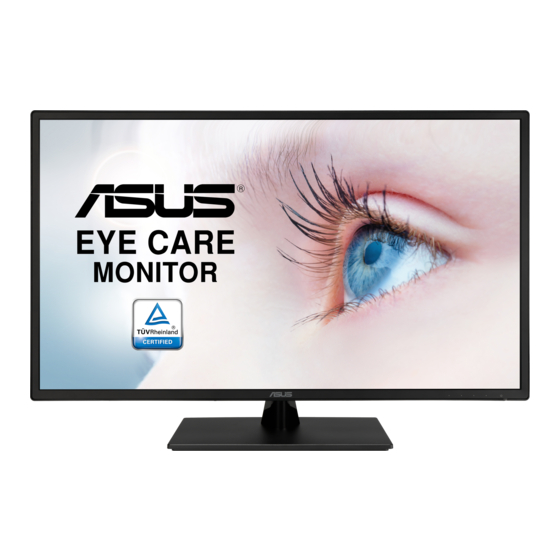
® Thank you for purchasing the ASUS LCD monitor! The latest widescreen LCD monitor from ASUS provides a broader, brighter and crystal-clear display, plus a host of features that enhance your viewing experience. With these features, you can enjoy the convenience and delightful visual... -
Page 10: Monitor Introduction
Monitor introduction 1.3.1 Front view Menu Close Input Select Brightness Power button/power indicator • Turns the monitor on/off. • The color definition of the power indicator is as the below table. Status Description White Amber Standby mode Menu button: • Press this button to display the OSD menu when the OSD is off. -
Page 11: Back View
HDMI-2 port. This port is for connection with an HDMI-2 compatible device. VGA port. This 15-pin port is for PC VGA connection. Earphone jack. This port is only available when an HDMI/DP cable is connected. Kensington lock slot. Control buttons. ASUS LCD Monitor VA329HE... -
Page 12: Assembling The Monitor Base
Assembling the monitor base To assemble the monitor base: Have the front of the monitor face down on a table. Attach the base into the arm, making sure the tab on the arm fits into the groove on the base. Fix the base to the arm by rotating the screw until it fits into place. -
Page 13: Adjusting The Monitor
Hold the stand to prevent the monitor from falling when you change its angle. • You can adjust the monitor’s angle from +8˚ to -5˚. -5°~+8° It is normal that the monitor slightly shakes while you adjust the viewing angle. ASUS LCD Monitor VA329HE... -
Page 14: Connecting The Cables
Connecting the cables Connect the cables as the following instructions: HDMI-1 HDMI-2 PHONE • To connect the power cord: Connect one end of the power cord securely to the monitor’s AC input port, the other end to a power outlet. •... -
Page 15: Osd (On-Screen Display) Menu
Each mode has the Reset selection, allowing you to maintain your setting or return to the preset mode. ASUS VA329 Splendid Standard Mode HDMI 1920x1080@60Hz Standard Mode Scenery Mode Theater Mode Game Mode Night View Mode sRGB Mode Reading Mode Darkroom Mode ASUS LCD Monitor VA329HE... - Page 16 In the Reading mode, the following function(s) are not user-configurable: Contrast, Saturation, Color Temp., Skin Tone, Sharpness, ASCR. Eye Care In this function, you can adjust settings to better protect your eyes. ASUS VA329 Eye Care Standard Mode HDMI 1920x1080@60Hz Blue Light Filter...
- Page 17 0 to 100. • This function is not available when sRGB Mode is selected in the Splendid menu. • This function is not available when Reddish or Yellowish is selected in the Skin Tone menu. ASUS LCD Monitor VA329HE...
- Page 18 Color Set a desired color setting from this menu. ASUS VA329 Color Standard Mode HDMI 1920x1080@60Hz Brightness Contrast Saturation Color Temp. Skin Tone • Brightness: The adjusting range is from 0 to 100. • Contrast: The adjusting range is from 0 to 100.
- Page 19 • ASCR: Turns on/off the ASCR (ASUS Smart Contrast Ratio) function. • FreeSync: Allows an AMD FreeSync supported* graphics source to dynamically adjust display refresh rate based on typical content frame rates for power efficient, virtually stutter free and low-latency display update (Only available for HDMI input).
- Page 20 System Setup Allows you to adjust the system. System Setup Standard Mode HDMI 1920x1080@60Hz Splendid Demo Mode Volume GamePlus QuickFit ECO Mode OSD Setup Language More • Splendid Demo Mode: Splits the screen into two for Splendid modes comparison. (Scenery mode only) •...
- Page 21 Information: Shows the monitor information. • Power Indicator: Turns the power LED indicator on/off. • • Power Key Lock: Enables or disables the power key. • All Reset: “Yes” allows you to restore the default settings. ASUS LCD Monitor VA329HE...
- Page 22 Shortcut Defines the functions for Shortcut 1 and 2 buttons. ASUS VA329 Shortcut Standard Mode HDMI 1920x1080@60Hz Shortcut 1 Shortcut 2 Shortcut 1/Shortcut 2: Selects a function for Shortcut 1 and 2 • buttons. When a certain function is selected or activated, your shortcut key may not support.
-
Page 23: Specifications Summary
727 x 479.7 x 202mm (with stand) Dimension (WxHxD) 727 x 424.6 x 69.8mm (without stand) 860 x 537 x 145 mm (package) Net Weight (Esti.) 7.1 kg Gross Weight (Esti.) 9.6 kg Specifications are subject to change without notice. ASUS LCD Monitor VA329HE... -
Page 24: Troubleshooting (Faq)
Troubleshooting (FAQ) Problem Possible Solution Power LED is not ON • Press the button to check if the monitor is in the ON mode. • Check if the power cord is properly connected to the monitor and the power outlet. •... -
Page 25: Supported Operating Modes
1440x900 55.94(N) 59.89(P) 106.5 1600x1200 75.00(P) 60.00(P) 1680x1050 65.29(N) 60.00(P) 146.25 1920x1080 67.5(P) 60.00(P) 148.5 1920x1080 74.97(N) 83.89(P) 174.5 * “P”, “N” stands for “Positive”, “Negative” polarity of incoming H-sync/V-sync (inpuft timing). Timing mode : ASUS LCD Monitor VA329HE 3-11... - Page 26 When the monitor is operating in the video mode (ie, not displaying data) using the HDMI connector, the following high definition modes shall be supported in addition to standard definition video. Horizational Vertical Pixel Rate Timing Name Pixel Format Frequency (kHz) Frequency (Hz) (MHz) 480p...
Need help?
Do you have a question about the VA329HE and is the answer not in the manual?
Questions and answers
does va329 have internal speakers, and does it support an external mic?
The Asus VA329HE does not have internal speakers and there is no mention of support for an external microphone.
This answer is automatically generated