Table of Contents
Advertisement
Quick Links
A10 Dethatcher Attachment
Operator's Manual
Assembly, Attaching, Removing, Operation, and Maintenance
Compatible with decks: 42", 48", and 52"
Please Read and Save These Instructions
For Safety, Read All Assembly and Operation Instructions
Beginning S/N: 2022-26755
Prior to Operating Attachment
P/N: 6605-16
Advertisement
Table of Contents

Related Manuals for Walker A10


Summary of Contents for Walker A10
- Page 1 A10 Dethatcher Attachment Operator’s Manual Assembly, Attaching, Removing, Operation, and Maintenance Compatible with decks: 42”, 48”, and 52” Please Read and Save These Instructions For Safety, Read All Assembly and Operation Instructions Beginning S/N: 2022-26755 Prior to Operating Attachment P/N: 6605-16...
- Page 2 Foreword Thank you. . .for purchasing a Walker A10 Dethatcher Attachment. Every effort has been made to provide you with the most reliable machine on the market, and we are sure you will be among our many satisfied customers. If for any reason this product does not perform to your expectations, please contact your local dealer.
-
Page 3: Table Of Contents
Storage ________________________ 13 Remove and Store the Dethatcher __________________________________ 13 End of Season _______________________________ 13 Maintenance ____________________ 13 Lubrication __________________________________ 14 Parts Lists and Diagrams _________ 15 Parts List (A10) ______________________________ 15 Parts Diagram (A10) __________________________ 16 Limited Warranty ________________ 18... -
Page 4: General Information
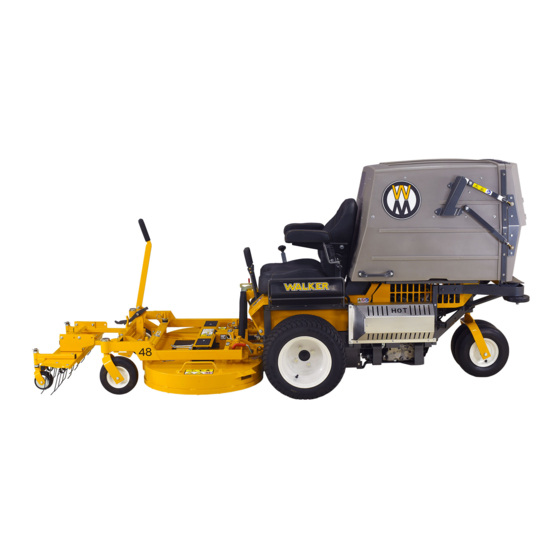
Walker Manufacturing recommends that any ser- vice requiring special training or tools be performed IDENTIFYING NUMBER LOCATIONS by an authorized Walker Mower Dealer. There are several general practices to be aware of in the The dethatcher serial number is affixed to the area of safety. - Page 5 1-970-221-5614 www.walker.com UNIT DESCRIPTION The A10 Dethatcher can be installed on the front of a 42 in., 48 in., or 52 in. gear-driven deck without any tools. It is compatible with decks that have the ex- tended forks to accommodate the big tire option available on the MB line.
-
Page 6: Specifications
Specifications Specifications MODEL Height in. (cm) 35.75 (91) Width in. (cm) 41 (104) Length in. (cm) 25 (64) Overall Length Installed on Tractor in. (cm) 107.75 (274) Weight lb (kg) 57 (26) NOTE: The manufacturer reserves the right to make changes in specifications shown herein at any time without notice or obligation. -
Page 7: Component Identification
Component Identification Optional Wall Mount Lift Lever (Foldable) Foot Trigger Mounting Channel Mount Channel Mount Bracket Carrier Frame LH Tray Mount Bracket RH Tray Mount Bracket Tine Tray Caster Wheel Mount Dethatching Caster Wheel Tines A10 Dethatcher Front View (Not Installed) -
Page 8: Safety Instructions
DANGER If you have any questions concerning setup, opera- tion, maintenance, or safety, please contact your authorized Walker Mower dealer or call Walker Man- An IMMEDIATE hazard that WILL result in se- ufacturing Company at (970) 221-5614. vere personal injury or DEATH, if warning is... -
Page 9: Operating
Safety Instructions met is advisable and required by some local ordi- WARNING nances and insurance regulations. 7. Prolonged exposure to loud noise can cause im- pairment or loss of hearing. Operator hearing This product expose protection is recommended. Wear a suitable chemicals including Phenylethane which is hearing protective device, such as earmuffs or known to the State of California to... -
Page 10: Maintenance
Safety Instructions 5. In case the transmission drive belt breaks during 14. Never adjust gauge wheels or skid shoes with operation, and if the machine is on a slope, the the engine running. Before adjusting height or machine will freewheel down the slope. servicing, disengage the PTO clutch, stop the engine, and remove the ignition key. - Page 11 Safety Instructions 6. Always use proper engine service manuals when working on the engine. Unauthorized maintenance operations or modifications to the engine may result in unsafe operating condi- tions. Altering the machine in any manner which ad- versely affects its operation, performance, du- rability or use will VOID the warranty and may cause hazardous conditions.
-
Page 12: Assembly And Installation
1.5 - 2 in. (3.8 - 5 cm) from the end to prevent them from slipping back through the The Walker Lawn Dethatcher will effectively dis- tines. The safety rod must be free to move lodge excessive thatch from your lawn. Thatch is a slightly from side to side. - Page 13 Assembly and Installation Install the foot trigger as shown in the Foot Trigger photo using the 5/16-18 x 1-3/4 Hex Bolt (F316), 5/16 x 1 x 7/64 Flat Washer (F170), Washer (F060) and 5/16-18 ESNA Nut (F020). The foot trigger should move freely after tightening the nut.
-
Page 14: Install The Dethatcher
Assembly and Installation INSTALL THE DETHATCHER ADJUST THE TINES Select a smooth, flat surface such as a drive- Check and adjust the dethatcher tine working height way, sidewalk, garage floor, etc. It is a simple on a flat surface. With the dethatcher mounted on procedure for attachment, with no tools re- the mower deck and the tines lowered into the work- quired. -
Page 15: Operating Instructions
Operating Instructions Operating Instructions FREE POSITION The dethatcher can be raised or lowered to engage, or disengage, the tines as desired. To engage the dethatcher, pull back on the lift lever. While holding the foot trigger, lower the dethatcher into the working position as shown in the Engaging Dethatcher photo. -
Page 16: Storage
Storage and Maintenance Storage Maintenance The Walker Lawn Dethatcher is nearly maintenance REMOVE AND STORE THE free. However, periodically grease will need to be DETHATCHER added to the grease fittings on the caster wheel mounts and the pivot points shown in “Lubrication”... -
Page 17: Lubrication
Maintenance LUBRICATION Ident Lubrication Location Type Places Caster Wheel Mounts Grease* Carrier Frame Pivot Foot Trigger Pivot Grease every twenty-five (25) hours. (3) Trigger Foot Pivot (1) Caster Wheel Mount Grease Fittings (2) Carrier Frame Pivot A10 Lubrication Points... -
Page 18: Parts Lists And Diagrams
Parts Lists and Diagrams PARTS LIST (A10) ITEM PART DESCRIPTION ITEM PART DESCRIPTION REQ’D REQ’D DT40A Dethatcher (40”) Fasteners 6605-9 Tine Tray F009 5/16-18 Whiz Locknut 6607-8 Carrier Frame F013 3/8-16 Whiz Locknut 6609-9 Mounting Bracket F017 5/16-18 Keps Nut... -
Page 19: Parts Diagram (A10)
PARTS DIAGRAM (A10) F013 F013 F013 F316 F013 F020 F060 F049 F170 F042 F020 F571 F571 F551 F316 F042 F551 F571 F255 F009 F571 F571 F316 F009 F009 F009 F255 F316 F009 F009 F017 F434 F170 F009 Beginning S/N 2022-26755 Use only genuine Walker replacement parts. - Page 20 MAINTENANCE AND SERVICE RECORD SHEET DATE SERVICE ENGINE ITEM HOURS ______________________________________________________________________________________________________________ ______________________________________________________________________________________________________________ ______________________________________________________________________________________________________________ ______________________________________________________________________________________________________________ ______________________________________________________________________________________________________________ ______________________________________________________________________________________________________________ ______________________________________________________________________________________________________________ ______________________________________________________________________________________________________________ ______________________________________________________________________________________________________________ ______________________________________________________________________________________________________________ ______________________________________________________________________________________________________________ ______________________________________________________________________________________________________________ ______________________________________________________________________________________________________________ ______________________________________________________________________________________________________________ ______________________________________________________________________________________________________________ ______________________________________________________________________________________________________________ ______________________________________________________________________________________________________________ ______________________________________________________________________________________________________________ ______________________________________________________________________________________________________________ ______________________________________________________________________________________________________________ ______________________________________________________________________________________________________________ ______________________________________________________________________________________________________________ ______________________________________________________________________________________________________________ ______________________________________________________________________________________________________________ ______________________________________________________________________________________________________________ ______________________________________________________________________________________________________________ ______________________________________________________________________________________________________________ ______________________________________________________________________________________________________________ ______________________________________________________________________________________________________________ ______________________________________________________________________________________________________________ ______________________________________________________________________________________________________________ ______________________________________________________________________________________________________________ ______________________________________________________________________________________________________________...
- Page 21 MAINTENANCE AND SERVICE RECORD SHEET DATE SERVICE ENGINE ITEM HOURS ______________________________________________________________________________________________________________ ______________________________________________________________________________________________________________ ______________________________________________________________________________________________________________ ______________________________________________________________________________________________________________ ______________________________________________________________________________________________________________ ______________________________________________________________________________________________________________ ______________________________________________________________________________________________________________ ______________________________________________________________________________________________________________ ______________________________________________________________________________________________________________ ______________________________________________________________________________________________________________ ______________________________________________________________________________________________________________ ______________________________________________________________________________________________________________ ______________________________________________________________________________________________________________ ______________________________________________________________________________________________________________ ______________________________________________________________________________________________________________ ______________________________________________________________________________________________________________ ______________________________________________________________________________________________________________ ______________________________________________________________________________________________________________ ______________________________________________________________________________________________________________ ______________________________________________________________________________________________________________ ______________________________________________________________________________________________________________ ______________________________________________________________________________________________________________ ______________________________________________________________________________________________________________ ______________________________________________________________________________________________________________ ______________________________________________________________________________________________________________ ______________________________________________________________________________________________________________ ______________________________________________________________________________________________________________ ______________________________________________________________________________________________________________ ______________________________________________________________________________________________________________ ______________________________________________________________________________________________________________ ______________________________________________________________________________________________________________ ______________________________________________________________________________________________________________ ______________________________________________________________________________________________________________...
- Page 22 MAINTENANCE AND SERVICE RECORD SHEET DATE SERVICE ENGINE ITEM HOURS ______________________________________________________________________________________________________________ ______________________________________________________________________________________________________________ ______________________________________________________________________________________________________________ ______________________________________________________________________________________________________________ ______________________________________________________________________________________________________________ ______________________________________________________________________________________________________________ ______________________________________________________________________________________________________________ ______________________________________________________________________________________________________________ ______________________________________________________________________________________________________________ ______________________________________________________________________________________________________________ ______________________________________________________________________________________________________________ ______________________________________________________________________________________________________________ ______________________________________________________________________________________________________________ ______________________________________________________________________________________________________________ ______________________________________________________________________________________________________________ ______________________________________________________________________________________________________________ ______________________________________________________________________________________________________________ ______________________________________________________________________________________________________________ ______________________________________________________________________________________________________________ ______________________________________________________________________________________________________________ ______________________________________________________________________________________________________________ ______________________________________________________________________________________________________________ ______________________________________________________________________________________________________________ ______________________________________________________________________________________________________________ ______________________________________________________________________________________________________________ ______________________________________________________________________________________________________________ ______________________________________________________________________________________________________________ ______________________________________________________________________________________________________________ ______________________________________________________________________________________________________________ ______________________________________________________________________________________________________________ ______________________________________________________________________________________________________________ ______________________________________________________________________________________________________________ ______________________________________________________________________________________________________________...
-
Page 23: Limited Warranty
(90) days. At Walker’s request, customer will make the defective part available for inspection by Walker and/or return the defective part to Walker, transportation charges prepaid. - Page 24 WALKER MFG. CO. • 5925 E. HARMONY ROAD, FORT COLLINS, CO 80528 • (970) 221-5614 FORM NO. 060322 PRINTED IN USA www.walker.com ©2022 WALKER MFG. CO...
Need help?
Do you have a question about the A10 and is the answer not in the manual?
Questions and answers