Table of Contents
Advertisement
Quick Links
Advertisement
Table of Contents

Subscribe to Our Youtube Channel
Related Manuals for Metronics Quadra-Chek 200


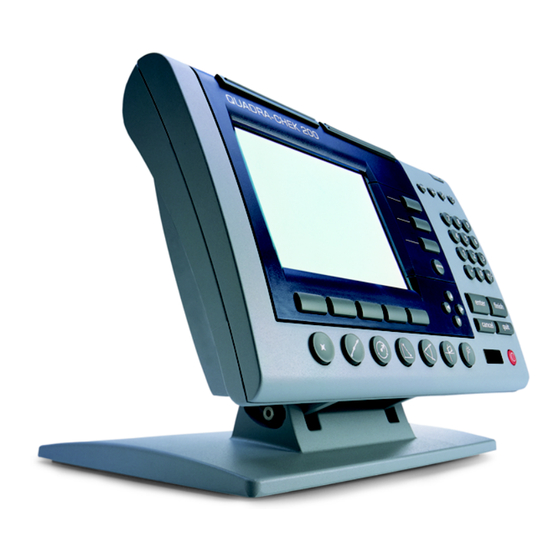
Summary of Contents for Metronics Quadra-Chek 200
- Page 1 ® Quadra-Chek User’s Guide...
- Page 3 ® Quadra-Chek User’s Guide Metronics, Inc. Bedford, New Hampshire, USA...
- Page 4 Metronics Inc. shall not be liable to the purchaser of this product or third parties for damages, losses, costs, or expenses incurred by the purchaser or third parties...
- Page 5 Location & Mounting The QC200 must be placed or mounted on a stable, reliable surface. If the QC200 should fall, it could become seriously damaged and more importantly could cause injuries to the user. For mounting instructions, refer to the Getting Started section of Chapter 3: Operation, for the mounting bolt hole pattern.
- Page 6 Backup Battery Charging The QC200 utilizes an internal battery to maintain system configuration set- tings during power interruptions. A battery circuit charges this backup battery during periods of normal operation. When the QC200 is used on a daily basis, the backup battery will be adequately charged to maintain configuration settings during power outages.
- Page 7 FCC Compliance Statement FCC Rule NP15R Rev. 23, June, 1989 This equipment has been tested and found to comply with the limits for a Class A digital device, pursuant to Part 15 of the FCC Rules. These limits are designed to provide reasonable protection against harmful interference when the equip- ment is operated in a commercial environment.
- Page 8 Guide Part Number: 11A10487 Printing History: April, 2000 First Printing Revision 1.0 June, 2000 Second Printing Revision 2.0 November, 2001 Third Printing Revision 3.0 Software Version: 1.23 Printed in the USA...
- Page 9 Keep this guide in a convenient location. Refer to it any time additional informa- tion about the use and operation of the QC200 is needed. Use the index to locate information by subject. Additional information related to this guide can be found on the Internet at www.metronics.com/help.html. Who Should Read This Guide This guide is intended for operators, technicians, supervisors, and dealer repre- sentatives.
- Page 10 This chapter contains additional information about quantization error, best fit algorithms, and repeatability. Conventions & Terms The terms Quadra-Chek 200, QC200 in this guide refer to the Quadra-Chek 200 digital readout. System refers to the QC200 and the measuring device connected to it.
- Page 11 Icons This guide uses the following icons to highlight information: Warning The raised hand icon warns of a situation or condition that can lead to personal injury or death. Do not proceed until the warning is read and thoroughly understood. Warning messages are shown in bold type. Caution The exclamation point icon indicates a situation or condition that can lead to equipment malfunction or damage.
- Page 12 (NLEC) if needed. Anytime the QC200 is connected to a different measuring device, it is necessary to perform configuration and setup again. Qualified supervisory personnel should refer to chapter 7: setup or contact their Metronics distributor for assis- tance. WARNING...
- Page 13 Contents Contents Contents Contents Contents Overview ............1-1 Specifications ....................1-5 Quick-Start Demonstration......2-1 Safety Reminders ..................2-2 Applying power .................... 2-3 Adjusting LCD tilt Adjusting LCD tilt ............................................Adjusting LCD tilt Adjusting LCD tilt Adjusting LCD tilt ............................................
- Page 14 Table of Contents Power-up screen Power-up screen ............................................Power-up screen Power-up screen ......................Power-up screen ............................................3-3 Adjusting LCD tilt Adjusting LCD tilt Adjusting LCD tilt ......................Adjusting LCD tilt Adjusting LCD tilt ......................................................................................3-4 Adjusting LCD contrast Adjusting LCD contrast ....................
- Page 15 Quadra-Chek ® QC200 T T T T T o measure a line o measure a line o measure a line ..........................................3-39 3-39 o measure a line o measure a line ................................................................3-39 3-39 3-39 Measuring circles Measuring circles Measuring circles Measuring circles...
- Page 16 Table of Contents T T T T T o perform a perpendicularity tolerance on a line o perform a perpendicularity tolerance on a line o perform a perpendicularity tolerance on a line ......................3-97 3-97 o perform a perpendicularity tolerance on a line o perform a perpendicularity tolerance on a line ............
- Page 17 Quadra-Chek ® QC200 Connections ....................5-3 Connecting fiber-optic cables ..................5-4 Connecting the screen sensor cable to the comparator ..........5-4 Connecting the reference cable ..................5-5 Checking the sensor light levels ..................5-6 T T T T T o check sensor cable light levels o check sensor cable light levels o check sensor cable light levels ..................
- Page 18 Table of Contents Ascii codes Ascii codes ................................................ 6-43 6-43 Ascii codes Ascii codes ........................Ascii codes ................................................ 6-43 6-43 6-43 Printer connections Printer connections Printer connections ...................... Printer connections Printer connections ..............................................................6-45 ...................... 6-45 6-45 6-45 6-45...
- Page 19 Quadra-Chek ® QC200 Reference ............7-1 Repeatability ....................7-2 Best Fit Algorithms ..................7-4 LSBF (lines and circles) LSBF (lines and circles) LSBF (lines and circles) LSBF (lines and circles) LSBF (lines and circles) ....................................................................................................7-4 ISO (lines and circles) ISO (lines and circles) ISO (lines and circles) .....................
- Page 20 Table of Contents Contents-8...
- Page 21 Chapter 1 Overview Metronics is the world’s premiere developer of metrology software and digital readouts for measuring and inspecting 2D and 3D geometric components. The Quadra-Chek 200 is an advanced digital readout system for 2, 3 and 4 axis ®...
- Page 22 The user interface retains many functions and features familiar to users of the Quadra-Chek 2000 and other Metronics products. In addition, more informa- ® tion is given to the operator via the graphic LCD display. Data is clearly pre- sented on one screen, eliminating the need to page or scroll for information.
- Page 23 Quadra-Chek ® QC200 Use the front panel keys to perform standard inspection tasks. Select measure- ment functions, change operation and display modes, enter numeric data, zero axes, turn the LCD display on/off, or send data to a printer or computer with the press of a button.
- Page 24 Chapter 1 Overview All front panel keys (except fast track keys) provide tactile sensory feedback. Additionally, supervisors can configure keys to provide audio feedback. The QC200 is equipped with a speaker and external speaker jack. Adjust speaker volume to suit the operating environment or plug a headset into the speaker jack. Transmit measurement data to a computer over the RS-232 port connection, or to a printer over the parallel or RS-232 port.
- Page 25 There are no user-serviceable parts inside. Contact your There are no user-serviceable parts inside. Contact your There are no user-serviceable parts inside. Contact your Metronics distributor for service. Metronics distributor for service. Metronics distributor for service. Metronics distributor for service.
- Page 26 Chapter 1 Overview...
- Page 27 Quick-Start Demonstration Before You Begin Use this chapter to learn the basic operation of the Quadra-Chek 200. The demonstrations in this chapter help experienced operators start using the QC200 immediately. Less experienced operators may need to read chapter 3: operation to understand some of the material in this chapter.
- Page 28 Chapter 2 Quick-Start Demonstration Safety Reminders Location and mounting Location and mounting Location and mounting Location and mounting Location and mounting Mount the QC200 on a stable surface. If it falls, serious damage or injury can result. Checking connections Perform routine inspections on all connections to the digital readout system. Keep connections clean and tight.
- Page 29 Quadra-Chek ® QC200 Applying power Move the power switch located on the back of the QC200 to the ON position. The system initializes and displays the power-up screen. Power Power Power Power Power-up screen -up screen -up screen -up screen -up screen The power-up screen is displayed each time the QC200 is turned on.
- Page 30 Chapter 2 Quick-Start Demonstration Adjusting LCD contrast Adjust the LCD contrast for optimum viewing of the DRO screen. Press the decimal point key to decrease contrast or the +/- key to increase contrast. Selecting measurement and display modes Use the mode selection keys located above the numeric keypad to choose mea- surement units, datums, and display coordinates.
- Page 31 Quadra-Chek ® QC200 Probing methods Probing methods Probing methods Probing methods Probing methods Probe features with crosshairs or optical edge detection. Align crosshairs on the desired point and press enter to take points. The crosshair probe indicator ap- pears on the upper right corner of the LCD as shown. Optical edge detection requires the user to ‘teach’...
- Page 32 Chapter 2 Quick-Start Demonstration Backward/forward annotation Backward/forward annotation Backward/forward annotation Backward/forward annotation Backward/forward annotation Use forward annotation to set the required number of points for each feature type. Use backward annotation to allow the operator to determine the number of points. When using forward annotation, the number of required points is shown on the top left corner of the screen.
- Page 33 Quadra-Chek ® QC200 Skewing the Part Accurate measurements require the part to be perfectly aligned on the coordi- nate measuring system. An imperfectly aligned part yields inaccurate measure- ments. Use the skew function to convert machine coordinates to part coordi- nates and compensate for part misalignment.
- Page 34 Chapter 2 Quick-Start Demonstration Step 3 Press the enter key. Step 4 Probe two more points along the line as shown. Press the enter key after each point. Step 5 Press the finish key.
- Page 35 Quadra-Chek ® QC200 The skew data screen is displayed and the skew is added to the feature list. The small skew icons displayed next to the X and Y axes indicate that the part is mechanically misaligned. An electronic alignment is applied to the skew line to compensate for the part skew.
- Page 36 Chapter 2 Quick-Start Demonstration Set the Datum All measurements are relative to the datum. The datum is the zero point or origin of the coordinate system. Establish a datum once the part is skewed. The simplest way to establish a datum is to zero the X and Y axes on a point. In the example below, the skew line and a second line are used to construct a point.
- Page 37 Quadra-Chek ® QC200 Step 3 Press the finish key. The result is displayed as shown. Steps 4 through 9 construct a point from line 2 and skew 1. See chapter 3: operation for more information about constructions. Step 4 Press the point key. Step 5 Press the constr (construct) soft key.
- Page 38 Chapter 2 Quick-Start Demonstration Step 6 Use the arrow keys to highlight line 2 as shown. Step 7 Press the enter key. A check mark appears next to the line 2 in the feature list and line 1 is now highlighted.
- Page 39 Quadra-Chek ® QC200 Step 9 Press the finish key. The constructed point appears in the feature list and is highlighted. Step 10 zeros the X and Y axes on the newly constructed point. Use the zero axes keys to establish a datum on any point feature. Step 10 Press the zero X and zero Y axes keys.
- Page 40 Chapter 2 Quick-Start Demonstration Measuring Lines The QC200 allows the user to probe up to 100 points while measuring a line. A minimum of two points are required to measure a line. Use more points for greater accuracy. A best-fit algorithm is applied to lines with more than two points.
- Page 41 Quadra-Chek ® QC200 Step 4 Probe two more points along the line as shown. Press the enter key after each point. Step 5 Press the finish key. 2-15...
- Page 42 Chapter 2 Quick-Start Demonstration The line feature data is displayed on the screen and added to the feature list. Press the view soft key for a graphic representation of the line feature. NOTE NOTE NOTE NOTE NOTE Press the Press the Press the change soft key change soft key change soft key...
- Page 43 Quadra-Chek ® QC200 Measuring Circles A minimum of three points are required to measure a circle. The QC200 allows the user to probe up to 100 points for circle measurements. Use more points for greater accuracy. A best-fit algorithm is applied to circles with more than three points.
- Page 44 Chapter 2 Quick-Start Demonstration Step 4 Probe three more points along the edge of the circle. Press the enter key after each point. NOTE NOTE NOTE NOTE NOTE Space points approximately 90 to 120 degrees apart for best Space points approximately 90 to 120 degrees apart for best Space points approximately 90 to 120 degrees apart for best Space points approximately 90 to 120 degrees apart for best Space points approximately 90 to 120 degrees apart for best...
- Page 45 Quadra-Chek ® QC200 The circle feature data will be displayed on the screen and the feature is added to the feature list. The circle feature data is displayed on the screen and added to the feature list. Press the view soft key for a graphic representation of the circle feature. NOTE NOTE NOTE...
- Page 46 Chapter 2 Quick-Start Demonstration Tolerancing The following tolerances are available on the QC200: NOTE NOTE NOTE NOTE NOTE Use the following example to learn how to perform tolerances Use the following example to learn how to perform tolerances Use the following example to learn how to perform tolerances Use the following example to learn how to perform tolerances Use the following example to learn how to perform tolerances with the QC200.
- Page 47 Quadra-Chek ® QC200 Step 2 Press the tol soft key. Step 3 Press the positional tolerance (pos) soft key to perform a positional tolerance. Step 4 Press the true position (TP) soft key. Step 5 Use the numeric keypad to enter the nominal values for X and Y. NOTE NOTE NOTE...
- Page 48 Chapter 2 Quick-Start Demonstration Step 6 Enter the nominal diameter. Step 7 Enter the tol zone of the circle as shown. NOTE NOTE NOTE NOTE NOTE tol zone (tolerance zone) tol zone (tolerance zone) tol zone (tolerance zone) of the circle is the radius within of the circle is the radius within of the circle is the radius within The tol zone (tolerance zone)
- Page 49 Quadra-Chek ® QC200 Step 8 Select limits or +/-. NOTE NOTE NOTE NOTE NOTE Use the Use the limits field limits field limits field to set upper and lower limits on a value. For to set upper and lower limits on a value. For to set upper and lower limits on a value.
- Page 50 Chapter 2 Quick-Start Demonstration The results for the tolerance are displayed as shown. Features that pass the tolerance are displayed with a check mark as shown. Failed features are displayed with a circled X and hollow fonts as shown. 2-24...
- Page 51 In general, users simply enter a series of points and the QC200 applies the appropriate geometric calculations to each feature. Use this chapter to learn how to operate the QC200 and maximize its capabilities. Demonstrations in this chapter use the Metronics ‘quickie’ slide to demonstrate typical two-dimension (X and Y axes) inspection. NOTE...
- Page 52 Chapter 3 Operation Getting Started Read and understand all safety and operating instructions before operating the QC200. To complete the tasks described in this chapter, users must understand the inspection process, the measuring device used, and the controls, indicators, and information presented on the QC200 display. NOTE NOTE NOTE...
- Page 53 Quadra-Chek ® QC200 Configuration & System Setup Only qualified supervisors and dealer representatives should perform system configuration and setup. Operators should not attempt to alter the configura- tion of the QC200. Applying power Move the power switch located on at the back of the QC200 to the ON posi- tion.
- Page 54 Chapter 3 Operation Adjusting LCD tilt Adjust the tilt angle of the QC200 for comfortable viewing. If necessary, loosen the two Allen screws at the base of the enclosure and tilt the QC200 to the desired angle. Tighten the Allen screws so the enclosure is held firmly but can be adjusted again without loosening.
- Page 55 Quadra-Chek ® QC200 Controls & Display There are several types of keys (buttons) located on the front of the QC200. • mode selection • feature selection • command keys • soft keys • fast keys • arrow keys • numeric keypad •...
- Page 56 Chapter 3 Operation mm/inch Use the mm/inch mode selection key to toggle the display units between milli- meters and inches. The current unit of measure is displayed in the upper right corner of the screen. Datum Use the datum mode selection key to toggle between datum 1 and datum 2. The current datum number is displayed in the upper right corner of the screen.
- Page 57 Quadra-Chek ® QC200 Polar coordinates describe the locations of points as a radial distance and angle from the datum. For example, a point given as (2, 60 degrees) is located by following a 2 unit radial distance from the datum (pole) at an angle of 60 degrees.
- Page 58 Chapter 3 Operation Circle Press the circle key once to measure one circle, or twice to use auto repeat to measure a series of circles. A minimum of three (max. 100) data points are required to measure a circle. Distance Press the distance key once to measure one distance, or twice to use auto repeat to measure a series of distances.
- Page 59 Quadra-Chek ® QC200 Soft keys There are five soft keys located beneath the LCD display. Soft keys correspond to the functions that appear above each key at the bottom of the LCD display. For example, the soft keys above correspond to the setup, program (prog), extra, clear, and edge functions.
- Page 60 Chapter 3 Operation Cancel Press the cancel key to erase the last point entered. The cancel key is also used to erase data in input fields such as on a setup screen or delete any highlighted feature from the feature list. Quit Press the quit key to abandon the current task and return to the DRO screen.
- Page 61 Quadra-Chek ® QC200 Fast track keys There are two programmable fast track keys located above the LCD display. By default the left fast track key is the same as the enter key and the right is the same as the finish key. Users can program either fast track key to perform any fre- quently used functions.
- Page 62 Chapter 3 Operation Send/print Press the send/print key to transmit measurement results to a computer or printer. LCD on/off Press the LCD on/off button to shut down the LCD display without removing power from the QC200. Press the button a second time to restore the LCD display.
- Page 63 Quadra-Chek ® QC200 Menus Setup menu Press the setup menu soft key to access the QC200 setup screens. Supervisors and dealer representatives use the setup menu to configure measure- ment, display, and communication parameters of the QC200. Use the arrow keys to highlight the desired setup screen.
- Page 64 Chapter 3 Operation The program menu contains a list of programs created by the user. Programs are prerecorded sequences of key-presses and measurements. Highlight the desired program in the list and press the run soft key to run a program. Recording programs is discussed in chapter 4.
- Page 65 Quadra-Chek ® QC200 DMS/DD Toggles the display of angles between degrees, minutes and seconds and decimal degrees. Highlight MCS to clear datums and re-establish machine coordinates. NOTE NOTE NOTE NOTE NOTE Previous datums cannot be recovered once machine coordinates Previous datums cannot be recovered once machine coordinates Previous datums cannot be recovered once machine coordinates Previous datums cannot be recovered once machine coordinates Previous datums cannot be recovered once machine coordinates...
- Page 66 Chapter 3 Operation Send X Select send X to send the X axis data to a printer or computer. Send Y Select send Y to send the Y axis data to a printer or computer. Send < Select send < to send angle measurement data to a printer or computer. Time Displays the current date and time.
- Page 67 Quadra-Chek ® QC200 Edge menu Pressing the edge soft key to display the edge detector soft keys. There are five edge detector soft keys: Teach Use the teach soft key to ‘teach’ the edge detector to recognize light-to-dark or dark-to-light transitions. D cal Distance calibrations (d cal) are performed by supervisors or dealer representa- tives during the installation of edge detector systems.
- Page 68 Chapter 3 Operation LCD screens The digital readout (DRO) screen shows the location of the axes prior to measur- ing a feature. Once the feature is measured there are two basic types of screens displayed by the QC200: data screens and graphic screens. Both data and graphic screens are associated with a feature.
- Page 69 Quadra-Chek ® QC200 DRO screen DRO screen DRO screen DRO screen DRO screen The DRO screen shows the current positions of axes, current units (mm/inch), current datum, current probe (crosshair or edge detector), and the feature list. Soft key assignments may or may not be shown across the bottom of the screen. Data screens Data screens display numeric feature data.
- Page 70 Chapter 3 Operation Press the view soft key to toggle the screen between data and graphic screens. Press the change soft key to select the desired algorithm used to calculate the feature. Press the tolerance (tol) soft key to perform a tolerance on the feature. Graphic screens Graphic screens display a graphic feature and numeric data.
- Page 71 Quadra-Chek ® QC200 There are five soft keys displayed on a graphic screen: recall, view, change, zoom, and tolerance (tol). Press the recall soft key to view the data screen of another feature. Press the view soft key to toggle the screen between data and graphic. Press the change soft key to select the desired algorithm used to calculate the feature.
- Page 72 Chapter 3 Operation Press the zoom soft key to zoom in/out of the graphic feature image. Press the increase (inc) soft key to zoom in on the graphic feature image. Press the decrease (dec) soft key to zoom out. Press the tolerance (tol) soft key to perform a tolerance on the feature. 3-22...
- Page 73 Quadra-Chek ® QC200 Features Features consist of data points obtained by probing the geometry of the part. For example, several points probed along the perimeter of a circle generate a graphic and numeric representation of the measured circle geometry. In this guide, a measured geometry is referred to as a feature.
- Page 74 Chapter 3 Operation Probing T Probing T echnique echnique Probing T Probing T Probing Technique echnique echnique Probe features with crosshairs or optical edge detection. Align crosshairs on the desired point and press enter to take points. The crosshair probe indicator ap- pears on the upper right corner of the LCD as shown.
- Page 75 Quadra-Chek ® QC200 To toggle between auto edge and manual edge detec- tion Step 1 Press the menu key. Step 2 Press the edge soft key. Step 3 Press the auto edge (auto e) soft key. The auto edge detection icon is shown on the left and the manual edge detection icon is on the right.
- Page 76 Chapter 3 Operation Backward/forward annotation Backward/forward annotation Backward/forward annotation Backward/forward annotation Backward/forward annotation Use forward annotation to require a specified number of points for each feature type. Use backward annotation to allow the operator to determine the number of points. When using forward annotation, the number of required points is shown on the top left corner of the screen.
- Page 77 Quadra-Chek ® QC200 Step 3 Use the arrow keys to highlight annot (annotation) in the list as shown. Step 4 Press the enter key. Forward annotation displays the required number of points as shown. NOTE NOTE NOTE NOTE NOTE This example of forward annotation required four points. For This example of forward annotation required four points.
- Page 78 Chapter 3 Operation Backward annotation displays the number of points as they are taken. 3-28...
- Page 79 Quadra-Chek ® QC200 If a feature requires a few additional points to ensure accuracy, press the bottom zero axis key to increase the required number of points for that measurement. Increasing the required points with the zero axis affects only the current measure- ment.
- Page 80 Chapter 3 Operation Skewing the part Accurate measurements require the part to be perfectly aligned on the coordi- nate measuring system. An imperfectly aligned part yields inaccurate measure- ments. Use the skew function to convert machine coordinates to part coordi- nates and compensate for part misalignment.
- Page 81 Quadra-Chek ® QC200 Step 4 Probe two more points along the line. Press the enter key after each point. Step 5 Press the finish key. The skew data screen is displayed and the skew is added to the feature list. Small skew icons are displayed next to the X and Y axes display.
- Page 82 Chapter 3 Operation Datum Datum Datum Datum Datum All measurements are relative to a datum. A datum is the zero point or origin of the coordinate system. Establish a datum once the part is skewed. The simplest way to establish a datum is to zero the X and Y axes on a point. In the example below, the skew line and a second line are used to construct a point.
- Page 83 Quadra-Chek ® QC200 Step 2 Probe a minimum of two points along the line as shown. Press the enter key after each point. Step 3 Press the finish key. The result is displayed as shown. Steps 4 through 9 construct a point from line 2 and skew 1. See chapter 3: operation for more information about constructions.
- Page 84 Chapter 3 Operation Step 4 Press the point key. Step 5 Press the constr (construct) soft key. Step 6 Use the arrow keys to highlight line 2 as shown. Step 7 Press the enter key. 3-34...
- Page 85 Quadra-Chek ® QC200 A check mark appears next to the line 2 in the feature list and line 1 is now highlighted. NOTE NOTE NOTE NOTE NOTE In this example, skew 1 is the next feature for the construction In this example, skew 1 is the next feature for the construction In this example, skew 1 is the next feature for the construction In this example, skew 1 is the next feature for the construction In this example, skew 1 is the next feature for the construction...
- Page 86 Chapter 3 Operation Step 10 Press the zero X and zero Y axis keys. When both axes are zeroed the screen appears as shown. The datum is complete. 3-36...
- Page 87 Quadra-Chek ® QC200 Measuring Features Use the measurement procedures in this section to measure points, lines, circles, angles, and distances. To measure a feature, press the desired feature selection key, probe the required points, and press the finish key. For example, to measure a circle press the circle key, probe a minimum of three points, and press the finish key.
- Page 88 Chapter 3 Operation Measuring points Points are the simplest features to probe. Only one point is required to define the location. A maximum of two points can be probed to measure a single point. The QC200 averages the points to produce the resulting point feature. To measure a point Step 1 Press the point key.
- Page 89 Quadra-Chek ® QC200 Measuring lines The QC200 allows the user to probe up to 100 points while measuring a line. A minimum of two points are required to measure a line. Use more points for greater accuracy. A best-fit algorithm is applied to lines with more than two points to determine location.
- Page 90 Chapter 3 Operation The display shows the points as they are entered. Step 5 Press the finish key. The line feature data is displayed on the screen and added to the feature list. Press the view soft key for a graphic representation of the line feature. NOTE NOTE NOTE...
- Page 91 Quadra-Chek ® QC200 Measuring circles A minimum of three points are required to measure a circle. The QC200 allows the user to probe up to 100 points for circle measurements. Use more points for greater accuracy. A best-fit algorithm is applied to circles with more than three points.
- Page 92 Chapter 3 Operation Step 4 Probe three more points along the edge of the circle. Press the enter key after each point. NOTE NOTE NOTE NOTE NOTE Space points approximately 90 to 120 degrees apart for best Space points approximately 90 to 120 degrees apart for best Space points approximately 90 to 120 degrees apart for best Space points approximately 90 to 120 degrees apart for best Space points approximately 90 to 120 degrees apart for best...
- Page 93 Quadra-Chek ® QC200 The circle feature data is displayed on the screen and added to the feature list. Press the view soft key for a graphic representation of the circle feature. NOTE NOTE NOTE NOTE NOTE Press the Press the Press the change soft key change soft key change soft key...
- Page 94 Chapter 3 Operation Measuring distances Distances are actually relationships between two features. Two points are re- quired to measure a distance. Users can probe two points to measure a distance but it is more common to construct a distance from previously measured fea- tures.
- Page 95 Quadra-Chek ® QC200 Step 4 Highlight the second circle in the features list as shown. Step 5 Press the enter key. Step 6 Press the finish key. The distance feature data is displayed on the screen and added to the feature list. The distance results screen displays the length of the distance as L and shows the distance traveled by the X and Y axes.
- Page 96 Chapter 3 Operation Measuring angles Angles are measured by probing points on the two lines (legs) that make up the angle. Up to 100 points can be probed on each line. A minimum of two points (per leg) is required. Use more points for greater accuracy. When more than two points are probed on any line, a best-fit algorithm determines the location of the line and a form (F ) value is calculated the line.
- Page 97 Quadra-Chek ® QC200 Step 4 Probe the second point as shown in step 2. Press the enter key to enter the point. Step 5 Press the finish key. The first leg of the angle is displayed in the features list as shown. Steps 6 through 9 measure the second leg of the angle and complete the angle measurement.
- Page 98 Chapter 3 Operation The probe angle screen is displayed as shown. Step 7 Press the enter key. Step 8 Probe the second point on the second leg as shown in step 6. Press the enter key to enter the point. Step 9 Press the finish key.
- Page 99 Quadra-Chek ® QC200 Press the change soft key to select a different angle result. There are four possible results from any angle measurement. The included angle is the default result. Use the illustration below to help you choose the desired angle result. The illustrations below show how the different angles appear on the screen.
- Page 100 Chapter 3 Operation Using Measure Magic Measure magic is a time saving feature that recognizes the geometric pattern of data points. Use measure magic to automatically measure point, line, and circle features. To use measure magic, press the measure magic key, probe the desired points, and press the finish key.
- Page 101 Quadra-Chek ® QC200 To measure a circle using measure magic NOTE NOTE NOTE NOTE NOTE This demonstration shows how to use measure magic to measure This demonstration shows how to use measure magic to measure This demonstration shows how to use measure magic to measure This demonstration shows how to use measure magic to measure This demonstration shows how to use measure magic to measure a circle.
- Page 102 Chapter 3 Operation Step 3 Probe the second point as shown in step 2. The X and Y coordinates are dis- played as shown. Step 4 Probe the third point as shown in step 2. The X and Y coordinates are displayed as shown.
- Page 103 Quadra-Chek ® QC200 The circle feature data is displayed on the screen and added to the feature list. Press the view soft key for a graphic representation of the circle feature. 3-53...
- Page 104 Chapter 3 Operation To measure a series of features using measure magic and auto repeat Step 1 Press the measure magic key twice. The probe features screen is displayed as shown. Steps 2 and 3 measure a point. Step 2 Probe the desired point as shown.
- Page 105 Quadra-Chek ® QC200 The probe features screen is displayed as shown. Step 3 Press the finish key. The point appears in the features list and the probe features screen is displayed as shown. Steps 4 through 6 measure a line. Step 4 Probe the first point as shown.
- Page 106 Chapter 3 Operation The probe features screen is displayed as shown. Step 5 Probe the second point as shown in step 4. The probe features screen is displayed as shown. NOTE NOTE NOTE NOTE NOTE Up to 100 points can be probed when using measure magic to Up to 100 points can be probed when using measure magic to Up to 100 points can be probed when using measure magic to Up to 100 points can be probed when using measure magic to...
- Page 107 Quadra-Chek ® QC200 Steps 7 through 10 measure a line. Step 7 Probe the first point. The X and Y coordinates are displayed as shown. Step 8 Probe the second point as shown in step 7. The X and Y coordinates are dis- played as shown.
- Page 108 Chapter 3 Operation Step 9 Probe the third point as shown in step 7. The probe features screen is displayed as shown. NOTE NOTE NOTE NOTE NOTE Up to 100 points can be probed when using measure magic to Up to 100 points can be probed when using measure magic to Up to 100 points can be probed when using measure magic to Up to 100 points can be probed when using measure magic to Up to 100 points can be probed when using measure magic to...
- Page 109 Quadra-Chek ® QC200 Changing feature types Occasionally, measure magic produces a different feature than the user intends. This is usually the result of unevenly spaced points. For example, measure magic might recognize three points but not be able to tell if the user intended a line or a circle.
- Page 110 Chapter 3 Operation Step 3 Press the desired soft key to change the feature. The feature is changed from a line to a circle as shown. NOTE NOTE NOTE NOTE NOTE In this example, graphic view screens are shown to illustrate the In this example, graphic view screens are shown to illustrate the In this example, graphic view screens are shown to illustrate the In this example, graphic view screens are shown to illustrate the...
- Page 111 Quadra-Chek ® QC200 Creating Features It is sometimes useful to create features that are not found on the part geometry. Created features are often used as reference points for inspection purposes. For example, a feature on a part might be referenced to a point off the part geometry. In that situation, the user needs to create the reference point.
- Page 112 Chapter 3 Operation Step 3 Use the numeric keypad to enter the X and Y coordinates of the point. Step 4 Press the finish key. The point feature data is displayed on the screen and added to the feature list. Press the view soft key for a graphic representation of the point feature.
- Page 113 Quadra-Chek ® QC200 To create a line Step 1 Press the line key. Step 2 Press the create soft key. Step 3 Use the numeric keypad to enter the point coordinates for the first point. Step 4 Enter the desired angle. 3-63...
- Page 114 Chapter 3 Operation Step 5 Press the finish key. The line feature data is displayed on the screen and added to the feature list. Press the view soft key for a graphic representation of the line feature. 3-64...
- Page 115 Quadra-Chek ® QC200 To create a circle Step 1 Press the circle key. Step 2 Press the create soft key. Step 3 Use the numeric keypad to enter the point coordinates for the center point. 3-65...
- Page 116 Chapter 3 Operation Step 4 Enter the desired radius. NOTE NOTE NOTE NOTE NOTE Press the diameter (diam) soft key to enter a diameter instead Press the diameter (diam) soft key to enter a diameter instead Press the diameter (diam) soft key to enter a diameter instead Press the diameter (diam) soft key to enter a diameter instead Press the diameter (diam) soft key to enter a diameter instead of a radius.
- Page 117 Quadra-Chek ® QC200 To create a distance Step 1 Press the distance key. Step 2 Press the create soft key. Step 3 Use the numeric keypad to enter the size for the X and Y axes. For example, the distance shown here has an X axis size of 1 mm and a Y axis size of 1mm. NOTE NOTE NOTE...
- Page 118 Chapter 3 Operation The distance feature data is displayed on the screen and added to the feature list. Press the view soft key for a graphic representation of the distance feature. 3-68...
- Page 119 Quadra-Chek ® QC200 To create an angle Step 1 Press the angle key. Step 2 Press the create soft key. Step 3 Use the numeric keypad to enter the point coordinates for the vertex. Step 4 Use the numeric keypad to enter the desired angle. 3-69...
- Page 120 Chapter 3 Operation Step 5 Press the finish key. The angle feature data is displayed on the screen and added to the feature list. Press the view soft key for a graphic representation of the angle feature. 3-70...
- Page 121 Quadra-Chek ® QC200 To create a skew Step 1 Press the skew key. Step 2 Press the create soft key. Step 3 Use the numeric keypad to enter the point coordinates for the vertex. Step 4 Use the numeric keypad to enter the desired angle. 3-71...
- Page 122 Chapter 3 Operation Step 5 Press the finish key. The skew feature data is displayed on the screen and added to the feature list. Press the view soft key for a graphic representation of the skew feature. 3-72...
- Page 123 Quadra-Chek ® QC200 Constructing Features New features can be constructed from probed, created, or constructed features in the features list. Essentially, constructions use previously measured features to build new features. Construct features by pressing the desired feature selection key. For example, press the circle key to construct a circle.
- Page 124 Chapter 3 Operation Using the recall soft key It is sometimes inconvenient to scroll through the features list using the arrow keys. This is particularly true when there are many features in the features list. The recall soft key is a handy way to select a feature without scrolling through the entire features list.
- Page 125 Quadra-Chek ® QC200 Step 5 Press the recall soft key. Step 6 Use the numeric keypad to enter the feature number of the second feature used in the construction. This construction uses circle 4 from the features list. Step 7 Press the enter key.
- Page 126 Chapter 3 Operation Constructing a skew Skew lines are commonly constructed from features on a part. Any construction that produces a line can be used to construct a skew. Check the construction chart in this section for a list of all line constructions. The procedure below shows how to skew a part from two previously measured circles.
- Page 127 Quadra-Chek ® QC200 Step 4 Press the enter key. Step 5 Highlight the next feature in the features list. Step 6 Press the enter key. Step 5 Press the finish key. The constructed skew feature is displayed on the screen and added to the feature list.
- Page 128 Chapter 3 Operation Point Constructions 3-78...
- Page 129 Quadra-Chek ® QC200 Line Constructions 3-79...
- Page 130 Chapter 3 Operation Circle Constructions 3-80...
- Page 131 Quadra-Chek ® QC200 Distance Constructions NOTE NOTE NOTE NOTE NOTE Distance constructions between circles are center-to-center by Distance constructions between circles are center-to-center by Distance constructions between circles are center-to-center by Distance constructions between circles are center-to-center by Distance constructions between circles are center-to-center by change soft key change soft key default.
- Page 132 Chapter 3 Operation Deleting Features Users can delete features from the features list individually or delete the entire list. Deleted features cannot be restored. Make certain that features are no longer required before deleting them. The QC200 requires users to verify the intent to delete features before actually deleting them..
- Page 133 Quadra-Chek ® QC200 The feature is removed from the features list. 3-83...
- Page 134 Chapter 3 Operation To delete all features from the features list NOTE NOTE NOTE NOTE NOTE Any skews or datums established on the QC200 remain until Any skews or datums established on the QC200 remain until Any skews or datums established on the QC200 remain until Any skews or datums established on the QC200 remain until Any skews or datums established on the QC200 remain until new skew and datums are established by the user...
- Page 135 Quadra-Chek ® QC200 Step 4 Press the yes soft key. NOTE NOTE NOTE NOTE NOTE no soft key no soft key no soft key if you do not wish to delete the feature Press the Press the Press the Press the Press the no soft key no soft key if you do not wish to delete the feature...
- Page 136 Chapter 3 Operation Deleting a Skew Use the clear soft key to delete a skew. Skew features compensate for part misalign- ment. NOTE NOTE NOTE NOTE NOTE Deleting the skew restores the QC200 to machine coordinates. Deleting the skew restores the QC200 to machine coordinates. Deleting the skew restores the QC200 to machine coordinates.
- Page 137 Quadra-Chek ® QC200 The following dialog box is displayed. Step 4 Press the yes soft key. NOTE NOTE NOTE NOTE NOTE Press the Press the Press the no soft key no soft key no soft key no soft key no soft key if you do not wish to delete the skew. if you do not wish to delete the skew.
- Page 138 Chapter 3 Operation To delete all features, datums, and skews NOTE NOTE NOTE NOTE NOTE Use the Use the Use the clear all soft key clear all soft key clear all soft key clear all soft key to restore the QC200 to machine clear all soft key to restore the QC200 to machine to restore the QC200 to machine...
- Page 139 Quadra-Chek ® QC200 Step 4 Press the yes soft key. NOTE NOTE NOTE NOTE NOTE no soft key no soft key no soft key if you do not wish to delete the features, Press the Press the Press the Press the Press the no soft key no soft key if you do not wish to delete the features,...
- Page 140 QC200. Step-by-step procedures are available for every with the QC200. Step-by-step procedures are available for every with the QC200. Step-by-step procedures are available for every with the QC200. Step-by-step procedures are available for every tolerance at http://www.metronics.com/help.html. tolerance at http://www.metronics.com/help.html. tolerance at http://www.metronics.com/help.html. tolerance at http://www.metronics.com/help.html.
- Page 141 Quadra-Chek ® QC200 Point Tolerances To perform a true position tolerance on a point NOTE NOTE NOTE NOTE NOTE Version 1.22 of the QC200 software shows true position Version 1.22 of the QC200 software shows true position Version 1.22 of the QC200 software shows true position Version 1.22 of the QC200 software shows true position Version 1.22 of the QC200 software shows true position tolerancing as RFS tolerancing.
- Page 142 Chapter 3 Operation Step 4 Enter the nominal values for X and Y. NOTE NOTE NOTE NOTE NOTE Until the user enters nominal values, the QC200 displays the Until the user enters nominal values, the QC200 displays the Until the user enters nominal values, the QC200 displays the Until the user enters nominal values, the QC200 displays the Until the user enters nominal values, the QC200 displays the actual coordinates in the nominal X and Y fields.
- Page 143 Quadra-Chek ® QC200 Step 6 Press the finish key. The tolerance results are displayed as shown. 3-93...
- Page 144 Chapter 3 Operation Line Tolerances To perform a bi-directional tolerance on a line Step 1 Highlight a line in the features list as shown. Step 2 Press the tol soft key. Step 3 Press the pos soft key to perform a positional tolerance. Step 4 Press the BiDir soft key.
- Page 145 Quadra-Chek ® QC200 Step 5 Select +/- or limits as shown. NOTE NOTE NOTE NOTE NOTE Limits allows the user to set upper and lower limits on a value. Limits allows the user to set upper and lower limits on a value. Limits allows the user to set upper and lower limits on a value.
- Page 146 Chapter 3 Operation Step 7 Enter the X axis tolerance (+/-) or limits. Step 8 Enter the Y axis tolerance (+/-) or limits. Step 9 Press the finish key. The results for the tolerance are displayed as shown. 3-96...
- Page 147 Quadra-Chek ® QC200 To perform a perpendicularity tolerance on a line NOTE NOTE NOTE NOTE NOTE Use the perpendicularity tolerance to verify that a line is Use the perpendicularity tolerance to verify that a line is Use the perpendicularity tolerance to verify that a line is Use the perpendicularity tolerance to verify that a line is Use the perpendicularity tolerance to verify that a line is perpendicular to a given feature within a specified tolerance...
- Page 148 Chapter 3 Operation Step 4 Press the perpendicular (perp) soft key. Step 5 Enter the desired tolerance zone value. Step 6 Enter the feature number of the desired reference feature. NOTE NOTE NOTE NOTE NOTE A reference feature must be measured before the feature to be A reference feature must be measured before the feature to be A reference feature must be measured before the feature to be A reference feature must be measured before the feature to be...
- Page 149 Quadra-Chek ® QC200 Step 7 Press the finish key. The tolerance results are displayed as shown. 3-99...
- Page 150 Chapter 3 Operation To perform a form tolerance on a line NOTE NOTE NOTE NOTE NOTE The form tolerance for a line is a straightness tolerance. The form tolerance for a line is a straightness tolerance. The form tolerance for a line is a straightness tolerance. The form tolerance for a line is a straightness tolerance.
- Page 151 Quadra-Chek ® QC200 Step 4 Enter the desired tolerance zone value. Step 5 Press the finish key. The tolerance results are displayed as shown. 3-101...
- Page 152 Chapter 3 Operation Circle Tolerances To perform a true position tolerance on a circle NOTE NOTE NOTE NOTE NOTE Version 1.22 of the QC200 software shows true position Version 1.22 of the QC200 software shows true position Version 1.22 of the QC200 software shows true position Version 1.22 of the QC200 software shows true position Version 1.22 of the QC200 software shows true position tolerancing as RFS tolerancing.
- Page 153 Quadra-Chek ® QC200 Step 4 Press the true position soft key. Step 5 Enter the nominal values for X and Y. NOTE NOTE NOTE NOTE NOTE Until the user enters nominal values, the QC200 displays the Until the user enters nominal values, the QC200 displays the Until the user enters nominal values, the QC200 displays the Until the user enters nominal values, the QC200 displays the Until the user enters nominal values, the QC200 displays the...
- Page 154 Chapter 3 Operation Step 7 Use the numeric keypad to enter the desired tolerance zone in the tol zone field as shown. NOTE NOTE NOTE NOTE NOTE tol zone (tolerance zone) tol zone (tolerance zone) The tol zone (tolerance zone) tol zone (tolerance zone) tol zone (tolerance zone) of the circle is the radius within of the circle is the radius within...
- Page 155 Quadra-Chek ® QC200 Step 9 Enter the diameter tolerance (+/-) or limits. Step 10 Press the finish key. The results for the tolerance are displayed as shown. 3-105...
- Page 156 Chapter 3 Operation To perform a MMC tolerance on a circle Step 1 Highlight the desired circle in the features list. Step 2 Press the tolerance (tol) soft key. Step 3 Press the positional (pos) soft key. Step 4 Press the MMC soft key. 3-106...
- Page 157 Quadra-Chek ® QC200 Step 5 Use the soft keys to choose boss if tolerancing a pin or bore if tolerancing a hole. Step 6 Enter the desired nominal values for the X and Y coordinates. Step 7 Enter the desired nominal diameter value. 3-107...
- Page 158 Chapter 3 Operation Step 8 Enter the desired tolerance zone for the X and Y coordinates. NOTE NOTE NOTE NOTE NOTE X and Y nominal coordinates represent the nominal location of X and Y nominal coordinates represent the nominal location of X and Y nominal coordinates represent the nominal location of X and Y nominal coordinates represent the nominal location of X and Y nominal coordinates represent the nominal location of...
- Page 159 Quadra-Chek ® QC200 Step 10 Enter the desired diameter tolerance values. Step 11 Press the finish key. The tolerance results are displayed as shown. 3-109...
- Page 160 Chapter 3 Operation To perform a concentricity tolerance on a circle NOTE NOTE NOTE NOTE NOTE Concentricity relates the location of the toleranced circle to the Concentricity relates the location of the toleranced circle to the Concentricity relates the location of the toleranced circle to the Concentricity relates the location of the toleranced circle to the Concentricity relates the location of the toleranced circle to the location of a reference circle.
- Page 161 Quadra-Chek ® QC200 Step 4 Enter the desired tolerance zone value. The tolerance zone is a radius from the center point of the reference feature. The center point of the tolerance circle must lie within the tolerance zone to pass the tolerance. Step 5 Enter the desired reference feature number.
- Page 162 Chapter 3 Operation About the runout tolerance Like the concentricity tolerance, the runout tolerance requires the use of a refer- ence feature. Use any feature that shares its center point with the toleranced circle. Generally, the reference feature is a circle but a point co-located with the center of the toleranced circle works as well.
- Page 163 Quadra-Chek ® QC200 Step 2 Press the tolerance (tol) soft key. Step 3 Press the runout soft key. Step 4 Enter the desired tolerance zone value. Step 5 Enter the desired reference feature number. 3-113...
- Page 164 Chapter 3 Operation Step 6 Press the finish key. The tolerance results are displayed as shown. 3-114...
- Page 165 Quadra-Chek ® QC200 Distance Tolerances To perform a width tolerance on a distance Step 1 Highlight the desired distance in the features list. Step 2 Press the tolerance (tol) soft key. Step 3 Press the width soft key. 3-115...
- Page 166 Chapter 3 Operation Step 4 Select limits or +/-. NOTE NOTE NOTE NOTE NOTE Limits allow the user to set upper and lower limits on a value. Limits allow the user to set upper and lower limits on a value. Limits allow the user to set upper and lower limits on a value.
- Page 167 Quadra-Chek ® QC200 Step 6 Enter the nominal length. Step 7 Enter the +/- tolerance values for the X and Y coordinates as shown. Step 8 Enter the +/- tolerance values for the length as shown. Step 9 Press the finish key. 3-117...
- Page 168 Chapter 3 Operation The tolerance results are displayed as shown. 3-118...
- Page 169 Quadra-Chek ® QC200 Angle Tolerances To perform an angle tolerance Step 1 Highlight the desired angle in the features list. Step 2 Press the tolerance (tol) soft key. Step 3 Press the angle soft key. 3-119...
- Page 170 Chapter 3 Operation Step 4 Select limits or +/-. NOTE NOTE NOTE NOTE NOTE Limits allow the user to set upper and lower limits on a value. Limits allow the user to set upper and lower limits on a value. Limits allow the user to set upper and lower limits on a value.
- Page 171 Quadra-Chek ® QC200 Step 7 Enter the nominal value of the angle. Step 8 Press the finish key. The tolerance results are displayed as shown. 3-121...
- Page 172 Chapter 3 Operation 3-122...
- Page 173 Chapter 4 Programming The QC200 programming capability automates repetitive inspection tasks. Pro- grams are inspection sequences recorded by users and stored in the QC200. Using programs saves time by reducing the amount of key-presses required by the user. For example, a circle requires at least five key-presses (circle key, enter key for each point, and finish key).
- Page 174 Chapter 4 Programming Sample Program It is a good idea to plan the part inspection before recording a program. Look at the part drawing to identify the required measurements and determine the points required for each feature. Choose a measurement order that is efficient and practical for your application.
- Page 175 Quadra-Chek ® QC200 Step 3 Press the record soft key. Step 4 Use the numeric keypad to enter the desired program number, then press the OK soft key. NOTE NOTE NOTE NOTE NOTE If there are any datum/skew features in the system the following If there are any datum/skew features in the system the following If there are any datum/skew features in the system the following If there are any datum/skew features in the system the following...
- Page 176 Chapter 4 Programming Steps 5 through 8 clear old features, datums, and skews from the features list. NOTE NOTE NOTE NOTE NOTE It is a good practice to clear all features and skews before It is a good practice to clear all features and skews before It is a good practice to clear all features and skews before It is a good practice to clear all features and skews before It is a good practice to clear all features and skews before...
- Page 177 Quadra-Chek ® QC200 Steps 9 through 11 establish a skew line Step 9 Press the skew key. Step 10 Probe the skew line as shown. Press enter to take each point. Step 11 Press the finish key. The skew results appear as shown.
- Page 178 Chapter 4 Programming Steps 12 through 14 measure a line feature. Step 12 Press the line key. Step 13 Probe the line as shown. Press enter to take each point. Step 14 Press the finish key. The line results appear as shown.
- Page 179 Quadra-Chek ® QC200 Steps 15 through 20 construct a point and zero the X and Y axes on that point. Step 15 Press the point key. Step 16 Press the construct (constr) soft key. Step 17 Highlight line 2 in the features list as shown and press enter. Step 18 Highlight skew 1 in the features list as shown and press enter.
- Page 180 Chapter 4 Programming Step 19 Press the finish key. The point results appear as shown. Step 20 Press the X and Y zero axes keys. The datum is now set at the intersection of skew 1 and line 2. Steps 20 through 22 measure a circle feature Step 21 Press the circle key.
- Page 181 Quadra-Chek ® QC200 Step 22 Probe the circle as shown. Press enter to take each point. Step 23 Press the finish key. The circle results appear as shown.
- Page 182 Chapter 4 Programming Steps 24 through 27 tolerance the circle for form. NOTE NOTE NOTE NOTE NOTE Any tolerance can be inserted into a program. See Any tolerance can be inserted into a program. See Any tolerance can be inserted into a program. See chapter 3: chapter 3: chapter 3: chapter 3:...
- Page 183 Quadra-Chek ® QC200 The tolerance results appear as shown. Steps 28 through 31 complete the recording of the program. Step 28 Press the finish key. Step 29 Press the menu key. Step 30 Press the program (prog) soft key. Step 31 Press the end record (end rec) soft key.
- Page 184 Chapter 4 Programming Running a program It is a good idea to test a program after you record it. This gives you an opportu- nity to make certain all required measurements and tolerances are included. If anything is missing, use the program editing functions to correct the program. Select the desired program from those listed on the programs screen.
- Page 185 Quadra-Chek ® QC200 Step 3 Highlight the desired program as shown. Step 4 Press the run soft key. NOTE NOTE NOTE NOTE NOTE The run indicator is displayed on the upper right corner of the The run indicator is displayed on the upper right corner of the The run indicator is displayed on the upper right corner of the The run indicator is displayed on the upper right corner of the The run indicator is displayed on the upper right corner of the...
- Page 186 Chapter 4 Programming NOTE NOTE NOTE NOTE NOTE This step displays the program graphically This step displays the program graphically This step displays the program graphically This step displays the program graphically This step displays the program graphically. The plus (+) sign .
- Page 187 Quadra-Chek ® QC200 Editing Programs Edit programs to change, insert, or delete steps. There are a variety of reasons to edit programs. A program may contain an error or omission. For example, a feature may have been left out or measured from the wrong reference frame. Part specifications may change and editing an existing program is often faster than creating an entirely new program.
- Page 188 Chapter 4 Programming Step 4 Press the edit soft key. The edit screen displays the contents of the highlighted program. 4-16...
- Page 189 Quadra-Chek ® QC200 Viewing compressed steps Program steps are sometimes compressed to save space on the edit screen. Com- pressed steps are displayed with a plus (+) sign in front of them as shown. In this example, step 18 contains all the steps required to construct the datum point.
- Page 190 Chapter 4 Programming The expanded step is displayed as shown. Notice that steps 19 through 21 are now displayed. Use the above procedure to view the sub-steps in any com- pressed step. Program properties step Program properties is a set of basic parameters for each program. Users can edit program properties using the soft keys.
- Page 191 Quadra-Chek ® QC200 Print tolerance (tol) results Press the never soft key to never print the tolerance results. Press the if fail soft key to print the results if a tolerance fails. Press the if pass soft key to print the results if a tolerance passes.
- Page 192 Chapter 4 Programming NOTE NOTE NOTE NOTE NOTE In this example, the clear features parameter is highlighted. In this example, the clear features parameter is highlighted. In this example, the clear features parameter is highlighted. In this example, the clear features parameter is highlighted. In this example, the clear features parameter is highlighted.
- Page 193 Quadra-Chek ® QC200 Units Use the units system setting to select the desired units of measure for the program. Press the edit soft key to toggle between millimeters and inches. Mode Use the mode system setting to select the desired coordinate display for the pro- gram.
- Page 194 Chapter 4 Programming Step 3 Highlight the desired setting. NOTE NOTE NOTE NOTE NOTE In this example, the mode system setting is highlighted. In this example, the mode system setting is highlighted. In this example, the mode system setting is highlighted. In this example, the mode system setting is highlighted.
- Page 195 Quadra-Chek ® QC200 To edit a feature measurement step Step 1 Use the arrow keys to highlight the desired measurement step as shown. Step 2 Press the edit soft key. The step expands to show the compressed steps indented under the segment heading.
- Page 196 Chapter 4 Programming Inserting new steps Sometimes, a critical step is inadvertently left out of a program. For example, a required tolerance might have been forgotten. In this case, simply use the edit functions to insert the tolerance as a new step. The example below adds a new line measurement to an existing program.
- Page 197 Quadra-Chek ® QC200 Step 3 Perform the new step. NOTE NOTE NOTE NOTE NOTE In this example a new line measurement is added to the program. In this example a new line measurement is added to the program. In this example a new line measurement is added to the program. In this example a new line measurement is added to the program.
- Page 198 Chapter 4 Programming The new line measurement step is added to the program as shown. 4-26...
- Page 199 Quadra-Chek ® QC200 To delete a program step CAUTION CAUTION CAUTION CAUTION CAUTION Deleted steps cannot be restored. Think carefully before deleting Deleted steps cannot be restored. Think carefully before deleting Deleted steps cannot be restored. Think carefully before deleting Deleted steps cannot be restored.
- Page 200 Chapter 4 Programming Copying programs Copy and edit existing programs to save time instead of creating new programs for similar parts. Use the editing functions to change, insert, or delete program steps to accommodate the new part. To copy a program Step 1 Press the menu key.
- Page 201 Quadra-Chek ® QC200 Step 5 Press the yes soft key. NOTE NOTE NOTE NOTE NOTE Press the no soft key to abort the copy process. Press the no soft key to abort the copy process. Press the no soft key to abort the copy process. Press the no soft key to abort the copy process.
- Page 202 Chapter 4 Programming The new program is added to the list of programs. Edit the copied program to accommodate the new part. 4-30...
- Page 203 Quadra-Chek ® QC200 Deleting programs Delete programs when longer needed to conserve system memory and make space for new programs. To delete a program CAUTION CAUTION CAUTION CAUTION CAUTION Deleted programs cannot be restored. Think carefully before Deleted programs cannot be restored. Think carefully before Deleted programs cannot be restored.
- Page 204 Chapter 4 Programming Step 5 Press the yes soft key. NOTE NOTE NOTE NOTE NOTE Press the Press the Press the no soft key no soft key no soft key no soft key no soft key to abort the deletion process. to abort the deletion process.
- Page 205 Chapter 5 Edge Detectors Use optical edge detection to increase throughput, accuracy, repeatability and reduce operator fatigue. Optical edge detection recognizes light-to-dark or dark- to-light edge crossings on projection-based measuring machines. Each time a light-to-dark (or dark-to-light) is detected the QC200 identifies a point. Manual edge detection Manual optical edge detection recognizes light-to-dark or dark-to-light edge transitions.
- Page 206 Chapter 5 Edge Detectors Step 3 Press the auto edge (auto e) soft key. The selected edge detection mode is indicated on the upper right portion of the screen. The auto edge detection icon appears as shown. The manual edge detection icon appears as shown.
- Page 207 Quadra-Chek ® QC200 Connections There are two fiber-optic cables that connect the QC200 to the optical compara- tor. One cable mounts over the view screen and detects light-to-dark (or dark-to- light) transitions. Press the curved metal tip of the cable through the hole in the plastic mounting plate on the view screen.
- Page 208 Chapter 5 Edge Detectors Connecting fiber-optic cables Connect fiber-optic cables to the QC200 first and then connect to the compara- tor. Fiber-optic cable connections are located on the back panel of the QC200. The sensor cable connector is marked with a crosshair icon and the reference cable connector is marked with a light bulb icon.
- Page 209 Quadra-Chek ® QC200 Connecting the reference cable Point the reference sensor directly at the comparator lamp. Consult the compara- tor manufacturer’s information for specific mounting instructions. CAUTION CAUTION CAUTION CAUTION CAUTION Avoid mounting fiber-optic cables next to the lamp. High Avoid mounting fiber-optic cables next to the lamp.
- Page 210 Chapter 5 Edge Detectors Checking the sensor light levels Check fiber-optic cables and light sensors before using the edge detector. Light levels received by the sensor and reference cables are displayed on the optical edge detection install screen as shown. Adjust light levels by moving the sensors. To check sensor cable light levels NOTE NOTE...
- Page 211 Quadra-Chek ® QC200 Step 4 Position the sensor cable is positioned over a light area of the comparator screen The light levels screen appears as shown. Screen levels generally range from 500 to 4000. Reference levels generally range from 1000 to 2000.
- Page 212 Disconnect the screen sensor cable from the QC200 and shine a flashlight into the sensor cable connector . The screen level should rise. If the light level rises, check cables for wear. If the light level does not rise, contact your Metronics distributor.
- Page 213 Quadra-Chek ® QC200 Edge Detector Calibration Perform the following calibrations before operating the edge detector: • Teach • Distance cal • Cross cal Use teach to calibrate the edge detector to recognize light and dark areas of the comparator screen. Use the distance calibration (d. cal) to calibrate the edge detector to accurately read irregular or fuzzy edges.
- Page 214 Chapter 5 Edge Detectors Step 3 Press the teach soft key to perform the calibration. The user is prompted to place the edge detector sensor over a dark area of the comparator screen. Step 4 Place the edge detector sensor over a dark area. Step 5 Press the enter key.
- Page 215 Quadra-Chek ® QC200 Step 6 Place the edge detector sensor over a light area. Step 7 Press the enter key. The teach calibration is complete. Test the edge detector over a few transitions to verify the teach calibration was successful. 5-11...
- Page 216 Chapter 5 Edge Detectors Distance calibration (d. cal) It is not necessary to perform a distance calibration unless measuring parts with poorly defined edges. Perform a distance calibration to fine tune the edge detec- tor for irregular edges. Parts with rounded edges or thick parts require distance calibrations.
- Page 217 Quadra-Chek ® QC200 Step 4 Place the edge detector sensor over a dark area. Step 5 Press the enter key. The user is prompted to place the edge detector sensor over a light area of the comparator screen. Step 6 Place the edge detector sensor over a light area.
- Page 218 Chapter 5 Edge Detectors The user is prompted to enter the standard’s size. Step 10 Use the numeric keypad to enter the standard’s size. Step 11 Press the enter key. The user is prompted to press the enter key and measure a distance using the edge detector.
- Page 219 Quadra-Chek ® QC200 Step 12 Measure the distance of the standard. NOTE NOTE NOTE NOTE NOTE See chapter 3: operation for information on measuring distances. See chapter 3: operation for information on measuring distances. See chapter 3: operation for information on measuring distances. See chapter 3: operation for information on measuring distances.
- Page 220 NOTE NOTE NOTE NOTE Use the Metronics Quickie slide for the cross calibration. Use the Metronics Quickie slide for the cross calibration. Use the Metronics Quickie slide for the cross calibration. Use the Metronics Quickie slide for the cross calibration.
- Page 221 Quadra-Chek ® QC200 Step 4 Measure the circle. NOTE NOTE NOTE NOTE NOTE Use the largest circle on the slide. See chapter 3: operation for Use the largest circle on the slide. See chapter 3: operation for Use the largest circle on the slide. See chapter 3: operation for Use the largest circle on the slide.
- Page 222 Chapter 5 Edge Detectors 5-18...
- Page 223 Metronics has not evaluated their compatibility..Metronics has not evaluated their compatibility Metronics has not evaluated their compatibility Contact your Metronics distributor to purchase a RS-232 cable if you do not have one. The cable part number is 11B12176. Connections...
- Page 224 Chapter 6 Communications To connect to a PC using the RS-232 cable NOTE NOTE NOTE NOTE NOTE T T T T T urn off the power to both the PC and the QC200 before urn off the power to both the PC and the QC200 before urn off the power to both the PC and the QC200 before urn off the power to both the PC and the QC200 before urn off the power to both the PC and the QC200 before...
- Page 225 Quadra-Chek ® QC200 Using HyperTerminal Use HyperTerminal to connect a computer to the QC200 and transfer data to the computer. HyperTerminal uses the RS-232 ports on the computer and the ® QC200 and is included on most Windows PCs. To connect to a computer using HyperTerminal Steps 1 through 15 describe how to set up HyperTerminal to receive data from the QC200.
- Page 226 Chapter 6 Communications Step 3 Click OK. Step 4 Select the desired port (direct to com1 or direct to com2) from the connect using list box. Step 5 Click OK.
- Page 227 Quadra-Chek ® QC200 Step 6 Enter the port settings as shown. Port settings: Bits per second: 9600 Data bits: Parity: None Stop bits: Flow control: Hardware NOTE NOTE NOTE NOTE NOTE Use the same port settings on the QC200. See steps 15 through Use the same port settings on the QC200.
- Page 228 Chapter 6 Communications Step 8 Click on the file menu and select properties.
- Page 229 Quadra-Chek ® QC200 Step 9 Click on the settings tab and match the following settings: • Terminal keys • Set emulation to auto detect • Set backscroll buffer lines to 100 Leave the remaining settings as is. Click the ASCII setup button when finished.
- Page 230 Chapter 6 Communications Step 10 Match the following settings: • Check echo typed characters locally • Enter 0 milliseconds for line delay • Enter 0 milliseconds for character delay • Check append line feeds to incoming line ends • Check wrap lines that exceed terminal width Step 11 Click OK.
- Page 231 Quadra-Chek ® QC200 Step 12 Click OK. Step 13 Click on the file menu and select save as... in the HyperTerminal application.
- Page 232 Chapter 6 Communications Step 14 Type the desired file name and click save. Steps 15 through 21 describe how to set up the QC200 to send data to HyperTerminal. Step 15 Press the menu key. Step 16 Press the setup soft key. 6-10...
- Page 233 Quadra-Chek ® QC200 Step 17 Highlight ports in the list as shown. Step 18 Enter the following RS-232 port settings. Port settings: Baud: 9600 Word length: Stop bits: Parity: None Handshake: Hardware Step 19 Set the RS-232 data field to either display, report, or tolerance (tol rpt) report. 6-11...
- Page 234 Chapter 6 Communications Step 20 Highlight the parallel data field and press the none soft key. Step 21 Press the finish key twice. 6-12...
- Page 235 Quadra-Chek ® QC200 To send data from the QC200 to HyperTerminal Step 1 Press the send/print key. NOTE NOTE NOTE NOTE NOTE Users can also select print options from the Users can also select print options from the extra menu extra menu extra menu .
- Page 236 Use SPC-IV to connect a computer to the QC200 and transfer data to the computer. Like HyperTerminal, SPC-IV uses the RS-232 ports on the com- puter and the QC200 to send data to a spreadsheet. Contact your Metronics distributor to purchase SPC-IV for your computer.
- Page 237 Quadra-Chek ® QC200 Step 3 Click on create data set. Step 4 Click on the gage cursor icon as shown. 6-15...
- Page 238 Chapter 6 Communications Step 5 Click options. Step 6 Enter 0 in the ignore first text box and click OK. Step 7 Click on settings. 6-16...
- Page 239 Quadra-Chek ® QC200 Match the communications settings as shown: Settings: Baud rate: 9600 Data bits: Stop bits: Parity: None Flow Control: Hardware Port: COM 1 or COM 2 (as connected) Step 8 Click OK. 6-17...
- Page 240 Chapter 6 Communications Step 9 Click save. Step 10 Type the desired name. 6-18...
- Page 241 Quadra-Chek ® QC200 Step 11 Click OK. 6-19...
- Page 242 Chapter 6 Communications Step 12 Set the following cursor options: • Select data 1 in the columns list • Enter 3 in the start at row text box Step 13 Click OK. 6-20...
- Page 243 Quadra-Chek ® QC200 NOTE NOTE NOTE NOTE NOTE Adjust d Adjust d Adjust d Adjust d Adjust data column width if necessary to view data. ata column width if necessary to view data. ata column width if necessary to view data. ata column width if necessary to view data.
- Page 244 Chapter 6 Communications Step 17 Highlight ports in the list as shown. Step 18 Enter the following RS-232 port settings. Port settings: Baud: 9600 Word length: Stop bits: Parity: None Handshake: Hardware Step 19 Set the RS-232 data field to display. 6-22...
- Page 245 Quadra-Chek ® QC200 Step 20 Highlight the parallel data field and press the none soft key. Step 21 Press the finish key twice. The QC200 is now set up to send data to the SPC-IV application. 6-23...
- Page 246 Chapter 6 Communications To send data to SPC-IV Step 1 Press the send/print key. NOTE NOTE NOTE NOTE NOTE Users can also select print options from the Users can also select print options from the extra menu extra menu . Press extra menu .
- Page 247 QC200 and transfer data to the ® computer. WinWedge uses the RS-232 ports on the computer and the QC200 to send data to a spreadsheet or other applications. Contact your Metronics ® distributor to purchase WinWedge for your computer.
- Page 248 Chapter 6 Communications Step 3 Type EXCEL in the application title bar text box as shown. NOTE NOTE NOTE NOTE NOTE T T T T T ype the name of the application that will receive the QC200 ype the name of the application that will receive the QC200 ype the name of the application that will receive the QC200 ype the name of the application that will receive the QC200 ype the name of the application that will receive the QC200...
- Page 249 Quadra-Chek ® QC200 Step 6 Enter the following settings: • Connector: COM 1 or COM2 (as connected) • Baud rate: 9600 • Parity: None • Data bits: • Stop bits: • Flow control: Hardware • Buffer size: Step 7 Click OK. 6-27...
- Page 250 Chapter 6 Communications Step 8 Click on the define menu... and choose input data record structure. Step 9 Select Carriage Return or CrLf Received Step 10 Click on continue. 6-28...
- Page 251 Quadra-Chek ® QC200 Step 11 Select single field data records. Step 12 Click on continue. 6-29...
- Page 252 Chapter 6 Communications Step 13 Select numeric from the filter list as shown. Step 14 Type {DOWN} in the field postamble keystrokes text box. NOTE NOTE NOTE NOTE NOTE Leave the Leave the Leave the record preamble keystrokes field record preamble keystrokes field record preamble keystrokes field record preamble keystrokes field blank.
- Page 253 Quadra-Chek ® QC200 The WinWedge ® connection window appears. Steps 16 through 22 describe how to set up the QC200 to send data to WinWedge ® Step 16 Press the menu key. Step 17 Press the setup soft key. Step 18 Highlight ports in the list as shown.
- Page 254 Chapter 6 Communications Step 19 Enter the following RS-232 port settings. Port settings: Baud: 9600 Word length: Stop bits: Parity: None Handshake: Hardware Step 20 Set the RS-232 data field to display. Step 21 Highlight the parallel data field and press the none soft key. 6-32...
- Page 255 Quadra-Chek ® QC200 Step 22 Press the finish key twice. ® The QC200 is now set up to send data to the WinWedge application. 6-33...
- Page 256 Chapter 6 Communications ® To send data to WinWedge Step 1 Press the send/print key. NOTE NOTE NOTE NOTE NOTE Users can also select print options from the Users can also select print options from the extra menu extra menu . Press extra menu .
- Page 257 Quadra-Chek ® QC200 Printed Reports Use the QC200 to generate printed reports of inspection results. Press the send/ print key to print reports. There are two QC200 report formats: report and tolerance report. Reports Reports contain measurement results for each feature in the feature list. Feature results include: •...
- Page 258 Chapter 6 Communications Step 3 Highlight ports as shown. NOTE NOTE NOTE NOTE NOTE Use the arrow keys to highlight the desired field. Use the arrow keys to highlight the desired field. Use the arrow keys to highlight the desired field. Use the arrow keys to highlight the desired field.
- Page 259 Quadra-Chek ® QC200 Step 6 Press the finish key twice. The printer port is now set up to print reports. 6-37...
- Page 260 Chapter 6 Communications To print a report Step 1 Press the send/print key. The generated report appears as shown. Reports are shown in 32, 40, and 80 column width formats. Use the print setup screen to change report widths. See chapter 7: setup for information.
- Page 261 Quadra-Chek ® QC200 6-39...
- Page 262 Chapter 6 Communications Tolerance reports Tolerance reports contain tolerance results for toleranced features in the features list. Tolerance results include: • Feature number • Type of tolerance • Actual dimensions • Nominal dimensions • High & low limits • Bonus/reference To set up a printer to print tolerance reports NOTE NOTE...
- Page 263 Quadra-Chek ® QC200 NOTE NOTE NOTE NOTE NOTE Use the arrow keys to highlight the desired field. Use the arrow keys to highlight the desired field. Use the arrow keys to highlight the desired field. Use the arrow keys to highlight the desired field. Use the arrow keys to highlight the desired field.
- Page 264 Chapter 6 Communications To print a tolerance report Step 1 Press the send/print key. The generated tolerance report appears as shown. All tolerance reports are in 80 column width format. 6-42...
- Page 265 Quadra-Chek ® QC200 Ascii codes Use ascii character codes to adjust the format of printed reports. Insert the desired ascii character codes in the preline, post line, and post form fields of the print setup screen. For example, use ascii character codes to insert a line feed and carriage return command as shown here.
- Page 266 Chapter 6 Communications 6-44...
- Page 267 Quadra-Chek ® QC200 Printer connections Connect the QC200 to a printer via the printer port or the RS-232 port. Use the printer port to connect to a parallel printer and use the RS-232 port to connect to a serial printer. See the illustration at the beginning of this chapter to locate the printer and RS-232 ports.
- Page 268 Chapter 6 Communications Step 6 Highlight the ports field as shown. Step 7 Enter the following RS-232 port settings. Port settings: RS-232 data: None Parallel data: Display, report, or tolerance (tol rpt) report Step 8 Press the finish key twice. The parallel printer is connected to the QC200.
- Page 269 Quadra-Chek ® QC200 To connect to a serial printer NOTE NOTE NOTE NOTE NOTE Shut off power to the printer and the QC200 while connecting Shut off power to the printer and the QC200 while connecting Shut off power to the printer and the QC200 while connecting Shut off power to the printer and the QC200 while connecting Shut off power to the printer and the QC200 while connecting the printer cable.
- Page 270 Chapter 6 Communications Step 8 Enter the following RS-232 port settings. Port settings: Bits per second: 9600 Word length: Parity: None Stop bits: Flow control: Hardware EOL delay: 125,000 EOC delay: 10,000 Parallel data: None Step 9 Highlight the print field as shown. 6-48...
- Page 271 Quadra-Chek ® QC200 Step 10 Enter the following print settings. Print settings: Form feed: Post line: 10 13 NOTE NOTE NOTE NOTE NOTE 10 (line feed) 10 (line feed) 13 (carriage return) 13 (carriage return) Use ascii character codes Use ascii character codes Use ascii character codes Use ascii character codes Use ascii character codes 10 (line feed)
- Page 272 Chapter 6 Communications Keyboard Commands Use keyboard commands to operate the QC200 via a computer connection. Keyboard commands can perform the task of any button on the front of the QC200. For example, typing keyboard command KEY 33 in HyperTerminal is the same as pressing the enter key.
- Page 273 Supervisor password Enter the supervisor password on the supervisor setup screen to access password restricted setup fields. Contact your Metronics distributor to receive your pass- word. Limit password use to operators or supervisors properly trained to change the QC200 setup.
- Page 274 NOTE NOTE NOTE NOTE Contact your Metronics distributor to receive your password. Contact your Metronics distributor to receive your password. Contact your Metronics distributor to receive your password. Contact your Metronics distributor to receive your password. Contact your Metronics distributor to receive your password.
- Page 275 Quadra-Chek ® QC200 Step 5 Enter the supervisor password as shown. Step 6 Press the finish key. All password restricted setup fields can now be accessed.
- Page 276 Chapter 7 Setup Setup Screens Press the menu key and then the setup soft key to view setup screens. Use the list on the left-hand side of the screen to select the desired setup screen. Setup screens on the QC200 are as follows: •...
- Page 277 Quadra-Chek ® QC200 Display Highlight the display field as shown. Use the display setup screen to enter measurement resolution and display param- eters. Set display resolution fields to match encoder resolution. Set the startup linear and startup angular fields to define the default display of linear and angular measurements.
- Page 278 Chapter 7 Setup Set the radix field to decimal or comma. There is no difference between measure- ments displayed with a decimal radix or a comma radix. Select the radix appro- priate for your reporting needs. Set the current angular field to define the angular units of measure for the current session.
- Page 279 Quadra-Chek ® QC200 Encoders Highlight the encoder field as shown. Use the encoder setup screen to define encoder parameters for each axis. Set the resolution field to match the resolution of the encoder. For example, enter 0.0001 for 1 micron encoders. Highlight the type field and select the desired encoder type.
- Page 280 Chapter 7 Setup There are four types of encoder interfaces supported by the QC200: • • Analog • Mitutoyu (MTISer) serial • Mitutoyo (MTI 2) 2 NOTE NOTE NOTE NOTE NOTE Use Mitutoyo (MTISer) serial for Mitutoyo products that use 10 Use Mitutoyo (MTISer) serial for Mitutoyo products that use 10 Use Mitutoyo (MTISer) serial for Mitutoyo products that use 10 Use Mitutoyo (MTISer) serial for Mitutoyo products that use 10...
- Page 281 Quadra-Chek ® QC200 Highlight the machine zero (MZ Cnts) counts field. Use the machine zero (MZ Cnts) counts field to define the machine zero position of an (Acu-Rite Absolute) encoder. Enter zero (0) to record the current encoder position as the machine zero for the next system startup.
- Page 282 Chapter 7 Setup Highlight the interpolation field. Press the soft key for the desired interpolation value. Highlight the units field. Press the soft key for the desired units of measure (millimeters or inches) that correspond to the encoder used. NOTE NOTE NOTE NOTE...
- Page 283 Quadra-Chek ® QC200 To calibrate the Q axis NOTE NOTE NOTE NOTE NOTE This example assumes that the type, interpolation, and units This example assumes that the type, interpolation, and units This example assumes that the type, interpolation, and units This example assumes that the type, interpolation, and units This example assumes that the type, interpolation, and units fields are properly set for the encoders in use.
- Page 284 Chapter 7 Setup Step 4 Press the degrees (deg) soft key. Step 5 Highlight the teach amount (teach amt) field as shown. Step 6 Enter the desired teach amount. NOTE NOTE NOTE NOTE NOTE Use a large teach amount. For example, enter a teach amount Use a large teach amount.
- Page 285 Quadra-Chek ® QC200 Step 7 Highlight the scale counts (scale cnts) field as shown. Step 8 Press the teach soft key. NOTE NOTE NOTE NOTE NOTE Press the reset soft key to set the scale counts (scale cnts) fields Press the reset soft key to set the scale counts (scale cnts) fields Press the reset soft key to set the scale counts (scale cnts) fields Press the reset soft key to set the scale counts (scale cnts) fields Press the reset soft key to set the scale counts (scale cnts) fields...
- Page 286 Chapter 7 Setup Step 10 Press the teach soft key. Step 11 Press the finish key twice. The Q axis calibration is complete. To check Q axis calibration Step 1 Rotate the Q axis to zero degrees. Step 2 Press the zero axis key for the Q axis. Step 3 Rotate the Q axis by the teach amount.
- Page 287 Quadra-Chek ® QC200 To calibrate a filar axis NOTE NOTE NOTE NOTE NOTE This example assumes that the type, interpolation, and units This example assumes that the type, interpolation, and units This example assumes that the type, interpolation, and units This example assumes that the type, interpolation, and units This example assumes that the type, interpolation, and units fields are properly set for the encoders in use.
- Page 288 Chapter 7 Setup Step 4 Highlight the resolution (res) field as shown. Step 5 Press the soft key for the desired magnification. NOTE NOTE NOTE NOTE NOTE This example calibrates magnification 1. Choose the desired This example calibrates magnification 1. Choose the desired This example calibrates magnification 1.
- Page 289 Quadra-Chek ® QC200 Step 7 Use the numeric keypad to enter the length of the standard artifact. NOTE NOTE NOTE NOTE NOTE This example uses a 1 mm artifact. Enter the correct size for the This example uses a 1 mm artifact. Enter the correct size for the This example uses a 1 mm artifact.
- Page 290 Chapter 7 Setup Step 9 Measure the artifact. Step 10 Press the teach soft key. Step 11 Press the finish key twice. The filar axis is calibrated. To check filar axis calibration Step 1 Press the zero axis key for the filar axis. Step 2 Measure the artifact used for calibration.
- Page 291 Quadra-Chek ® QC200 Hot Keys Highlight the hot keys field as shown. Use the hot keys setup screen to save time by assigning common or repetitive tasks as hot keys. For example, it takes four steps to clear all features from the features list.
- Page 292 Chapter 7 Setup Highlight a key number as shown. Assign one of the following functions using the soft keys: • None: no hot key function assigned • Key: hot key function assigned by pressing the desired front panel key • Special: hot key function assigned from list •...
- Page 293 Quadra-Chek ® QC200 Step 2 Press the soft soft key. Step 3 Highlight the key 2 field as shown. Step 4 Press the special soft key. Step 5 Highlight the teach function as shown. 7-21...
- Page 294 Chapter 7 Setup Step 6 Press the finish key. The teach function is now assigned to soft key 2. Functions in the special list include: Annot Highlight annotation (annot) in the menu list to toggle between backward and forward annotation. DMS/DD Toggles the display of angles between degrees, minutes and seconds and decimal degrees.
- Page 295 Quadra-Chek ® QC200 NOTE NOTE NOTE NOTE NOTE All send data menu items send data to the RS-232 port. These All send data menu items send data to the RS-232 port. These All send data menu items send data to the RS-232 port. These All send data menu items send data to the RS-232 port.
- Page 296 Chapter 7 Setup Print Highlight the print field as shown. Use the print setup screen to format printed reports. Highlight the report width field as shown. Select the desired report width using the soft keys. The following widths are available: 32, to, and 80 characters. Highlight the lines/page field as shown.
- Page 297 Quadra-Chek ® QC200 Highlight the form feed field as shown. Use the yes and no soft keys to toggle on/off the form feed printer command. Essentially, form feed advances the printer to the top of the next page after printing. This primarily used when printing on pre-formatted forms. Highlight the pre line field as shown.
- Page 298 Chapter 7 Setup Highlight the post line field as shown. Use the numeric keypad to enter up to four ascii key codes. Ascii key codes entered in the post line field occur after each line of print on a report. For example, enter ascii key code 10 and 13 to insert a line feed and carriage return after each line of print.
- Page 299 Quadra-Chek ® QC200 Highlight the auto label field as shown. Use the no and yes soft keys to toggle on/ off the auto label function. Auto label inserts labels into report data fields. For example, auto label inserts an “X” label next to X axis data. Turn of auto label when printing on pre-labeled forms.
- Page 300 Chapter 7 Setup Select one of the four options from the list: • Off: turn off print edges options • Standard: print X and Y coordinates when crossing edge • Stf2: print X and Y coordinates of edge crossed and last known coordinates before edge.
- Page 301 Quadra-Chek ® QC200 Form characters (form chars) Highlight the form characters (form chars) field as shown. Use the form characters setup screen to enter pre form ascii key codes. See chapter 6: communications for more information on the use of ascii key codes. Ports Highlight the ports field as shown.
- Page 302 Chapter 7 Setup Highlight the baud field as shown. Use the baud field to set the baud rate. Press the decrease (dec) soft key to decrease the baud rate. Press the increase (inc) soft key to increase the baud rate. Highlight the word length (word len) field as shown.
- Page 303 Quadra-Chek ® QC200 Highlight the parity field as shown. Press the none soft key to select no parity. Press the odd soft key to select odd parity. Press the even soft key to select even parity. NOTE NOTE NOTE NOTE NOTE handshake field handshake field...
- Page 304 Chapter 7 Setup Highlight the EOC (end-of-character) delay field as shown. EOC delay is a chronological delay following each character sent. Use the nu- meric keypad to enter a delay value from 0 to 99,999. Highlight the EOL (end-of-line) delay field as shown. EOL delay is a chronological delay following each line sent.
- Page 305 Quadra-Chek ® QC200 Use the parallel data field to select the parallel data output from the QC200. There are four parallel data output options: • None: no data output • Display: outputs content of DRO screen • Report: prints standard results report •...
- Page 306 Chapter 7 Setup Measure Highlight the measure field as shown. Use the measure setup screen to set parameters for various measurement functions. Highlight the annotation field as shown. Use the annotation field to select forward or backward annotation. Forward annotation requires the user to enter the prescribed number of points for a feature measurement.
- Page 307 Quadra-Chek ® QC200 Highlight the forward point (fwd point) field as shown. Use the numeric keypad to enter the number of points required to measure a point using forward annotation. Highlight the forward line (fwd line) field as shown. Use the numeric keypad to enter the number of points required to measure a line using forward annotation.
- Page 308 Chapter 7 Setup Highlight the retain features field as shown. Press the no soft key to delete features in the features list when power is cycled off and on. Press the yes soft key to retain features in the features list when power is cycled off and on.
- Page 309 Quadra-Chek ® QC200 Highlight the targeting zone field as shown. Use the numeric keypad to specify the size of the targeting zone box. The targeting zone box is displayed when running a program. Only points within the targeting zone box are accepted when a program is running. Highlight the pause tolerance results field as shown.
- Page 310 Chapter 7 Setup Highlight the print tolerance results field as shown. Use the print tolerance results field to print a report depending on the results of feature tolerances. Press the never soft key to print no report regardless of tolerance results.
- Page 311 Quadra-Chek ® QC200 Highlight the warning field as shown. Use the warning field to toggle the warning beep on/off. The warning beep sounds anytime the QC200 displays an on-screen warning. Press the none soft key to turn off the warning beep. Press the simple soft key to turn on the warning beep.
- Page 312 Chapter 7 Setup Highlight the begin measure field as shown. Use the begin measure field to toggle the begin measure beep on/off. The begin measure beep sounds prior to each feature measurement. Press the none soft key to turn off the begin measure beep. Press the simple soft key to turn on the begin measure beep.
- Page 313 Quadra-Chek ® QC200 Highlight the failed result field as shown. Use the failed result field to toggle the failed result beep on/off. The failed result beep sounds for failed tolerance results. Press the none soft key to turn off the failed result beep.
- Page 314 Chapter 7 Setup Highlight the volume field as shown. Use the numeric keypad to enter a volume level from 0 to 10. Supervisor Highlight the supervisor field as shown. Use the supervisor setup screen to enter the supervisor password lock/unlock pro- grams.
- Page 315 Quadra-Chek ® QC200 Highlight the programs field as shown. Use the programs field to lock or unlock the following programming functions: record, edit, copy, and delete. Press the unlock soft key to unlock the programming features. Press the lock soft key to lock the programming features. Squareness Highlight the squareness field as shown.
- Page 316 Chapter 7 Setup Highlight the angle field as shown. Use a standard imprinted with a perfect right angle to obtain the measurement for the angle field. Enter the result of the angle measurement in the angle field using the numeric keypad or press the teach key and measure the angle. Highlight the master axis field as shown.
- Page 317 Quadra-Chek ® QC200 Scale factor Highlight the scale factor field as shown. Use the scale factor setup screen to define a multiplier for measurement results. Scale factors compensate for part shrinkage or expansion during actual-use con- ditions. Highlight the active field as shown. Press the yes soft key to turn on the scale factor compensation.
- Page 318 Chapter 7 Setup Highlight the multiplier field as shown. Use the numeric keypad to enter the user-defined multiplier value. Highlight the user settable field as shown. Press no soft key to password restrict the scale factor setup screen. Press the yes soft key to grant user access to the scale factor setup screen.
- Page 319 Quadra-Chek ® QC200 Miscellaneous (misc) Highlight the miscellaneous (misc) field as shown. Use the miscellaneous setup screen to set/adjust the following functions: • Key delay • Contrast • Backlight • Auto DRO counts • Screen saver minutes • X external 0 •...
- Page 320 Chapter 7 Setup Highlight the contrast field as shown. Use the contrast field to adjust the LCD display contrast. Use the numeric keypad to enter a contrast value between 350 to 425. Values above and below this range tend to make the display unreadable. Adjust the contrast setting to suit the lighting conditions of your work area.
- Page 321 Quadra-Chek ® QC200 Highlight the auto DRO counts (auto DRO cnts) field as shown. Use the numeric keypad to enter an auto DRO count value between 0 and 999. Auto DRO counts define the amount of part movement required before the DRO refreshes the axis counts.
- Page 322 Chapter 7 Setup Highlight the X external 0 field as shown. Press the yes soft key if using a rotary type micrometer equipped with a manual zero button. Selecting yes enables the manual zero button on the rotary mi- crometer. For all other encoder types, or to disable the manual zero button, press the no soft key.
- Page 323 Quadra-Chek ® QC200 Highlight the minutes field to enter the minutes. Highlight the seconds field to enter the seconds. Highlight the date format field as shown. Press the M/D/Y soft key to select month/day/year format. Press the D/M/Y soft key to select day/month/year format.
- Page 324 Chapter 7 Setup Error Correction There are three error correction methods used with the QC200: • Linear error correction (LEC) • Segmented linear error correction (SLEC) • Non-linear error correction (NLEC). All QC200 models are equipped with LEC and SLEC. NLEC is sold as a separate option.
- Page 325 Quadra-Chek ® QC200 Segmented linear error correction (SLEC) divides each axis into a number of user-defined segments. Each segment has one error correction coefficient to compensate for variation within the segment. Each axis is also offset (MZ reference) to account for the variation between the standard datum and machine zero.
- Page 326 Chapter 7 Setup Non-linear error correction (NLEC) divides the entire measurement area into a grid. Each grid cell compensates for variation with its own error correction coefficient. Specify the nominal and measured X and Y coordinates from the standard dur- ing the setup process.
- Page 327 Quadra-Chek ® QC200 Linear error correction (LEC) Highlight the LEC field as shown. Use LEC to compensate for encoder and machine travel variations. Highlight the X standard field as shown. Use the numeric keypad to enter the nominal value of a point on the X axis of the standard.
- Page 328 Chapter 7 Setup Highlight the X observed field as shown. Use the numeric keypad to enter the actual value of the point as shown on the X axis DRO display. Highlight the Y standard field as shown. Use the numeric keypad to enter the nominal value of a point on the Y axis of the standard.
- Page 329 Quadra-Chek ® QC200 To setup linear error correction Step 1 Place a glass standard on the measuring device. Step 2 Zero the X and Y axes on the standard’s datum. Step 3 Move the crosshair to the desired point on the X axis. Step 4 Record the X axis result on a piece of paper.
- Page 330 Chapter 7 Setup Step 9 Highlight the LEC field as shown. NOTE NOTE NOTE NOTE NOTE Use the arrow keys to highlight the desired field. Use the arrow keys to highlight the desired field. Use the arrow keys to highlight the desired field. Use the arrow keys to highlight the desired field.
- Page 331 Quadra-Chek ® QC200 Step 12 Enter the actual value of the point as recorded from the X axis DRO display. Step 13 Highlight the Y standard field as shown and enter the nominal value of the point on the Y axis of the standard. Step 14 Highlight the Y observed field as shown and enter the actual value of the point as recorded from the Y axis DRO display.
- Page 332 Chapter 7 Setup Step 15 Press the finish key twice. Linear error correction (LEC) setup is complete. The LEC correction coefficient is applied to all subsequent measurements. 7-60...
- Page 333 Quadra-Chek ® QC200 Segmented linear error correction (SLEC) Highlight the SLEC field as shown. Use the SLEC setup screen to define error correction coefficients for segments on the X and Y axes. Segments are comprised of the axial distance from one SLEC station to the next. There is no specified minimum or maximum distance between stations.
- Page 334 Chapter 7 Setup Select ref when using encoders with a single reference mark. Users are prompted at startup to move the axis until a reference mark is crossed. There are two types of absolute reference marks supported by the QC200: absolute Acu-Rite and absolute Heidenhain.
- Page 335 Quadra-Chek ® QC200 To setup SLEC Steps 1 through 3 turn on startup zero. Startup zero prompts the user to set machine zero each time it is turned on. Step 1 Use the arrow keys to highlight the startup zero field on the measure setup screen as shown.
- Page 336 Chapter 7 Setup Step 4 Use the arrow keys to highlight the ref marks field on the encoder setup screen as shown. Step 5 Press the soft key that corresponds to the type of reference marks used on the measuring device’s encoders. This example uses manual reference marks. Select the appropriate reference marks for your encoders.
- Page 337 Quadra-Chek ® QC200 Step 8 Press the clear soft key. Step 9 Press the clear all soft key. The following dialog box is displayed. Step 10 Press the yes soft key. Step 11 ensures that systems equipped with non-absolute reference marks al- ways cross the same reference marks during the machine zero process.
- Page 338 Chapter 7 Setup Step 11 Move all axes to the most negative position. Steps 12 through 14 establish machine zero. Step 12 Use the power switch to turn off the QC200. Step 13 Turn on the QC200. Press any key when the startup screen is displayed. Step 14 Set machine zero according to the on screen prompt.
- Page 339 Quadra-Chek ® QC200 Step 17 Press the teach soft key. Step 18 Press the enter key. Step 19 Press the finish key twice. Step 20 Press the zero axis key next to the desired axis. This example uses the X axis. Steps 21 through 32 describe how to define station 0 as the last known point with no variation between standard and observed values.
- Page 340 Chapter 7 Setup Step 22 Press the desired axis soft key. NOTE NOTE NOTE NOTE NOTE This example uses the This example uses the This example uses the X axis soft key X axis soft key X axis soft key X axis soft key X axis soft key .
- Page 341 Quadra-Chek ® QC200 Step 25 Use the arrow keys to highlight the station field as shown. Make sure station 0 is entered for this step. Step 26 Use the numeric keypad to enter the nominal value printed on the standard. Step 27 Highlight the observed field as shown.
- Page 342 Chapter 7 Setup Step 28 Use the numeric keypad to enter the same value entered in the nominal field. NOTE NOTE NOTE NOTE NOTE This example assumes that the last known point with no variation This example assumes that the last known point with no variation This example assumes that the last known point with no variation This example assumes that the last known point with no variation This example assumes that the last known point with no variation...
- Page 343 Quadra-Chek ® QC200 The MZ offset value is automatically entered in the MZ offset field. Step 32 Press the finish key. Station 0 is now defined as the last known point on the X axis with no variation between standard and observed values. All subsequent stations should show some variation between standard and observed values.
- Page 344 Chapter 7 Setup Step 36 Highlight the standard field as shown. Step 37 Use the numeric keypad to enter the nominal value printed on the standard. Step 38 Highlight the observed field as shown. 7-72...
- Page 345 Quadra-Chek ® QC200 Step 39 Press the teach soft key. Step 40 Move the crosshairs to the desired point on the standard. This is the same point entered as the nominal value in step 37. Step 41 Press the enter key. NOTE NOTE NOTE...
- Page 346 Chapter 7 Setup Step 42 Press the finish key. Station is now defined. Use steps 34 through 42 to define the remaining SLEC stations. Up to 29 additional stations can be entered on each axis. Do not turn on SLEC until all the desired stations are defined.
- Page 347 NOTE NOTE NOTE NLEC is not included on all QC200s. Contact your Metronics NLEC is not included on all QC200s. Contact your Metronics NLEC is not included on all QC200s. Contact your Metronics NLEC is not included on all QC200s. Contact your Metronics NLEC is not included on all QC200s.
- Page 348 Chapter 7 Setup To setup NLEC NOTE NOTE NOTE NOTE NOTE Place the standard grid on the measuring device before you begin. Place the standard grid on the measuring device before you begin. Place the standard grid on the measuring device before you begin. Place the standard grid on the measuring device before you begin.
- Page 349 Quadra-Chek ® QC200 Step 4 Enter the grid length for the X axis. NOTE NOTE NOTE NOTE NOTE This example uses a 3 inch by 3 inch grid. This example uses a 3 inch by 3 inch grid. This example uses a 3 inch by 3 inch grid. This example uses a 3 inch by 3 inch grid.
- Page 350 Chapter 7 Setup Step 7 Enter the desired cell size for the X and Y axes as shown. NOTE NOTE NOTE NOTE NOTE This example uses 1 inch by 1 inch cells. This example uses 1 inch by 1 inch cells. This example uses 1 inch by 1 inch cells.
- Page 351 Quadra-Chek ® QC200 Step 10 Press the teach soft key. Step 11 Move the crosshair to the station 1,1 on the grid standard. Step 12 Press the enter key. Step 13 Press the finish key. The QC200 prompts the user to measure the remaining stations on the grid. Finish NLEC setup by moving the crosshair to the prompted station.
- Page 352 Chapter 7 Setup Step 15 Highlight the NLEC field as shown. Step 16 Press the on soft key. Step 17 Press the finish key twice. NLEC station setup is complete. Up to 29 cells can be entered on each axis. The NLEC correction coefficient is applied to all subsequent measurements when turned on.
- Page 353 Chapter 8 Reference Three non-collinear points are the minimum required to measure a circle. Up to 100 points can be probed during a circle measurement. Use more points for greater accuracy. Every point on a circle is weighted equally but the first three points are used to estimate the form.
- Page 354 Chapter 8 Reference When more than 3 points are used, a rough edge can be measured with greater repeatability. When 3 points are probed on a circle, each point contributes approximately 33% to the result. When 100 are used, each point contributes only 1%.
- Page 355 Quadra-Chek ® QC200...
- Page 356 Chapter 8 Reference Best Fit Algorithms There are four basic algorithms used by the QC200 to determine the best geometrical form fit of measured features. When the QC200 measures a line it uses the first two points probed to estimate the form fit of the line. The first three points are used to estimate the form of a circle.
- Page 357 Features 3-23. See Circles Constructions Index Index Index Index Index to construct a datum 2-10 constructing 3-73 to construct a datum 3-32 circles 3-80 to construct a distance distances 3-74 between 2 circles 3-44 lines 3-79 points 3-78 A A A A A D D D D D skews 3-76 Annotated drawings 1-...
- Page 358 Index Lines 2-14 crosshair probe 3-23 Repeatability 7-2 to select crosshair probe Reports 6-35, 8-24 M M M M M 3-24 printing 6-38 edge detector 2-5 RS-232 port 3-15, 6-2, 8-29 Measure magic 3-50 To select optical edge/ changing features 3-59 S S S S S crosshair probe 2-5 circles 3-51...
- Page 359 Quadra-Chek ® QC200 Z Z Z Z Z edge detector auto e soft key 3-17 Zero axes keys 2-13, 3-10 d cal soft key 3-17 install soft key 3-17 teach soft key 3-17 x cal soft key 3-17 probe soft key 3-24 recall soft key 3-19, 3-21, 3- tolerance soft key 3-20, 3- view soft key 3-20, 3-21...
- Page 360 Index Index-4...
Need help?
Do you have a question about the Quadra-Chek 200 and is the answer not in the manual?
Questions and answers
Our QuadraChek 200 stop working and a message shows " not enough memory". Can you advise what to do and if this is related to the battery. Thanks.