Table of Contents
Advertisement
Available languages
Available languages
Quick Links
Advertisement
Table of Contents

Related Manuals for Atlantis VOLTA


Summary of Contents for Atlantis VOLTA
- Page 1 la Telecamera a Pile GUIDA RAPIDA QUICK START GUIDE V 1.03...
-
Page 2: Caratteristiche Tecniche
Caratteristiche tecniche / SENSORE IMMAGINE Sony IMX323 1/2.9” CMOS Sensor IMAGE SENSOR RISOLUZIONE 1920 x 1080 (2.0 Megapixel) DISPLAY RESOLUTION LENTE LENS ANGOLO DI VISUALE ANGLE VIEW DISTANZA DI RILEVAZIONE PIR Bassa: 2-4m / Media: 4-6m (default) / Alta: 6-9m PIR DETECTING DISTANCE SPECIFICHE HARDWARE HARDWARE FEATURES... - Page 3 Caratteristiche tecniche / UTENTI Sino ad 8 utenti USER SPECIFICHE SOFTWARE CONDIZIONI DI RISVEGLIO SOFTWARE FEATURES STANDBY AWAKEN MODALITA’ DI REGISTRAZIONE RECORD MODE WIRELESS STANDARD WIRELESS STANDARD FREQUENZA 2.4Ghz OPERATING FREQUENCY WI-FI MASSIMA POTENZA < 100mW MAX. POWER TRANSMITTED SICUREZZA WIRELESS WIRELESS SECURITY TIPO TYPE...
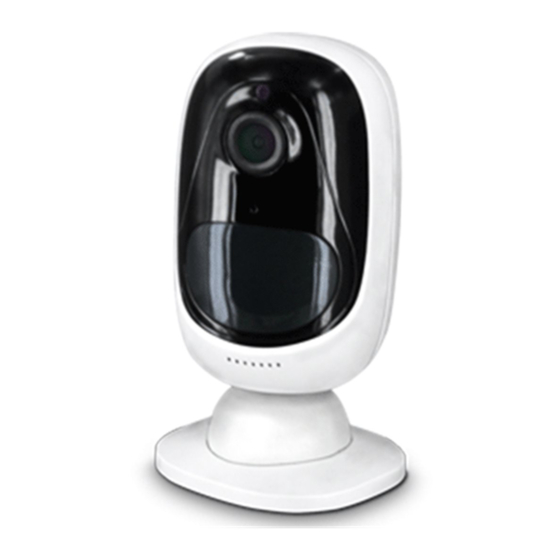
- Page 4 Introduzione generale Slot per Sensore di luminosità Micro SD Lente LED di stato rosso: connessione Wi-Fi non attiva blu: connessione Wi-Fi attiva Microfono PIR integrato Altoparlante Bottone per il reset premere per qualche secondo sino a quando la camera riprodurrà un messaggio vocale Base magnetica...
- Page 5 Inserimento batterie nella camera Utilizzare l’apposito perno per rimuovere la copertura posteriore. Premere delicatamente nella zona indicata e poi ruotare. Inserire le quattro batterie fornite rispettando le polarità.
- Page 6 Installazione della App Digitare Atlantis Volta in App Store (Apple) o Play Store (Android). Scaricare ed installare la App. Installazione della camera Inserite le batterie nella camera, riprodurrà il seguente messaggio vocale: “Volta è pronta Lanciare la App, toccare il simbolo per installare Volta.
- Page 7 Qr Code e cliccando su Toccare su per passare alla pagina seguente. Nel caso in cui non venga riprodotto nessun messaggio vocale, toccare collegarsi). Toccare per proseguire. a circa 20 cm dalla lente). Volta riprodurrà il seguente messaggio vocale: , quindi toccare per proseguire.
- Page 8 Volta riprodurrà il seguente messaggio vocale: ad indicare il per proseguire. In caso di problemi Volta riprodurrà il seguente messaggio vocale: “Connessione Wi-Fi non riuscita. . Toccare “Ho sentito connessione Wi-Fi non riuscita". Stabilita la connessione con la camera, occorrerà impostare le proprie credenziali di accesso (nome della camera e password).
-
Page 9: Menù Principale
“Il Reset è stato una/più telecamere . La camera successivamente riprodurrà il seguente il messag gio: “Volta è pronta per essere Status della batteria l'App, toccare sul simbolo + e seguire le indicazioni per la cui si desidera connettere la Permette di attivare camera e lanciare l’App. - Page 10 Menù Live Video Permette di attivare e/o disattivare le camere visualizzate nella Permette la vista multiview modalità multiview in caso di più telecamere installate sul dispositivo Permette di attivare e/o disattivare il microfono Permette di mettere in pausa i Live Video Permette di visualizzare Permette di catturare foto l’immagine a tutto schermo...
- Page 11 Toccare per decidere la sensibilità della rilevazione in accordo con la tabella sotto riportata. Registra. Sensibilità Distanza Distanza di rilevazione di rilevazione (ambiente abitato) (veicoli in movimento) LOW (basso) Sino a 4 metri Sino a 10 metri MID (medio) Sino a 6 metri Sino a 12 metri HIGH (alto) Sino a 9 metri...
- Page 12 Area di rilevazione Tipo di installazione Quando si installa la camera, non è consigliabile La camera é stata progettata per posizionare il sensore PIR in linea verticale rispetto operare in ambienti indoor con copertu all'oggetto in movimento. La camera, utilizzando la apposita avvicina al sensore PIR in linea retta o verticale, il cover in silicone (acquistabile separa sensore PIR potrebbe non rilevarne il movimento.
-
Page 13: Montaggio A Muro
Montaggio a muro i tasselli forniti in dotazione Fronte Agganciare il supporto di sicurezza alla placca Retro sia inserito nel supporto) Premere il bottone sul supporto di sicurezza Stringere saldamente la vite posta sul supporto di sicurezza prima di avvitare la camera al supporto stesso. -
Page 14: Montaggio Su Palo
Montaggio su palo della placca di montaggio Agganciare il supporto di sicurezza alla placca sia inserito nel supporto) Premere il bottone sul supporto di sicurezza Stringere saldamente la vite posta sul supporto di sicurezza prima di avvitare la camera al supporto stesso. - Page 15 BATTERIE La camera non è stata progettata per offrire uno streaming continuativo, quanto Un kit di 4 batterie (CR123A non ricaricabili) può far funzionare la camera sino a 6 mesi in modalità stand by oppure 800 minuti (LED IR spenti durante il giorno) di registrazione o visualizzazione.
-
Page 16: General Introduction
General introduction Micro SD Daylight sensor card slot Lens Status LED red: Wi-Fi connection failed blue: Wi-Fi connection succeeded Bult-in microphone Bult-in PIR Motion sensor Speaker Reset button press for a few seconds until the camera plays a voice message Magnetic base... - Page 17 Insert the batteries into the camera Please use the stick to press the white button and then rotate to separate the back case from the camera. Insert the batteries into the battery slot. weatherproof performance.
-
Page 18: Install App
Search Volta in App Store (Apple) or Play Store (Android). Download and install the App. Set up camera Insert the batteries in the camera, Volta will play the following voice message: “Volta has been started up. Please run the App...”. - Page 19 Touch “I heard the voice prompt” to continue. If you did not hear the voice prompt, please touch: ”I didn’t hear the voice prompt”. Enter the Wi-Fi password of the selected network (the same to which Volta will try to connect) and touch “I have entered the correct information” to continue.
- Page 20 Wi-Fi network. Touch “I heard Connession to the router succeeded” to continue. In case of problems Volta will play the following voice message: “Connection to the router failed!”. Touch “I heard Connession to the router failed”.
- Page 21 Please release the reset button”. camera plays another message: “Volta been Battery status started up. Please run the App, add the camera and set it up”. connect smartphone network which you want to connect the camera and launch the App.
-
Page 22: Live Video Menu
Live Video menu It allows to enable and/or disable the cameras showed in It allows multiview mode the multiview mode in case of more cameras installed on the device It allows to enable and/or disable the microphone It allows to pause the Live Video It allows to view the It allows to take a photo... - Page 23 Touch PIR settings to decide the sensitivity of the detection according to the table below. To record on the SD card, flag Record. Push. Sensitivity Detecting Detecting distance distance (living space) (moving vehicles) Up to 4 meters Up to 10 meters Up to 6 meters Up to 12 meters HIGH...
-
Page 24: Monitoring Area
Monitoring area Installation type When installing the camera, it’s not suggested to The camera has been designed make the PIR sensor vertically face the moving to operate indoor in environmen- object. ts with Wi-Fi coverage. Please note that if the moving object approaches The silicone cover with UV the PIR sensor vertically, the PIR sensor may not protection enables to use the... -
Page 25: Wall Mount
Wall mount Screw the security mount plate into the wall Latch the security mount on its plate Fronte (make sure the top edge of the backing plate is inserted into the mount) Retro Press the security mount button until its plate clicks into the mount Tighten the screw on the safety support before screwing the camera to the support itself. -
Page 26: Pole Mount
Pole mount Loop the velcro belt into the plate slots Fasten the warp strap to the pole Latch the security mount on its plate (make sure the top edge of the backing plate is inserted into the mount) Press the security mount button until its plate clicks into the mount Tighten the screw on the safety support before screwing the camera to the support itself. -
Page 27: Important Safeguards
Important safeguards BATTERIES The camera is not designed for 24/7 full capacity running or around-the-clock live streaming. It’s designed to record on a memory card and to allow, on request, direct Please note that a set of 4 batteries (CR123A non-rechargeable) will support up to 180 days in stand-by mode, or 800 minutes (IR LEDs off in daytime) of motion triggered recording and live view. - Page 28 Ú Hellatron S.r.l. Via C. Chiesa,21 - 20010 Pogliano Milanese (MI) - Italy Tel. +39 02 99 76 011 - info@atlantis-land.com www.atlantis-land.com...
Need help?
Do you have a question about the VOLTA and is the answer not in the manual?
Questions and answers