Table of Contents
Advertisement
Quick Links
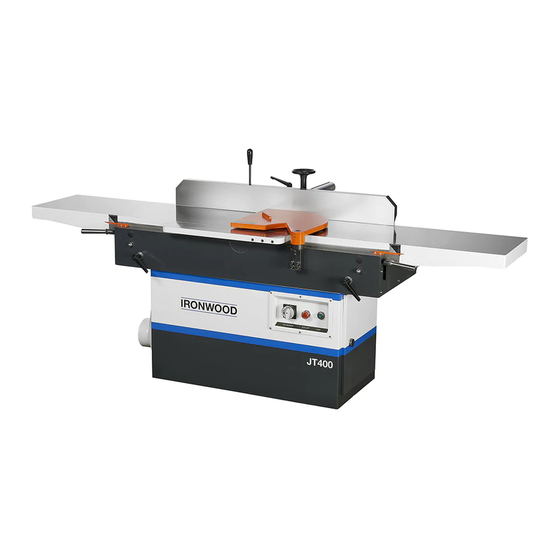
Ironwood JT400
User Manual
fence assembly.
general information. features.
technical specifi cations.
delivery and installation.
pre-operation cleaning. assembly.
operation and adjustments.
machine controls.
cutterhead maintenance. blade care.
troubleshooting.
facility preparation.
safety considerations.
types of cuts. maintenance.
connect to power. safety.
inspection.
periodic maintenance.
electrical print.
Advertisement
Table of Contents

Related Manuals for Ironwood JT400


Summary of Contents for Ironwood JT400
- Page 1 Ironwood JT400 User Manual general information. features. technical specifi cations. safety considerations. inspection. delivery and installation. pre-operation cleaning. assembly. operation and adjustments. fence assembly. types of cuts. maintenance. machine controls. cutterhead maintenance. blade care. periodic maintenance. troubleshooting. electrical print. connect to power. safety.
-
Page 2: Table Of Contents
Troubleshooting ..............23 9.1 Electrical Print PLEASE REVIEW AND OBSERVE ALL SAFETY INFORMATION / DIRECTIVES BEFORE INSTALLING, OPERATING, OR PERFORMING MAINTENANCE ON THIS MACHINERY. Ironwood JT400 | User Manual... -
Page 3: General Information
1.0 General Information 1.1 Thank You! 1.3 Features Thank you for your purchase of the Ironwood JT400 jointer. At Stiles • Solid construction featuring cast iron tables Machinery, our goal is to ensure that you are fully satisfied with • Generous 96" cutting length your purchase. -
Page 4: Technical Specifications
18.2 amps (230v) / 9.1 amps (460v) 6" (152mm) port Dust Port Size Dust Extraction Requirements 450 cfm @ 4,500 feet/min Shipping Dimensions 100" x 31" x 42" (2,540mm x 780mm x 1,050mm) Shipping Weight 1,380 lbs. (625 kg) Ironwood JT400 | User Manual... -
Page 5: Safety Considerations
For your safety, read these instructions thoroughly before you install WaRninG and operate this machine. Always have these instructions available Never use the JT400 for purposes other than its intended use. Do at the machine for reference. not modify or remove any guards or other safety features. Improper... -
Page 6: Facility Preparation
2.3 Power accommodate the Ironwood JT400. Follow these guidelines: WaRninG 2.1 Floor A licensed electrician must connect the JT400 to the building power source. • The floor must be flat and level. • Do not use extension cords. • Although no special foundations are required, a concrete floor is •... -
Page 7: Delivery And Installation
Remove then remove the four and save the sides. paperwork attached to crate. Do not remove the machine from the pallet while uncrating. Do not remove the protective paper that covers the tabletop surface. Ironwood JT400 | User Manual... -
Page 8: Inspection
Seven (7) extra cutterhead nuts 10. Seven (7) extra cutterhead set screws 11. Four (4) leveling pads 12. Four (4) leveling bolts with nut 13. Two (2) push pads 14. Paint (2 color set) 15. User manual Ironwood JT400 | User Manual... -
Page 9: Remove Machine From Pallet
Caution Lift the machine from the pallet by one of 3 methods: The JT400 weighs approximately 1,380 pounds (625 kg). For this a. Team lift procedure, we recommend using a fork lift or hand truck. -
Page 10: Level
Remove the rust-preventative oil that coats the machine using a soft cloth and nonflammable degreasing agent, such as Simple Green or other citrus-based cleaners. Do not use abrasive pads. Caution Use extreme care when cleaning or working with the cutterhead. The knives are very sharp. Ironwood JT400 | User Manual... -
Page 11: Connect To Power
Insert power source cables through the opening of the terminal box. Connect the three power cables to terminals L1, L2 and L3, and the yellow/green ground wire to ground terminal. Replace the clear plastic insulator and the power box cover. Ironwood JT400 | User Manual... -
Page 12: Safety
Like all power equipment, there is danger associated with the Make certain the machine is either unplugged or electrically Ironwood JT400. Use caution and follow all safety instructions. disconnected and locked out when performing all maintenance, Take every precaution to protect yourself, others around you, and cleaning, or machine adjustments. -
Page 13: Assembly
Remove the two bolts that secure the fence assembly to the pallet for shipping. Attach the fence assembly to the machine body at the two holes using the provided cap screws and lock washers. Fence Cap screw and lock washer. Hole locations Ironwood JT400 | User Manual... -
Page 14: Cutterhead Guard
There are two styles of guards available on the JT400 jointer: • The fold-away guard comes standard with the JT400 jointer. • The swing-away guard is available as an option from Stiles Parts Dept. Call 1.800.727.8780. -
Page 15: Operation And Adjustments
Once both sides of a knife are dull, achieved. the carbide inserts should be replaced. To obtain replacements, call Stiles Parts Dept. at 1.800.727.8780. Reference part Retighten the lower hex nut. # 56-010-12005. Ironwood JT400 | User Manual... - Page 16 If the outfeed table is too low, the work will be gouged or sniped at Outfeed Table Infeed Table the end of the cut. Cutter Head CORRECT Work Piece Outfeed Table Infeed Table Cutter Head WRONG Ironwood JT400 | User Manual...
- Page 17 Move table adjustment arm to raise or lower the infeed table. The gauge indicates the distance that the table has been raised or lowered from the “0” point. Tighten the table lock handle. Con rm table height. Ironwood JT400 | User Manual...
- Page 18 Tighten the hex nut. such as nails. Kickback can also occur when the material is fed Tighten the lock handle. against the grain on the cutterhead. Ironwood JT400 | User Manual...
- Page 19 NOTE: If only workpieces of the same dimensions are run through the jointer, the operator may want to occasionally adjust the fence forward or backward to prevent wear on only one area of the knives. Ironwood JT400 | User Manual...
-
Page 20: Types Of Cuts
Use extra precautions when performing such procedures. WaRninG Rabbet cuts require removal of the cutterhead guard. Always use extreme caution while rabbeting. Keep hands clear of the cutterhead. When rabbeting is complete, immediately replace the guard. Ironwood JT400 | User Manual... -
Page 21: Maintenance
Monthly - Check wiring, loose terminals, insulation deterioration, voltage check NOTE: After changing a setting, making an adjustment, performing repair/maintenance work, or troubleshooting, please check that all applicable safety functions are working properly before performing another operation. Ironwood JT400 | User Manual... -
Page 22: Blade Care
Periodically vacuum the inside of the machine electrical cabinet, as wood shavings, dust or other debris may accumulate. To replace ball bearings, please contact Stiles Parts Dept. at 1.800.727.8780. Ironwood JT400 | User Manual... -
Page 23: Troubleshooting
Uneven knife marks on workpiece. Inserts are chipped or out of alignment. Replace chipped inserts; align inserts properly ensuring cutterhead is free of debris before reinstalling inserts. If you cannot resolve your issue, contact Stiles Technical Support at 616.698.6615. Ironwood JT400 | User Manual... -
Page 24: Electrical Print
9.1 Electrical Print Ironwood JT400 | User Manual... - Page 26 Stiles Machinery Inc. 3965 44th St. SE Version A Grand Rapids, MI 49512 September 2013 p. 616.698.7500 f. 616.698.9411 © 2013 Stiles Machinery Inc. www.stilesmachinery.com...
Need help?
Do you have a question about the JT400 and is the answer not in the manual?
Questions and answers