Table of Contents

Summary of Contents for Leprecon LPC-48V
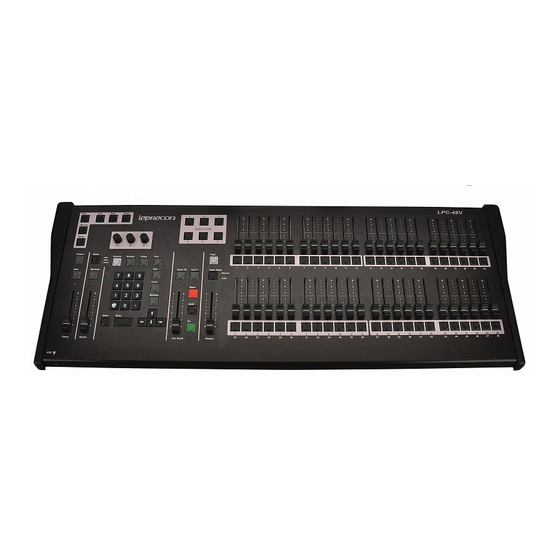
- Page 1 LPC Quick Start Guide Publication 28-0720 Document Revision: F 23 April 2009 This document contains proprietary information. It is not to be duplicated or disseminated in any manner without written permission of Leprecon,...
-
Page 2: Table Of Contents
1.Specifications ....................3 1.1. Channel capacity................3 1.2. DMX dimmers ..................3 1.3. Power Supply..................3 1.4. Peripherals ..................3 1.5. Show Storage ..................3 2. Startup......................4 2.1. Connections ..................4 2.2. Boot sequence ..................4 2.3. Power -off....................4 3. Setup......................5 3.1. Patch ....................5 3.2. Settings....................5 3.3. Defaults ....................6 3.4. -
Page 3: Specifications
The following specifications may be changed at any time without notice. Future software upgrades may affect these system specs. 1.1. Channel capacity The LPC-48V manages up to 204 control channels. 1.2. DMX dimmers 512 DMX channels. Industry standard 5 pin XLR connectors are used. -
Page 4: Startup
2. Startup 2.1. Connections 1. Connect monitor to VGA port. LPC has fixed 1024 x 768 resolution. 2. Connect USB keyboard and mouse. 3. If an ELO touch screen is being used, connect USB from touch screen monitor. 4. Connect AC power cord. 5.Turn on power. -
Page 5: Setup
3. Setup The main setup screen shows the current software versions, and contains submenus for all setup functions. Three software components comprise the LPC system, and the revision level and release date for each of the components is shown in the main Setup screen. The LPC title bar at the top of each screen also shows an elapsed time stopwatch. -
Page 6: Defaults
The Settings screen sets the following conditions: Manual mode - This selects either 2 scene preset or wide mode for the manual faders. This change can disrupt stage output, so is set as a configuration item. Work Lamp intensity This control sets the light level of the gooseneck work lamps. 3.3. -
Page 7: Show
Channels and dimmers that are parked are shown in a list. Selecting an item from the list and deleting it will ‘unpark’ the channel or dimmer. NOTE: If any channels or dimmers are Parked, a red indicator with the letter ‘P’ is shown on the title bar at the top of the screen. -
Page 8: Stage View - Manual Channels
4. Stage view - manual channels LPC allows manual channel control using front panel faders. Channels beyond the fader range (48) are set using the video interface or keypad. The manual fader on the left side of the board controls manual channels. Getting output from the manual scene requires the Grand Master and the Manual fader to be up. -
Page 9: Setting Channels With Video Interface
The choice of 'wide' or 'two scene' operation is in the setup menu. Switching between manual and submaster mode for the bottom bank of faders is done with a front panel switch. 4.2. Setting channels with video interface If a touch screen is connected, touch a channel selection to capture it. The channel number and level field will turn green. -
Page 10: Bump Buttons
If there are channels selected when the ‘group’ button is pressed, that selection will be carried into the ‘group’ creation screen. Channels can be selected and de-selected from the group screen as well. Once channels are selected, click or touch ‘save as’ to create the new group. Give the group a convenient name, and it can be re-used for future recording. -
Page 11: Submasters
5. Submasters 5.1. Recording Submasters Selecting Record and Submaster tabs brings up the Submaster Record screen. The screen shows submaster properties at the top of the screen, and channel levels at the bottom. Channel levels shown are the actual LPC output, so previously recorded submasters can be used to build new looks. - Page 12 Page - selects the current submaster page. The current page can also be set at any time using the front panel 'page' key. Sub - this control selects the submaster to be recorded. Title - a name can be set for the submaster. This title will be shown in the Submaster Run screen.
-
Page 13: Submaster Playback
5.2. Submaster Playback The Submaster Run screen shows the status of all LPC submasters. The display at the top includes submaster name, current level, and page status. Stage view channel levels are shown below the submaster status display. Next and Previous scroll controls allow viewing the complete set of 24 submasters. - Page 14 The background changes color, and the channel levels shown are the values of the submaster, not stage levels. In Preview mode, all the channel selection methods (faders, touch screen, channel dialog) can be used to change submaster channel levels. Clicking 'save' will update the submaster channel values. Another submaster can be previewed, or click 'exit' to return to Submaster Run screen.
-
Page 15: Cues
6. Cues 6.1. Recording cues LPC can save and play back up to 500 cues. Each cue has independent up and down fade time, and can have delay and follow times associated, if desired. The entire Cue Stack can be turned off if LPC is used only for manual and submaster control. - Page 16 Up Fade - Time for the new cue to reach 100% Down Fade - Time needed for the previous cue to completely fade out. In addition, each cue can have a chase associated, with a specific rate. When the cue starts to fade in, the chase will also start. Cues can be named using the Title field, and this name will appear in the Cue Run screen.
- Page 17 6.1.3. Cue List From the Cue Record screen, clicking or touching the 'Cue List' control will open the Cue List screen. This screen shows a summary of current cue timing parameters, and the cue order. The graphic at the bottom of the screen represents scene timing values. Future releases will enable timing to be changed by dragging the timelines.
-
Page 18: Cue Playback
6.2. Cue Playback Opening the Cue Run screen shows Cue status, with graphic displays for active fades. The top part of the screen shows current Cue information, and the bottom of the screen shows Stage levels. The two vertical bar graphs show the fade progress of an active fade. If there are wait times or hold times that are elapsing, that is shown with a progress bar. -
Page 19: Manual Crossfade
6.2.1 Manual Crossfade When the Cue Stack is first turned on, the Cue list will be in a blackout state. Moving the manual crossfader will transition from blackout to the first cue. The fade status will be shown on the bar graph displays at the top of the screen. When the cue is complete, moving the manual fader back to the original position will crossfade between the next two cues. - Page 20 the same techniques that are used to create the Cues; faders, channel controls, or touching channel numbers. Clicking or touching 'Save' will update the cue. 'Previous' and 'Next' can be used to preview other cues in the show.
-
Page 21: Chase
7. Chase LPC uses Chase patterns to run sequences. Chases can be linked to cues or submasters, or selected and controlled from a front panel fader. The first four chases are permanent system chases, and cannot be altered. There are a total of sixteen programmable chase patterns available. -
Page 22: Saving Chase Patterns
cycles. Blend - Chases can be set to snap from step to step, or fade from one step to the next. Setting blend to zero sets the chase to snap, and a blend value of 100% will produce a fluid chase that is constantly fading from one step to the next. The 'Delete' control is used to remove steps from a chase pattern. -
Page 23: Support And Contact Info
8. Support and Contact Info Up to date product information will be available from our website: www. Leprecon.com We can also be reached at our physical address: Leprecon, LLC 10087 Industrial Drive PO Box 218 Hamburg, MI 48139 810 231 9373...
Need help?
Do you have a question about the LPC-48V and is the answer not in the manual?
Questions and answers