Table of Contents
Advertisement
Quick Links
Installation and Care Guide
Guide d'installation et d'entretien
Guía de instalación y cuidado
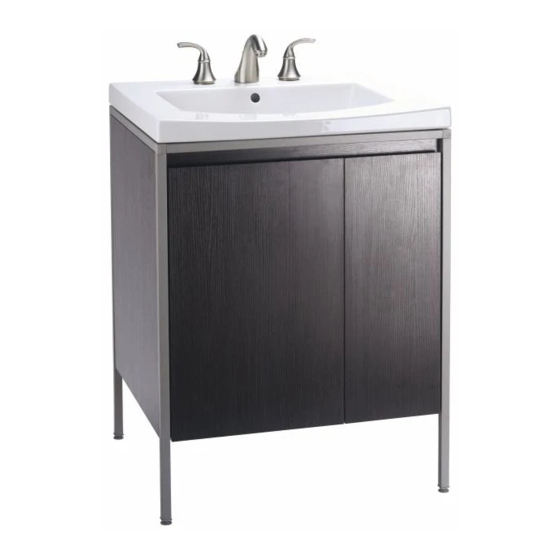
Vanity
Meuble
Tocador
K-2529
M product numbers are for Mexico (i.e. K-12345M)
Los números de productos seguidos de M
USA/Canada: 1-800-4KOHLER
corresponden a México (Ej. K-12345M)
México: 001-800-456-4537
kohler.com
1106944-2-A
©2009 Kohler Co.
Advertisement
Table of Contents

Related Manuals for Kohler K-2529


Summary of Contents for Kohler K-2529
- Page 1 Guide d’installation et d’entretien Guía de instalación y cuidado Vanity Meuble Tocador K-2529 M product numbers are for Mexico (i.e. K-12345M) Los números de productos seguidos de M USA/Canada: 1-800-4KOHLER corresponden a México (Ej. K-12345M) México: 001-800-456-4537 kohler.com 1106944-2-A ©2009 Kohler Co.
-
Page 2: Merci D'avoir Choisi La Compagnie Kohler
All the information in this guide is based upon the latest product information available at the time of publication. At Kohler Co. we strive to fulfill our mission of improving the level of gracious living for each person who is touched by our products and services. We reserve the right to make changes in product characteristics, packaging, or availability at any time without notice. -
Page 3: Before You Begin
Do not use 100% silicone sealant, which will damage the finish of the vanity. Observe all local plumbing and building codes. Two people should install this product. Kohler Co. reserves the right to make revisions in the design of products without notice, as specified in the Price Book. Avant de commencer AVERTISSEMENT: Risque d’endommagement du matériel. -
Page 4: Antes De Comenzar
Cumpla con todos los códigos locales de plomería y construcción. Dos personas deben instalar este producto. Kohler Co. se reserva el derecho de modificar el diseño de los productos sin previo aviso, tal como se especifica en la lista de precios. - Page 5 1/4" (3 mm) (3 mm) (6 mm) 1" (2.5 cm) 22-1/2" 23-1/2" 31-1/2" (57.2 cm) (59.7 cm) (80 cm) 8" 7" (20.3 cm) (17.8 cm) 14-1/8" (35.9 cm) 3/4" (1.9 cm) 20" (50.8 cm) 22-1/2" (57.2 cm) Kohler Co. 1106944-2-A...
-
Page 6: Prepare Site
Raccorder l’alimentation d’eau et les conduites de drain dans la zone de plomberie du raccordement du meuble. Se référer à la section « Plan de raccordement » du meuble et du lavabo pour la mise en place correcte. 1106944-2-A Kohler Co. -
Page 7: Prepare El Sitio
Termine la pared acabada. Asegúrese de que la pared acabada esté recta y a plomo, y que el piso esté plano y perpendicular a la pared acabada. AVISO: No instale molduras que puedan impedir que el tocador quede al ras con la pared acabada. Kohler Co. 1106944-2-A... - Page 8 Align and insert the front rail and rear rail onto the frame. Complete Assembly Place seven (7) studs into the inserts of the left frame. Insert four (4) wood dowels into the shelf assembly dowel holes. Align and insert the left frame into the shelf assembly. 1106944-2-A Kohler Co.
- Page 9 Coloque siete (7) pernos en los insertos de la estructura izquierda. Inserte cuatro (4) espigas de madera en los orificios de espiga del montaje del estante. Alinee e inserte la estructura izquierda en el montaje del estante. Kohler Co. 1106944-2-A...
- Page 10 Insérer quatre (4) cames dans le rail avant, quatre (4) cames dans le rail arrière et six (6) cames dans l’étagère. Utiliser un tournevis cruciforme pour tourner les serrures d’un quart de tour dans le sens des aiguilles d’une montre. 1106944-2-A Kohler Co.
- Page 11 (hacia la derecha para subir, hacia la izquierda para bajar). Taladre orificios guía a través del riel posterior, la pared acabada y dentro del material de refuerzo. Inserte pernos de fijación (no provistos) en los orificios, luego apriete los pernos de fijación. Kohler Co. 1106944-2-A...
- Page 12 à 100%, cela endommagera la finition du meuble. NOTICE: Ne pas laisser le mastic entrer en contact avec les glissières et le chariot des tiroirs. Appliquer un lit fin et continu de mastic acrylique siliconé autour du rebord supérieur complet du meuble. 1106944-2-A Kohler Co.
- Page 13 Limpie el exceso de sellador de los filos y limpie el sellador que pueda haber entrado en contacto con las correderas de cajón y el carro. Deje secar el sellador durante por lo menos ocho horas. Conecte todas las líneas de plomería y desagüe. Verifique que no haya fugas. Kohler Co. 1106944-2-A...
-
Page 14: Install Door
Remove Hold and support the door with one hand while releasing the lower hinge latch from the bracket. Repeat for the lower hinge. Adjust Refer to the illustration and note the screwdriver location for desired adjustment type. 1106944-2-A Kohler Co. -
Page 15: Installer La Porte
Sostenga la puerta con una mano y al mismo tiempo suelte el enganche de la bisagra inferior del soporte. Repita este procedimiento con la bisagra inferior. Ajuste Consulte la ilustración y apunte donde debe colocar el destornillador para obtener el tipo de ajuste deseado. Kohler Co. 1106944-2-A... -
Page 16: Service Drawer
Risk of personal injury. To ensure the drawer is properly installed, ensure the latches are engaged on the drawer. Open and close the drawer to confirm proper operation and ensure the latches are engaged. Dépanner le tiroir Retrait Étendre complètement le tiroir. 1106944-2-A Kohler Co. -
Page 17: Care And Cleaning
Abra y cierre el cajón para confirmar que funcione correctamente y asegúrese que los enganches estén encajados. Care and Cleaning For best results, keep the following in mind when caring for your KOHLER product: Metal • Use a mild detergent such as liquid dishwashing soap and warm water for cleaning. -
Page 18: Entretien Et Nettoyage
• To protect against scratches, use felt, leather, or cork under all items placed on the wood surface. To conceal scratches, a touch-up marker is available for order. Contact a Kohler distributor or call 1-800-4-KOHLER for ordering information. • Do not expose wood furniture to direct sunlight, drying heat sources, or dampness. -
Page 19: Cuidado Y Limpieza
Kohler Co. will, at its election, repair, replace or make appropriate adjustment where Kohler Co. inspection discloses any such defects occurring in normal usage within one (1) year after installation. Kohler Co. is not responsible for removal or installation costs. Use of in-tank toilet cleaners will void the warranty. -
Page 20: Garantie
Kohler Co. jugera à sa discrétion, de la réparation, du remplacement ou du réglage approprié et ceci après toute inspection faite par Kohler Co. de tous défauts dus à une utilisation normale et ceci pendant un (1) an à partir de la date d’installation. Kohler Co. - Page 21 El uso de limpiadores de inodoro que se colocan dentro del tanque anulará la garantía. Para obtener el servicio de garantía, comuníquese con Kohler Co. a través de su distribuidor, contratista de plomería o distribuidor a través de Internet, o escriba directamente a: Kohler Co., Attn.: Customer Care Center, 444 Highland Drive, Kohler, WI...
- Page 22 Plumón para retocar **Finish/color code must be specified when ordering. **Vous devez spécifier les codes de la finition et/ou de la couleur quand vous passez votre commande. **Se debe especificar el código del acabado/color con el pedido. 1106944-2-A Kohler Co.
- Page 23 Kohler Co. 1106944-2-A...
- Page 24 1106944-2-A...
Need help?
Do you have a question about the K-2529 and is the answer not in the manual?
Questions and answers