Table of Contents
Advertisement
Quick Links
P
R
E
S
E
P
R
E
S
E
N
E
T
A
S
N
E
T
A
S
Date
April 2010
September 2010
Reference: naengde_product-installation
Copyright NETASQ 2010
N
T
A
T
I
O
N
N
T
A
T
I
O
N
Q
P
R
O
D
U
Q
P
R
O
D
U
Version
V1.0
V1.1
A
N
D
I
N
S
T
A
A
N
D
I
N
S
T
C
T
S
C
T
S
Author
NETASQ
NETASQ
L
L
A
T
I
O
N
A
L
L
A
T
I
O
N
Details
Creation
Update
INSTALLATION GUIDE
O
F
O
F
Page 1/65
Advertisement
Table of Contents

Related Manuals for NETASQ NA-F25


Summary of Contents for NETASQ NA-F25
- Page 1 INSTALLATION GUIDE Date Version Author Details April 2010 V1.0 NETASQ Creation September 2010 V1.1 NETASQ Update Reference: naengde_product-installation Copyright NETASQ 2010 Page 1/65...
- Page 2 You are strongly advised to read this document in full before installing any NETASQ UTM product. This guide aims to facilitate the quick integration of a NETASQ firewall into your network, but does not provide information on how to configure it. Please consult the relevant help file on the CD-ROM provided for configuration matters.
- Page 3 Under no circumstances shall NETASQ be held liable for any loss of data or revenue, or any special damage or incident, resulting from or indirectly caused by the use of the product and its associated documentation.
-
Page 4: Table Of Contents
EAR PANEL 5 CONNECTIONS 31 NSTALLATION PRECAUTIONS 5.1.1 OCATION OWER PLUG ONNECTION FOR ADMINISTERING THE APPLIANCE ONNECTING TO THE NETWORK 5.4.1 5.4.2 Copyright NETASQ 2010 Page 4/65... - Page 5 CENARIO IN WHICH A PORT CARD IS ADDED TO A DEFAULT CONFIGURATION 7.4.3 PCI-X PCI-E CENARIO IN WHICH A PORT CARD IS ADDED AFTER A CARD APPENDIX D: ADDING AN NG1000-A AND NG5000-A EXTENSION MODULE 62 Copyright NETASQ 2010 Page 5/65...
- Page 6 INSTALLATION GUIDE: CONTENTS ENERAL POINTS PPLIANCES CONCERNED ESCRIPTION OF THE CARDS ROCEDURE FOR ADDING A CARD APPENDIX E: INSTALLING VIA THE CD-ROM 64 GLOSSARY 65 Copyright NETASQ 2010 Page 6/65...
-
Page 7: Introduction
In the case of an intrusion attempt, depending on the instructions given in the security policy, the NETASQ Firewall blocks the transmission, generates an alarm and stores the information linked to the packet which had set off the alarm. -
Page 8: Usage Precautions
It would be even better to protect the power supply with UPS devices. WARNING NETASQ appliances do not have power supply switches. In all cases, unplugging the power cable from the mains socket will disconnect the appliance from the main power supply. - Page 9 The metal brackets on the front panel of the U6000, NG1000-A and NG5000 products are not to be used for lifting the product but only for racking the firewall or for removing it from its racks. Copyright NETASQ 2010 Page 9/65...
-
Page 10: Upon Receiving Your Firewall
INSTALLATION GUIDE : 3. UPON RECEIVING YOUR FIREWALL In order to guarantee the integrity of your product, NETASQ has set up several mechanisms. Check these mechanisms to confirm that your product has not been tampered with: 3.1.1 Labels Every firewall is delivered in a cardboard box with three labels affixed, indicating information identifying the product it contains and its version. -
Page 11: Quality Seal
Figure 3: Product version label 3.1.2 Quality seal Every firewall is delivered in a cardboard box on which a NETASQ-specific quality seal or a “NETASQ QUALITY SEAL” is affixed. Check that there is such a seal on your product’s packaging. -
Page 12: Firewall Seal
This label has the peculiarity of displaying a message (VOID) that cannot be erased once the label has been removed. There are two types of seal: one pasted by NETASQ after production and one pasted by your partner if a maintenance operation has been performed on your appliance (your partner would have explained this maintenance operation to you through an activity certificate). -
Page 13: The Chassis
(U30, U70). 3.2.1 The chassis Flexible feet have been placed under the chassis of the firewall to ensure that the NETASQ firewall is on a stable plane (on a desk or on other IT equipment) and is protected from scratches. -
Page 14: Presentation Of The Appliances
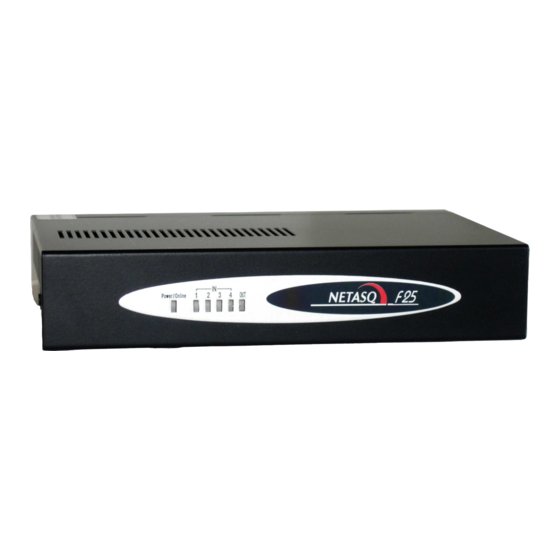
Online The Online LED goes off first, then Status followed by Power. The connectors on U30, U70, U120, U250 and U450 appliances are located on the front panel. The U30 appliance has the following characteristics: Copyright NETASQ 2010 Page 14/66... - Page 15 The LEDs above the interfaces provide indications as to the throughput. For the U30, an interface with a LED that does not light up indicates a throughput of 10 mbits/s, an interface with 2 LEDs that light up indicate a throughput of 100 mbits/s. Copyright NETASQ 2010 Page 15/66...
-
Page 16: The U70 Appliance
Online LED will be the last to light up when the product is running. Traffic will pass through the interfaces. When the appliance is starting, shutting down or being updated, only the Status and Power LEDs will light Copyright NETASQ 2010 Page 16/66... -
Page 17: The U120 Appliance
3. Serial port: for connecting the firewall directly to a PC or modem. 4. PS2 mini-din port: for connecting a keyboard. 5. VGA port: for connecting a monitor. 6. Button to reset to the default configuration (defaultconfig). 7. 1 USB port: for secure configuration or updates. Copyright NETASQ 2010 Page 17/66... -
Page 18: The U250 Appliance
NOTE: power is supplied to this appliance from inside the rear panel. An upgrade to version 8.0 is recommended. The U250 appliance has the following characteristics: Throughput of 850 Mbits/s. 400,000 concurrent connections. 6 Gigabit interfaces. 8,500 new sessions per second. Copyright NETASQ 2010 Page 18/66... - Page 19 IN interface, this indicates a throughput of 10 mbits/s, 2 LEDs that light up indicate a throughput of 100 mbits/s and if the right LED lights up, this indicates a throughput of 1000 mbits/s. One or two blinking LEDs on an IN interface indicate the presence of network activity. Copyright NETASQ 2010 Page 19/66...
-
Page 20: The U450 Appliance
The Status LED will blink (quick blinking every 250 milliseconds) in the event of a major failure of the product (hardware modification, faulty network interface, etc). In this case, do contact your distributor. Copyright NETASQ 2010 Page 20/66...
Need help?
Do you have a question about the NA-F25 and is the answer not in the manual?
Questions and answers