Table of Contents
Advertisement
Available languages
Available languages
Advertisement
Chapters
Table of Contents

Subscribe to Our Youtube Channel
Related Manuals for Oregon Scientific JM889N


Summary of Contents for Oregon Scientific JM889N
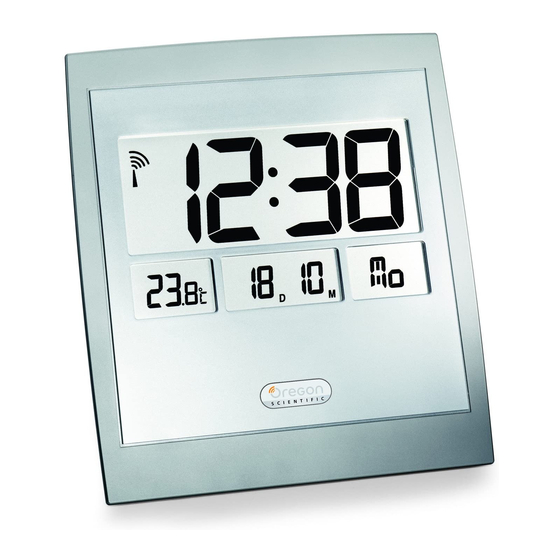
- Page 1 Jumbo RF Clock with Indoor Thermometer Model: JM889N / JM889NU User Manual...
-
Page 2: Table Of Contents
Displaying alarm time ... 8 Adjusting the alarm time ... 9 Activating / deactivating the alarm ... 9 Reset hole ... 9 Troubleshooting guide ... 10 Specifications ... 11 Warnings ... 11 About Oregon Scientific ... 12 EC-Declaration of conformity... 13... -
Page 3: Tm Jumbo Rf Clock
MSF60 generated from Rugby, England (model JM889NU) or DCF77 generated from Frankfurt, Germany for Central Europe (model JM889N). In addition to providing step-by-step instructions for this product, this manual contains important safety and care information. -
Page 4: Back View
Back View 5. Wall-Mount Recess Hole For mounting the unit to a wall 6. Alarm Button Display and adjust alarm time 7. Clock Button Manually adjust current time and date 8. Reset Hole Returns all settings to default values. Button... -
Page 5: Safety And Care Instructions
GETTING STARTED Unpacking the product When you unpack your clock, make sure to keep all the packing materials in a safe place, in case you need to later transport or return it for servicing. In the box, you will find:... -
Page 6: Batteries
Batteries NOTE When using the product for the first time, please note that the batteries have already been installed in the unit. To operate, locate the clear plastic battery tab inside the battery compartment and remove it. To load the batteries: Diagram Instructions 1. -
Page 7: Indoor Temperature Display
To toggle between displaying seconds or day-of-week on the LCD screen, press CLOCK. RADIO RECEPTION This product is designed to synchronize its calendar clock automatically once it is brought within range of the radio signal. When the unit is receiving the signal, the Radio Reception symbol with start to blink. -
Page 8: Enabling/Disabling Radio Reception
Press once or press and hold [UP to adjust the value of each setting. Diagram Instructions 1. Press and hold the CLOCK button for 2 seconds. 2. Adjust the current month. Press CLOCK when done. Diagram ] simultaneously for... -
Page 9: Language Options
ALARM FUNCTIONS Basic Functions Your product can also be used as an alarm clock. 1. When the alarm sounds, you can turn it off by pressing ALARM. 2. The alarm will automatically stop ringing after 1 minute. -
Page 10: Adjusting The Alarm Time
2. Press ALARM button to enable or disable the alarm. RESET HOLE If the clock behaves strangely or stops responding, insert and press a blunt stylus into the clock’s Reset Hole. The clock will then be reset to its original factory setting. is displayed,... -
Page 11: Troubleshooting Guide
Batteries of the Check LCD on LCD screen. unit are low. Display of the unit. Clock time is not No radio signal Electromagnetic correctly set. reception. interference or objects are barring reception. Orientation or... -
Page 12: Specifications
Weight 426g (without batteries) Radio frequency: System DCF77 (JM889N) or MSF60 (JM889NU) Display: Time format 24 Hour (JM889N) or 12-Hour AM/PM (JM889NU) Date format DD-MM Day-of-week display In English, French, German, Spanish, and Italian Clock accuracy +/-0.5 second per day... -
Page 13: About Oregon Scientific
We hope you will find all the information you need on our website, however if you'd like to contact the Oregon Scientific Customer Care department directly, please visit: www2.oregonscientific.com/service/support Call 949-608-2848 in the US. -
Page 14: Ec-Declaration Of Conformity
EC-DECLARATION OF CONFORMITY This product complies with the essential requirements of Article 3 of the R&TTE 1999 / 5 / EC Directive, if used as intended and the following standards have been applied: Safety of information technology equipment (Article 3.1.a of the R&TTE Directive) Applied Standard Electromagnetic compatibility (Article 3.1.b of the R&TTE Directive) - Page 15 Cómo configurar las alarmas ... 9 Cómo activar / desactivar las alarmas ... 9 Cómo volver a configurar la unidad ... 9 Resolución de problemas ... 10 Especificaciones ... 11 Advertencias ... 11 Sobre Oregon Scientific ... 12 EC-Declaracion de Conformidad ... 13...
-
Page 16: Introducción
MSF60 que se transmite desde Rugby, Inglaterra (Modelo JM889NU) o la señal de radio DCF77 que se transmite desde Frankfurt, Alemania, para Europa Central (Modelo JM889N). Este manual, además informarle sobre el manejo y cuidado del prodcuto, contiene información importante sobre seguridad y mantenimiento. -
Page 17: Vista Posterior
Vista posterior 5. Orificio para colgar de la pared Para colgar la unidad de la pared. 6. Botón de alarma Para mostrar y ajustar el horario de la alarma. 7. Botón del reloj Para ajustar manualmente el horario y la fecha actual. 8. -
Page 18: Instrucciones De Seguridady Mantenimiento
INSTRUCCIONES DE SEGURIDAD Y MANTENIMIENTO Precauciones de seguridad Tenga en cuenta las siguientes precauciones de seguridad cuando utilice este producto. • Panel LCD - El panel LCD puede romperse si la unidad se cae o si se golpea. • Fuentes de calor - Mantenga este producto alejado de fuentes de calor, como radiadores, estufas, calefactores y otros productos que generen calor. -
Page 19: Pilas
Pilas NOTA Con el producto se entregan 2 pilas UM-3/ AA de 1.5 V. Ya están instaladas así que asegúrese de que se ha retirado la lengüeta de plástico transparente dentro del compartimiento de la pila antes de hacer funcionar el producto. Para colocar las pilas: Diagrama Instrucciones... -
Page 20: Descripción De La Recepción De Radio
Cambio entre la pantalla con los segundos/día de la semana Para cambiar entre la pantalla con los segundos o el día de la semana en la pantalla LCD, presione el CLOCK (RELOJ). LA RECEPCIÓN DE RADIO Este producto fue diseñado para sincronizar automáticamente su reloj cuando se encuentra dentro del alcance de la señal de... -
Page 21: Cómo Habilitar / Deshabilitar La Recepción
4. Elija el idioma exhibido para el día de la semana. Presione CLOCK (RELOJ) cuando termine. 5. Elija el día actual de la semana. Presione CLOCK (RELOJ) cuando termine. 6. Ajuste el horario actual. Presione CLOCK (RELOJ) cuando termine. -
Page 22: Opciones Del Idioma
Opciones de idioma La unidad principal puede mostrar el día de la semana en cinco idiomas seleccionables. FUNCIÓN DE ALARMA Funciones básicas También se puede utilizar este producto como un reloj alarma. 1. Cuando finaliza la alarma, puede apagarla presionando ALARM (ALARMA). - Page 23 Ajuste el horario de la alarma Asegúrese de que el Horario de la alarma aparezca en la pantalla de LCD. Diagrama Instrucciones 1. Presione sin soltar el botón de ALARM (ALARMA) durante 2 segundos. 2. Ajuste la hora del Horario de la alarma. Presione ALARM (ALARMA) cuando termine.
-
Page 24: Resolución De Problemas
RESOLUCIÓN DE PROBLEMAS Esta sección incluye una lista de preguntas frecuentes para los problemas con los que se puede encontrar. Si su reloj no está funcionando como usted piensa que debería hacerlo, compruebe lo siguiente antes de llevarlo a reparar: Problema Síntoma Compruebe... -
Page 25: Especificaciones
Ancho x Alto x Fondo 234mm x 220mm x 23mm (A x A x D) Peso 426g (sin batería) Frecuencia de radio: Sistema DCF77 (JM889N) o MSF60 (JM889NU) Pantalla: Formato hora 12hr am/pm (JM889NU)/ 24hr (JM889N) Formato para la fecha DD/MM (Día/Mes) -
Page 26: Sobre Oregon Scientific
SOBRE OREGON SCIENTIFIC Visite nuestra página web (www.oregonscientific.com) para conocer más sobre los productos de Oregon Scientific tales como: Reproductores MP3, juegos y productos de aprendizaje electrónico para niños, relojes de proyección, productos para la salud y el deporte, estaciones meteorológicas y teléfonos... -
Page 27: Ec-Declaracion De Conformidad
EC-DECLARACIÓN DE CONFORMIDAD Este producto cumple con las normas esenciales que marca el Artículo 3 de la Directiva Europea R&TTE 1999 / 5 / EC siempre que cumpla los siguientes parámetros: La seguridad de equipo de tecnología de información (Artículo 3.1.a de la Directiva R&TTE) el standard(s) aplicado La compatibilidad electromagnética (Artículo 3.1.b de la Directiva R&TTE) - Page 28 Grundfunktionen ... 8 Weckalarmzeitanzeige ... 8 Einstellen des Weckalarms ... 9 Ein-/Ausschalten des Weckers ... 9 Rücksetzung des Gerätes ... 9 Leitfaden zur Fehlerdiagnose ... 10 Technische Daten ... 11 Warnungen ... 11 Über Oregon Scientific ... 12 EG-Konformitätserklärung ... 13...
-
Page 29: Einleitung
• Tägliche Weckfunktion *Synchronisiert automatisch die aktuelle Uhrzeit und das aktuelle Datum mit dem von Frankfurt, Deutschland für Mitteleuropa ausgestrahlten Funkzeitsignal DCF77 (JM889N), sobald sich die Uhr in einem Umkreis von 1500km vom Sender befindet. Die UK-Version (JM889NU) synchronisiert mit dem MSF60 Funkzeitsignal aus Rugby, England. -
Page 30: Rückansicht
5. Bohrung für Wandmontage Zum anbringen des Gerätes an einer Wand. 6. [Alarm] Taste Zur Einstellung und Anzeige der Weckalarmzeit. 7. [Clock] Taste (Uhr) Zum manuellen Einstellen der aktuellen Uhrzeit und des Datums sowie zur Umschaltung zwischen Sekunden- und Wochentagsanzeige. -
Page 31: Sicherheits- Und Pflegehinweise
SICHERHEITS- UND PFLEGEHINWEISE VORSICHTSMASSNAHMEN Bitte beachten Sie die folgenden Sicherheitsvorkehrungen, wenn Sie dieses Produkt in Betrieb nehmen und verwenden. • LCD-Scheibe - Die LCD-Scheibe ist aus Glas und kann zerbrechen, wenn Sie das Gerät fallen lassen oder Stößen aussetzen. • Wärmequellen - Bringen Sie dieses Produkt nicht in die Nähe von Wärmequellen wie z.B. -
Page 32: Batterien
Batterien HINWEIS Zwei (2) Batterien der Größe LR6/UM-3/AA 1,5V werden mit dem Produkt mitgeliefert und wurden bereits in das Gerät eingelegt. Stellen Sie sicher, dass die durchsichtige Plastiklasche (Batterietrennstreifen) im Batteriefach entfernt wurde, bevor Sie das Produkt in Betrieb nehmen. Einlegen der Batterien: Abbildung Anweisungen... -
Page 33: Innentemperaturanzeige
Innentemperaturanzeige Unmittelbar nach Entfernung des Batterietrennstreifens, misst das Gerät die Innentemperatur und zeigt diese an. Umschalten zwischen Sekunden-/Wochentagsanzeige Betätigen Sie die CLOCK (Uhr) um, auf der LCD-Anzeige, zwischen der Sekunden- und der Wochentagsanzeige umzuschalten. Abbildung Dieses Produkt wurde zur automatischen Synchronisation der Uhrzeit und des Datums entwickelt, sobald es sich im Empfangsbereich des Funksignals befindet. -
Page 34: Ein-/Ausschalten Des Funkempfangs
] gedrückt um die jeweiligen Werte einzustellen. Abbildung ] und [ Beschreibung 1. Halten Sie die CLOCK Taste (Uhr) für 2 Sekunden gedrückt. 2. Stellen Sie den aktuellen Monat ein. Betätigen Sie CLOCK (Uhr) wenn Sie fertig sind. 3. Stellen Sie das aktuelle Datum ein. Betätigen Sie CLOCK (Uhr) wenn Sie fertig sind. -
Page 35: Sprachenauswahl
Abbildung Beschreibung 6. Stellen Sie die aktuelle Stunde ein. Betätigen Sie CLOCK (Uhr) wenn Sie fertig sind. 7. Stellen Sie die aktuelle Minute ein. Betätigen Sie CLOCK (Uhr) wenn Sie fertig sind. 8. Die LCD-Anzeige schaltet zur normalen Zeitanzeige zurück. -
Page 36: Einstellen Des Weckalarms
Abbildung Beschreibung 3. Die eingestellte Weckalarmzeit wird angezeigt. Einstellen des Weckalarms Stellen Sie sicher dass die Weckalarmzeit auf der LCD-Anzeige angezeigt wird. Abbildung Beschreibung 1. Halten Sie die ALARM Taste für 2 Sekunden gedrückt. 2. Stellen Sie die Stunde für den Alarm ein. Betätigen Sie ALARM wenn Sie fertig sind. -
Page 37: Leitfaden Zur Fehlerdiagnose
LEITFADEN ZUR FEHLERDIAGNOSE Dieser Abschnitt enthält eine Liste von häufig gestellten Fragen in Bezug auf Probleme, welche auftreten können. Wenn Ihr Gerät nicht so funktioniert, wie es Ihrer Meinung nach funktionieren sollte, sehen Sie hier bitte nach, bevor Sie sich an den Kundendienst wenden. -
Page 38: Technische Daten
Deutschland (Die UK- Version synchronisiert mit dem MSF60 Funkzeitsignal aus Rugby, England.) Anzeige: Zeitformat 12 Stunden- (JM889NU) (am/pm) oder 24 Stundenformat (JM889N) Datumsformat TT / MM (Tag / Monat) Wochentagsanzeige In Englisch, Französisch, Deutsch, Spanisch oder Italienisch Zeitgenauigkeit +/- 0,5 Sekunden/Tag (wenn... -
Page 39: Über Oregon Scientific
Sie bitte Ihre örtlichen Bestimmungen zur Abfallentsorgung. ÜBER OREGON SCIENTIFIC Besuchen Sie unsere Website (www.oregonscientific.de) und erfahren Sie mehr über unsere Oregon Scientific- Produkte wie zum Beispiel Digitalkameras, MP3-Player, Kinderlerncomputer und Spiele, Projektionsfunkuhren, Produkte für Gesundheit und Fitness, Wetterstationen und Digital-und Konferenztelefone. -
Page 40: Eg-Konformitätserklärung
EG-KONFORMITÄTSERKLÄRUNG Bei bestimmungsgemäßer Verwendung entspricht dieses Produkt den grundlegenden Anforderungen des Artikels 3 der R & TTE 1999 / 5 / EG Richtlinie. Folgende(r) Standard(s) wurde(n) angewandt: Schutz der Gesundheit und Sicherheit des Benutzers (Artikel 3.1.a der R & TTE Richtlinie) Angewandte(r) Standard(s) Elektromagnetische Verträglichkeit (Artikel 3.1.b der R &... - Page 41 Ajustement de l'heure de l'alarme ... 9 Activation / Désactivation de la sonnerie ... 9 Remise à zéro de l'appareil ... 9 Guide de dépannage ... 10 Caractéristiques techniques ... 11 Avertissements ... 11 A Propos d'Oregon Scientific ... 12 Déclaration de conformite Européenne ... 13...
-
Page 42: Introduction
MSF 60 émis de Rugby en Angleterre (modèle JM889NU) ou du signal DCF77 émis pour l'Europe Centrale de Frankfort-sur-le-Main en Allemagne (modèle JM889N). En plus d'instructions détaillées sur ce produit, ce mode d'emploi contient également des informations importantes concernant la sécurité... -
Page 43: Vue Arrière
Vue arrière 5. Trou de fixation murale Pour l'installation de l'unité au mur 6. Bouton d'alarme Pour afficher et ajuster l'heure de l'alarme 7. Bouton d'horloge Pour ajuster manuellement l'heure et la date actuelles 8. Trou de réinitialisation Renvoie les paramètres aux valeurs par défaut Bouton Utilisé... -
Page 44: Notices Concernant La Sécurité Et L'entretien
NOTICES CONCERNANT LA SECURITE ET L'ENTRETIEN Précautions de sécurité Prière de suivre pendant le réglage et l'utilisation de ce produit les précautions de sécurité suivantes : • Affichage à cristaux liquides - L'affichage est fait de verre et peut se casser pendant une chute ou un choc. •... -
Page 45: Piles
Piles REMARQUE Deux piles UM-3/AA 1.5 V sont livrées avec l'appareil. Les piles sont déjà installées. Vous devez, avant de mettre l'appareil en marche, vérifiez que la languette en plastique dans le logement des piles a été retirée. Pour changer les piles : Figure Instructions 1. -
Page 46: Affichage De La Température Intérieure
Bascule entre un affichage des secondes/du jour de la semaine Pour basculer entre un affichage des secondes ou du jour de la semaine, appuyez sur CLOCK. LA RECEPTION RADIO Cet appareil synchronise automatiquement le réveil et le calendrier dès qu'il se trouve dans la zone de réception du signal radio. -
Page 47: Sélecteur Marche/Arrêt De La Réception Radio
Graphiques Instructions 1. Appuyez et retenez le bouton CLOCK pendant 2 secondes. 2. Ajustez le mois actuel. Appuyez sur CLOCK lorsque vous avez terminé. Graphiques ] Pour ajuster la Instructions 3. Ajustez la date actuelle. Appuyez sur CLOCK lorsque vous avez terminé. -
Page 48: Options De Langue
Options de langue L'unité principale peut afficher le jour de la semaine dans cinq langues différentes. FONCTION ALARME Fonctions de base Votre produit peut également être utilisé comme une alarme. 1. Lorsque l'alarme est déclenchée, vous pouvez la désactiver en appuyant sur ALARM. -
Page 49: Ajustement De L'heure De L'alarme
Ajustement de l'heure de l'alarme Assurez-vous que celle-ci est actuellement affichée sur l'écran à cristaux liquides. Graphiques Instructions 1. Appuyez sur et retenez le bouton ALARM pendant 2 secondes. 2. Ajustez l'heure de l'heure de l'alarme. Appuyez sur ALARM lorsque vous avez terminé. 3. -
Page 50: Guide De Dépannage
GUIDE DE DEPANNAGE Ce chapitre contient une liste des questions souvent posées, concernant des problèmes que vous pouvez rencontrer. Si vous pensez que l'appareil ne fonctionne pas correctement, vérifiez ici le problème avant de vous reporter au service technique. Problème Symptôme A vérifier L'antenne de la... -
Page 51: Caractéristiques Techniques
Largeur x hauteur x 234mm x 220mm x 23mm profondeur Poids 426g (sans piles) Fréquence radio : Système DCF77 (JM889N) ou MSF60 (JM889NU) Affichage : Format de l'heure 12 heures (JM889NU) am/pm ou 24 heures (JM889N) Format de la date... -
Page 52: A Propos D'oregon Scientific
Nous espérons que vous trouverez toutes les informations dont vous avez besoin sur notre site, néanmoins, si vous souhaitez contacter le service client Oregon Scientific directement, allez sur le site www2.oregonscientific.com/service/support ou appelez le 949-608-2848 aux US. Pour des demandes internationales, rendez vous sur le site: www2.oregonscientific.com/about/international/default.asp... -
Page 53: Déclaration De Conformite Européenne
DÉCLARATION DE CONFORMITE EUROPÉENNE Cet instrument est conforme aux exigences contenues dans l'Article 3 des Directives R&TTE 1999 / 5 / EC : si il est utilisé à bon escient et si la ou les normes suivantes sont respectées: Sécurité des appareils à technologie d'information (Article 3.1.a de la Directive R&TTE) norme(s) appliquée(s) Compatibilité... - Page 54 Impostazione della sveglia ... 9 Abilitazione / Disabilitazione della sveglia ... 9 Reset dell'apparecchio ... 9 Guida alla soluzione dei problemi ... 10 Specifiche tecniche ... 11 Avvertenze ... 11 Informazioni su Oregon Scientific ... 12 Dichiarazione di conformità ... 13...
-
Page 55: Introduzione
INTRODUZIONE Grazie per avere scelto l'orologio JUMBO radiocontrollato, con termometro ambientale, della Oregon Scientific apparecchio è progettato per offrire molti anni di affidabile servizio. Ha le seguenti caratteristiche: • Orologio radiocontrollato con calendario* • Display con temperatura interna • Sveglia giornaliera... -
Page 56: Vista Dal Retro
5. Foro per il montaggio a parete Per montare l'apparecchio su una parete 6. Pulsante sveglia Per mostrare e regolare l'orario di sveglia 7. Pulsante clock Per impostare manualmente data e ora 8. Foro di reset Riporta le impostazioni ai valori iniziali 9. -
Page 57: Istruzioni D'uso E Manutenzione
ISTRUZIONI D'USO E MANUTENZIONE Avvertenze Osservare queste avvertenze nell'installazione ed uso del prodotto. • Schermo LCD - Lo schermo LCD può rompersi se l'apparecchio cade o viene urtato. • Fonti di calore - Mantenere il prodotto lontano da fonti di calore, come termosifoni, forni, stufe e altri oggetti che producono calore. -
Page 58: Batterie
Batterie NOTA 2 batterie da 1,5V UM-3/AA sono fornite con il prodotto. Sono già installate. Assicurarsi di rimuovere la striscia di plastica all'interno dello scomparto batterie per iniziare ad usare l'apparecchio. Per inserire le batterie: Schema Istruzioni 1. Localizzare lo scomparto batterie. 2. -
Page 59: Scelta Della Visualizzazione Secondi/Giorno Della Settimana
Scelta della visualizzazione secondi/giorno della settimana Per scegliere tra la visualizzazione dei secondi o del giorno della settimana sul display LCD, premere il pulsante CLOCK. LA RICEZIONE RADIO Questo prodotto è progettato per sincronizzare l'orologio e il calendario automaticamente una volta posto a portata del radiosegnale. -
Page 60: Abilitazione/Disabilitazione Della Ricezione Radio
] o [DOWN ] per regolare il valore di ogni impostazione. Schema Istruzioni 1. Premere e mantenere premuto il pulsante CLOCK per 2 secondi. 2. Impostare il mese corrente. Premere CLOCK una volta fatto. Schema ] finché il simbolo di Istruzioni 3. -
Page 61: Impostazione Della Lingua
Impostazione della lingua L'apparecchio può mostrare il giorno della settimana in cinque lingue selezionabili. LA SVEGLIA Funzioni base L'apparecchio può funzionare anche come sveglia. 1. Quando la sveglia si accende, é possibile spegnerla premendo ALARM. 2. L a s v e g l i a s m e t t e r à automaticamente di suonare dopo un minuto. -
Page 62: Impostazione Della Sveglia
Impostazione della sveglia Assicurarsi che l'orario di sveglia sia visualizzato sul display LCD. Schema Istruzioni 1. Premere e mantenere premuto il pulsante ALARM per 2 secondi. 2. Impostare l'ora della sveglia. Premere ALARM una volta fatto. 3. Impostare i minuti della sveglia. Premere ALARM una volta fatto. - Page 63 RISOLUZIONE DEI PROBLEMI Questa sezione comprende una lista di domande più frequenti poste sui problemi che si possono incontrare. Se il prodotto non funziona consultare la lista prima di contattare l'assistenza. Problema Causa Controllo L'antenna radio Il segnale radio Ostacoli non è...
-
Page 64: Avvertenze
Dimensioni: Larghezza x Altezza x 234mm x 220mm x 23mm Profondità Peso 426g (senza batterie) Frequenza radio: Sistema DCF77 (JM889N) o MSF60 (JM889NU) Display: Formato di visualizzazione 12 ore am/pm (JM889NU)/ dell'ora 24 ore (JM889N) Formato di visualizzazione GG / MM (Giorno/Mese) -
Page 65: Informazioni Su Oregon Scientific
• Nel disfarsi dell'apparecchio, farlo in accordo con le leggi locali per lo smaltimento dei rifiuti. INFORMAZIONI SU OREGON SCIENTIFIC Per avere maggiori informazioni sui nuovi prodotti Oregon Scientific, come le fotocamere digitali, il lettori MP3, i computer didattici per ragazzi, gli orologi con proiezione dell’ora, le... -
Page 66: Dichiarazione Di Conformità
DICHIARAZIONE DI CONFORMITÁ Questo prodotto è conforme ai requisiti essenziali dell'articolo 3 della Direttiva 1999 / 5 / CE di R&TTE se utilizzato per l'uso previsto e se vengono applicati i seguenti standard: Requisiti essenziali sulla sicurezza dell’apparecchio (Articolo 3.1.a della direttiva R&TTE) Standard applicati Compatibilità... - Page 67 Alarmtijden weergeven ... 8 De alarmen instellen ... 9 De alarmen activeren/deactiveren ... 9 Het toestel herinstellen ... 9 Gids voor het verhelpen van storingen ... 10 Specificaties ... 11 Waarschuwingen ... 11 Over Oregon Scientific ... 12 EG-Verklaring van Gelijkvormigheid ... 13...
-
Page 68: Inleiding
INLEIDING Wij danken u voor de aankoop van de Oregon Scientific Reuze RF Klok met Kamerthermometer. Dit product werd ontworpen om u vele jaren trouwe diensten te bewijzen met inbegrip van volgende opties: • Radiogestuurde kalenderklok* • Weergave kamertemperatuur • Dagelijks alarm... -
Page 69: Achteraanzicht
Achteraanzicht 5. Muurbevestigingsgaatje Om het apparaat aan de muur te hangen 6. Alarm Knop OM de alarm tijd weer te geven en bij te stellen 7. Klok Knop OM de huidige tijd en datum handmatig in te stellen 8. Reset Knop Zet alle instellingen terug naar de oorspronkelijke fabrieksinstellingen Knop... -
Page 70: Veiligheids- En Onderhoudsrichtlijnen
VEILIGHEIDS- EN ONDERHOUDSRICHTLIJNEN Veiligheidsvoorschriften Neem volgende veiligheidsvoorschriften in acht wanneer u uw dit product installeert en gebruikt. • LCD scherm - Het LCD scherm is uit glas vervaardigd en kan dus breken wanneer het toestel valt of aan een schok wordt blootgesteld. -
Page 71: De Batterijen
De batterijen OPGELET 2 UM-3/ AA 1.5 V batterijen werden met het product meegeleverd. Ze werden reeds in het toestel ingebracht, verzekert u ervan dat u het plastic label uit het batterijvak verwijdert opdat het product kan functioneren. Het inbrengen van de batterijen: Diagram Richtlijnen 1. -
Page 72: Kamertemperatuur Weergave
Schakelen tussen Seconden/Dag van de Week Weergave Om te schakelen tussen weergave van seconden of dag van de week op het LCD scherm, druk op de CLOCK. RADIO-ONTVANGST Dit product is zo ontworpen dat het de kalender en de klok automatisch aanpast wanneer het binnen het bereik van het radiosignaal komt. -
Page 73: De Radio-Ontvangst Activeren/Deactiveren
] ingedrukt om de waarde van iedere instelling te veranderen. Diagram Instructies 1. Houdt de CLOCK knop voor 2 seconden ingedrukt. 2. Stel de huidige maand in. Druk op CLOCK als u klaar bent. Diagram Instructies 3. Stel de huidige tijd in. Druk op CLOCK als u klaar bent. -
Page 74: Taal Keuzes
Taal Keuzes Het hoofdapparaat kan de dag van de week weergeven in 5 verschillende instelbare talen. ALARMFUNCTIE Algemene Functies Het apparaat kan tevens gebruikt worden als wekker. 1. Wanneer het alarm afgaat, kunt u het uitzetten door op ALARM te drukken. 2. - Page 75 Instellen van de alarmtijd Ga na dat de alarmtijd op dat moment weergegeven wordt op het LCD scherm. Diagram Instructies 1. Houdt de ALARM knop voor 2 seconden ingedrukt. 2. Stel het uur van de alarmtijd in. Druk op ALARM als u klaar bent.
-
Page 76: Gids Voor Het Verhelpen Van Storingen
GIDS VOOR HET VERHELPEN VAN STORINGEN Dit deel bevat een aantal veel voorkomende vragen inzake problemen die u kunt krijgen tijdens het gebruik. Werkt het product niet naar behoren dan kunt u dit hoofdstuk eerst doornemen voordat u het toestel inbrengt voor onderhoud. Probleem Symptoom Ga het... -
Page 77: Specificaties
234mm x 220mm x 23mm Gewicht 426g (zonder batterijen) Radiofrequentie: Systeem DCF77 (JM889N) of MSF60 (JM889NU) Display: Tijdsformaat 24 Hr. (JM889N) of 12 Hr. AM/PM (JM889NU) Datum formaat DD-MM Weekdag weergave In Engels, Duits, Frans, Italiaans en Spaans Tijdsnauwkeurigheid +/-0.5 sec per dag... -
Page 78: Over Oregon Scientific
OVER OREGON SCIENTIFIC Bezoek onze website (www.oregonscientific.com) om meer te weten over uw nieuwe product en andere Oregon Scientific producten zoals digitale fototoestellen, gezondheids- en fitnessuitrusting en weerstations. Op deze website vindt u tevens de informatie over onze klantendienst, voor het geval u... -
Page 79: Eg-Verklaring Van Gelijkvormigheid
EG-VERKLARING VAN GELIJKVORMIGHEID Dit product voldoet aan de essentiële vereisten van Artikel 3 van de R&TTE-richtlijnen 1999 / 5 / EC, indien gebruikt als aangewezen en dat volgende normen werden toegepast: Veiligheid van informatietechnologische uitrusting (Artikel 3.1.a van de R&TTE-richtlijnen) Toegepasten normen: Elektromagnetische congruentie (Artikel 3.1.b van de R&TTE-richtlijnen) - Page 80 Relógio RF Jumbo de Oregon Scientific com Termômetro para Interior (JM889N / JM889NU) Manual do Usuário ÍNDICE Introdução ... 2 Caracterísiticas Principais ... 2 Vista frontal ... 2 Vista posterior ... 3 Símbolos do Mostrador LCD ... 3 Instruções de Segurança e Manutenção ... 4 Precauções de Segurança ...
-
Page 81: Introdução
INTRODUÇÃO Agradecemos ter escolhido o Relógio JUMBO RF com Termômetro para interior da Oregon Scientific da sua preferência. O aparelho está concebido para lhe proporcionar muitos anos de um serviço de confiança, incluindo as seguintes funções: • Relógio-Calendário controlado via rádio* •... -
Page 82: Vista Posterior
Vista posterior 5. Abertura para pendurar na parede Para pendurar a unidade da parede 6. Botão de alarme Para exibir e ajustar o horário do alarme 7. Botão do relógio Para ajuste manual do horário e da data atuais 8. Abertura de reinício Restabelecimento de todas as configurações para os valores predeterminados Botão... -
Page 83: Instruções De Segurança Emanutenção
INSTRUÇÕES DE SEGURANÇA E MANUTENÇÃO Precauções de Segurança Por favor respeite as seguintes precauções de segurança referentes a montagem e utilização deste produto. • Painel LCD - O painel LCD é fabricado em vidro e pode partir-se se a unidade cair ou bater em algum objeto. •... -
Page 84: Pilhas
Pilhas NOTA São fornecidas com o produto 2 pilhas UM-3/AA 1.5V. As pilhas já se encontram instaladas, por isso retire a proteção de plástico, que se encontra no interior do compartimento das pilhas, para o produto poder funcionar. Para inserir as pilhas: Diagrama Instruções 1. -
Page 85: Recepção Rádio
A unidade vai ler e exibir a temperatura do interior do ambiente justo depois de retirado o separador de plástico. Mudança entre a tela com os segundos/día da semana Presionar o botão CLOCK (RELÓGIO) para mudar entre a tela LCD com os segundos ou com o dia da semana. RECEPÇÃO RÁDIO Este produto foi desenhado para sincronizar o seu calendário... -
Page 86: Ativar/Desativar A Recepção Rádio
3. Ajuste a data atual. Pressione CLOCK (RELÓGIO) quando finalizar. 4. Escolha o idioma exibido para o dia da semana. Pressione CLOCK (RELÓGIO) quando finalizar. 5. Escolha o dia atual da semana. Pressione CLOCK (RELÓGIO) quando finalizar. 6. Ajuste o horário atual. Pressione CLOCK (RELÓGIO) quando finalizar. -
Page 87: Função Alarme
Opções de idioma A unidade principal pode exibir o día da semana em cinco idiomas selecionáveis. FUNÇÃO ALARME Funções básicas Este produto também pode ser utilizado como um relógio de alarme. 1. Desligue o alarme pressionando ALARM (ALARME) quando a mesma finalizar. -
Page 88: Reprogramar A Unidade
Ajuste do horário do alarme Para ajustar o horário de alarme, verifique que o Horário do alarme fique exibido na tela de LCD. Diagrama Instruções 1. Pressione sem soltar o botão de ALARM (ALARME) durante 2 segundos. 2. Ajuste a hora do Horário do alarme. Pressione ALARM (ALARME) quando finalizar. -
Page 89: Guia De Resolução De Problemas
GUIA DE RESOLUÇÂO DE PROBLEMAS Esta seção inclui uma lista das questões mais frequentes relativas a problemas que possa encontrar. Se o seu aparelho não estiver funcionando devidamente, verifique, primeiro, aqui antes de o levar para a assistência. Problema Sintoma Verifique isto A antena do Não é... -
Page 90: Especificações
Largura x Altura x 234mm x 220mm x 23mm Profundidade Peso 426 g (sem pilhas) Frequência rádio: Sistema DCF77 (JM889N) oU MSF60 (JM889NU) Mostrador: Formato hora 12hr am/pm (JM889NU) / 24hr (JM889N) Formato para data DD / MM (Dia / Mês) Tela com o día da semana... -
Page 91: Sobre A Oregon Scientific
• Quando se desfizer do seu produto, faça-o de acordo com os regulamentos locais de remoção de resíduos. SOBRE A OREGON SCIENTIFIC Visite nosso site (www.oregonscientific.com.br) para aprender mais sobre nossos outros produtos, tais como Câmeras Digitais; Produtos de aprendizagem; Relógios de Projeção;... -
Page 92: Declaração De Conformidade-Ec
DECLARAÇÃO DE CONFORMIDADE-EC Este produto está em conformidade com os requerimentos essenciais do artigo 3 da diretriz R&TTE 1999 / 5 / EC, se usado para seu uso pretendido e os seguintes padrões foram aplicados: Segurança do Equipamento de tecnologia de informação (Artigo 3.1.a da diretriz R&TTE) Padrões Aplicados Compatibilidade Eletromagnética... - Page 93 Visa alarmtid ... 8 Ställa in alarmtid ... 9 Att ställa / stänga av alarmet ... 9 Att återställa enheten ... 9 Felsökningsguide ... 10 Teknisk specifikation ... 11 Varning ... 11 Om Oregon Scientific ... 12 Försäkran om Överensstämmelse ... 13...
-
Page 94: Klocka Med Inomhustermometer
INLEDNING Grattis till ert inköp av Oregon Scientific™ radiostyrd Jumbo klocka med inomhustermometer. Klockan är tillverkad för att fungera tillfredsställande i många år om den hanteras varsamt. Klockan har bland annat följande funktioner: • Radiostyrd klocka med kalender* • Display för inomhustemperatur •... -
Page 95: Baksida
Baksida 5. Hål för väggmontering För att montera enheten på väggen 6. Alarmknapp Visar och ändrar alarmtid 7. Klockknapp För att ställa in aktuell tid och datum manuellt 8. Reset-hål Återställer alla värden till fabriksinställningar Knapp För att justera ner inställningar med ett steg eller för att aktivera/stänga av radiomottagningen Knapp För att justera upp inställningar med ett steg eller för att... -
Page 96: Säkerhetsföreskrifter Och Skötselråd
SÄKERHETSFÖRESKRIFTER OCH SKÖTSELRÅD Säkerhetsföreskrifter Vänligen följ nedanstående säkerhetsföreskrifter vid installation och användning av produkten: • LCD-panel. Panelen är gjord av glas och kan gå sönder om den tappas eller utsätts för stötar. • Värmekällor. Placera ej produkten nära värmekällor såsom element, ugnar, värmepannor och andra värmegenererande produkter. -
Page 97: Batterier
Batterier 2 st UM-3/AA 1.5 V batterier är inkluderade och redan installerade. Innan produkten tas i bruk, avlägsna den genomskinliga plastremsan i batterifacket. Att sätta i batterier: Figur Instruktioner 1. Lokalisera batterifacket. 2. Sätt i batterierna enligt polanvisningarna. Använd alltid korrekt batterityp (2 AA / UM-3 1.5 V batterier). - Page 98 Så snart den genomskinliga plastremsan har avlägsnats börjar enheten automatiskt att läsa av inomhustemperaturen. Att växla mellan Sekund/Veckodag display För att växla mellan sekund/veckodag display tryck på CLOCK RADIOMOTTAGNING Enheten ställer automatiskt in klocka och kalender då den befinner sig inom räckvidd för radiosignalen. När enheten tar emot radiosignalen, börjar symbolen för radiomottagning att...
-
Page 99: Att Ställa Klockan Och Kalendern Manuellt
] eller [NER ] för att ändra värdet på en inställning. Figur Instruktioner 1. Tryck och håll inne CLOCK-knappen i 2 sekunder. 2. Ställ in aktuell månad. Tryck på CLOCK när du är klar. BORT Figur ] samtidigt i 2 sekunder. försvinner ] samtidigt i 2 sekunder. -
Page 100: Språkval
Språkval Enheten kan visa veckodag på fem olika språk. ALARMFUNKTIONEN Basfunktioner Enheten kan även användas som alarmklocka. 1. När alarmet ljuder, stäng av detta genom att trycka på ALARM 2. Alarmet stängs av automatiskt efter 1 minut. Efter 8 minuter ljuder det åter såvida inte ALARM tryckts ned. -
Page 101: Ställa In Alarmtid
Att ställa in alarmtid Se till att alarmtiden visas på LCD displayen. Figur Instruktioner 1. Tryck och håll inne ALARM-knappen i 2 sekunder. 2. Ställ in timme för alarmtiden. Tryck på ALARM när du är klar. 3. Ställ minuter för alarmtiden. Tryck på ALARM när du är klar. -
Page 102: Felsökningsguide
FELSÖKNINGSGUIDE Det här avsnittet innehåller en lista med vanligen återkommande frågor om produkten. Om enheten inte fungerar som förväntat, vänligen läs avsnittet innan enheten skickas för reparation. Problem Effekt Möjlig orsak Radioantennen Ingen radiosignal Hinder visas inte på mottages. (elektromagnetiska displayen. -
Page 103: Teknisk Specifikation
TEKNISK SPECIFIKATION Storlek: Höjd x Bredd x Djup 234mm x 220mm x 23mm Vikt: 426g (utan batterier) Radiofrekvens: System DCF77 (JM889N) eller MSF60 (JM889NU) Display: Tidsformat 24-timmarsvisning (JM889N) eller 12-timmarsvisning (JM889NU) Datumformat Dag/Månad Veckodag display På Engelska, Franska, T y s k a , Italienska. -
Page 104: Om Oregon Scientific
Vi hoppas du hittar all information du behöver på vår hemsida och om du vill komma i kontakt med Oregon Scientific kundkontakt besöker du vår lokala hemsida www.oregonscientific.se... -
Page 105: Försäkran Om Överensstämmelse
FÖRSÄKRAN OM ÖVERENSSTÄMMELSE Den här produkten överensstämmer med de viktigaste kraven i "Artikel 3 i R&TTE 1999 / 5 / EC-direktiven" om den används för avsett bruk och följande standards har tillämpats: Säkerhet för informationsteknologisk utrustning (Artikel 3.1.a i R&TTE-direktivet) Tillämpad standard Elektromagnetisk kompatibilitet (Artikel 3.1.b i R&TTE-direktivet) - Page 106 © 2004 Oregon Scientific. All Rights Reserved. 086-003404-055...
Need help?
Do you have a question about the JM889N and is the answer not in the manual?
Questions and answers