Advertisement
Table of Contents
- 1 Table of Contents
- 2 Features
- 3 Important Safeguards
- 4 Precautions
- 5 Mono
- 6 Control Position and Names
- 7 System Connections
- 8 Power Connections
- 9 Playing Tapes
- 10 Real Time Counter
- 11 Recording
- 12 Useful Functions
- 13 Handling Cassette Tape
- 14 Troubleshooting Guide
- 15 Cassette Deck Maintenance
- 16 Specifications
- Download this manual
Ster eo Cassette Tape Deck
EJECT
TIMER
OFF
REC
PLAY
POWER
ON
OFF
Features ................................................ 2
Important Safeguards ........................... 3
Precautions .......................................... 3
Control Position and Names ................ 4
System Connections ............................ 5
Power Connections .............................. 5
Playing Tapes ...................................... 6
TA-6711
3 HEAD DUAL CAPSTAN
DIMMER
REW
Instruction Manual
CONTENTS
TAPE MONITOR
ELAP/REMA
RESET
T- SIZE
MPX FILTER DOLBY NR AUTO ACCUBIAS
FF
REC
PAUSE
STOP
PLAY
L
MIC
MONO
STEREO CASSETTE TAPE DECK TA- 6711
Real Time Counter............................... 8
Recording .......................................... 10
Useful Functions ................................ 13
Handling Cassette Tape ..................... 14
Troubleshooting Guide ...................... 15
Cassette Deck Maintenance ............... 16
Specifications .................................... 16
REC LEVEL
5
4
6
3
7
2
8
1
9
0
10
R
ACCUBIAS
REC BALANCE
L
R
1
Advertisement
Table of Contents

Related Manuals for Onkyo TA-6711


Summary of Contents for Onkyo TA-6711
-
Page 1: Table Of Contents
TA-6711 Ster eo Cassette Tape Deck EJECT TIMER PLAY 3 HEAD DUAL CAPSTAN POWER Instruction Manual Features ... 2 Important Safeguards ... 3 Precautions ... 3 Control Position and Names ... 4 System Connections ... 5 Power Connections ... 5 Playing Tapes ... -
Page 2: Features
Thank you for your purchase of the Onkyo TA-6711 cassette tape deck. Please read this manual thor- oughly before making connections and turning power on. Follow these instructions to obtain optimum performance and maximum listening enjoyment from your new TA-6711. -
Page 3: Important Safeguards
Important Safeguards 1. Read Instructions — All the safety and operating instructions should be read before the appliance is operated. 2. Retain Instructions — The safety and operating instructions should be retained for future reference. 3. Heed Warnings — All warnings on the appliance and in the operating instructions should be adhered to. -
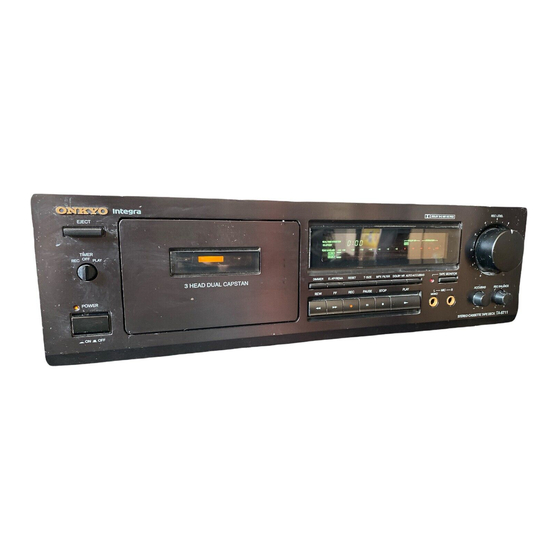
Page 4: Control Position And Names
Control Positions and Names 1 POWER 2 EJECT 3 TIMER EJECT TIMER PLAY 3 HEAD DUAL CAPSTAN POWER 17 Tape operation buttons PAUSE STOP PLAY REAL TIME COUNTER ELAPSED REMAIN MPX FILTER PEAK LEVEL(dB) BIAS L CH START R CH 5 DIMMER 6 ELAP/REMA 7 RESET... -
Page 5: System Connections
ONKYO ® WARNING AVIS If the TA-6711 is properly connected to another Onkyo component bearing the z mark, you will be able to control the TA-6711 using the other component's remote control. Power Connections Connecting to an Amplifier Connect the tape deck LINE IN jacks to the... -
Page 6: Playing Tapes
Playing Tapes EJECT DOLBY NR PLAY REAL TIME COUNTER ELAPSED PEAK LEVEL(dB) L CH R CH EJECT Cassette holder Dolby NR eSTOP gPAUSE DOLBY NR STOP PAUSE sPLAY Listening to a Tape 1. Press the EJECT button to open the cassette holder. 2. -
Page 8: Real Time Counter
Real Time Counter ELAPSED P LAYREAL SIZE TIME COUNTERELAPSED ELAP/REMA RESET T-SIZE sPLAY C-46 C-50 C-54 C-60 C-64 C-120 C-100 C-90 C-74 C-70 RESET Determining the Elapsed Tape Running Time (ELAPSED) The counter reads [0:00] "ELAPSED'' when the power is first turned on. 1. - Page 9 ELAP/REMA PLAY REAL TIME COUNTER ELAPSED REMAIN PEAK LEVEL(dB) BIAS L CH START R CH REAL TIME COUNTER REMAIN T- SIZE PEAK LEVEL(dB) L CH R CH REAL TIME COUNTER REMAIN PEAK LEVEL(dB) L CH R CH T- SIZE REMAIN OPERATION DOLBY NR MPX FILTER...
-
Page 10: Recording
If the g PAUSE button is pressed first, the unit switches to the pause mode instead of the rec/pause mode. Note that when this happens the input selector of an Onkyo amplifier (or receiver) connected to the unit will switch automatically to the TAPE position. - Page 11 PLAY button on the tape deck at the same time. You can also use the CD Synchro Record- ing function if the tape deck is properly connected to an Onkyo CD player bearing the z z mark.
- Page 12 CD Synchro Recording System Once the TA-6711 is connected to a CD player bearing the z recording to commence automatically on the TA-6711. 1. Insert a cassette with the side to be recorded facing out.
-
Page 13: Useful Functions
Useful Functions TAPE MONITOR TAPE MONITOR TAPE MONITOR TIMER PLAY TIMER PLAY Monitoring the Recorded Signal This deck is a three-head deck, so by switching between the source monitor and tape monitor settings you can compare the signal which has just been recorded on the tape with the source signal. -
Page 14: Handling Cassette Tape
Handling Cassette Tapes Examine cassette tapes carefully before using them with the TA-6711. Erasure Prevention Cassette tapes are constructed with erasure prevention niches on the back edge that are initially covered by break-off tabs. 1. If you wish to protect a recording from 2. -
Page 15: Troubleshooting Guide
Troubleshooting Guide The following guide lists problems which do not require professional servicing. If, however, the problem cannot be remedied using this guide, contact an Onkyo authorized service center for assistance. • No power. Cause: Power cord plug is loose Remedy: Insert plug properly into outlet. -
Page 16: Cassette Deck Maintenance
Tel: 0720-31-8111 Fax: 0720-33-5222 ONKYO U.S.A. CORPORATION 200 Williams Drive, Ramsey, N.J. 07446, U.S.A. Tel: 201-825-7950 Fax: 201-825-8150 ONKYO EUROPE ELECTRONICS GmbH Industriestrasse 18-20, 82110 Germering, GERMANY Tel: 089 84 93 20 Fax: 089 84 93 226 ONKYO FRANCE Immeuble Le Diamant, Domaine Technologique de Saclay, 4 Rue René Razel,...
Need help?
Do you have a question about the TA-6711 and is the answer not in the manual?
Questions and answers