
Related Manuals for Livoo DOM392


Summary of Contents for Livoo DOM392
- Page 1 DOM392 κινητό τοπικό κλιματιστικό p23-p40 p41-p59 p60-p79 p80-p98 p99-p117 p118-p136 p2-p22 version_2019...
- Page 2 σε ερμητικά σφραγισμένη συσκευή. Σας ευχόμαστε καλή διασκέδαση με το νέο σας φορητό κλιματιστικό LIVOO. Περίληψη Προφυλάξεις κατά τη χρήση και οδηγίες ασφαλείας ………………………...3 Σημασία των εικονογραμμάτων 3 Οδηγίες για ασφαλή χρήση 3 Προειδοποιήσεις (εάν χρησιμοποιείτε ψυκτικό αέριο R290) 6 Επεξεργασία...
- Page 3 Notes relatives à la conception et à la conformité .............. 22 MANUEL D’UTILISATION DU CLIMATISEUR MOBILE...
- Page 4 PRÉCAUTIONS D’EMPLOI ET CONSIGNES DE SÉCURITÉ Signification des pictogrammes Αρκετά σημαντικά μηνύματα ασφαλείας και εικονογράμματα εμφανίζονται σε αυτές τις οδηγίες λειτουργίας και στη συσκευή σας. Διαβάστε τα προσεκτικά και σεβαστείτε τα συστηματικά. Σημαντικές πληροφορίες και χρήσιμες συμβουλές για τη χρήση της...
- Page 5 Instructions pour une utilisation en toute sécurité (suite) μέγιστο επιτρεπόμενο ρεύμα στη Η εγκατάσταση πρέπει να ˛ συσκευή. Ποιο ρεύμα πραγματοποιηθεί σύμφωνα με υποδεικνύεται η πινακίδα είναι τις οδηγίες εγκατάστασης. Η εγκατεστημένη στη συσκευή), ακατάλληλη εγκατάσταση εγκαταστήστε τη σωστή πρίζα μπορεί...
- Page 6 χρησιμοποιείται με τέτοιο τρόπο Instructions pour une utilisation en toute sécurité (suite) ώστε να προστατεύεται από την θα μπορούσε να προκαλέσει υγρασία, π.χ. συμπύκνωση, πυρκαγιά. πιτσιλιές κ.λπ. Μην τοποθετείτε ή ˛ Η συσκευή διαθέτει τροχούς για αποθηκεύετε το κλιματιστικό σας να...
- Page 7 χρήστη δεν πρέπει να Instructions pour une utilisation en toute sécurité (suite) πραγματοποιούνται από παιδιά χωρίς επίβλεψη ˛ Αυτή η συσκευή δεν προορίζεται για χρήση από άτομα (συμπεριλαμβανομένων των παιδιών) με περιορισμένη σωματική, αισθητηριακή ή διανοητική ικανότητα ή δεν διαθέτει γνώση ή εμπειρία εάν η τελευταία...
- Page 8 ˛ Λάβετε υπόψη ότι τα ψυκτικά μπορεί να είναι τεμαχίων εξοπλισμού που επιτρέπεται να άοσμα. αποθηκευτούν μαζί θα καθοριστεί από τους Η συσκευή DOM392 πρέπει να τοπικούς κανονισμούς εγκατασταθεί, να χρησιμοποιηθεί και να αποθηκευτεί σε δωμάτιο με επιφάνεια μεγαλύτερη 6. Πληροφορίες συντήρησης.
- Page 9 Avertissements (uniquement si vous utilisez le gaz réfrigérant R290) (suite) εργασίας. 3) Γενικός χώρος εργασίας Όλο το προσωπικό συντήρησης και άλλοι που εργάζονται στην περιοχή πρέπει να έχουν λάβει οδηγίες σχετικά με τη φύση της εργασίας που εκτελείται. Αποφύγετε να εργάζεστε...
- Page 10 Avertissements (uniquement si vous utilisez le gaz réfrigérant R290) (suite) πιθανώς επικίνδυνης κατάστασης. δυσανάγνωστα σημάδια · • Δώστε ιδιαίτερη προσοχή στα ακόλουθα • Τα εξαρτήματα του σωλήνα ψύξης ή του για να διασφαλίσετε ότι η εργασία σε συστήματος εγκαθίστανται σε θέση όπου ηλεκτρικά...
- Page 11 7. Καλωδίωση ξεπλένεται με άζωτο χωρίς οξυγόνο για να κάνει τη Avertissements (uniquement si vous utilisez le gaz réfrigérant R290) (suite) Βεβαιωθείτε ότι η καλωδίωση δεν υπόκειται σε μονάδα ασφαλή. Αυτή η διαδικασία μπορεί να χρειαστεί φθορά, διάβρωση, υπερβολική πίεση, δόνηση, να...
- Page 12 Avertissements (uniquement si vous utilisez le gaz réfrigérant R290) (suite) Τα κενά μπουκάλια ανάκτησης εκκενώνονται και, εάν είναι δυνατόν, ψύχονται πριν από τη λειτουργία ανάκτησης. Ο εξοπλισμός ανάκτησης πρέπει να είναι σε καλή κατάσταση λειτουργίας με ένα σύνολο οδηγιών για τον...
- Page 13 Traitement des déchets d’équipements électriques Ανακύκλωση συσκευασιών Το σύμβολο στη συσκευή ή στα συνοδευτικά Η συσκευασία είναι 100% ανακυκλώσιμη, έγγραφα δηλώνει ότι αυτό το προϊόν δεν πρέπει οπότε έχει το ακόλουθο σύμβολο. Τα διάφορα να αντιμετωπίζεται ως οικιακά απόβλητα. μέρη της...
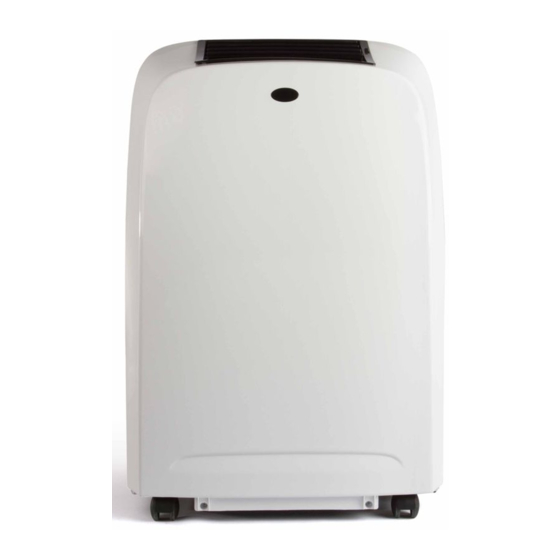
- Page 14 Εισαγωγή αέρα Υποδοχή τροφοδοσίας Σωλήνας αποστράγγισης Έξοδος αποστράγγισης Έξοδος αποστράγγισης στο κάτω δοχείο Télécommande Πριν χρησιμοποιήσετε το νέο σας κλιματιστικό, εξοικειωθείτε με το τηλεχειριστήριο εκ των προτέρων. Το παρακάτω είναι μια σύντομη επισκόπηση του τηλεχειριστηρίου. Για οδηγίες λειτουργίας για το κλιματιστικό...
- Page 15 INSTALLATION Choix du bon emplacement Η τοποθεσία εγκατάστασης πρέπει να πληροί τις ακόλουθες απαιτήσεις: • Φροντίστε να εγκαταστήσετε τη συσκευή σας σε επίπεδη επιφάνεια για να ελαχιστοποιήσετε τον θόρυβο και τους κραδασμούς. • Πρέπει να εγκατασταθεί κοντά σε γειωμένη πρίζα και η αποστράγγιση της δεξαμενής ανάκτησης...
- Page 16 Accessoires Pièces Quantité Description Σωλήνας αποστράγγισης 1 τμχ Προσαρμογέας πλευράς 1 τμχ συσκευής Πλευρικός προσαρμογέας 1 τμχ αποστράγγισης Κιτ συρόμενων παραθύρων 1 τμχ Installation du kit d’évacuation Προετοιμασία του σωλήνα αποστράγγισης Tuyau d’évacuation Προετοιμασία του σωλήνα αποστράγγισης Σπρώξτε τον εύκαμπτο σωλήνα...
- Page 17 Installation du kit d’évacuation (suite) Τοποθετήστε το σωλήνα αποστράγγισης στη συσκευή Τοποθετήστε τον προσαρμογέα εύκαμπτου σωλήνα εξαγωγής στην κάτω εγκοπή της εξόδου αέρα στη συσκευή ευθυγραμμίζοντας το άγκιστρο του προσαρμογέα με το περίγραμμα της οπής εξόδου αέρα και σύρετε τον εύκαμπτο σωλήνα...
- Page 18 Installation du kit d’évacuation (suite)
- Page 19 Installation du kit d’évacuation (suite) Σημείωση Για να διασφαλιστεί η σωστή λειτουργία, αποφύγετε την υπερβολική τέντωμα ή τσακισμό του εύκαμπτου σωλήνα. Βεβαιωθείτε ότι δεν υπάρχει εμπόδιο κοντά στην έξοδο αέρα του σωλήνα εξάτμισης (εντός 50 cm) για να εξασφαλίσετε τη βέλτιστη...
- Page 20 Installation du kit d’évacuation (suite) επιλεγμένες ρυθμίσεις.
- Page 21 Panneau de commande (suite) Κουμπί λειτουργίας Επιλέξτε τον κατάλληλο τρόπο λειτουργίας. Κάθε φορά που πατάτε αυτό το κουμπί, μια λειτουργία επιλέγεται με την ακόλουθη σειρά: Αυτόματο, Ψύξη, Αφυγραντήρας και Εξαερισμός. Ανάβει η ένδειξη για την επιλεγμένη λειτουργία. Πλήκτρα ρύθμισης Πάνω (+) και Κάτω (-) Αυτό...
- Page 22 Mode de fonctionnement (suite) Λειτουργία ψύξης • Πατήστε το κουμπί λειτουργίας μέχρι να ανάψει η λυχνία λειτουργίας ψύξης. • Πατήστε τα πλήκτρα ρύθμισης "+" ή "-" για να επιλέξετε την επιθυμητή θερμοκρασία δωματίου. Η θερμοκρασία μπορεί να ρυθμιστεί σε κλίμακα από 15 έως 31 ° C. •...
- Page 23 Nettoyage du filtre à air Συμβουλές συντήρησης • Βεβαιωθείτε ότι η μονάδα είναι απενεργοποιημένη πριν αφαιρέσετε το φίλτρο αέρα. • Χρησιμοποιήστε ηλεκτρική σκούπα για να καθαρίσετε το φίλτρο αέρα. Εάν χρησιμοποιείτε απορρυπαντικό, αφήστε το φίλτρο να στεγνώσει καλά πριν το εγκαταστήσετε...
- Page 24 DEPANNAGE Veuillez contrôler l’appareil selon la description suivante avant de demander un entretien : Problème Dépannage Causes possibles Η δεξαμενή συλλογής νερού είναι γεμάτη. Απενεργοποιήστε Κωδικός σφάλματος "E4". Η συσκευή δεν ενεργοποιείται τη συσκευή, αφαιρέστε το νερό όταν πατάω το κουμπί On / Off. από...
- Page 25 DEPANNAGE Απενεργοποιήστε τη συσκευή, Διαρροή νερού από τη Το δοχείο συλλογής νερού είναι αφαιρέστε το νερό από τη συσκευή. γεμάτο ή το βύσμα δεξαμενή συλλογής νερού και, αποστράγγισης δεν έχει στη συνέχεια, ελέγξτε το βύσμα εγκατασταθεί σωστά. αποστράγγισης και επανεκκινήστε τη συσκευή.
- Page 26 Η ενεργειακή ταξινόμηση αυτής της συσκευής βασίζεται σε μια εγκατάσταση που χρησιμοποιεί έναν αγωγό εξάτμισης που δεν έχει αναπτυχθεί χωρίς έναν προσαρμογέα κιτ συρόμενου παραθύρου (όπως υποδεικνύεται στην ενότητα Εγκατάσταση αυτού του εγχειριδίου). Τεχνικές προδιαγραφές Μοντέλο DOM392 Ηλεκτρική προστασία Classe 1 Τροφοδοσία (V / Hz) 220-240V~50Hz Ψυκτικό...
-
Page 27: Table Of Contents
USER MANUAL Thank you ! Intended purpose Congratulations on the purchase of your new The mobile air conditioner LIVOO has been mobile air conditioner LIVOO. You have selected designed to offer cooling, dehumidifying and a high-quality product. fan functions. The operating instructions are a constituent part... -
Page 28: Safety Precautions
SAFETY PRECAUTION Meanings of the symbols Following symbols are used in the various section of this manual and on the product. Please read the user instructions carefully and respect them. Important information or useful hints about usage. Warning for hazardous situations with regard to life and property. Warning to actions that must never perform. - Page 29 Safety precautions ˛ on’t touch the unit with wet or damp hands responsible for their safety. Children should be supervised to ensure that they do not play with or when barefoot. the appliance. (Except for the AC with CE- ˛ on’t pull the unit by the cord.
-
Page 30: Warning (If You Use R290 Refrigerant)
Safety precautions WARNING ny person who is involved with working on or breaking into a refrigerant circuit should hold a current valid certificate from an industry-accredited assessment authority, which authorises their competence to handle refrigerants safely in accordance with an industry recognised assessment specification. - Page 31 Safety precautions installations using flammable refrigerants: isabsolutely necessary to have an electrical supply to equipment during servicing, then a • The charge size is in accordance with the permanently operating form of leak detection room size within which the refrigerant shall be located at the most critical point to containing parts are installed;...
- Page 32 Safety precautions be “flushed” with OFN to render the unit safe. 5. Detection of flammable refrigerants This process may need to be repeated several Under no circumstances shall potential times. Compressed air or oxygen shall not be sources of ignition be used in the searching used for this task.
- Page 33 Safety precautions operation. refrigerant. b. Isolate system electrically. 11. Recovery c. Before attempting the procedure ensure that: When removing refrigerant from a system, either servicing decommissioning, 1) Mechanical handling equipment is available, if recommended good practice that all refrigerants required for handling refrigerant cylinders; 2) All removed safely.
-
Page 34: Weee Warning And F-Gas Instruction
WEEE Warning and F-Gas instruction Meaning of crossed out wheeled dustbin: Do not dispose of electrical appliances as unsorted municipal waste, use separate collection facilities. Contact you local government for information regarding the collection systems available. If electrical appliances are disposed of in landfills or dumps, hazardous substances can leak into the groundwater and get into the food chain, damaging your health and well-being.When replacing old appliances with new ones, the retailer is legally obligated to take back your old appliance for disposals at least free of charge. -
Page 35: Remote Control
Upper air intake Power cable Air outlet Bottom tray Drain outlet drain outlet Remote control Before using your new air conditioner, familiarize yourself in advance with its remote control. The following is a brief introduction to the remote control. For instructions on operating your air conditioner, refer to the Operation section of this manual, page 35. -
Page 36: Installation
INSTALLATION Select the best location The location of your installation must meet the following requirements: • Install the mobile air conditioner in a flat and spacious location where the air outlets will not be obstructed. • A minimum clearance of 30cm from walls or other obstacles should be kept. -
Page 37: Accessories
Accessories Parts Description Quantity Exhaust duct 1 pc Adaptator A (device side) 1 pc Adaptator B (outdoor side) 1 pc Window slider kit 1 pc Installation Duct preparation Exhaust duct Connect the duct exhaust into the adaptor of the window slider kit and secure it with the elastic loops adapters. - Page 38 Installation Install exhaust duct Connect the exhaust duct to the Air outlet connector on back of the unit. Slide-in the adaptor A downwards until it is locked in place. Window slider kit preparation Adjust the length of the Window slider kit. When the exhaust duct and window slider kit are ready, select one of these installation method to connect them.
-
Page 39: Operation
Installation Note To ensure proper operation, do not overtighten or bend the hose. You do not encounter any obstacles placed near the exit of the drain pipe (less than 50 cm) to ensure the optimal operation of the exhaust system. All illustrations in this manual are for illustrative purposes only. -
Page 40: Operation
Control panel the running mode indicator light illuminates to indicate which one is selected: Auto, Cool, Dry and Fan. Settings button (+) and (-) Each time the + or - button is pressed, the setting temperature will increase or decrease by 1°C. The setting temperature ranges from 15°C - 31°C. -
Page 41: Maintenance
Operation Mode de fonctionnement Veille • Press this button to enter sleep mode, which the unit will exit after 6 hours of continuous operation and restore to the previous status. • The temperature will increase from 1°C after 60 minutes and 2°C after 120 minutes. Drain water •... - Page 42 Clean the unit and storage Clean the unit • When the unit is contaminated, clean it gently with a wrung towel using tepid water below 40°C. Storage • Empty the water collection tray following the instructions in the previous section. •...
-
Page 43: Troubleshooting
TROUBLESHOOTING To save the cost of a service call, please try the suggestions below to see if you can solve your problem without outside help. Problem Causes solutions Turn off the unit and drain the Error code «E4». Unit doesn’t start when pressing condesate water. -
Page 44: Specifications
The energy classification for this unit is based on an installation using a non-expanded exhaust duct without a sliding bay window adapter (as described in the Installation section of this manual). Specification Model name DOM392 Electric class Class 1 Voltage/frequency (V/Hz)
Need help?
Do you have a question about the DOM392 and is the answer not in the manual?
Questions and answers