Table of Contents
Advertisement
Quick Links
Advertisement
Table of Contents

Related Manuals for COSMO Bully NBM Series

Summary of Contents for COSMO Bully NBM Series
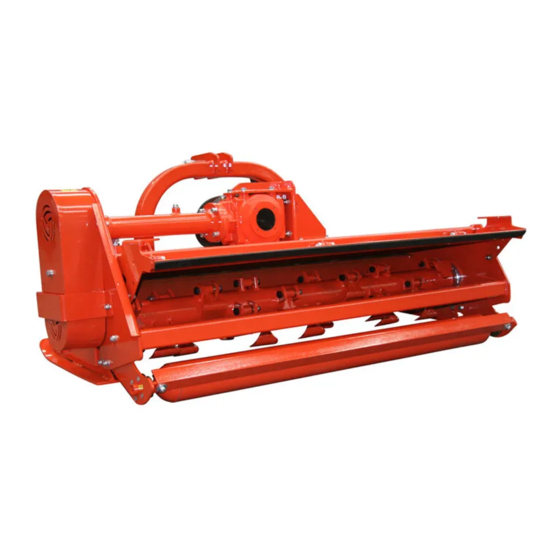
- Page 1 NBM SERIES FLAIL MULCHER OM-EN-1_JUL_2020...
- Page 2 MULCHER – NBM Series Congratulation for purchasing your new COSMO BULLY mulcher! This machine has been designed and manufactured following all safety and quality requirements needed for a safe and satisfactory use over time. A careful reading of this manual will permit you to familiarize with your new equipment and will provide you all the tools needed to use it safely.
- Page 3 RIGHT-HAND AND LEFT-HAND sides are determined by watching from the tractor side. Sometime in the future, your Flail Mulcher may need new parts to replace those are worn or broken. If so, go to nearest COSMO BULLY dealer and provide him with the model and part number. Customer information...
-
Page 4: Table Of Contents
TABLE OF CONTENT Important Safety Information Safety at All Times ________________________________________________ Look For The Safety Alert Symbol ____________________________________ Safety label ______________________________________________________ Section 1: Assembly and Set-up Tractor Requirements ______________________________________________ Assembly ________________________________________________________ Tractor Hook-Up __________________________________________________ Tractor-Implement Stability _________________________________________ 9-10 Driveline Installation _______________________________________________ 10-12 Section 2: Operating Instructions Transporting _____________________________________________________... -
Page 5: Safety At All Times
Safety at all times. Thoroughly read and understand the instructions given in this manual before operation. Refer to the “Safety Decal”, read all instructions noted on them. Do not allow anyone to operate this equipment who has not fully read and comprehended this manual and who has not been properly trained in the safe operation of the equipment. - Page 6 CAUTION Indicates a potentially hazardous situation which, if not avoided, may result in minor or moderate injury. It may also be used to alert against unsafe practices. For your protection Thoroughly read and understand the “safety label” section, read all instructions noted on them.
-
Page 7: Safety Label
Wear protective equipment Protective clothing and equipment should be worn. Wear clothing and equipment appropriate for the job. Avoid loose fitting clothing. Prolonged exposure to loud noise can cause hearing impairment or hearing loss. Wear suitable hearing protection such as earmuffs or earplugs. Operating equipment safely requires the full attention of the operator. -
Page 8: Section 1: Assembly And Set-Up Tractor Requirements
Section 1: Assembly and Set-up Tractor Requirements This mower is designed with a 3-Point category I hitch. Tractor engine horsepower rating should not exceed 50hp Assembly Refer to the parts illustration. Tractor Hook-Up Be certain that tractor draw bar will not interfere. Move draw bar ahead or remove if required. -
Page 9: Driveline Installation
Driveline Installation The gearbox unit is equipped with a free wheel inside, able to absorb the rotor inertia during stopping, and to prevent possible damage to the transmission system machine- tractor that would be caused by an instantaneous stop of the rotor. Consequently, the use of a cardan shaft with free wheel is not required. - Page 10 Driveline Length - Check Before operating the Flail Mulcher, ensure that the size of driveshaft is adequate. The driveshaft supplied with the machine has a standard length, therefore it may need an adaptation of the length, depending of the tractor which the Flail Mulcher is combined. The length of the driveshaft must be such to: •...
-
Page 11: Section 2: Operating Instructions Transporting
A driveshaft too long may cause structural damages to the tractor and machine. If the driveshaft is too long, it may be adapted by removing it and shortening the tubes according to the instructions provided by the Manufacturer in its use and maintenance manual. A driveshaft too short can cause disengage of the tubes during operation, with severe hazard for the operator and structural damage to the tractor and machine. -
Page 12: Mowing Instructions
Mowing Instructions Clear area to be mowed of objects and debris that might be picked up and thrown by the mower blades. Grass is best cut when it is dry. Mowing wet grass can cause plugging resulting in grass clumps behind the mower. Grass should be mowed frequently as shorter clippings deteriorate faster. -
Page 13: 3-Point Hitch Adjustments
3-Point Hitch Adjustments The 3-point hitch system on this mower has been designed for front to back flotation when mowing on uneven terrain. Adjust tractor’s top center link to place the upper hitch pin vertically above or slightly behind the lower hitch pins. The mower should be run with the back 15 degrees lower than the front. -
Page 14: Blade Replacement
After using the mower for several hours, check all bolts to be sure they are tight and check drive belt tension. Replace any worn, damaged or illegible safety decals by obtaining new decals from dealer. Blade Replacement IMPORTANT: Make sure that the knife is the same length as the others on the mower. This will keep the rotor rotation balanced. -
Page 15: Storage
If the movement/deflection of the belts is greater than 10mm and you have run out of belt adjustment, then it’s time to replace the belts. To replace the belts, at a minimum, you need to loosen all the bolts/nuts at the outer end of the lateral drive tube. -
Page 16: Cutter Rotor Bearing (Both Ends)
Cutter Rotor Bearing (Both Ends) Type of Lubrication: Multi-purpose Grease Gearbox Type of Lubrication: SAE 90W Gear Lube Check oil level in gearbox by removing the plug located on the right hand side. Oil should be level with bottom of plug hole. Add oil if necessary by removing top fill plug and side plug. -
Page 17: Section 5: Specifications & Capacities
Section 5: Specifications & Capacities Code NBM145 NBM155 NBM175 Description NBM 1.45m Mulcher NBM 1.55m Mulcher NBM 1.75m Mulcher Transmission Belt drive Belts Three (3) Four (4) Gearbox 50hp, 540rpm with free wheel clutch PTO Shaft Series 4 Skids Adjustable, four (4) positions Rear roller Ø121mm, height adjustable, six (6) positions Finish... -
Page 18: Section 6: Troubleshooting
Section 6: Troubleshooting Problem Solution CAUTION Do not try to clean rear discharge area when mower is running. Bodily harm may occur! Unplug and clean mower deck. Belt slipping Remove belt guard shields and clean sheaves. Replace belt. Mow at full throttle (540 PTO rpm), check PTO speed and tractor engine. -
Page 19: Section 7: Appendix Bolt Torque
Section 7: Appendix Bolt Torque The tables shown below give correct torque values for various bolts and cap screws. Tighten all bolts to the torques specified unless otherwise noted. Check tightness of bolts periodically, using bolt torque chart as a guide. Replace hardware with the same strength bolt. -
Page 20: Warranty
WARRANTY COSMO Srl offers the following warranty to the purchaser of COSMO BULLY FLAIL MULCHER mentioned herein above subject to the conditions set out herein after provided the COSMO BULLY FLAIL MULCHER shall be in possession of and used by such purchaser as from the date of delivery. - Page 21 working conditions and maintenance requirements are outlined in the relevant operator’s manual. 6. All new Implements are provided with a 12-month comprehensive warranty from the date of invoice against faulty workmanship or materials, under normal working conditions and service, as outlined in the relevant operational manual for the particular good.
- Page 22 Any defect is not informed immediately to the company or its authorised representative, any alteration in warranty card is made. Any change in the location of the COSMO BULLY MULCHER or in its ownership during the warranty period must be intimated in writing to the company or its Authorized Representative ten days before the change.
- Page 23 WHEN THE WARRANTY BECOMES VOID Besides the cases specified in the supply agreement, the warranty shall, in any case, become void: Should there have been a maneuvering error, use of an inadequate safety bolt on the cardan shaft torque limiter or when the cardan shaft clutch has been damaged through improper maintenance.
- Page 24 Manufactured by: Distributed by: Cosmo Srl FARM IMPLEMENTS Pty Ltd Via Laghi D'avigliana 117 12 Tarmac Way 12022 Busca (CN) ITALY Pakenham Victoria AUSTRALIA 3810 AUST: +61 3 9706 5166 +64 9 237 1500 info@cosmobully.com www.cosmobully.com...
Need help?
Do you have a question about the NBM Series and is the answer not in the manual?
Questions and answers