Table of Contents
Advertisement
Advertisement
Chapters
Table of Contents

Related Manuals for Bellingham and Stanley ADP440


Summary of Contents for Bellingham and Stanley ADP440
- Page 1 ADP440 POLARIMETER...
- Page 3 We apologise if the foreign language brochure of your choice is not available. Contact Sales at Bellingham and Stanley Ltd. to discuss a particular application or to receive details of your local distributor. Bellingham + Stanley Ltd. recognise all trademarks ©...
- Page 5 Longfield Road, Tunbridge Wells, Kent TN2 3EY United Kingdom declares that the product Product Name ADP440 Polarimeter Model Number Is designed to conform to the following Product Specifications: Safety BSEN60950:1992 + A1 + A2 + A3 + A4 + A11 Emissions •...
-
Page 7: Table Of Contents
contents Installing the instrument ..........1 Instrument description..........2 Instrument overview ..........2-1 Basic operation............. 2-4 The instrument logs..........2-14 Sampling techniques ..........2-15 Flow-through and water-jacketed tubes....2-17 Setting up the system..........3 Menu flow chart ............ 3-1 Shortcut keys............3-3 Calibration ............ -
Page 9: Installing The Instrument
section 1 Installing the instrument Unpacking the instrument ........1-1 Contents list............1-1 Part numbers............1-1 Positioning the system ......... 1-2 Mains connection ..........1-2 Power requirements ..........1-2 Power supply adapter........... 1-2 Installing the instrument Section 1 37-256’01 R0 September 2006... - Page 11 Check that all parts listed below are present and that no transit damage has occurred. If any are damaged or missing, contact the supplier immediately. Contents list ADP440 Polarimeter module, see table below for part number Power supply, 55-105 Mains lead, see below for part number...
- Page 12 Positioning the system Place the instrument on a flat and stable bench that is: • dry and indoors • away from draughty or hot equipment like fans or heaters • out of direct sunlight or strong ambient light • away from potential sources of interference, such as RFI generating equipment •...
-
Page 13: Instrument Description
section 2 Instrument description Instrument overview ............ 2-1 The polarimeter ............ 2-1 The services panel ..........2-2 The display panel ..........2-3 Basic operation............2-4 Switching on ............2-4 Switching off ............2-4 Switching on for the first time ....... 2-4 Initial operation after switch on...... -
Page 15: Instrument Overview
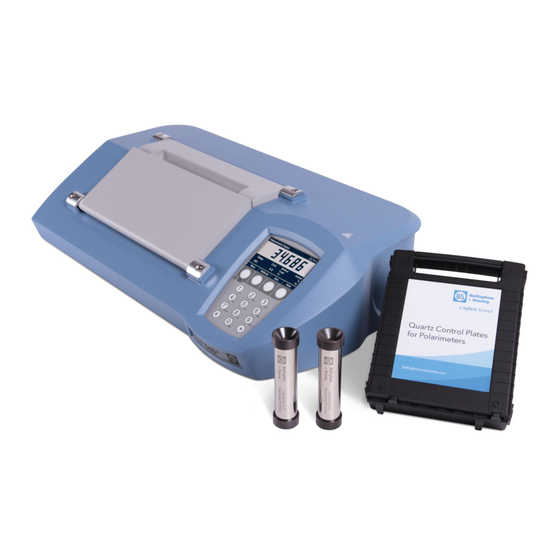
Instrument overview The polarimeter The ADP440 polarimeter is a self-contained, easy-to-use instrument suitable for measuring the rotation of optically active samples. The readings are displayed in either ºAngular or ºZ (International Sugar Scale) on a backlit widescreen LCD display. Other reading scales are available see page 3-25. -
Page 16: The Services Panel
The services panel RS232 Serial port 1: RS232 Serial port 2: For printing or remote For connecting either a communication barcode scanner or refractometer Parallel Port For connecting to a Power connector: parallel printer 24V dc from power supply Warning symbol: See similarly marked warnings in this manual... -
Page 17: The Display Panel
The display panel Operation status bar Shows the details of the current operation Current time Soft key functions Power key: Press to switch ON Soft keys Press for 2 seconds to Functions change switch to STANDBY with display Power indicator STANDBY —... -
Page 18: Basic Operation
Basic operation Switching on Plug in the power supply and switch on the mains supply. The instrument will display configuration data and then switch to standby mode with the power indicator showing red. To switch on, press the Power Key – the Power Indicator will show green. Switching off To switch to standby, press the Power Key and hold down until a confirmation screen shows (approximately 2 seconds). -
Page 19: Initial Operation After Switch On
Initial operation after switching on When the instrument is switched on, the reading mechanism will start-up. The screen shown below will be displayed briefly. After a few seconds the following will be displayed. It is important that the chamber is empty whilst the instrument stabilises. The instrument will now wait for reading mechanism to reach operating speed, the vertical progress bar indicates how much longer this will take, which should take less than one minute. -
Page 20: Manoeuvring Through The Menus
Manoeuvring through the menus Menu items can be found and selected by either: pressing the Up/Down softkeys and then pressing Select pressing the item number key i.e. press 3 for Setup If the menu item contains a list of options to choose from then either: select the menu item and then choose the option from the displayed list press the Forward/Back arrow keys to step through the options Menu items that can be modified by using the arrow keys are identified by... -
Page 21: Keying In Letters, Numbers And Other Characters
Keying in letters, numbers and other characters When it is necessary to enter in text, such as a profile name, the alpha- numeric entry screen will be displayed. This will allow entry of numbers, letters and a range of punctuation characters including “ ! ? / ( ; etc. by multiple presses of keys. -
Page 22: Keying In Numerical Values
Keying in numerical values Numerical values, such as a refractive index 1.33299 or a polynomial constant 0.0123456, can entered in either fixed decimal point format or in scientific notation. E.g.: Fixed decimal point Scientific 1.2345 1.2345E0 -123.45 -1.2345E2 0.00012345 1.2345E-4 One of the softkeys (second from left) gives access to the minus (-), decimal point (.) and exponent (E) symbols that will be required to enter both numerical formats. -
Page 23: Display Screen Information
Display screen information Current time Stability Progress bar Reading Result Measurement Settings Softkey titles Instrument description Page 2-9 37-256’01 R0... -
Page 24: Taking A Reading
Taking a reading Fill the polarimeter tube with your sample. Gently rock the tube from end to end to ensure all air bubbles are released through the centre filling tube. Lift open the chamber cover and place the tube on the two rails. The instrument will now start taking readings continually. -
Page 25: Zeroing The Reading
Zeroing the reading The instrument should be zeroed often to ensure accurate readings. It is a quick and simple procedure so can easily be carried out before every measurement. There must be no sample present and so it can be done with an empty chamber or, if preferred, with the polarimeter tube that will be used to measure the sample. -
Page 26: Optical Density
If the optical density of the sample is greater than 3, the background of the reading area will appear grey, show below (see page 2-10). Temperature sensor The ADP440 has a in-built temperature sensor. The measured temperature will automatically be updated and displayed in degrees Celsius. The probe is found inside the measurement chamber. -
Page 27: Printing The Readings
Printing the readings If the fourth (right hand) softkey is set to ‘Print’ or ‘Prt+Save’, the last displayed reading can be sent to a printer via the selected port. The print layout can be either with the reading data listed sequentially, suitable for narrow printers with 24 columns, or with the data in CSV (comma separated values) suitable for connection to a LIMS. -
Page 28: The Instrument Logs
The instrument logs The ADP440 polarimeter has two separate logs for storing data. This data will be held in the instrument whether or not the power is on or off and can be downloaded to a computer using the ADP Log Acquisition Program (see below). -
Page 29: Measurement Settings
Measurement Settings The measurement settings are accessed in the Mode menu, which is available from the Measurement Display. Mode menu The mode menu will be familiar to users of the ADP220 polarimeter and many other Bellingham + Stanley instruments. The measurement settings are changed from the Mode menu, which is accessed from the Measurement Display. -
Page 30: Measurement Settings In Detail
Measurement settings in detail The ADP440 has a number of measurement settings… Scale (the scale units that the readings is displayed in) Temp. Comp. (whether temperature compensation is used) Limits (tests to check if the reading parameters are within set... - Page 31 Angular degree range The Range setting is only available when the angular degree scale (°a) is selected. The default range for the °a scale is -89° to +89° (std). The “(std)” has been added to this one range title to allow easy identification of the standard range.
-
Page 32: Remote Operation
Remote operation Operation of the ADP440 can be controlled remotely from a computer via the RS232 Serial port. The 54-07 interconnecting cable optionally available from Bellingham+Stanley will connect to the COM port of a typical PC. Use a proprietary terminal program or custom software to send commands and receive data. -
Page 33: Rs232 Serial Port
RS232 serial port The RS232 serial ports can be accessed via the 9 pin “D type” connectors on the rear of the instrument. The interconnecting cable socket can be secured with the 2 screws but these must be finger-tightened only – DO NOT OVER- TIGHTEN.. -
Page 34: Sampling Techniques
Sampling techniques In order to achieve the maximum performance from the ADP440 Series polarimeter, it is essential that extreme care is taken with cleanliness of the instrument and the polarimeter tubes. Allow the instrument to stabilise for at least 30 minutes after switching on before taking accurate readings. -
Page 35: Cover Glass Stress
Cover glass stress As stated above, excessive tightening of an end cap can cause stresses in the cover glass which will cause optical rotation in the glass itself and so give a measurement error. The reading displayed will be a combination of the rotation of the sample and the rotation in the glass. -
Page 36: Flow-Through And Water-Jacketed Tubes
Flow-through and water-jacketed tubes When using optional water-jacketed polarimeter tubes, the standard upper lid should be replaced with a slotted type, see ‘Section 5, Accessories’. Mechanically compatible ADP410 model shown The upper lid can be easily removed by unscrewing the hinge block retaining screws using a standard 4mm Allen key. -
Page 37: Setting Up The System
section 3 Setting up the system Menu flow chart............3-1 Shortcut keys............... 3-3 Calibration ..............3-5 Calibration Standard values ......... 3-5 Span calibration............ 3-5 Cancel the last calibration ........3-6 Calibration report..........3-6 Calibration warning frequency......3-7 Measurement settings..........3-8 Which to use, the Mode menu or Methods? .. - Page 38 Adding extra scales............. 3-25 Adding a standard scale........3-25 Adding a custom designed scale ......3-25 Adding a custom designed temp. compensation . 3-26 Special library scales ..........3-27 Activating special library scales ......3-27 Specific rotation............ 3-28 Concentration ............3-30 Purity ..............
-
Page 39: Menu Flow Chart
Menu flow chart 1. Saved Results 1. Span (Top Menu 2. Installation Calibration) Wizard 2. Undo 3. Report 1. Data 2. Hide normal 3. Selection Method 4. Print List… 1. Calibration 2. Tools 3. Setup 1. normal 4. Information 2. span 5. - Page 40 Page 3-2 Setting up the system 37-256’01 R0 September 2006...
-
Page 41: Shortcut Keys
Shortcut keys Shortcut key functions can be activated when the Measurement Display is shown. Press and hold down the key until the next screen is displayed. Press and hold to: switch to standby Press and hold to: adjust the Display Contrast and Backlight Setting up the system Section 3-3... - Page 42 Page 3-4 Setting up the system 37-256’01 R0 September 2006...
-
Page 43: Calibration
Calibration The ADP440 calibration can be set at two points: Zero As described in section 2, the zero sets the low end of the measurement range, to correct for the day-to-day minor variations. This should be carried out simply with an empty tube and, as such, can be performed at regular intervals;... -
Page 44: Cancel The Last Calibration
Cancel the last calibration If the span calibration was carried out in error, e.g. an incorrect sample was applied or the wrong value was entered, it can be cancelled. press the Menu softkey select 1. Calibration select 2. Undo press Yes Calibration report Display a report of the last Zero &... -
Page 45: Calibration Warning Frequency
Calibration warning frequency If you require that the instrument is to be spanned every n days, the instrument can be configured to automatically warn the user that a calibration is now required. The Warning Frequency menu item is only accessible to users with Setup and Calibration rights. -
Page 46: Measurement Settings
Measurement settings The instrument’s measurement settings can be set in one of two ways. Mode Menu A Mode menu is accessible from the Measurement display. The mode menu displays the measurement settings. Methods Preconfigured Methods are chosen from the Measurement Display. Regardless as to how the measurement settings are selected the instrument has the following measurement settings. -
Page 47: Methods
Methods A method is a set of measurement settings options. This allows the measurement settings to be changed quickly between frequently used configurations. Initially, there are two methods set in the instrument: normal for measuring samples span the conditions used for a ‘span’ calibration The span profile does not contain the Range settings. -
Page 48: Editing An Existing Method
Editing an existing method press the Menu softkey select 3. Setup select 1. Methods select the method to be edited To delete a method select option 6. which is Delete Method. Hiding the normal methods If the polarimeter will always be used with the normal method, i.e. one set of conditions for all samples, and no other profiles have been added, then the Methods function can be disabled and the second softkey in the Measurement display will be blank. -
Page 49: Method Selection Type
Method selection type Before reading a sample, the relevant method should be selected by pressing the Method softkey in the Measurement Display. This will show a list of all available methods and the appropriate one can be selected. However, if a large number of methods have been created, e.g. greater than 20, then it could be easier to select the required method by its index number rather than scrolling through the list. -
Page 50: Reading Limits
Reading limits Reading Limits allows up to three test conditions to be set. If any of the reading parameters values fall outside the limits then the reading is identified as ‘fail’. The three test conditions can be set to check any, or all, of the available parameters. -
Page 51: User Accessibility
The high protection level is suitable for use in CFR21 part 11 compliant systems. Access to the ADP440 functions can be restricted by providing users with a PIN code (Personal Identification Number) which will allow them specific rights. Initially, there are three User names with PIN codes preset in the instrument. -
Page 52: Security Features
Security features The instrument has a range of security features. These are only generally activated when the high protection level is selected, or they are activated from the custom security level option. Feature Settings Description User pin only When required user Selection identified by entering their PIN. -
Page 53: Preset Protection Level
Preset protection level As mentioned above the instrument has 3 preset protection levels. Instrument will request a PIN when entering the main menu. User Selection .......pin PIN Length ........3 Maximum PIN Age ......off Remember Last User..... no Invalid PIN Lockout ...... no Prohibit PIN Recycling.... -
Page 54: Setting The Protection Level
Setting the protection level As mentioned above on page 3-15 the instrument has 3 preset protection levels and a custom setting. To select the protection level… press the Menu softkey select 3. Setup select 2. Users select 4. Protection Select the required protection level. If custom is selected a menu will appear allowing the individual security features to be selected. -
Page 55: Cfr Part 11
21 CFR Part 11 This instrument complies with the technical aspects of the FDA 21 CFR part 11 regulations. However the instrument is only a small part of the compliancy. Standard operating procedures are required. Instrument setup See page 1. Protection level set to........high 3-16 2. -
Page 56: System Settings
System settings Setting the date format The instrument can display the date in two formats, ‘dd.mm.yy’ (typically UK) and ‘mm.dd.yy’ (typically US). press the Menu softkey select 3. Setup select 5. System select 2. Time / Date select 1. Date Format Select the required date format from the list. -
Page 57: Set The Print Mode
Set the print mode The fourth (right hand) softkey function in the Measurement Display can be set to: Mode Function Softkey caption none None; softkey disabled blank print Print the last displayed reading to the selected printer Print port save Save the last displayed reading to the reading log Save prt+save... - Page 58 Using statistic print mode This instrument has an optional statistical printout mode (see page 3-19). This allows a group of up to 10 results to be temporarily logged together and a statistical analysis carried out upon the results. When Print is pressed and no previous results have been logged, the instrument will request the traceability data (batch and operator details) if selected.
-
Page 59: Customising The Instrument
Customising the instrument The instrument can be customised to suit individual operating requirements both in visual aspects, the layout of the screen & the amount of data displayed, and operational settings. Change the display layout press the Menu softkey select 3. Setup select 3. -
Page 60: Adjust The Display Contrast & Backlight
Adjust the display contrast & backlight If the display is difficult to read, especially in either uncommonly bright or dim ambient lighting conditions, it can be improved by adjusting the display contrast and/or the backlight intensity. The instrument must be in the measuring condition with the Measurement Display screen showing. -
Page 61: Measurement Traceability
Measurement traceability All ‘Printed’ readings are recorded together with the measurement settings selected and the time & date of the measurement. In addition, an optional product batch code and a user code can be entered. Batch codes If a batch code is required, it can be either a number (in which case the keys will only enter 0 –... -
Page 62: Using Barcodes As Batch Codes
Using barcodes as batch codes If a barcode reader is to be used (55-80 or 55-81) it has be to plugged in to the instrument’s serial 2 port. With the instrument showing the Measurement Display, scan in the barcode. The display will briefly show ‘Result Printed.’ or ‘Result Saved.’ depending upon printer type configuration. -
Page 63: Adding Extra Scales
Adding extra scales As supplied, the ADP440 can display readings in angle or ISS scales. Other scales can be added to convert the readings to standard recognised units, such as specific rotation, or company specific units pertaining to a particular product. - Page 64 The scale will then be added to the Scales List and can subsequently be Altered, Deleted or Copied. The scale will now be available when adding or editing methods. Adding a custom designed temperature compensation The readings can be temperature compensated for special temperature coefficients using the following formule: No.
-
Page 65: Special Library Scales
Special library scales The instrument has 5 special scales. Unlike traditional user defined scales that use a multi-term polynomial that simply rescales the °a value, these scales use additional data, and present the result in special measurement display formats. Scale Name Scale ID Description specif. -
Page 66: Specific Rotation
Specific rotation The instrument can automatically calculate Specific Rotation. The scale can be added to the scale list by adding it from the Scale Library menu (see page 3-27). Specific rotation is calculated using the formula shown below. α α ×... - Page 67 The concentration value can either be fixed to the value set in the measurement settings or variable. When set to variable, if a measurement is recorded (saved or printed) the instrument allows the concentration to be changed (shown below). The change whether concentration is fixed or variable press press the Menu softkey select 3.
-
Page 68: Concentration
Concentration The concentration scale is selectable from the Scale Library menu (see page 3-27). Concentration is a rearrangement of the specific rotation formula, however now, the unknown is concentration, below is the formula used. α α × where: is the concentration in g/cm3 α... - Page 69 The specific rotation value can either be fixed to the value set in the measurement settings or variable. When set to variable, if a measurement is recorded (saved or printed) the instrument allows the specific rotation to be changed (shown below). The change whether concentration is fixed or variable press press the Menu softkey select 3.
-
Page 70: Purity
Bellingham + Stanley RFM refractometer. As there are different methods used throughout industry for calculating sugar purity, the ADP440 has a number of settings which allow the instrument to be setup using the appropriate calculation. The general equation used to calculate sugar purity is shown below. - Page 71 Purity Settings The purity scale has a number of options. Number Format 0.00 to 0.0000 Determines the format that the purity value is displayed in. Constant Used to customise the purity equation match different measuring methods. Refractometer manual A default brix value will be available from the measurement settings.
-
Page 72: Inversion Of Sucrose Solution
% Inversion of sucrose solution The instrument can automatically calculate % inversion of sucrose solution. The scale can be added to the scale list by adding it from the Scale Library menu (see page 3-27). % inversion of sucrose solution is calculated using the formula shown below. - Page 73 The concentration value can either be fixed to the value set in the measurement settings or variable. When set to variable, if a measurement is recorded (saved or printed) the instrument allows the concentration to be changed (shown below). The change whether concentration is fixed or variable press press the Menu softkey select 3.
-
Page 74: Change Of Product Over A Period Of Time
% Change of product over a period of time The instrument can automatically calculate % change of product over a period of time. The scale can be added to the scale list by adding it from the Scale Library menu (see page 3-27). % change scale is calculated using the formula shown below. - Page 75 The concentration value can either be fixed to the value set in the measurement settings or variable. When set to variable, if a measurement is recorded (saved or printed) the instrument allows the concentration to be changed (shown below). The change whether concentration is fixed or variable press press the Menu softkey select 3.
-
Page 76: Setting The Default Values
Setting the default values If the instrument fails to start up correctly after switching on, or it is functioning unexpectedly, it could be advisable to reset certain settings to the original factory set (or default) values. Unplug the instrument. Press, and hold down, the far left soft key (power) and plug the instrument back in. -
Page 77: Specification
section 4 Specification Performance............4-1 Polarimeter tube ........... 4-1 Temperature............4-1 Temperature compensation ......... 4-1 Light source............4-1 RS232 configuration..........4-1 Physical ..............4-1 Power requirements ..........4-1 Specification Section 4 37-256’01 R0... - Page 79 Specification Performance Scale ºa - Angular ºz - ISS -90 to +90 ° Range -225 to +225 Resolution 0.1 / 0.01 / 0.001 Accuracy (Sucrose solution @ 0.01 0.03 20°C) (±) Maximum OD for accuracy Polarimeter tube Maximum tube length 220 mm End cap collar diameter 30 mm...
-
Page 81: Spares And Accessories
section 5 Spares and accessories Printers ..............5-1 Barcode readers........... 5-1 Interconnecting cables ......... 5-1 Quartz control plates ..........5-1 Instruction manuals ..........5-1 Spares ..............5-1 Polarimeter tubes ..........5-2 Upper lids ............. 5-3 Power supplies ............. 5-3 Spares and accessories Section 5 37-256’01 R0... - Page 83 Spares and accessories Printers Code Dot matrix impact printer parallel: Euro version 230V 55-11 Dot matrix impact printer parallel: US version 110V 55-12 Dot matrix impact printer parallel: UK version 230V 55-13 Dot matrix impact printer serial: Euro version 230V 55-14 Dot matrix impact printer serial: US version 110V 55-15...
- Page 84 Polarimeter tubes Type * Code no. shown Length Slotted Code (mm) upper lid Standard glass sample 35-29 * tube with bulb to clear required 35-30 bubble from field of view Centre filling glass tube 35-46 with straight central required 35-47 * arm for filling from funnel or flexible tube Centre filling glass tube...
- Page 85 Upper lids Type Code No slots 37-008 (as supplied) 2 slots 37-009 2 slots 37-010 4 slots 37-011 4 slots 37-012 Power supplies Code Power supply (unsealed) 110-230V 55-105 Mains lead for 55-105 with plug suitable for: United Kingdom 61-191 Euro (Schuko) 61-193 United States...
Need help?
Do you have a question about the ADP440 and is the answer not in the manual?
Questions and answers