OHAUS FC5515R Service Manual
Hide thumbs
Also See for FC5515R:
- Instruction manual (200 pages) ,
- User manual (11 pages) ,
- User manual (128 pages)

Related Manuals for OHAUS FC5515R


Summary of Contents for OHAUS FC5515R
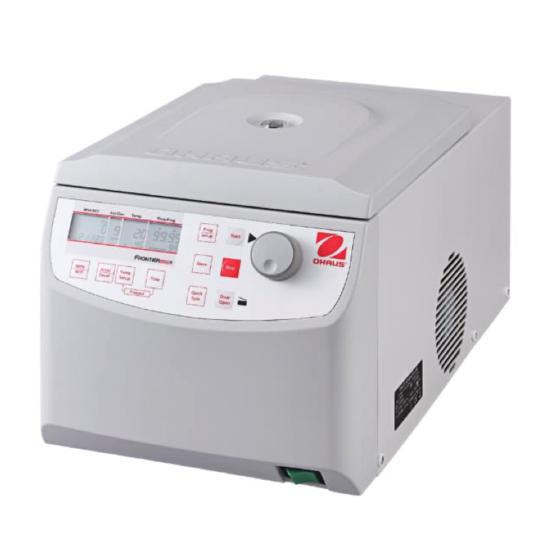
- Page 1 SERVICE MANUAL FC5515R CENTRIFUGE Ohaus Corporation 7 Campus Drive, Suite 310, Parsippany, NJ 07054, USA +1 973 377 9000...
-
Page 3: Table Of Contents
1.3.6 Danger and Precautions ..................1-3 Service Facilities ......................1-4 Tools and Test Equipment Required ................1-4 1.5.1 Standard Tools and Test Equipment ...............1-4 Transporting, Installing, Transferring and Disposing of the Centrifuge FC5515R ..1-5 1.6.1 Transport ......................1-5 1.6.2 Packing ......................1-5 1.6.3 Unpacking .......................1-5 1.6.4 Transferring FC5515R from its original packing box ........1-5... - Page 4 3.3.15 Replacing the Temperature Sensor ............. 3-13 3.3.16 Replacing the Control Board ............... 3-14 3.3.17 Replacing the Break Resistor ..............3-14 3.3.18 Replacing the Speaker ................3-15 3.3.19 Replacing the Lid Lock ................3-15 FC5515R Centrifuge Service Manual Ohaus Corporation www.ohaus.com...
- Page 5 3.6.1 Error Message: Case/Solution ............... 3-22 3.6.2 Possible Error Message and Their Solutions ..........3-22 3.6.2.1 Lid Release during Power Failure ............3-22 3.6.2.2 Descriptions of the Error Message ............3-23 Error Codes......................3-24 Ohaus Corporation www.ohaus.com FC5515R Centrifuge Service Manual...
-
Page 6: Chapter 1 Getting Started
CHAPTER 1 GETTING STARTED INTRODUCTION This service manual contains the information needed to perform routine maintenance and service on the Ohaus centrifuge model FC5515R. Before servicing the equipment, you should be familiar with the Instruction Manual which is packed with every equipment. -
Page 7: User
1.3.2 Rotor and Accessories Only OHAUS original rotors and accessories shall be used. Any other use or intended use is considered improper. OHAUS is not liable for damage resulting from improper use. CAUTION: Read all safety warnings before installing, making connections, or servicing this equipment. -
Page 8: Exclude The Following Environmental Influences
During centrifugation, the presences of people are prohibited within 30 cm around the centrifuge according to the regulations of EN 61010-2-020. FC5515R is not explosion-proof and must therefore not be operated in explosion-endangered areas or locations. Centrifugation of flammable, explosive, radioactive, or such substances, which ... -
Page 9: Service Facilities
TOOLS AND TEST EQUIPMENT REQUIRED 1.5.1 Standard Tools and Test Equipment 1. Flat and Philip screw drivers, tweezers, adjustable open wrenches and socket set (with drive socket sets from 4mm-14mm, Ratchet and drive extension bar.) Ohaus Corporation www.ohaus.com FC5515R Centrifuge Service Manual... -
Page 10: Transporting, Installing, Transferring And Disposing Of The Centrifuge Fc5515R
Use assistance when lifting or removing the equipment. It is recommended that three or more people should lift the FC5515R. Please refer to section 1.6.4 for details about how to lift it out of the packing. - Page 11 2. Remove the plastic sleeve. Connect the device 1. After taken out the FC5515R from the packing, wait for four hours before switching the centrifuge on in order to avoid damage to the compressor. 2. Check that the mains voltage and frequency match the requirements on the device name plate(see rear side of the device) and then connect the device to the power supply.
-
Page 12: Technical Data
TECHNICAL DATA 1.7 TECHNICAL DATA 1.7.1 Acceleration and Deceleration times FC5515R. 1.7.2 Imbalance shut-off Data FC5515R (120V / 230 V) Rotor- Shut off speed (approx. Permitted imbalance in Imbalance shut-off in gram number values) in rpm gram 30130870 14500 30130871... -
Page 13: Specifications
CHAPTER 1 GETTING STARTED 1.7.4 Specifications. Ohaus Corporation www.ohaus.com FC5515RCentrifuge Service Manual... -
Page 14: Service Instructions
The actuation is a three phase asynchronous motor which is controlled by frequency converter. Model FC5515R has an independent error detection program, displaying possible errors and therefore supporting the trouble shooting process. The unit is equipped with several safety features: •... - Page 15 The centrifuge is not sealed. Use suitable protection measures when using the centrifuge for infectious and pathogenic samples. Follow appropriate safety precautions when handling these samples. Ohaus Corporation www.ohaus.com 1-14 FC5515R Centrifuge Service Manual 1-10...
- Page 16 CHAPTER 1 GETTING STARTED Equipment Redemption Form or Decontamination Certificates FC5515R Centrifuge Service Manual 1-15 Ohaus Corporation www.ohaus.com 1-11...
-
Page 17: Electrical And Electronic Components
The control board consists of one PCBA. The board can only be exchanged completely. If there is a defect you have to exchange the complete board. All signal lines lead to the control board. The PCB controls the entire centrifuge. Figure 2: Control board Ohaus Corporation www.ohaus.com 1-14 FC5515R Centrifuge Service Manual 1-12... -
Page 18: Frequency Converter
The actual speed is extracted by a hall-effect-sensor placed on the lower side of the motor. There is a “preset/actual "comparison in the control board. Thereupon a new “actual-signal” is given by the control board to the converter. Figure 3: Hall-Effect-Sensor FC5515R Centrifuge Service Manual 1-15 Ohaus Corporation www.ohaus.com 1-13... -
Page 19: Lid Mechanism
The lid lock is unlatched by an electro motor, receiving its signal from the control board. The actual state is indicated in the display (see M1, M2). Figure 4: Lid Mechannism Display and Overlay Layout. Ohaus Corporation www.ohaus.com 1-14 FC5515R Centrifuge Service Manual 1-14... -
Page 20: Imbalance Detection
The unit stops when the oscillating motions are too strong. Therefore you have to follow the adjustment instructions stated by the manufacturer. Figure 5: Imbalance PCBA. FC5515R Centrifuge Service Manual 1-15 Ohaus Corporation www.ohaus.com 1-15... -
Page 21: Lcd Display
CHAPTER 1 GETTING STARTED 1.9 LCD Display The following picture shows the individual elements of the LCD-display. Figure 6: FC5515R LCD Display Ohaus Corporation www.ohaus.com 1-14 FC5515R Centrifuge Service Manual 1-16... -
Page 22: Function Label
LCD-display. Inside the time display of the control panel the error message is indicated if there occur any troubles. Figure 7: FC5515R Function Label LCD Display Program setup model... -
Page 23: Chapter 2 Service Menu
Part 1 is accessible for the USER and different points can be read respectively settled. This is also described in the instruction manual. Part 2 is for internal use respectively for OHAUS trained service personnel only. 2.1.1 Activation of the Operation Menu (part 1) The menu can be started as follows: ... - Page 24 Accel/Decel (5) and "service" will stop flashing after 5 sec. Only as long as this word is flashing you can scroll through the further submenus with the potentiometer (12). You have to repeat this step continuously to enter the different submenus. Ohaus Corporation www.ohaus.com FC5515R Centrifuge Service Manual...
-
Page 25: Submenu Motor Start
Turn the potentiometer (12) until the special digit “service H“ appears in the display “acc/dec” (A-2). The duty cycle will indicate in the display "rmp/rcf" (A-1), see Figure 12. Figure 12: Submenu Duty Cycle. FC5515R Centrifuge Service Manual Ohaus Corporation www.ohaus.com... -
Page 26: Submenu Running Time
Turn the potentiometer (12) until the special digit ”service S“ appears in the display „acc/dec” (A-2). The software version will indicate in the display "rmp/rcf" (A-1), see Figure 14. Figure 14: Submenu Software Version Ohaus Corporation www.ohaus.com FC5515R Centrifuge Service Manual... -
Page 27: Submenu Error Memory
(12). Now the last 99 occurred error messages are indicated in the display “rpm/rcf“ (A-1). Whereas the first two digits describe the place number and the last two digits do FC5515R Centrifuge Service Manual Ohaus Corporation www.ohaus.com... -
Page 28: Submenu Setup Of The Loudspeaker (Optional)
"start" (3) to store all parameters. Otherwise the setups were all for nothing. If the storage has been successful in the display “rpm/rcf“ (A-1) the value of the imbalance sensor and the word “StorE“ are indicated. Ohaus Corporation www.ohaus.com FC5515R Centrifuge Service Manual... -
Page 29: Submenu Setup Of The Keypad Tone (Optional)
Note: After all points have been reviewed and/or set up, you have to press shortly the key "start" (3) to store all parameters. Otherwise the FC5515R Centrifuge Service Manual Ohaus Corporation www.ohaus.com... -
Page 30: Submenu Setup Volume Of The Loudspeaker (Optional)
(12). At the end of the run you can now hear the setup volume whereas 0 is the most quiet setup and 9 the loudest one. Ohaus Corporation www.ohaus.com FC5515R Centrifuge Service Manual... -
Page 31: Submenu Setup Of Signal Melody
At the end of the run you can now hear the audible sound in the setup volume whereas 0 is the most quiet setup and 9 the loudest one. FC5515R Centrifuge Service Manual Ohaus Corporation www.ohaus.com... -
Page 32: Submenu Check Of The Imbalance Sensor
Turn the potentiometer (12) until the special digit “service F“ appears in the display “acc/dec” (A-2). Figure 25: Submenu Check of the Imbalamce Sensor The upper value should be „C 115“and lower value should be +/- 2 (typical value should between 113-117) Ohaus Corporation www.ohaus.com 2-10 FC5515R Centrifuge Service Manual... -
Page 33: Submenu Keyboard Test
“acc/dec“ (A-2). Figure 27: Sebmenu Keyboard Test By pressing each key the word “PrESS“ switches from the bottom to the top line in the display “rpm/rcf“ (A-1). The key accel/decel (5) excluded. FC5515R Centrifuge Service Manual 2-11 Ohaus Corporation www.ohaus.com... -
Page 34: Submenu Setup For Temperature
• Activate the operation menu as described in chapter 2.1.1. • Turn the potentiometer (12) until the special digit “service c“ appears in the display “acc/dec” (A-2). Figure 29 Submenu Temperature Setup Ohaus Corporation www.ohaus.com 2-12 FC5515R Centrifuge Service Manual... -
Page 35: Activation Of The Service Menu (Part 2)
Activate the operation menu as described in chapter 2.1.1. Activate the service menu as described in chapter 2.2. Turn the potentiometer (12) until the special digit “service t“ appears in the display “acc/dec“ (A-2). Examples: FC5515R Centrifuge Service Manual 2-13 Ohaus Corporation www.ohaus.com... - Page 36 Turn the potentiometer (12) until the special digit “service C“ appears in the display “acc/dec“ (A-2).Do not confuse with “c“ submenu setup of the temperature. no = nothing Figure 31 Centrifuge Operation Ohaus Corporation www.ohaus.com 2-14 FC5515R Centrifuge Service Manual...
-
Page 37: Submenu Adjustment/Correction Of The Imbalance Cut Off Value
"start"(3) to store all parameters. Otherwise the setups were all for nothing. If the storage has been successful in the display „rpm/rcf“ the value of the imbalance sensor and the word „StorE“ are indicated. FC5515R Centrifuge Service Manual 2-15 Ohaus Corporation www.ohaus.com... - Page 38 CHAPTER 2 SEVICE MENU Figure 33: Store Ohaus Corporation www.ohaus.com 2-16 FC5515R Centrifuge Service Manual...
-
Page 39: Chapter 3 Maintenance Procedures
Due to humidity or not hermetically sealed samples, condensate may be formed. The condensate has to be removed from the rotor chamber with a soft cloth regularly. FC5706 Centrifuge Service Manual Ohaus Corporation www.ohaus.com... -
Page 40: Cleaning And Disinfection Of The Unit
5. Dry the rotor cone with a soft, dry and lint-free cloth and look for damage. Do not grease the rotor cone. 6. Place the dry motor onto the motor shaft. Pull the rotor nut tight by using the rotor-key. Ohaus Corporation www.ohaus.com FC5706 Centrifuge Service Manual... -
Page 41: Disinfection Of Aluminum Rotor
Bottles, boxes and rotors may be treated with the usual liquid disinfectants. Attention: Before applying a different decontamination method than recommended by the manufacturer, contact the manufacturer to ensure that it will not damage the unit or the rotor. FC5706 Centrifuge Service Manual Ohaus Corporation www.ohaus.com... -
Page 42: Glass Breakage
Transparent rotor lids and caps made of PC or PP as well as rotors, tube racks and adapters of PP have a maximum service life up to 3 years from first use. Condition for the operating life: Proper use, damage-free condition, recommended care. Ohaus Corporation www.ohaus.com FC5706 Centrifuge Service Manual... -
Page 43: Front Housing
(see figure 34). Pull the covering away from the ground plate. Remove the interface cable on the control board. (Connection between control board and control panel). Figure 34: Replacing Front Housing. FC5515R Centrifuge Service Manual Ohaus Corporation www.ohaus.com... -
Page 44: Replacing The Incremental Shaft Encoder (Potentiometer)
Figure 35: Replacing the Potentiometer. Loosen all electrical contacts to the shaft encoder on the back side of the front housing as in Figure 36. Figure 36 Electrical Contact of the shaft encoder. Ohaus Corporation www.ohaus.com FC5515R Centrifuge Service Manual... -
Page 45: Replacing The Display
Glue the new foil keyboard precisely in the recess. Make sure the foil matches precisely and the window of the foil keyboard lies exactly over the display. Reassemble the control panel in reversed order and mount it back in the front housing. FC5515R Centrifuge Service Manual Ohaus Corporation www.ohaus.com... -
Page 46: Removing The Housing
Removing the Housing. • Remove the back wall plate and its electrical ground. • Remove the front cover as described in chapter 3.3.1 Figure 38 Removing Housing. Figure 39 Loosen ground cable connections. Ohaus Corporation www.ohaus.com FC5515R Centrifuge Service Manual... -
Page 47: Removing The Lid
• Remove the back wall plate as described in chapter 3.3.5. • Hold the lid with one hand and remove the fixing nuts of the hinges (see photo). • The lid can now be removed completely. Figure 41: Loosen hinge screws. FC5515R Centrifuge Service Manual Ohaus Corporation www.ohaus.com... -
Page 48: Replacing The Hinges
2) Current supply motor (on the frequency converter U2 = blue V2 = brown W2 = black 3.) Speed- and imbalance sensor (on the control board) • Remove the ground cable Figure 42: Loosen cables. Ohaus Corporation www.ohaus.com FC5515R Centrifuge Service Manual 3-10... -
Page 49: Replacing The Motor Rubber Bearing
When tightening the motor rubber mounts, also take care that they are not being twisted FC5515R Centrifuge Service Manual Ohaus Corporation www.ohaus.com 3-11... -
Page 50: Replacing The Power Board
• Remove all cable connections to the frequency converter. • Remove fixing screws as shown on the below picture and remove the frequency converter from the unit. Figure 46: Frequency converter. Ohaus Corporation www.ohaus.com FC5515R Centrifuge Service Manual 3-12... -
Page 51: Checkup The Imbalance Sensor
• Remove all connections of the temperature sensor on the control board. Figure 47: Replacing Temperature Sensor. • Pull the temperature sensor out of his anchorage and following the rubber bushing. • Pull the plug through the holes. FC5515R Centrifuge Service Manual Ohaus Corporation www.ohaus.com 3-13... -
Page 52: Replacing The Control Board
• Remove the screw of the braking resistance and remove it. Figure 49: Replacing Break Resistor. • Put in the new break resistance, connect the electrical connections and reassemble the unit in reverse order. Ohaus Corporation www.ohaus.com FC5515R Centrifuge Service Manual 3-14... -
Page 53: Replacing The Speaker
3.3.19 Replacing the Lid Lock. • Remove the covering of the front housing as described in chapter 3.3.1 • Remove the electrical supply on the control board (see below picture). Figure 51: Replace Lid Lock. FC5515R Centrifuge Service Manual Ohaus Corporation www.ohaus.com 3-15... - Page 54 Otherwise you have to repeat the step 3.) and 4.). 5.) Perhaps you have to bend the steel nibs of the other micro switches of the end stops into there position. 6.) Tighten all the screws well. Ohaus Corporation www.ohaus.com FC5515R Centrifuge Service Manual 3-16...
-
Page 55: Major Internal Cable Connection
Pin 1&2: Gray U2: Blue V2: Brown W2: Black GND: Green/Yellow (Grounding) Grounding: Make sure that all grounding cables are properly connected and the housing is securely installed before connecting power to the centrifuge FC5515R Centrifuge Service Manual Ohaus Corporation www.ohaus.com 3-17... - Page 56 CHAPTER 3 MAINTENANCE PROCEDURES Connector connection on Main PCBA: Ohaus Corporation www.ohaus.com FC5515R Centrifuge Service Manual 3-18...
-
Page 57: Refrigerated System
The temperature adjustment of the microprocessor is based on this calculated temperature value. Therefore, the user always gets the exactly requested sample temperature (± 2° C). 3.5.2 Refrigeration scheme Figure 53: Refrigeration scheme. FC5515R Centrifuge Service Manual Ohaus Corporation www.ohaus.com 3-19... -
Page 58: Emptying And Filling Refrigeration System
• Fill the refrigeration set with the proper amount of prescribed refrigerant (prescribed on the compressor). • Check all tube connections with a leakage detection device for possible leakage. Figure 54: Compressor. Ohaus Corporation www.ohaus.com FC5515R Centrifuge Service Manual 3-20... - Page 59 CHAPTER 3 MAINTENANCE PROCEDURES Figure 55: Manometer combination, vacuum pump, refrigerant bottle FC5515R Centrifuge Service Manual Ohaus Corporation www.ohaus.com 3-21...
-
Page 60: Trouble Shooting
• Put the plastic stopper back in the unit again, for go on working. • WARNING: Do not put your hands in the rotor chamber as long as the rotor is still spinning! Figure 56: Manually open the Lid. Ohaus Corporation www.ohaus.com FC5515R Centrifuge Service Manual 3-22... - Page 61 3.6.2.2 Description of the error message system The error message is shown in the "time" display through particular numbers. At the same time the word “error“ is indicated in the display. Figure 57: Error Message. FC5515R Centrifuge Service Manual Ohaus Corporation www.ohaus.com 3-23...
-
Page 62: Error Codes
Brief power failure, Cable break, plug is converter loosen (between control to frequency converter), frequency converter is defective, control unit is defective. Over voltage frequency Break resistant is defective, the impact is converter too strong during motor breaking/stopping. Ohaus Corporation www.ohaus.com FC5515R Centrifuge Service Manual 3-24... - Page 63 The rotor, which is stored in There was chosen a program, in which a the program, does not certain rotor is stored, but the inserted rotor match with the inserted is another one. rotor. FC5515R Centrifuge Service Manual Ohaus Corporation www.ohaus.com 3-25...
- Page 65 ™ Registered trademark of Ohaus Corporation. The information contained in this manual is believed to be accurate at the time of publication, but Ohaus Corporation assumes no liability arising from the use or misuse of this material. Reproduction of this material is strictly prohibited.
Need help?
Do you have a question about the FC5515R and is the answer not in the manual?
Questions and answers