Table of Contents
Advertisement
Quick Links
Advertisement
Table of Contents

Related Manuals for tronical TRONICALTUNE


Summary of Contents for tronical TRONICALTUNE
- Page 1 Push. strum. tuned. rock! MANUAL MANUAL V 2.12 V 2.12...
- Page 2 22-23 reFerence tuning Firmware Version battery leVel conFIGurAtIon menu calibration mode 28-30 accuracy mode robohead delay reset mode robohead sPeed interFerence leVel system conFIGurAtIon (eXPert menu) 36-41 tronIcAL tune - rePLAce BAttery / chArGInG the BAttery 42-44 LeGAL InFormAtIon www.tronical-comPonents.com...
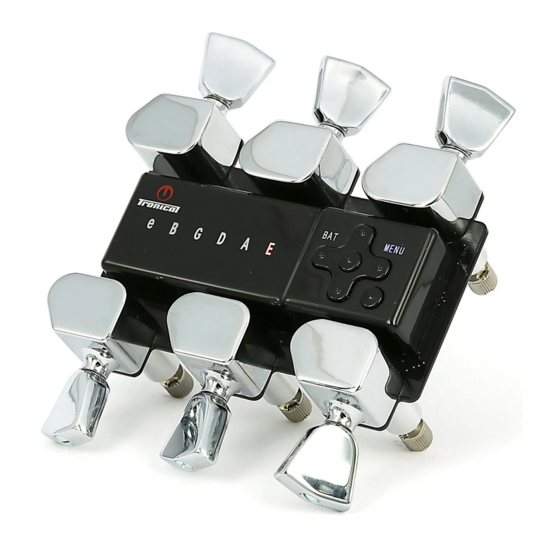
- Page 3 - overvIew 6 roBoheAds wIth new surFAce LockInG mechAnIsm tune controLLer InteGrAted Led-dIsPLAy (uP, down, LeFt, rIGht, enter) MENU (6 strInG Leds, 1 menu Led, 1 chArGe LeveL Led) on/oFF/BAck BAttery eXchAnGeABLe, rechArGeABLe 3.7 voLts, LI-PoLymer, APProX. 300 tunInGs...
- Page 4 : respective robohead is in movement : frequency measurement in progress Blinking menu led : Interference between lower and hIgher strIngs : acoustic Guitar Mute lower strings that are in tune : ElEctric guitar and struM higher strings again. www.tronical-comPonents.com...
-
Page 5: Getting Started
GettInG stArted InstALL the system to the GuItAr www.tronical-comPonents.com... - Page 6 Pcb drill holes are use the oPen-end wrench which comes now tronical tune is ready to in alignment with the neck´s tuner holes. with the set to screw tight the heX string uP your guitar.
- Page 7 GettInG stArted strInG your GuItAr mAX. recomended strInG GAuGes: .013 .017 .026 .035 .045 .056 (thIrteen to FIFty-sIXes) note: hIGher strInG GAuGes mAy cAuse dAmAGe to the tuners! www.tronical-comPonents.com...
- Page 8 Lock nut tighten the heX nuts oF the roboheads. strInG recess strInG shAFt heX nut www.tronical-comPonents.com...
- Page 9 90 degrees to long- itudinal direction oF the neck. the string shaFt. you can turn manually on the key or by string uP mode (Page 23) www.tronical-comPonents.com...
- Page 10 (maX 1nm torque)! do not use any tools to tighten the lock nut! www.tronical-comPonents.com...
- Page 11 GettInG stArted FIrst stePs www.tronical-comPonents.com...
-
Page 12: First Steps
(green led on tune conroller) and strum the not tuned strings only! tuning should be comPleted aFter 4 strums maXimum. remember that the systems algorithm is still learning the stePs and robohead runtimes, the more you tune the Faster it will work. www.tronical-comPonents.com... - Page 13 GettInG stArted how to tune / AddItIonAL InFormAtIon www.tronical-comPonents.com...
- Page 14 Following”). single string mode is recommended to get Familiar with the system and when you use the system in a loud enVironment with ambient noise (esPecially with acoustic guitars). multi-string mode is recommended as the deFault mode as soon you are used to the sys- tem. www.tronical-comPonents.com...
-
Page 15: Performance Specification
* wIth A Good BAttery chArGe, eG. ”BAt” IndIcAtor Is Green * AccurAcy set to stAndArd, 3 Leds (+/- 2,5 cent AccurAcy) unIt sInGLe-strInG mode sec per string tunInG tIme muLtI-strInG mode sec all strings unIt sInGLe-strInG mode strums per string numBer oF strums muLtI-strInG mode strums all strings www.tronical-comPonents.com... -
Page 16: Start To Tune
www.tronical-comPonents.com... - Page 17 : Interference between lower and hIgher strIngs Mute lower strings that are in tune and struM higher strings again. MENU Press & hold ”enter” to change to single string mode. when tuning is comPleted the system turns oFF automatically. www.tronical-comPonents.com...
- Page 18 Press “LeFt“ or “rIGht“ to select a string you would like to tune. LeFt / rIGht mute strings that are already in tune (green). see led eXPlanation on Page 2 or see multi-string tuning MENU when tuning is comPleted the system turns oFF automatically. www.tronical-comPonents.com...
- Page 19 (e-e) Press ”LeFt“ or ”rIGht“. single-click on ”enter“ to actiVate selected tuning MENU enter multi-string mode. or Press and hold “enter“ For single-string mode. LeFt / rIGht the menu led will light uP b lue. tunings www.tronical-comPonents.com...
- Page 20 Pick the indicated string (single tune mode) or strum all strings (multi tune mode) to LeFt / rIGht start Fine tune Phase. when all strings are in tune the system is switching oFF automatically. tunings www.tronical-comPonents.com...
- Page 21 “user-deFined 01“ MENU “user-deFined 02“ “user-deFined 03“ “user-deFined 04“ “user-deFined 05“ BLue BAnk tunInGs “user-deFined 06“ the deFault For any tuning in the blue bank is standard tuning. to saVe user-deFined tunings, see “Function menu - custom tuning“ www.tronical-comPonents.com...
-
Page 22: Function Menu
(e, a, d, g, b). Press “enter“ to conFirm or Press “BAck“ MENU enter tuning selection mode. LeFt / rIGht BAck FunctIon menu overvIew MENU string uP and down mode custom tuning mode reFerence tuning FunctIon menu Firmware Version battery leVel www.tronical-comPonents.com... - Page 23 (+- 300 cent) to standard Pitch, then release the uP/down button and Pluck the string. the system takes oVer and will tune the string to standard MENU Pitch. note: down oVer-tightening may riP the strings or cause damage to the tuner (dePending on string gauge) www.tronical-comPonents.com...
-
Page 24: Custom Tuning
Flashing “e“-led. uPon comPletion the “e“-led will light uP solid green. mute the “e“ string and Proceed with the “a“ string in the same manner and so Forth until all strings are measured (green). eXamPle: MENU MENU MENU etc. www.tronical-comPonents.com... - Page 25 Push and hold MENU “BAck“ to switch the system oFF. BAck you can saVe custom tunings in the blue bank only. you can select your custom tuning in the same manner as any other tuning. www.tronical-comPonents.com...
- Page 26 Preset in relation to the measured reFerence Pitch. the latest comPleted reFerence tuning is aVailable on start-uP until you comPlete any other tuning. should you wish to store your reFerence tuning reFer to “custom tuning“ Page 24-25. www.tronical-comPonents.com...
-
Page 27: Firmware Version
Firmware Version digits. the First digit number is green, the second blue and third red. each color symbolizes Values From 1-6 according to the digits. zero is symbolized iF all led´s are white. eXamPle: led´s Flash three times Flash: Flash: Flash: MENU MENU MENU Version: www.tronical-comPonents.com... -
Page 28: Battery Level
“LeFt/rIGht“ button to select led-b and Press “enter“. a Fully charged battery disPlays all led´s as shown leFt. MENU iF the battery is low, the roboheads will lose PerFormance. iF only t wo red led´s (a & e) are disPlayed, high charge the battery immediatelly. www.tronical-comPonents.com... -
Page 29: Configuration Menu
“e“ lights uP light blue. LeFt / rIGht on/BAck down Press “LeFt/rIGht“ button to select the desired Function. MENU enter LeFt / rIGht BAck conFIGurAtIon menu overvIew MENU calibration mode accuracy leVel robohead delay reset FunctIon menu robohead sPeed interFerence leVel www.tronical-comPonents.com... -
Page 30: Calibration Mode
MENU oF your guitar. this Feature is essential to enhance the enter tuning sPeed and accuracy. to get the best results strum the strings during the calibration Procedure in the same manner you would like to strum the strings in tunemode. - Page 31 ( E ) calibration is comPlete. MENU strum is recognized iF led´s are green. aFter t wo seconds all led´s start to blink again. MENU strum all strings within one second. calibration t wo begins. www.tronical-comPonents.com...
- Page 32 MENU comPleted the system turns oFF automatically. usually calibration takes 6 strums. sometimes uP to 9 strums dePending on guitar model. (select guitar model, see Page 42 ) www.tronical-comPonents.com...
- Page 33 +/- 2,5 cent (3 led´s e-d). MENU the highest accuracy leVel (all led´s on as shown leFt) will increase tuning time. tuning accuracy tuning speed a lower accuracy leVel will decrease tuning time resPectiVely. eXamPle: highest accuracy leVel www.tronical-comPonents.com...
- Page 34 No Delay low Delay high Delay the maX delay leVel as shown leFt will delay the start (2,5 sec) oF the roboheads by 2,5 sec. each additional led decreases the delay by 0,5 sec. eXamPle: maX delay www.tronical-comPonents.com...
- Page 35 Press and hold “uP“ and Press and hold “enter“ at the same time. LeFt / rIGht reset styLes reset will be conFirmed by a led cycle. BAck reset styLes overvIew reset all custom tunings Factory reset (reset all data eXcePt oF customer tuning data) www.tronical-comPonents.com...
- Page 36 Pushing “LeFt“ or “rIGht“. conFirm MENU with “enter“ or Push ”BAck” For bottom Function menu. fast slow the deFault is set to the highest sPeed leVel as shown leFt (all led´s on). eXamPle: highest sPeed leVel www.tronical-comPonents.com...
- Page 37 For all tuning modes. MENU deFault is 3-leds high select bet ween a high and low interFerence leVel to PreVent that the harmonic oF a low string is recognized as a harmonic oF a high string. eXamPle: highest interFerence leVel. www.tronical-comPonents.com...
-
Page 38: System Configuration
www.tronical-comPonents.com... - Page 39 Press “LeFt“ or “rIGht“ to naVigate through menu (e, a, d). Press “enter“ to conFirm or Press “BAck“ For tuning selection mode. system conFIGurAtIon overvIew MENU gain guitar tyPe Pitch window system conFIGurAtIon single or double click For tune www.tronical-comPonents.com...
-
Page 40: Gain Settings
GAIn settInGs tronical tune has a suPerior dynamic range to sense the solid-borne sound oF your instrument (>130db). this is achieVed by a Piezo transducer, a dynamical adjustable amPliFier and a 24 analog to digital conVerter (adc). with the “gain setting”... - Page 41 “a“-led and Press ”enter” LeFt / rIGht GuItAr tyPes BAck select either led-e For “electric“ or “a“ For “acoustic“ guitars and Press “enter“ to conFirm. MENU MENU green blinking “e“ led : green “e“ & blue “a“ blinking led´s: e-GuItAr AcoustIc GuItAr www.tronical-comPonents.com...
-
Page 42: Pitch Window
Pitch oF the low e string is more than 100cent oFF, the corresPonding e-led would eXamPle: become magenta (lower than eb or higher than F). www.tronical-comPonents.com... - Page 43 LeFt / rIGht cLIck oPtIons BAck select either led-e For “single click“ or “A“ For “double click“. and Press “enter“ to conFirm. MENU MENU green blinking “e“ led : green “e“ & blue “a“ blinking led´s: sInGLe cLIck (deFAuLt) douBLe cLIck www.tronical-comPonents.com...
- Page 44 BAttery / chArGe BAttery www.tronical-comPonents.com...
-
Page 45: Replace Battery
BAttery Press on the BAttery PuLL out the BAttery to reLeAse. MENU MENU www.tronical-comPonents.com... -
Page 46: Charge The Battery
BAttery BAttery PAck LI-PoLymer chArGer 3.7v 340mAh 1258mWh li-polyMEr iNpUT: Ac100-240v 50/60hz oUTpUT: 4.2v – 300mA A BAT TEry ThAT hAs BEEN iNfrEqUENTly UsEd, or A NEW oNE, coUld hAvE rEdUcEd cApAciTy. yoU MAy NEEd To rEchArgE iT A NUMBEr of TiMEs. -
Page 47: Legal Information
The battery in your Tronical Tune must be disposed of properly and should never be placed in municipal waste. - Page 48 Tronical Components GmbH • Heselstücken 18 • d-22453 hamburg germany Web: www.tronical.com • Mail: info@tronical-components.com hrB 94503 © copyright 2012 Tronical-components gmbh. All rights reserved.
Need help?
Do you have a question about the TRONICALTUNE and is the answer not in the manual?
Questions and answers