
Related Manuals for Morningstar MC8


Summary of Contents for Morningstar MC8
-
Page 1: Table Of Contents
Copy, Paste and Swap Presets Dual Switch Press Functions Global Settings Useful Concepts and Features Update Firmware 18.1 How to Update your Firmware 18.2 Unsuccessful Firmware Update Using an External MIDI Controller to control the MC8 19.1 MIDI Implementation Charts Introduction... -
Page 2: Power Requirements
Phantom Power (9-12v AC or DC) Connect a 7-pin MIDI cable to the MIDI Out port of the MC8. Phantom power can be supplied to the MC8 through pins 6 and 7 of the MIDI OUT port. When receiving DC power via phantom power, polarity does not matter. Phantom power that is received is chained to pins 6 & 7 of the MIDI IN port as well, allowing you to power other devices connected to it. -
Page 3: Omniports 1 To 4
MIDI Out Where MIDI data is sent from the MC8 to other devices. Use a standard 5-pin MIDI cable. To phantom power your MC8, you can also use a 7-pin cable if you have a device that provides phantom power via pins 6 & 7. -
Page 4: Banks And Presets
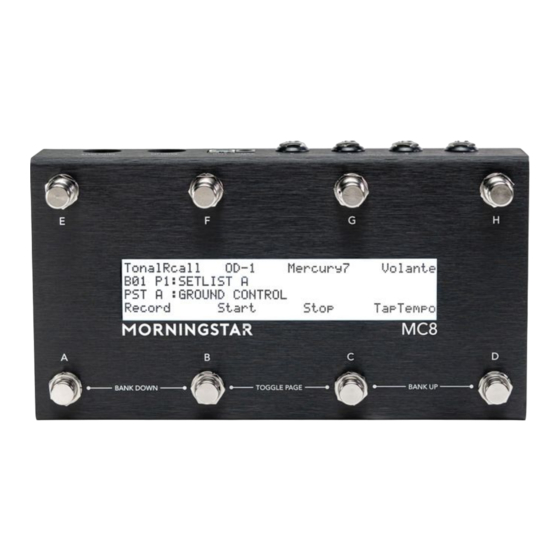
The MC8 has 8 foot switches A to H. Each switch corresponds with the text closest to it on the LCD display. Each switch on your Morningstar controller can send any combination of up to 16 different MIDI messages of your choice. By default all switches are EMPTY and not programmed to send any MIDI messages. -
Page 5: Midi Message Types
The final 6 presets in each bank (Q to V) are accessible by connecting external aux switches to your MC8. You can learn more about this in the sing External Aux Switches section of this manual. Each preset can be programmed to send 16 different messages of your choice. And with 16 different MIDI channels, each preset is capable of controlling up to 16 different MIDI devices at once. -
Page 6: Using The Morningstar Device Editor
Device Editor. The fastest and easiest way to program your switches is to use the Morningstar Device Editor. This will probably be your most commonly used method, as it gives you a clear visual representation of all your presets, banks and the MIDI messages being sent by each switch. -
Page 7: Toggle Mode
Press ‘Save’ to save the name Press ‘Exit’ Toggle Mode Toggle Mode allows each switch on your Morningstar MIDI controller to send different MIDI messages with each alternate press. This allows you to control your pedals and devices in useful and creative ways. Watch https://youtu.be/VEr0TB58EgA... -
Page 8: Bank Settings
Then, put your expression pedal into toe down position. Ideally, the value 127 should be displayed. Press ‘Save’ to save your settings. Do not worry if you are unable get values of 0 and 127 for each position. Once calibration is complete, the MC8 will automatically optimize settings to suit your expression pedal. -
Page 9: Programming An Expression Pedal Preset
The MC8 requires aux switches that are wired like in the schematic below. It has to be connected to the device with a stereo cable, where the Tip is connected to the ground via a SPST Footswitch, and similar to the Ring as well. -
Page 10: Trs Midi Outputs - 1/4 Inch
Switchable TRS MIDI Configuration With Firmware v3.8 onwards, you no longer need to move the jumper switches in the MC8 to change your Omniport TRS MIDI configurations. The TRS settings can be adjusted via the menus on the device itself or by using the Device Editor. -
Page 11: For Chase Bliss Pedals
However, devices such as Chase Bliss Audio pedals require a different configuration, where MIDI data is received via the Ring and the Tip is physically disconnected and floating. The MC8 can accommodate this. You will need to remove the back plate of the MC8 and do the following:... - Page 12 Remove the backplate screws carefully to avoid damage. If you find that the screws are too tight, you should try to loosen the 4 Omniport nuts first before removing the screws. Decide which port you want to configure to control your Chase Bliss pedal Remove the bottom jumper for that port (keep this somewhere safe for future use) Move the top jumper to the left as shown in the photo below In the image above, ports 1 and 4 are configured to send MIDI to Chase Bliss devices.
-
Page 13: Copy, Paste And Swap Presets
Copy, Paste and Swap Presets You can copy, paste and swap presets on your MC8. These options are available on the device itself (press the switch you want to copy, press [E+H] > Preset > Copy, Paste, Swap) and on the Device Editor. -
Page 14: Global Settings
(by stepping on 2 switches at once) more accurately. [MidiChnl] - MIDI Channel Set the MIDI receive channel for the MC8. The MC8 can receive and respond to MIDI messages from other MIDI controllers. Press Up or Down to select your desired MIDI receive channel. -
Page 15: Useful Concepts And Features
We regularly update our controllers' firmware to introduce new features, improve performance and fix bugs. Watch video tutorial https://youtu.be/wtvX8Y9LzXo How to Update your Firmware To update your Morningstar controller firmware, you first need to download the Morningstar Firmware Updater from the Morningstar website in the ‘Downloads’... -
Page 16: Unsuccessful Firmware Update
Morningstar Website. Download the latest MC8 firmware here Once you’ve downloaded it, launch the Morningstar Firmware Updater and connect your MIDI controller to your computer via . Your controller will automatically be recognised by the Updater. Click on the Upload button and open the new firmware .hex file from your downloads folder. The firmware update will begin automatically and your controller will restart. - Page 17 Set Toggle (All) Set Toggle (Individual) 0 = Preset A 1 = Preset B 2 = Preset C 21 = Preset V Clear Toggle (All) Clear Toggle (Individual) 0 = Preset A 1 = Preset B 2 = Preset C 21 = Preset V Toggle Page Engage Preset...
Need help?
Do you have a question about the MC8 and is the answer not in the manual?
Questions and answers