Table of Contents
Advertisement
Quick Links
Advertisement
Table of Contents
Troubleshooting

Subscribe to Our Youtube Channel
Related Manuals for Dahua ISC-D218


Summary of Contents for Dahua ISC-D218
- Page 1 Walk-through Metal Detector Quick Start Guide V1.0.0...
-
Page 2: Foreword
General This manual introduces the functions and operations of the walk-through metal detector (hereinafter referred to as "the Device"). Models ISC-D206, ISC-D218 Safety Instructions The following categorized signal words with defined meaning might appear in the manual. Signal Words Meaning Indicates a high potential hazard which, if not avoided, will result in death or serious injury. - Page 3 We are not liable for any loss caused by the operations that do not comply with the manual. The manual would be updated according to the latest laws and regulations of related jurisdictions. For detailed information, refer to the paper manual, CD-ROM, QR code or our official website.
-
Page 4: Important Safeguards And Warnings
Important Safeguards and Warnings This chapter describes the contents covering proper handling of the Device, hazard prevention, and prevention of property damage. Read these contents carefully before using the Device, comply with them when using, and keep the manual well for future reference. Operation Requirement Do not place or install the Device in a place exposed to sunlight or near the heat source. -
Page 5: Table Of Contents
3.1.2 Basic Operations ......................10 3.1.3 Configuring Function ......................11 ISC-D218 ............................ 12 3.2.1 Configuration Panel ......................12 3.2.2 Basic Operations ......................13 4 Troubleshooting ..........................16 Error Code (ISC-D218) ....................... 16 Troubleshooting........................... 17 Appendix 1 Cybersecurity Recommendations ................... 19... -
Page 6: Overview
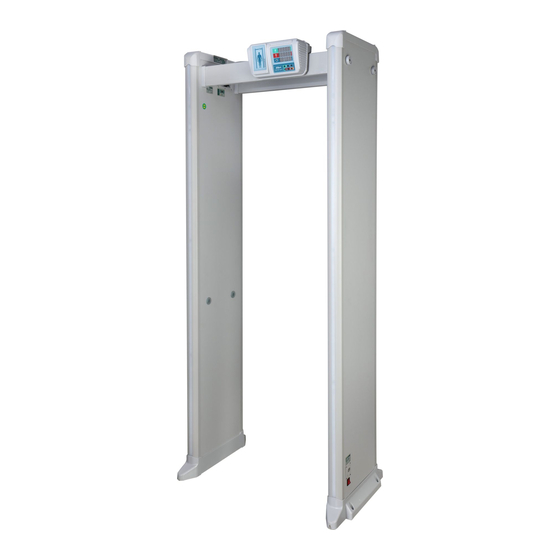
Overview Introduction Walk-through metal detector is a high-performance security gate. The Device has high metal detection sensitivity, light weight, strong anti-interference, and stable performance. It uses high-strength special materials which is light-weighted and easy to transport and install. The Device has a modular design and is manufactured on the unified assembly lines, so it can ensure the good stability. -
Page 7: Application Scenario
The IR units support manual start-stop technology for longer service life. Sensitivity Adjustable The sensitivity of each detection zone can be adjusted as needed to meet different sensitivity requirements of different zones. Alarm Light and sound alarm for sharp alert. The sound duration and volume can be adjusted as needed. -
Page 8: Installation
Installation Checking List After receiving your product, check against the table below. If there are any problems, contact the after-sales service personnel. Table 2-1 Checking list Order List Description Appearance Obvious damage Packaging Accidental impact Overall Accessories (list of packaging accessories on Complete or not warranty card) -
Page 9: Installation Environment
Table 2-2 Description Parameter Description Overall Exterior Size 2170 mm × 845 mm × 465 mm Passageway Interior Size 2015 mm × 688 mm × 368 mm Packing Size 2409 mm × 868 mm × 303.5 mm Net Weight 38 kg Gross Weight 43 kg Operating Voltage... -
Page 10: Installing The Device
Installing the Device Step 1 Check whether the package is complete and open the box. Figure 2-2 Open the box Step 2 Take out the left and right door panels from the box. Figure 2-3 Take out door panels Step 3 Take out the manual, beam, host box, and power supply from the box. - Page 11 Figure 2-4 Take out manual, beam, main box, and power supply Step 4 Follow the previous figure to prepare the door panels, beams, host box, and bolts. Figure 2-5 Prepare the parts and the tools Step 5 Install the beams and the host box. Figure 2-6 Install the beams and the host box...
- Page 12 Step 6 Connect the detection wire on the host box to the left and right door panels. Figure 2-7 Connect the detection wire Step 7 Stand the Device up. Figure 2-8 Stand the Device up. Step 8 Connect the power supply to the Device, and then turn on the power switch to start the Device.
- Page 13 Figure 2-9 Start the Device...
-
Page 14: Configuration
Configuration ISC-D206 3.1.1 Configuration Panel Figure 3-1 Single-zone panel (ISC-D206) Figure 3-2 Single-zone panel description (ISC-D206) Name ① Four-in-one digital tube. ② Four-in-one digital tube. ③ Working indicator light. ④ Save and exit. – ⑤ ⑥ ⑦ Program. ⑧ Pass indicator light. ⑨... -
Page 15: Basic Operations
Figure 3-3 4/6/L6-zone digital panel (ISC-D206) Figure 3-4 4/6/L6-zone panel description (ISC-D206) Name ① Four-in-one digital tube. ② Four-in-one digital tube. ③ Working indicator light. ④ Power button. – ⑤ ⑥ ⑦ Program. 3.1.2 Basic Operations Starting the Device Connect the power supply, press and hold the Reset/Switch button, and then the Device starts and enters the working state, and shows "0000 0000". -
Page 16: Configuring Function
Enter the new password (press – to change the bit, and press + to change the value), Step 4 and then press Program to save and go next. Figure 3-5 Change password 3.1.3 Configuring Function Configure functions and parameters. The values that you set at last are automatically saved when you go to the next interface. -
Page 17: Isc-D218
0–2 2 levels available. volume Configure alarm tone 1–10 10 levels available. ISC-D218 3.2.1 Configuration Panel Figure 3-7 Panel (LED screen) (ISC-D218) Figure 3-8 Panel description (ISC-D218) Name ② Five-in-one green digital tube ② Five-in-one red digital tube ③ Two-in-one green digital tube; Three-in-one red digital tube ④... -
Page 18: Basic Operations
Name ⑦ Working indicator light ⑧ Program ⑨ Power button Table 3-4 Functions description (ISC-D218) Function Description Press ⑨. Start Self-tests 12 detectors on the left and right door panels after power-on. An error message is prompted if a fault is discovered. - Page 19 To set parameter values, press ④ to increase, and press ⑤ to reduce. Table 3-5 6/12/18-zone parameter configuration Function Parameter Description Configure operating 1–50 50 levels available. frequency Configure security level 0–99 100 levels available. Configure zones 6/12/18 Three zone divisions are available. 0–399 400 levels available for Detector 1.
- Page 20 Scenario Scenario Scenario Railway station Gold and silver Courtroom jewelry Bus station Electroplating plant Food factory Wharf Die casting Bank. Reeducation-through- Precious metal Vault labor center Printing plant Communication room Convention and Exhibition Center Metals factory Meeting room Subway station Electronics factory VIP room Villa...
-
Page 21: Troubleshooting
Troubleshooting Error Code (ISC-D218) Figure 4-1 Error code Table 4-1 Error code description Code Description E.R.R. Error. 1.L. Detector 1 on the left door. 2.L. Detector 2 on the left door. 1.R. Detector 1 on the right door. 2.R. Detector 2 on the right door. -
Page 22: Troubleshooting
Figure 4-2 Fault display Table 4-2 Fault display description Code Description Number of passes. Number of alarm times. Display position of error code. Troubleshooting Table 4-3 Troubleshooting Problem Description Check Judgment Method Check whether the power cable between the host detection door and The Device the door 220V AC... - Page 23 Problem Description Check Judgment Method Turn on the phone camera, aim the lens at Does not the door panel dot, and Does not count the then you will see a Observe. count number of Replace the IR flashing red dot. The red Manual ...
-
Page 24: Appendix 1 Cybersecurity Recommendations
Appendix 1 Cybersecurity Recommendations Cybersecurity is more than just a buzzword: it’s something that pertains to every device that is connected to the internet. IP video surveillance is not immune to cyber risks, but taking basic steps toward protecting and strengthening networks and networked appliances will make them less susceptible to attacks. - Page 25 We suggest you to change default HTTP and other service ports into any set of numbers between 1024~65535, reducing the risk of outsiders being able to guess which ports you are using. Enable HTTPS We suggest you to enable HTTPS, so that you visit Web service through a secure communication channel.
- Page 26 suggested to use VLAN, network GAP and other technologies to partition the network, so as to achieve the network isolation effect. Establish the 802.1x access authentication system to reduce the risk of unauthorized access to private networks. It is recommended that you enable your device's firewall or blocklist and allowlist ...
Need help?
Do you have a question about the ISC-D218 and is the answer not in the manual?
Questions and answers