Table of Contents
Advertisement
Quick Links
Advertisement
Table of Contents

Related Manuals for Bosch HBG676E6 Series


Summary of Contents for Bosch HBG676E6 Series
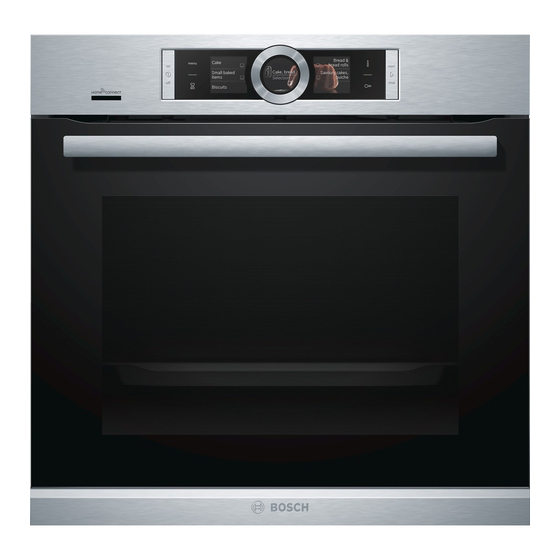
- Page 1 Built-in oven HBG676E.6 [en] Instruction manual Built-in oven...
-
Page 3: Table Of Contents
Table of contents [ e n ] I n s t r u c t i o n m a n u a l B u i l t - i n o v e n Intended use ......4 Basic settings. -
Page 4: Intended Use
4000 metres above sea Additional information on products, accessories, replacement parts and services can be found at level. www.bosch-home.com and in the online shop This appliance may be used by children over www.bosch-eshop.com the age of 8 years old and by persons with... -
Page 5: Important Safety Information
Important safety information Water in a hot cooking compartment may Risk of scalding! (Important safety ■ create hot steam. Never pour water into the information cooking compartment when the cooking compartment is hot. G eneral information Warning – Risk of injury! I m p o r t a n t s a f e t y i n f o r m a t i o n Scratched glass in the appliance door may Warning –... -
Page 6: Meat Thermometer
Important safety information the instructions even when using the Delayed Warning – Risk of electric shock! start function with a delayed end time. When replacing the cooking compartment bulb, the bulb socket contacts are live. Before Warning – Risk of burns! replacing the bulb, unplug the appliance from The cooking compartment becomes the mains or switch off the circuit breaker in... -
Page 7: Causes Of Damage
Causes of damage Inserting accessories: depending on the appliance ]Causes of damage ■ model, accessories can scratch the door panel when closing the appliance door. Always insert the accessories into the cooking compartment as far as G eneral information C a u s e s o f d a m a g e they will go. -
Page 8: Environmental Protection
Environmental protection Open the appliance door as infrequently as possible 7Environmental protection ■ when the appliance is in use. Y our new appliance is particularly energy-efficient. E n v i r o n m e n t a l p r o t e c t i o n Here you can find tips on how to save even more energy when using the appliance, and how to dispose of your appliance properly. -
Page 9: Getting To Know Your Appliance
Getting to know your appliance Control panel *Getting to know your In the control panel, you can use the various buttons, appliance touch fields, touch-screen displays and the rotary selector to set the different appliance functions. The current settings are shown on the display. I n this section, we will explain the indicators and G e t t i n g t o k n o w y o u r a p p l i a n c e controls. -
Page 10: Display
Getting to know your appliance Display Touch-screen displays The touch-screen displays are both a display medium The display is structured so that the information can be and control element at the same time. They show the read at a glance in any situation. options that you can select for a function and the The value that you can currently set is highlighted and current setting. -
Page 11: Types Of Heating
Getting to know your appliance Types of heating To make sure that you always use the right type of For temperature settings above 275 °C and grill heating to cook your food, we have explained the setting 3, the appliance reduces the temperature to differences and applications below. -
Page 12: Further Information
Accessories Further information _Accessories In most cases, the appliance provides notes and further information on the action just carried out. Y our appliance is accompanied by a range of A c c e s s o r i e s Touch the °... -
Page 13: Optional Accessories
Accessories Always insert the accessory between the two guide bars Example in the picture: Universal pan for a shelf position. Accessories can be pulled out approximately halfway without tipping. Notes Make sure that you always insert the accessories ■ into the cooking compartment the right way round. Always insert accessories fully into the cooking ■... -
Page 14: Before Using For The First Time
Before using for the first time Touch the "Complete the settings" text field to Glass tray confirm. For large roasts, moist cakes and bakes. A message appears on the display to confirm that the initial use has been completed. Glass tray For bakes, vegetable dishes and baked goods. -
Page 15: Starting The Operation
Press the ÿ On/Off button to switch on the appliance. Example in the picture: Hot air eco . at 195 °C. The Bosch logo appears on the display, followed by the Touch the text field with the required type of heating. -
Page 16: Rapid Heating
Time-setting options corresponding default temperature appears on the An audible signal sounds after a cooking time or timed display. period has elapsed. You can cancel the audible signal early by touching a field or touch-screen display. When you change the type of heating, the other Note: settings are also reset. -
Page 17: Setting The End Time
Time-setting options Once the cooking time has elapsed, an audible signal Changing and cancelling sounds. The appliance stops heating. The cooking time To change the cooking time, touch the "Cooking time" 00 m 00 s is shown on the display. text field. -
Page 18: Meat Thermometer
Meat thermometer Meat: For large pieces of meat, insert the meat probe at @Meat thermometer an angle from above as far as it will go into the meat. For relatively thin pieces of meat, insert the meat probe from the side at the thickest point. T he meat thermometer makes accurate cooking M e a t t h e r m o m e t e r possible. -
Page 19: Setting The Core Temperature
Meat thermometer Setting the core temperature Core temperatures of different foods The meat thermometer must be inserted into the socket Do not use frozen food. The figures in the table are on the left-hand side of the cooking compartment. given as a guide. They depend on the quality and composition of the food. -
Page 20: Childproof Lock
Childproof lock List of basic settings AChildproof lock Depending on the features of your appliance, not all basic settings are accessible. Y our appliance is equipped with a childproof lock so C h i l d p r o o f l o c k that children cannot switch it on accidentally or change Setting Options... -
Page 21: Changing The Time
Sabbath mode Changing the time When the cooking time for Sabbath mode has ended, an audible signal sounds. The appliance stops heating. If you want to change the time, for example from The cooking time 00 m 00 s is shown on the display. summer to winter time, you must change the basic Press the ÿ... -
Page 22: Remote Start
Declaration of Conformity WLAN network, which is connected to the Internet, your appliance transmits the following categories of data to Robert Bosch Hausgeräte GmbH hereby declares that the Home Connect server (initial registration): the appliance which features Home Connect is in... -
Page 23: Cleaning
Cleaning A detailed RED Declaration of Conformity can be found Area Cleaning online at www.bosch-home.com/de on the product page for appliance in the additional documents. Appliance exterior Stainless steel Hot soapy water: front Clean with a dish cloth and then dry with a soft cloth. -
Page 24: Keeping The Appliance Clean
Cleaning function Use suitable ovenware for roasting, e.g. a roasting ■ Glass cover for Hot soapy water: dish. the interior light- Clean with a dish cloth and then dry with a soft cloth. If the cooking compartment is heavily soiled, use oven cleaner. -
Page 25: Setting The Cleaning Function
Cleaning function Clean the appliance door and along the edges of the The appliance door locks shortly after the function starts cooking compartment in the area around the seal. Do running. A message and the n symbol appear on the not scrub or remove the seal. -
Page 26: Rails
Rails Then insert the rail into the front socket „, until the pRails rail also rests against the cooking compartment wall here, and press it downwards … (figure " W ith good care and cleaning, your appliance will retain R a i l s its appearance and remain fully functional for a long time to come. -
Page 27: Removing The Door Cover
Appliance door Removing the door cover Removing the appliance door Open the appliance door fully and push it in the The stainless steel inlay in the door cover may become direction of the appliance. discoloured. To carry out thorough cleaning, you can Fold up the two locking levers on the left and right remove the cover. - Page 28 Appliance door Removing the door from the appliance Fitting the door on the appliance When fitting the intermediate panel, make sure that the Open the appliance door slightly. arrow is in the top right of the panel and that it aligns Press on the right and left side of the cover (figure with the arrow on the metal panel.
-
Page 29: Trouble Shooting
Trouble shooting Rectifying faults yourself 3Trouble shooting You can often easily rectify technical faults on the appliance yourself. I f a fault occurs, there is often a simple explanation. T r o u b l e s h o o t i n g If a dish does not turn out exactly as you wanted, you Before calling the after-sales service, please refer to the can find many tips and instructions for preparation at... -
Page 30: Replacing The Bulb In The Top Of The Cooking Compartment
Customer service Set a cooking time so that the appliance does not Tip: 4Customer service switch off when you do not want it to, e.g. with an extremely long preparation time. The appliance heats up until the set cooking time has elapsed. O ur after-sales service is there for you if your appliance C u s t o m e r s e r v i c e needs to be repaired. -
Page 31: Dishes
Dishes Selecting a dish PDishes The dishes are arranged in a uniform structure: Y ou can use the "Assist" operating mode to prepare a Category ■ D i s h e s wide variety of food. The appliance selects the optimal Food ■... -
Page 32: Baking Sensor
Dishes Baking sensor The settings for this dish appear on the display. For many dishes, you can change the settings to suit Your appliance is equipped with a baking sensor.This your needs. sensor is automatically activated when you select a For some dishes, you must set the weight instead. -
Page 33: Tested For You In Our Cooking Studio
Tested for you in our cooking studio If you are using 4D Hot air as the type of heating, you JTested for you in our can choose between levels 1, 2, 3 and 4. cooking studio Baking on several levels Use 4D hot air. - Page 34 Tested for you in our cooking studio will result in more even browning. You can use a higher accessories into the cooking compartment until it has setting next time if necessary. finished preheating. If you wish to follow one of your own recipes when Baking times cannot be reduced by using higher Note: baking, you should use the setting values listed for...
- Page 35 Tested for you in our cooking studio Dish Accessories/cookware Shelf posi- Heating Tempera- Cooking tion function ture in °C time in mins. Small baked items Small cakes Baking tray 160** 20-30 Small cakes Baking tray 150** 25-35 < Small cakes, 2 levels Universal pan + baking tray 150** 25-35...
-
Page 36: Bread And Rolls
Tested for you in our cooking studio The cake is too dark on top, and too Bake the cake one level lower in the oven the next time. Select a lower temperature and extend the baking light underneath. time. Cakes baked in a tray or tin are too Place the baking tray in the middle of the accessories, not directly against the back wall. - Page 37 Tested for you in our cooking studio cooked on the outside, but would not be fully baked in Remove unused accessories from the cooking the middle. compartment. This will ensure that you achieve the best possible cooking results and energy savings of up to The setting values apply to food that is placed into a 20 per cent.
-
Page 38: Pizza, Quiche And Savoury Cakes
Tested for you in our cooking studio Pizza, quiche and savoury cakes not brown evenly. If you wish to bake using these baking tins/dishes and using top/bottom heating, slide Your appliance offers you a range of heating types for in the tin/dish at level 1. preparing pizza, quiche and savoury cakes. -
Page 39: Bakes And Soufflés
Tested for you in our cooking studio Types of heating used: % Top/bottom heating ■ < 4D hot air $ Pizza setting ■ ■ Dish Accessories Shelf posi- Type of Tempera- Cooking tion heating ture in °C time in mins. Pizza Pizza, fresh Baking tray... -
Page 40: Poultry
Tested for you in our cooking studio more even browning. You can increase the temperature If you wish to follow one of your own recipes when next time if necessary. cooking, you can use similar dishes in the table as a reference. - Page 41 Tested for you in our cooking studio The individual pieces should be approximately equal in Notes The grill element switches itself continuously on and size. ■ off; this is normal. The grill setting determines how A general rule: the larger the poultry is, the lower the frequently this occurs.
-
Page 42: Meat
Tested for you in our cooking studio Meat Uncovered cookware Use a deep roasting tin/dish for roasting meat. Place Your appliance offers you many heating types for the tin/dish onto the wire rack. If you do not have any preparing meat. You can find the ideal settings for many suitable cookware, use the universal pan. - Page 43 Tested for you in our cooking studio Try using the lower values at first. You can increase the Turn roasting joints and grilled items after approx. ^ to temperature next time if necessary. Z of the indicated time. The setting values apply to chilled meat placed into the If you wish to follow one of your own recipes, you cold cooking compartment.
-
Page 44: Fish
Tested for you in our cooking studio Tips on roasting and braising The cooking compartment becomes Prepare your food in an enclosed roasting dish with higher temperature or use the grill tray. You will achieve very dirty. the best roasting results if you use the grill tray. The grill tray can be bought later as a special accessory. The roast is too dark and the crack- Check the shelf position and temperature. -
Page 45: Vegetables And Side Dishes
Tested for you in our cooking studio In the table, you can find information for fish with default Only use greaseproof paper that is suitable for Note: values for the weight. If you want to cook a heavier fish, the selected temperature. Always cut greaseproof you should definitely use the lower temperature. -
Page 46: Yogurt
Tested for you in our cooking studio Types of heating used: ( Grill, large area ■ < 4D hot air $ Pizza setting ■ ■ Dish Accessories Shelf posi- Type of Tempera- Grill Cooking tion heating ture in °C setting time in mins. - Page 47 Tested for you in our cooking studio selected temperature. Always cut greaseproof paper to Universal pan or baking tray Slide the universal pan or the baking tray in carefully as size. far as the limit stop with the bevelled edge facing the appliance door.
-
Page 48: Acrylamide In Foodstuffs
Tested for you in our cooking studio Dish Accessories/cookware Shelf posi- Type of Tempera- Cooking tion heating ture in °C time in mins. Joint of veal, 1.5 kg Cookware, uncovered 170-180 110-130 Fish Fish, braised, whole 300 g, e.g. trout Cookware, covered 190-210 25-35... -
Page 49: Drying
Tested for you in our cooking studio Type of heating used: . Slow cooking ■ Dish Cookware Shelf posi- Heating Searing time Tempera- Cooking tion function in mins ture in °C time in mins Poultry Duck breast, medium rare, 300 g each Cookware, uncovered 45-60 Chicken breast fillet, 200 g each, well Cookware, uncovered... -
Page 50: Preserving
Tested for you in our cooking studio thinner the slices are, the quicker the drying process If you wish to dry additional foodstuffs, you should use will be and the more aromatic the dried food will similar foodstuffs in the table as a reference. remain. -
Page 51: Prove Dough
Tested for you in our cooking studio Type of heating used: < 4D hot air ■ Preserving Cookware Shelf posi- Type of Tempera- Cooking time in mins. tion heating ture in °C Vegetables, e.g. carrots 1-litre preserving jars 160-170 Before it starts bubbling:30-40 <... -
Page 52: Keeping Warm
Tested for you in our cooking studio Type of heating used: B Defrosting ■ Dish Accessories Shelf posi- Type of Tempera- Cooking tion heating ture in °C time in mins. Bread, bread rolls Bread & bread rolls general Baking tray 40-70 Cake Cake, moist... - Page 53 Tested for you in our cooking studio Dish Accessory Shelf posi- Type of Tempera- Cooking tion heating ture in °C time in mins. Fatless sponge cake Springform cake tin, diameter 26 cm 160-170** 25-35 Fatless sponge cake Springform cake tin, diameter 26 cm 160-170** 30-40 <...
- Page 56 *9001142099* 9001142099 000603...
Need help?
Do you have a question about the HBG676E6 Series and is the answer not in the manual?
Questions and answers