Table of Contents
Advertisement
Quick Links
Advertisement
Table of Contents

Related Manuals for Bosch HBG6764.6B


Summary of Contents for Bosch HBG6764.6B
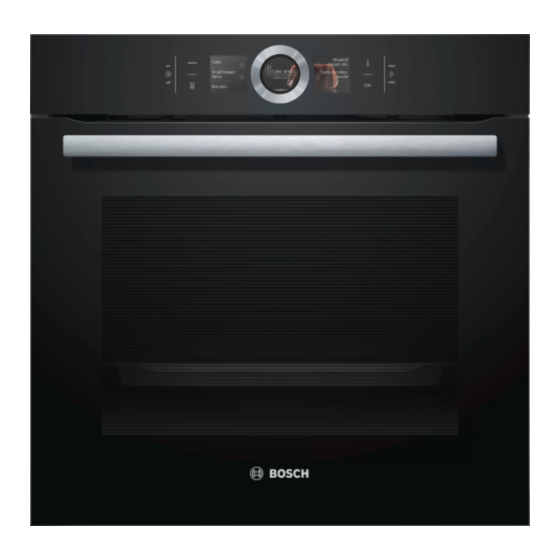
- Page 1 Oven HBG6764.6B User manual and installation instructions [en]...
-
Page 2: Table Of Contents
en Safety ¡ Keep the instruction manual and the Table of contents product information safe for future refer- ence or for the next owner. ¡ Do not connect the appliance if it has been USER MANUAL damaged in transit. Safety .............. 2 1.2 Intended use Preventing material damage ....... - Page 3 Safety en Loose food remnants, fat and meat juices WARNING ‒ Risk of injury! may catch fire. Scratched glass in the appliance door may ▶ Before using the appliance, remove the develop into a crack. worst of the food residues and remnants ▶ Do not use any harsh or abrasive cleaners from the cooking compartment, heating ele- or sharp metal scrapers to clean the glass ments and accessories.
-
Page 4: Safety
en Safety electronic implants, e.g. heart pacemakers or and remnants from the cooking compart- insulin pumps. ment and accessories. ▶ Wearers of electronic implants must stay at The outside of the appliance gets very hot least 10 cm away from the control panel. when the cleaning function is in progress. -
Page 5: Preventing Material Damage
Preventing material damage en 2 Preventing material damage Take care not to trap anything in the appliance ▶ 2.1 General door. Only leave the cooking compartment to dry with the ▶ ATTENTION! door open if a lot of moisture was produced during Objects on the cooking compartment floor at over operation. - Page 6 en Environmental protection and saving energy Remove any accessories that are not being used from the cooking compartment. ¡ Accessories that are not being used do not need to be heated. Allow frozen food to defrost before cooking. ¡ This will save the energy that would otherwise be required to defrost it.
-
Page 7: Familiarising Yourself With Your Appliance
Familiarising yourself with your appliance en 4 Familiarising yourself with your appliance 4.1 Control panel Buttons The buttons on the left- and right-hand side of You can use the control panel to configure all functions the control panel have a pressure point. Press- of your appliance and to obtain information about the ing a button will execute its function. - Page 8 en Familiarising yourself with your appliance the optimal time to place your food in the cooking 4.4 Touch displays compartment is as soon as the entire line has The touch displays act as both displays and controls. turned red. The touch displays are divided into several text fields. With set levels such as grill settings, the heating line The text fields show you the current selection options turns red immediately.
- Page 9 Operating modes en Appliance door If you open the appliance door during operation, the operation stops. When you close the appliance door, the operation continues automatically. 5 Operating modes This is where you can find an overview of your appli- Operating ance's operating modes and main functions.
-
Page 10: Accessories
en Accessories Symbol Type of heating Temperature What it's used for and how it works range Possible additional options Grill, large area Grill settings: Grill flat items such as steak and sausages, or make toast. Grat- 1 = low inate food. 2 = medium The entire area below the grill element becomes hot. - Page 11 You will find a comprehensive range of products for your appliance in our brochures and online: www.bosch-home.com Accessories vary from one appliance to another. When purchasing accessories, always quote the exact product number (E no.) of your appliance.
-
Page 12: Basic Operation
You can briefly pause operation and then continue. If ▶ you cancel operation completely, the settings will be re- a The Bosch logo appears in the display. The types of set. heating then appear. To pause operation briefly: 8.2 Switching off the appliance... -
Page 13: Rapid Heating
Rapid heating en Changing the type of heating 8.6 Setting the type of heating and temperature When you change the type of heating, the other set- tings will also be reset. Requirement: The operating mode "Types of heating" Press to pause operation. has been selected. Press "Types of heating". - Page 14 en Time-setting options To stop the signal early, press any touch field. 10.2 Setting the timer ‒ To set another cooking time, press "Cooking ‒ The timer runs independently of the appliance when it time" and use the control ring to set the time. is in operation.
-
Page 15: Meat Probe
Meat probe en 11 Meat probe Cook with precision by inserting the meat probe into Poultry Insert the meat probe into the thickest the food and setting a core temperature on the appli- part of the breast, pushing it in as far as ance. -
Page 16: Assist
en Assist Changing the type of heating a Once the dish is ready, a signal sounds. The appli- ance stops heating. In the display, the current core When you change the type of heating, the other set- temperature is the same as the set core temperat- tings will also be reset. - Page 17 Assist en 12.3 Overview of the dishes Suitable baking tins For an optimal baking result, use dark-coloured metal You can find out which individual dishes are available baking tins. to you on the appliance when you call up the operating ATTENTION! mode. Using silicone moulds or any film, covers or accessor- The dishes are sorted by categories and food.
-
Page 18: Childproof Lock
en Childproof lock Adding extra cooking time Press to start. For some dishes, the appliance offers the option to add a The appliance starts to heat and the cooking time extra cooking time once the cooking time has elapsed. counts down. You can do this as often as required. -
Page 19: Basic Settings
Basic settings en 15 Basic settings You can configure the appliance to meet your needs. Basic setting Selection Fan run-on time Recommended 15.1 Overview of the basic settings Minimum Here you can find an overview of the basic settings Pull-out system Not retrofitted (if shelf sup- and factory settings. -
Page 20: Home Connect
en Home Connect ¡ Operating the appliance on the appliance itself al- Download the Home Connect app. ways takes priority. During this time it is not possible to operate the appliance using the Home Connect app. ¡ In networked standby mode, the appliance requires a maximum of 2 W. - Page 21 16.5 Remote diagnostics 16.7 Declaration of Conformity Customer Service can use Remote Diagnostics to ac- Robert Bosch Hausgeräte GmbH hereby declares that cess your appliance if you contact them, have your ap- the appliance with Home Connect functionality meets pliance connected to the Home Connect server and if...
- Page 22 en Cleaning and servicing Remove all food remnants from the cooking com- ▶ New sponge cloths contain residues from production. partment and the appliance door before you next Wash new sponge cloths thoroughly before use. ▶ heat up the appliance. Suitable cleaning agents Only use cleaning agents that are suitable for the differ- ent surfaces on your appliance.
- Page 23 Cleaning function Pyrolytic self-cleaning en Area Suitable cleaning agents Information Rails ¡ Hot soapy water Soak any heavily soiled areas and use a brush or steel wool. Note: To clean thoroughly, detach the rails. → "Rails", Page 25 Pull-out system ¡ Hot soapy water Use a brush to remove very heavy soiling.
- Page 24 en Cleaning assistance Remove any objects from the cooking compartment. Cleaning set- Cleaning Duration in hours The cooking compartment must be empty except for ting level the accessory that is also being cleaned. Approx. 1:15 Medium Approx. 1:30 18.2 Setting the cleaning function High Approx.
- Page 25 Rails en Requirement: The cooking compartment must have a When the time has elapsed, a signal sounds. The cooled down. time shown in the display is zero. to switch the appliance off and leave the Open the appliance door and remove the remaining cooking compartment to cool for approx.
- Page 26 en Appliance door Note: Ensure that the appliance door slides onto the WARNING ‒ Risk of injury! hinges without any resistance. If you feel any resist- When the hinges are not secured, they can snap ance, check whether you are sliding it in at the cor- shut with great force.
- Page 27 Appliance door en Components inside the appliance door may have sharp WARNING ‒ Risk of injury! edges. Scratched glass in the appliance door may develop Wear protective gloves. ▶ into a crack. Do not use any harsh or abrasive cleaners or ▶ Open the appliance door slightly. sharp metal scrapers to clean the glass on the Push on the left- and right-hand side of the door oven door, as they may scratch the surface.
-
Page 28: Troubleshooting
en Troubleshooting Push the front pane to the appliance until the left- Screw both screws back in on the left and right of and right-hand hook is opposite the support . the appliance door. Put the door cover in position and push down on it until you hear it click into place. -
Page 29: Customer Service
Setting values, e.g. temperature or cooking time, depend on the recipe, quantity and food. Next time, set lower or higher values. ▶ Tip: A lot of information about the food preparation and corresponding set- ting values can be found on our website www.bosch-home.com. - Page 30 en Disposal 22.2 Replacing the oven light bulb Requirements ¡ The appliance is disconnected from the power sup- If the light in the cooking compartment fails, change ply. the oven light bulb. ¡ The cooking compartment has cooled down. Note: Heat-resistant, 40-watt, 230 V halogen bulbs are ¡...
-
Page 31: How It Works
How it works en 24.1 Product number (E-Nr.) and production number (FD) You can find the product number (E-Nr.) and the pro- duction number (FD) on the appliance's rating plate. Make a note of your appliance's details and the Cus- You will see the rating plate with these numbers if you tomer Service telephone number to find them again open the appliance door. - Page 32 en How it works Keep children away from the appliance. ¡ Place the food to be roasted directly on the wire ▶ rack. Grilling ¡ To catch any liquids that drip down, place the uni- Grill food if you want it to be crispy. versal pan, with the wire rack inside it, into the cook- The "Grill"...
- Page 33 How it works en Food Accessory/cookware Shelf pos- Heating Temperature in Cooking time in ition function °C mins → Page 9 Fruit pie Plate Ø 20 cm 160–170 55–65 Pie tin Fruit pie Plate Ø 20 cm 170–190 60–75 Pie tin Quiche Dark coated quiche 190–210 35–45 Bread or white bread Loaf tin, 1 x 900 g or 180–200...
- Page 34 en How it works Food Accessory/cookware Shelf pos- Heating Temperature in Cooking time in ition function °C mins → Page 9 Yoghurt Individual moulds Cooking 40 - 45 8-9 hrs compart- ment floor Preheat the appliance. Bone side down Do not turn Add the food after approx. one hour. Preheat the appliance for 5 minutes.
- Page 35 How it works en Recommended settings for slow cooking Food Accessory/cook- Shelf pos- Searing Heating function Temperature Cooking ware ition time in → Page 9 in °C time in mins mins Duck breast, medium Uncovered cook- 6 - 8 45 - 60 rare, 300 g each ware Fillet of pork, whole Uncovered cook-...
-
Page 36: Installation Instructions
en Installation instructions Food Accessory/cookware Shelf pos- Heating Temperature in Cooking time in ition function °C mins → Page 9 Viennese whirls, on 2 levels Universal pan 140 - 150 30 - 40 Baking tray Viennese whirls, on 3 levels x 2 5+3+1 130 - 140 35 - 55 Baking tray x 1... - Page 37 Installation instructions en ▶ If the power cord is too short, contact Cus- ¡ Do not install the appliance behind a decor- tomer Service. ative door or the door of a kitchen unit. ▶ Only use adapters approved by the manu- There is a risk of overheating.
- Page 38 en Installation instructions 26.4 Installation underneath a hob If the appliance is installed under a hob, the following minimum dimensions must be adhered to (including substructure, if applicable). The minimum worktop thickness a is based on the required minimum clearance . Hob type a raised in mm a flush in mm...
- Page 39 Installation instructions en ¡ The appliance must only be connected using the Screw the appliance into place. power cable provided. ¡ The power cable must be plugged in at the rear of the appliance until you hear a clicking sound. A 3 m power cable can be obtained from the after-sales service.
- Page 40 Expert advice for your Bosch home appliances, help with problems or a repair from Bosch experts. Find out everything about the many ways Bosch can support you: www.bosch-home.com/service Contact data of all countries are listed in the attached service directory.
Need help?
Do you have a question about the HBG6764.6B and is the answer not in the manual?
Questions and answers