Marantz SR7400 User Manual
Marantz user guide av surround receiver sr7400
Hide thumbs
Also See for SR7400:
- Service manual (96 pages) ,
- Specification (17 pages) ,
- Specifications (1 page)
Table of Contents
Advertisement
Advertisement
Table of Contents

Related Manuals for Marantz SR7400


Summary of Contents for Marantz SR7400
- Page 1 Model SR7400 User Guide AV Surround Receiver...
-
Page 2: Important Safety Instructions
CAUTION RISK OF ELECTRIC SHOCK DO NOT OPEN CAUTION: TO REDUCE THE RISK OF ELECTRIC SHOCK, DO NOT REMOVE COVER (OR BACK) NO USER-SERVICEABLE PARTS INSIDE REFER SERVICING TO QUALIFIED SERVICE PERSONNEL The lightning flash with arrowhead symbol within an equilateral triangle is intended to alert the user to the presence of uninsulated “dangerous voltage”... - Page 3 Grounding or Polarization – This product may be equipped with a polarized alternating- current line plug (a plug having one blade wider than the other). This plug will fit into the power outlet only one way. This is a safety feature.
-
Page 4: Table Of Contents
BATTERY REPLACEMENT INTERVAL ... 9 DISPLAY MODE ... 26 SETTING THE TIME ... 10 SELECTING ANALOG AUDIO INPUT OR GENERAL INFORMATION OF RC1400 TO SR7400 .. 10 DIGITAL AUDIO INPUT ... 26 CONNECTIONS ... 11 RECORDING AN ANALOG SOURCE ... 27 SPEAKER PLACEMENT ... -
Page 5: Introduction
INTRODUCTION DESCRIPTION Thank you for purchasing the Marantz SR7400 Surround receiver. This remarkable component has been engineered to provide you with many years of home theater DTS was introduced in 1994 to provide 5.1 enjoyment. Please take a few minutes to read this... -
Page 6: Features
The large left dial knob on the left can be used as multi dial which allows all functions of the SR7400 to be operated via the front panel. The SR7400 is here to perform in your unrivaled home entertainment setup. -
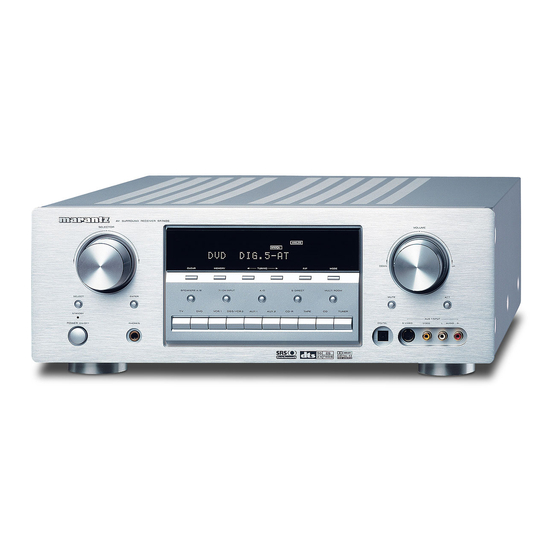
Page 7: Front Panel
7.1 CH. IN). HEADPHONE jack for stereo headphones This jack may be used to listen to the SR7400’s output through a pair of headphones. Be certain that the headphones have a standard 1 / 4" stereo phono plug. Note that the main room speakers will automatically be turned off when the headphone jack is in use. -
Page 8: Fl Display
SPKR A B ¡8 ¡7 DISP (Display Off) indicator V (video)-OFF mode indicator This indicator is illuminated when the SR7400 is in This indicator is illuminated when the Video-OFF the display off condition. function is active. SLEEP timer indicator NIGHT mode indicator... -
Page 9: Rear Panel
MINIMUM 6 OHMS FRONT A AND B : MINIMUM 8 OHMS and then into the power outlet on the wall. SR7400 has to be powered by 120 V AC only. AC OUTLETS Connect the AC power cables of components such as a DVD and CD player to these outlets. -
Page 10: Remote Controller Rc1400
AV equipment. Be sure to also point towards other remote controls when using the learning function. NAMES AND FUNCTIONS x POWER ON and OFF buttons (When AMP mode is selected) These buttons are used to turn the SR7400 on or off. POWER ON/OFF c SOURCE ON/OFF button... -
Page 11: Lcd Indicators
When the input signal is too high and the voice dis- while this button is pressed. The operations for torts even by throttling the SR7400 VOLUME con- LIGHT 1 and 2 are identical. trol, turn on this function. “ATT” is indicated when this function is activated. -
Page 12: Remote Control Range
This is displayed when the remote control is in renaming mode. The distance between the transmitter of the remote control and the IR SENSOR of the SR7400 should be less than 5 meters. If the remote control J LEARN indicator... -
Page 13: Setting The Time
SPK-AB DISP SLEEP GENERAL INFORMATION OF RC1400 CLEAR MEMO TO SR7400 TUNER CD-R To control the SR7400 by your RC1400, you have LEARN TAPE AUX1 AUX2 to select the device AMP or TUNER by pressing LIGHT RC1400 Learning Remote Controller the function selector button. -
Page 14: Connections
Surround left and right speakers CONNECTIONS When the SR7400 is used in surround operation, the preferred location for surround speakers is on the side walls of the room, at or slightly behind the SPEAKER PLACEMENT listening position. The ideal surround speaker system for this unit is... -
Page 15: Connecting Audio Components
• Do not bind audio/video connection cables with See page 18. power cords and speaker cables this will result in generating a hum or other noise. TAPE DECK OUT IN ANALOG AUDIO DIGITAL AUDIO (COAXIAL) MODEL NO.SR7400 MONITOR OUT S-VIDEO DSS/VCR2 MONITOR DIGITAL AUDIO RS-232C (OPTICAL) FLASHER... -
Page 16: Connecting Video Components
Make component video connections to a TV or monitor with component inputs to produce higher quality video images. Use a component video cable or 3 video cords to connect the component video out jacks on the SR7400 to the monitor. Notes: INPUT-2 MONITOR OUT •... -
Page 17: Advanced Connecting
Therefore you need to aim the remote signal only to the unit. Also, if a Marantz power amplifier (some models excluded) is connected to one of these terminals, the power amplifier’s, power switch is synchronized with this... -
Page 18: Connecting The Antenna Terminals
The supplied AM loop antenna is for indoor use only. Set it in the direction and position it to where you MODEL NO.SR7400 receive the clearest sound. Put it as far away as possible from the unit, televisions, speaker cables, and power cords. -
Page 19: Connecting For The Multi Room
VCR1 DSS/VCR2 TAPE CDR/MD MULTI MULTI AUDIO AUDIO (AUX2) (Multi room speaker ) RIGHT SPEAKER MODEL NO.SR7400 RS-232C SWITCHED UNSWITCHED AC IN 1A 120W MAX 1A 120W MAX SURROUND BACK / AC OUTLETS MULTI SPEAKER MULTI SPEAKER 120V 60H MULTIROOM 7.1CH... -
Page 20: Setup
After all components are connected, initial setup must be performed. ON SCREEN DISPLAY MENU SYSTEM The SR7400 incorporates an on-screen menu system, which makes various operations possible by using the cursor ( , , , ) and OK buttons on the remote control or MULTI FUNCTION dial, TUNING button and ENTER button on the front panel. -
Page 21: Input Setup (Assignable Digital Input And Component Video Input)
1 INPUT SETUP (ASSIGNABLE DIGITAL 2 SPEAKER SETUP INPUT AND COMPONENT VIDEO INPUT) After you have installed the SR7400, connected all the components, and determined the speaker Six digital inputs can be assigned to a desired layout, it is now time to perform the settings in the source. -
Page 22: Preference
The subwoofer can be adjusted to any level between -15 and +10 dB in 1 dB intervals.) The SR7400 will now emit the pink noise from the center speaker. Using the volume level of the noise from the center speaker so that it is the same level as the front left speaker. -
Page 23: Surround
Digital or DTS encoded material. surround ambience from stereo sources such as CDs. LFE LEVEL : In this mode, SR7400 includes three controls to Select the output level of the LFE signal included fine-tune the soundfield as follows. in the Dolby Digital signal or the DTS signal. -
Page 24: 7.1 Ch Input Level
• These settings will be memorized to 7.1CH INPUT source. 9 DC TRIGGER SETUP SR7400 has a DC trigger control jack, this is selectable to link with input functions for the main room or multi room. Select “DC-TRIG SETUP” in the SETUP MAIN MENU with 7 . -
Page 25: Basic Operation (Play Back)
OSD information on the video display. The input name will also appear in the display, on the front-panel. • As the input is changed, the SR7400 will automatically switch to the digital input, surround mode, attenuation, and night mode status which were entered during the configuration process for that source. -
Page 26: Temporarily Turning Off The Sound
• The tone control function can work in the AUTO Surround, Stereo, Dolby Pro Logic IIx , DTS, DTS-ES, and Multi Ch. Stereo mode. To program the SR7400 for automatic standby, TEMPORARILY TURNING OFF THE press tne SLEEP button on the remote. - Page 27 DTS source signals from certain CD players and LD players even if you connect the player to the SR7400 digitally. This is because the digital signal has been processed (such as the output level,...
- Page 28 Surround Mode The surround mode is selected with the surround AUTO mode selector on SR7400 or the remote control unit. However, the sound you hear is subject to the relationship between the selected surround mode and input signal. That relationship is as follows;...
-
Page 29: Other Function
5 minutes. LISTENING THROUGH HEADPHONES Notes: • AUTO POWER OFF is canceled if the SR7400 is This jack may be used to listen to the SR7400’s set to a source other than TV. output through a pair of headphones. Be certain that The function reactivates when TV is selected again. -
Page 30: Recording An Analog Source
In normal operation, the audio or video source Press the CD input source button to set audio selected for listening through the SR7400 is sent to output. the record outputs. Now “CD” has been selected as the audio This means that any program you are watching or input source and “AUX1”... -
Page 31: Basic Operation (Tuner)
“MANUAL TUNING” or “AUTO TUNING” section). Press the MEMORY button on the front panel. 2.4. 1. 3. “– –“ (preset number) starts blinking on the display. AV SURROUND RECEIVER SR7400 VOLUME Select the preset number by pressing the TUNING DOWN CLEAR CLEAR... - Page 32 RECALLING A PRESET STATION (Using the remote control unit) Press the TUNER button twice within two seconds on the remote. AV SURROUND RECEIVER SR7400 SELECTOR VOLUME Press the > button until PAGE2 is displayed and press the P-SCAN (D4) on the remote.
-
Page 33: Multi Room System
The Multi Room system is a function which allows you to listen to the same or a different source in a room other than the room in which the SR7400 is located. To use this function, a multi room remote unit and... -
Page 34: Remote Controller Operation
Press the desired operation buttons to play the selected component. • For details, refer to the component’s user guide. • It may not be possible to operate some models. CONTROLLING A MARANTZ DVD PLAYER (DVD MODE) SOURCE ON/OFF Turns the DVD player on and off POWER... - Page 35 CONTROLLING A MARANTZ CD RECORDER (CDR MODE) SOURCE ON/OFF Turns the CD recorder on and off POWER POWER ON/OFF ON/OFF POWER ON Turns the CD recorder on SOURCE SOURCE POWER OFF Turns the CD recorder off D1 - D5 / >(Page) (Refer to page vi)
-
Page 36: Basic Operation
DVD is shown on the LCD, and the remote control is set for DVD. Pressing the source button once changes the • When using Marantz products, TV and DVD can remote control to the settings for the source that be set to TV1 (TV/VDP: Projector) and TV2 was pressed. - Page 37 For codes which are not learned, the remote control will transmit either the Marantz preset codes from the initial settings, or remote codes from another manufacturer’s AV equipment which is set by the customer.
- Page 38 ERASING PROGRAMMED CODES (RETURNING TO Press the D3 (NAME) direct button . INITIAL SETTINGS) Press the DVD source button . NAME indicator blinks. Codes can be erased in five ways: by buttons, The “ ” blinks to indicate that the letter can be direct buttons, direct button pages, sources, and by all memory contents.
-
Page 39: Programming Macros
Erasing All Note: This procedure clears (resets) all programmed codes and names. Once all the data is cleared, the memory is returned to the factory default status. The programmed macros are also erased. • No signals are transmitted while programming a LEARN LEARN •... - Page 40 Hold down the M button for three seconds or Hold down the M button for three seconds or more. more. The menu is displayed. The menu is displayed. Press the D4 (MACRO) direct button . Press the D4 (MACRO) direct button . The macro menu is displayed.
-
Page 41: Clone Mode
SETTING THE MACRO TIMER EXECUTING THE MACRO TIMER Setting the macro timer enables the macro The macro program starts when the time that was program to automatically turn the power for a set is reached. The TIMER device on or off or perform other operations. whenever the macro timer is activated. -
Page 42: Setup
• If the copying fails in the middle of the Press the copying process, ERROR is displayed on lighting time. the remote control. Press the OK cursor button to enter the Check and perform steps 1 to 7 again. lighting time. Once the setting is finished, press the M Once copying is completed, press the M button . -
Page 43: Troubleshooting
If your trouble cannot be recovered with the remedy actions listed in the following table, malfunction of the internal circuitry is suspected; immediately unplug the power cable and contact your dealer, nearest Marantz authorized dealer or the Marantz Service Center in your country. SYMPTOM CAUSE SR7400 cannot be turned up. - Page 44 Should the operation or display seem to be abnormal, reset the unit with the following procedure. Memory backup The SR7400 is turned on, press and hold the • In case a power outage occurs or the power SELECT and S-DIRECT buttons simultaneously cord is accidentally unplugged, the SR7400 for 3 seconds or more.
-
Page 45: Technical Specifications
Weight ... 30.9 lbs (14.0 Kg) Remote Control Unit RC1400 ... 1 AAA-size batteries ... 3 FM Feeder Antenna ... 1 FM Antenna Converter ... 1 AM Loop Antenna ... 1 AV SURROUND RECEIVER SR7400 SELECTOR SELECT ENTER STANDBY POWER ON/STANDBY PHONES 17-5/16 ins. - Page 46 Source button name : AMP Integra Brand name Setup code Amstrad 0105 Arcam 0296 Audiolab 0296 Kenwood Carver 0296 0105 Magnavox Genexxa 0422 Marantz Grundig 0296 Micromega Harman/Kardon 0919 Musicmagic 0358 Myryad Left Coast 0919 Linn 0296 Norcent Magnavox 0296 Onkyo...
- Page 47 1032 Carver Orbitech 1127 Grundig Pace 0482, 0874, 1202, 1350 Harman/Kardon Panasonic 0274, 0728, 0874, 1347 Magnavox Panda 0482 Marantz Paysat 0751 Myryad Philips 1169, 0776, 1776, 0751, 1103, 0749, 0160, Optimus 0227, 0482, 0880 Philips Pioneer 0880 Pioneer Promax...
- Page 48 Source button name : TV Source button name : TV Brand name Setup code Brand name Chun Yun 0027, 0207, 0036, 0119 Chung Hsin 0207, 0080, 0135 Cimline 0036 Cineral 0478, 0119 Gateway Citizen 0087, 0057, 0119 Geloso Clarion 0207 Genexxa Clarivox 0064...
- Page 49 Loewe 0064, 0108, 1589 Logik 0267, 0099 Luxor 0075, 0131, 0070 M Electronic 0027 0062 0267, 0070 MGN Technology 0267 0267, 0027 Magnasonic 1305 Magnavox 0062, 0066, 0108, 0027, 1808 Magnin 0267 Manesth 0072, 0099 Marantz 0062, 0108 Marta 0064...
- Page 50 Zenith 0066, 0060, 0027, 1506 0072 0075, 0834 0131, 0099 0267 Source button name : DVD 0064, 0108, 0131 Brand name Setup code 0064 MARANTZ DVD1 0001 0072, 0099 MARANTZ DVD2 0002 0108 Acoustic Solutions 0757 0641, 0643 Alba 0744...
- Page 51 Source button name : DVD D I R E C T B U T T O N PAGE PAGE 1 FUNCTIONS Source button name : AMP PAGE Command Note PAGE 1 1 AUTO SELECT AUTO SURROUND PAGE 2 SELECT DOLBY MODE 3 DTS SELECT DTS MODE 4 EX/ES...
- Page 52 You can find your nearest authorized distributor or dealer on our website. JAPAN Marantz Japan, Inc. 35-1 Sagami Ohno 7-Chome, Sagamihara-shi, Kanagawa 228-8505, Japan U.S.A. Marantz America, Inc. 1100 Maplewood Drive, Itasca, IL 60143, U.S.A. EUROPE Marantz Europe B.V.
Need help?
Do you have a question about the SR7400 and is the answer not in the manual?
Questions and answers