
Related Manuals for Gunter & Hauer EOK 20 BL


Summary of Contents for Gunter & Hauer EOK 20 BL
- Page 1 Gunter & Hauer Naudojimo instrukcija Įmontuota mikrobangų krosnelė 20 BL / 20 X...
-
Page 3: Table Of Contents
Turinys Atsargumo priemonės ......4 Specifikacijos ..........4 Svarbūs saugos nurodymai ...... 5 Mikrobangų krosnelės paruošimas naudojimui ..........12 Surinkimas ir prijungimas ......13 Valdymo skydelis ........19 Naudojimo nurodymai ......20 Trikčių šalinimas ........26... -
Page 4: Atsargumo Priemonės
ATSARGUMO PRIEMONĖS, SKIRTOS IŠVENGTI PER DIDELIO MIKROBANGŲ ENERGIJOS POVEIKIO (a) Nebandykite naudoti šios mikrobangų krosnelės, kai yra atidarytos durelės, nes dėl to galite patirti neigiamos kenksmingos mikrobangų energijos poveikį. Labai svarbu nesugadinti arba nekeisti apsauginių blokavimo įtaisų. (b) Nedėkite jokių objektų tarp krosnelės priekinės dalies ir durelių, arba užtikrinkite, kad purvas arba valiklio likučiai nesikauptų... -
Page 5: Svarbūs Saugos Nurodymai
SVARBŪS SAUGOS NURODYMAI ĮSPĖJIMAS Kad sumažintumėte gaisro, elektros smūgio, sužeidimo arba per didelio mikrobangų krosnelės energijos poveikio, kai naudojate prietaisą, riziką, laikykitės pagrindinių atsargumo priemonių, įskaitant: 1. Perskaitykite ir vadovaukitės skyriumi: „ATSARGUMO PRIEMONĖS, SKIRTOS IŠVENGTI PER DIDELIO MIKROBANGŲ ENERGIJOS POVEIKIO.“ 2. - Page 6 6. ĮSPĖJIMAS. Pavojinga asmenims, išskyrus kompetentingus asmenis, atlikti bet kokią techninę priežiūrą arba remonto darbus, kurių metu turi būti nuimtas gaubtas, užtikrinantis apsaugą nuo elektromagnetinių bangų poveikio. 7. ĮSPĖJIMAS. Skysčiai ir kiti maisto produktai neturi būti šildomi sandariose pakuotėse, nes jos gali sprogti. Kai šildomas maistas plastikinėse arba popierinėse pakuotėse, stebėkite krosnelę, nes pakuotė...
- Page 7 16. Naudokite tik temperatūrinius zondus, rekomenduojamus naudoti su šia krosnele. (krosnelėms, kuriose yra temperatūros zondui tvirtinti skirta vieta). 17. Mikrobangų krosnelė turi būti naudojama, kai dekoratyvinės durelės yra atidarytos (krosnelės su dekoratyvinėmis durelėmis). 18. Šis prietaisas sukurtas naudoti buityje ir panašiems tikslams, pavyzdžiui: - personalui skirtose dirbtuvių, biurų...
-
Page 8: Naudojimui
23. Mikrobangų krosnelė turi būti naudojama kaip įmontuojamas virtuvinis prietaisas. 24. Garais valančius prietaisas naudoti draudžiama. 25. Spintelės stalčiaus paviršius gali įkaisti. ĮSPĖJIMAS. Naudojimo metu prietaisas ir pasiekiamos dalys įkaista. Būkite atidūs, kad neprisiliestumėte prie įkaitusių elementų. Jaunesniems nei 8 metų vaikams negalima artintis prie prietaiso be nuolatinės suaugusiųjų... - Page 9 Siekiant išvengti sužalojimo pavojaus, įrenkite įžeminimą sumontuotas ir įžemintas. PAVOJUS Jei kyla abejonių, Elektros smūgio pavojus pasitarkite su kvalifikuotu prisilietus prie vidinių komponentų gali elektriku, jeigu nesuprantate įžeminimo sunkiai instrukcijų arba abejojate dėl arba mirtinai sužaloti. tinkamo prietaiso įžeminimo. Neardykite šio Jeigu reikia naudoti prietaiso.
- Page 10 VALYMAS Nepamirškite atjungti prietaisą nuo maitinimo šaltinio. 1. Po naudojimo krosnelės vidų valykite šiek tiek sudrėkinta šluoste. 2. Priedus valykite įprastu būdu muiluotame vandenyje. 3. Durelių rėmas ir tarpikliai, bei besiribojančios dalys turi būti, jeigu reikia, valomos atsargiai drėgna šluoste. 4.
- Page 11 Medžiagos, kurias galite naudoti mikrobangų krosnelėje Indai Pastabos Vadovaukitės gamintojo instrukcijomis. Glazūruoto indo apačia turi būti Glazūruotas bent 5 mm (3/16 colio) aukščiau sukamojo padėklo. Neteisingai indas naudojamas sukamas padėklas gali sugesti. Saugius naudoti mikrobangų krosnelėje. Vadovaukitės gamintojo instrukcijomis. Nenaudokite įtrūkusių arba įskilusių indų. Stalo indai Visada nuimkite dangtį.
- Page 12 Metalas saugo maistą nuo mikrobangų. Metalinė apdaila gali Metaliniai indai arba pradėti kibirkščiuoti. indai su metaline apdaila Gali pradėti kibirkščiuoti ir krosnelėje gali kilti gaisras Metalinės susukamos vielutės Krosnelėje gali kilti gaisras. Popieriniai maišeliai Putplastis Putplastis gali lydytis arba užteršti viduje esantį skystį, kai yra veikiamas aukštos temperatūros.
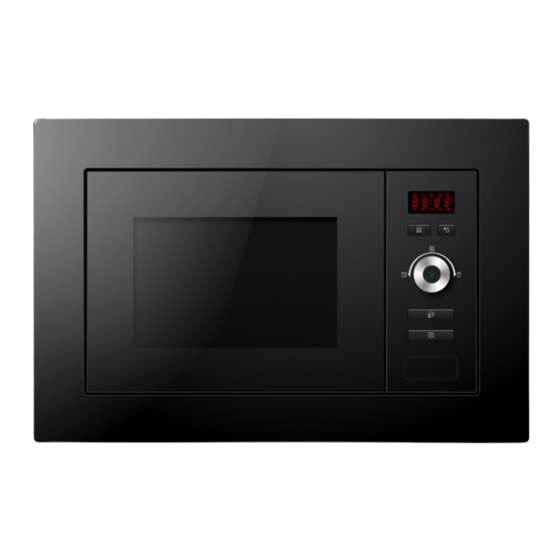
- Page 13 MIKROBANGŲ KROSNELĖS PARUOŠIMAS Krosnelės dalių ir priedų pavadinimai Išimkite krosnelę ir pašalinkite visas pakavimo medžiagas iš dėžės ir krosnelės vidaus. Krosnelė pateikiama su šiais priedais: Stiklinis padėklas Sukamojo padėklo žiedo surinkimas Naudojimo instrukcija A) Valdymo skydelis B) Sukamojo padėklo ašis C) Sukamojo padėklo žiedo surinkimas D) Stiklinis padėklas...
-
Page 14: Surinkimas Ir Prijungimas
Surinkimas ir prijungimas Šis prietaisas skirtas naudojimui namuose. Ši krosnelė yra skirta naudoti tik įmontuota. Ji nėra skirta naudoti pastatyta ant stalviršio arba spintelėje. Vadovaukitės specialiomis montavimo instrukcijomis. 4. Prietaisas gali būti montuojamas 60 cm pločio sieninėje spintelėje. Prietaise sumontuotas kištukas, kuris turi būti įjungtas į... - Page 15 Įrengimo instrukcijos Prieš montavimą įdėmiai perskaitykite naudotojo vadovą dėmesį Atkreipkite Elektros jungtis Krosnelėje sumontuotas kištukas, kuris turi būti įstatomas tik į tinkamai įžemintą lizdą. Maitinimo lizdas turi būti montuojamas ir ilginamasis laidas turi būti keičiamas kvalifikuoto elektriko, bei vadovaujantis galiojančiais teisės aktais. Jeigu sumontavus nėra galimybės pasiekti kištuką, montavimo vietoje turi būti sumontuotas visus kontaktus atjungiantis įtaisas, kuriame tarpeliai tarp kontaktų...
- Page 16 380+2...
- Page 17 380+2 Pastaba. Montuojant abiem montavimo būdais, reikalingas laikiklis ir spintelės lentynai skirtas šablonas.
- Page 18 B. Spintelės paruošimas 1. Perskaitykite ant SPINTELĖS LENTYNAI SKIRTO ŠABLONO pateikiamas instrukcijas, padėkite šabloną ant apatinės spintelės plokštumos. 2. Ant spintelės lentynos pažymėkite šablono vietas „a“ 3. Išimkite spintelės lentynai skirtą šabloną ir pritvirtinkite montavimo plokštelę sraigtu A.
- Page 19 Sumontuokite krosnelę 4. Įstatykite krosnelę į spintelę - Įsitikinkite, kad krosnelės galinė dalis užsifiksavimo montavimo plokštelėje. - Neįtvirtinkite arba neužlenkite maitinimo laido. Montavim plokštel ė 5. Atidarykite dureles, pritvirtinkite krosnelę prie spintelės sraigtu B. Tam naudokite montavimui skirtą skylę. Tada įstatykite apdailos rinkinio plastikinį gaubtą...
-
Page 20: Valdymo Skydelis
Valdymo skydelis Instrukcija:... -
Page 21: Naudojimo Nurodymai
Naudojimo nurodymai 1. Laikrodžio nustatymas Įjungus mikrobangų krosnelės maitinimą, ekrane bus rodoma „0:00“ ir vieną kartą suskambės garsinis signalas. 1) Paspauskite „ Kitchen Timer/Clock “ (virtuvinis laikmatis / laikrodis) du kartus, kad pasirinktumėte laikrodžio funkciją. Pradės mirksėti valandų simboliai. “, kad nustatytumėte valandas, įvedama laiko vertė turi būti 0–23 ribose. Pasukite 3) Paspauskite „... - Page 22 Start/+30Sec./Confirm“ 3) Paspa " „ Start/+30Sec./Confirm“ “, kad patvirtintumėte. Ekrane 3)paspauskite uskite „ (pradėti / +30 sek. / (pradėti / +30 sek. / patvirtinti) rodomas užrašas „P 80“. " kad patvirtintumėte, patvirtinti) ekrane rodomas užrašas „P 80“. " 4) Pasukite „ “, kad nustatytumėte maisto ruošimo laiką...
- Page 23 Pastaba. Maisto ruošimo trukmės reguliavimo žingsniai: 0---1 min. : 5 sek. 1---5 min. : 10 sek. 5---10 min. : 30 sek. 10---30 min. : 1 min. 30---95 min. : 5 min. „Micro./Grill/Combi.“ (mikrobangų rež. / Keptuvo režimas Mikrobangos keptuvo rež. / kombinuotasis rež.) Padėklo instrukcijos Eiliškumas Ekranas...
- Page 24 Pavyzdys. Jeigu norite naudoti mikrobangas 55 proc. galia ruošti maistui ir keptuvo funkciją 45 proc. galia (C-1) 10 minučių, krosnelę galite nustatyti kaip nurodyta toliau. Micro./Grill/Combi. " vieną kartą, ekrane bus rodoma „P100“. (mikrobangų rež. / Paspauski keptuvo rež. / te „...
- Page 25 Pastaba. Pasibaigus keptuvo režimui skirtam laikui, du kartus suskambės garsinis signalas. Tai yra normalu. Tam, kad maistas būtų geriau kepamas naudojant keptuvo režimą, turėtumėte apversti maistą, uždaryti dureles ir paspausti „ “, kad tęsti maisto ruošimą. Start/+30Sec./Confirm“ (pradėti / +30 sek. / patvirtinti) Jeigu neatliekami jokie veiksmai, krosnelė...
- Page 26 7. Virtuvinis laikmatis (1) Paspauskite „ “ (virtuvinis laikmatis / laikrodis) vieną kartą ir ekrane bus Kitchen Timer/Clock rodoma „00:00“. (2) Pasukite „ “, kad įvestumėte tinkamą laiką. (ilgiausia ruošimo trukmė yra 95 min.) (3) Paspauskite „ Start/+30Sec./Confirm “ (pradėti / +30 sek. / patvirtinti), kad patvirtintumėte parinktį.
- Page 27 Meniu lentelė: Meniu Ekranas Svoris 200 g Pica 400 g 250 g 350 g Mėsa 450 g 200 g 300 g Daržovės 400 g 50 g (su 450 ml šalto vandens) 100 g (su 800 ml šalto vandens) Makaronai 200 g 400 g Bulvės 600 g...
- Page 28 9. Kelių etapų maisto ruošimas Maisto ruošimui galima nustatyti ne daugiau nei 2 etapus. Kai kelių etapų maisto ruošime vienas etapas yra atitirpinimas, tai jis automatiškai yra nustatomas kaip pirmas. Pavyzdys. Jeigu norite atitirpinti maistą 5 minutes, tuomet ruošti maistą 80 proc. mikrobangų...
- Page 29 (2) Maisto ruošimo būsenoje paspauskite „Kitchen Timer/Clock“ (virtuvinis laikmatis / laikrodis), kad patikrintumėte laiką; laikas bus rodomas 3 sekundes. 11. Sauganti nuo vaikų blokavimo funkcija Blokuoti: laukimo būsenoje palaikykite paspaudę 3 sekundes „ Stop/Clear " (stabdyti / valyti), pasigirs ilgas garsinis signalas, nurodantis, kad perėjote į saugančio nuo vaikų užrakinimo būsenos.
-
Page 30: Trikčių Šalinimas
Trikčių šalinimas Pagal elektros ir elektroninės įrangos atliekų (EEĮA) direktyvą, EEĮA turi būti surenkamos ir perdirbamos atskirai. Jeigu norėsite šalinti prietaisą, NEIŠMESKITE jo kartu su buitinėmis atliekomis. Perduokite šį prietaisą į EEĮA surinkimo vietas. - Page 32 Günter & Hauer, GmbH Mühlenstraße 8A, Berlin 14167 Bundesrepublik Deutschland www.gunter-hauer.eu e-mail: info@gunter-hauer.de...
- Page 33 Translated from Lithuanian to English - www.onlinedoctranslator.com nter & Hauer Users manual Built-in microwave 20 BL / 20 X...
- Page 34 Content Precautions ......4 Specifications ..........4 Important safety instructions ...... 5 Preparing the microwave oven for use ..........12 Assembly and connection ......13 Control panel ........19 Instructions for use ......20 Troubleshooting ........26...
-
Page 35: Precautions
PRECAUTIONS TO AVOID EXCESSIVE EFFECTS OF MICROWAVE ENERGY (a) Do not attempt to use this microwave oven with the door open, as this may expose you to harmful microwave energy. It is very important not to damage or modify the safety interlocks. (b) Do not place any objects between the front of the oven and the door, or ensure that dirt or detergent residue does not accumulate on the gasket surfaces. -
Page 36: Important Safety Instructions
IMPORTANT SAFETY INSTRUCTIONS WARNING To reduce the risk of fire, electric shock, injury, or excessive exposure to microwave energy when using the appliance, take basic precautions, including: 1. Read and follow the instructions: “PRECAUTIONS TO AVOID EXCESSIVE MICROWAVES ENERGY IMPACT. " 2. - Page 37 6. WARNING. It is dangerous for persons other than the competent persons to carry out any maintenance or repair work during which the hood must be removed to ensure protection against the effects of electromagnetic waves. 7. WARNING. Liquids and other foodstuffs must not be heated in airtight containers as they may explode.
- Page 38 16.Use only temperature probes recommended for use with this oven. (for ovens with space for mounting a temperature probe). 17. The microwave oven must be used with the decorative door open (ovens with decorative doors). 18. This appliance is intended for household and similar use, for example: - staff kitchens for workshops, offices and other work environments;...
- Page 39 23. The microwave oven must be used as a built-in kitchen appliance. 24. The use of steam cleaners is prohibited. 25. The surface of the cabinet drawer may become hot. WARNING. The appliance and accessible parts become hot during use. Be careful not to touch the hot elements. Children under the age of 8 should not be allowed to approach the appliance without constant adult supervision.
- Page 40 Install grounding to avoid the risk of injury installed and grounded. DANGER In case of doubt, Risk of electric shock consult a qualified from touching electrician internal components can be if you do not understand the difficult grounding instructions or are in or fatally injured.
- Page 41 CLEANING Remember to disconnect the device from the power supply. 1. After use, clean the inside of the oven with a slightly damp cloth. 2. Clean the accessories in the usual way in soapy water. 3. The door frame and gaskets and adjacent parts must be cleaned with a damp cloth if necessary.
- Page 42 Materials you can use in the microwave Indai Notes Follow the manufacturer's instructions. The bottom of the glazed container Glazed should be at least 5 mm (3/16 inch) above the turntable. Improper use of indas the turntable can damage it. Safe to use in the microwave.
- Page 43 Metal containers or The metal protects the food from the microwave. The metal finish dishes with metal can start to sparkle. decoration May start to spark and cause a fire in the oven Metal twisted wires There may be a fire in the oven. Paper bags Foam...
- Page 44 MICROWAVE PREPARATION Names of oven parts and accessories Remove the oven and remove all packing materials from the box and inside the oven. The oven is supplied with the following accessories: Glass tray Rotating pallet ring assembly Users manual A) Control panel B) Rotating pallet axis C) Assembly of the turntable ring...
-
Page 45: Assembly And Connection
Assembly and connection 1. This appliance is intended for home use. 2. This oven is for built-in use only. It is not intended for use built into a countertop or cabinet. 3. Follow the special installation instructions. 4. The device can be mounted in a 60 cm wide wall cabinet. - Page 46 Installation instructions Read the user carefully before installation manual Please note attention Electrical connection The oven is equipped with a plug that should only be inserted into a properly grounded outlet socket. The power outlet must be installed and the extension cord must be replaced by a qualified electrician in accordance with applicable laws.
- Page 47 380 + 2...
- Page 48 380 + 2 Note. For both mounting methods, a bracket and a template for the cabinet shelf are required.
- Page 49 B. Cabinet preparation 1. Read the instructions on the TEMPLATE FOR THE CABINET SHELVES, place the template on the bottom plane of the cabinet. 2. Mark the locations of the template "a" on the cabinet shelf 3. Remove the template for the cabinet shelf and secure the mounting plate with screw A.
- Page 50 C.Install the oven 4. Place the oven in the cabinet - Make sure that the back of the oven is locked in the mounting plate. - Do not secure or bend the power cord. Montavim plate 5. Open the door, fasten the oven to the cabinet with screw B. Use the mounting hole for this.
-
Page 51: Control Panel
Control panel Instruction:... -
Page 52: Instructions For Use
Instructions for use 1. Setting the clock When the microwave is turned on, “0:00” will be displayed on the screen and a beep will sound once. 1) Click on " “(Kitchen timer / clock) twice that Kitchen Timer / Clock select the clock function. - Page 53 " 0S " 3) Paspa elast / + 3"0Sec.S / C fir3m 3) Press ec./Confirm"To confirm. On the screen taortn / + believe me nti) s ė „Pe8, 0“. (start (/ p + r3a0 for position k /. + / 30 sec.) "loose rokdaodmpaastvuižrtrianštuam t to confirm)
- Page 54 Note. Steps for adjusting the cooking time: min. : 5 sec 0 --- 1 min. : 10 sec 1 --- 5 5 --- 10 min. : 30 sec 10 --- 30 min. : 1 min 30 --- 95 min. : 5 min. "Micro./Grill/Combi."(microwave dir.
- Page 55 Example. If you want to use a microwave 55 percent. power to cook and pan function 45 percent. power (C-1) for 10 minutes, you can set the oven as follows. Micro./Grill/Combi. "once," P100 "will be displayed. (microwave mode / Click pan dir.
- Page 56 Note.At the end of the pan time, the beep will sound twice signal. This is normal. For better cooking in pan mode, you should turn the food over. close the door and press "Start / + 30Sec. / Confirm" to continue cooking. (start / +30 sec / to confirm) If no action is taken, the oven will continue to operate.
- Page 57 7. Kitchen timer (1) Click on " “(Kitchen timer / clock) once and will be displayed Kitchen Timer / Clock "00:00" is displayed. (2) Turn to to enter the correct time. (maximum cooking time is 95 minutes.) (3) Click on " ”(Start / +30 sec / confirm) to confirm Start / + 30Sec./Confirm option.
- Page 58 Menu table: Screen Weight The menu 200 g Pizza 400 g 250 g 350 g Meat 450 g 200 g 300 g Vegetables 400 g 50 g (with 450 ml of cold water) Pasta 100 g (with 800 ml of cold water) 200 g 400 g Potatoes...
- Page 59 9. Multi-stage cooking No more than 2 stages can be set for cooking. When one stage of multi-stage cooking is defrosting, it is automatically set as the first. Example. If you want to defrost food for 5 minutes, then cook 80 percent. microwave power for 7 minutes, follow these steps: 1) Click on "...
- Page 60 (2) In the cooking mode, press “ "(Kitchen timer / Kitchen Timer / Clock clock) to check the time; the time will be displayed for 3 seconds. 11. Child lock function Block: Press and hold for 3 seconds in standby mode "(stop / clean), Stop / Clear a long beep will sound to indicate that you have entered the child lock mode.
-
Page 61: Troubleshooting
Troubleshooting According to the Waste Electrical and Electronic Equipment (WEEE) Directive, WEEE must be collected and recycled separately. Do not throw away the appliance with the normal household waste at the end of its life, but hand it in at an official collection point for recycling. Take this appliance to a collection point for WEEE. - Page 63 Günter & Hauer, GmbH Mühlenstraße 8A, Berlin 14167 Bundesrepublik Deutschland www.gunter-hauer.eu e-mail: info@gunter-hauer.de...
Need help?
Do you have a question about the EOK 20 BL and is the answer not in the manual?
Questions and answers