Table of Contents

Related Manuals for Kverneland EDW2

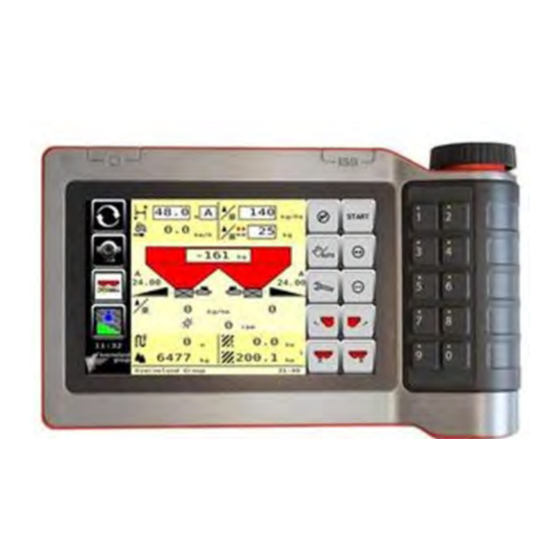
Summary of Contents for Kverneland EDW2
- Page 1 TSM Electronics weighing spreaders EDW2 Date December 2018 Subject Electronic weighing spreaders Place Kverneland Group Nieuw-Vennep BV Hoofdweg 1278 2153 LR Nieuw-Vennep The Netherlands Details Technical Service Manual Software version 1.19...
-
Page 2: Table Of Contents
1.6 Communication- and power cables (Machine side) 5.2 Hydraulic border spreading plate and GEOCONTROL 2. Sensor and actuators 6. Implement setting GEOCONTROL 2.1 EDW2 PCB 6.1 Calculating B distance 2.2 TrimFlow sensor 6.2 B setting under field conditions 2.3 Inductie sensor (RPM) 2.4 Reference sensor... -
Page 3: System Overview
1. System overview... -
Page 4: Iso Spreader With A Non-Iso Tractor
1. System overview All weighing spreaders are standard ISOBUS machines. Depending on the configuration the machine can have several components 1.2 ISO spreader with IM Tellus, Tellus GO or PRO 1.1 ISO spreader with a Non-ISO Tractor Setup for an ISO spreader and a Non-ISO tractor Setup for an ISO spreader and a ISO tractor The IsoMatch Tellus and IsoMatch Power Cable is conferting a non Iso The IsoMatch Tellus can be used on an ISO-Bus tractor. -
Page 5: Iso Spreader And Iso Tractor
1. System overview 1.3. ISO spreader and ISO tractor ECU, SPC, ITH or speed sensor is not necessary. Speed signal can be used from tractors CAN-BUS. (select wheel or radar in spreader software) Only one cable connection between tractor and spreader, the ISO-cable provides the transport of power and communication signals. After connecting ISO-plug from the spreader into the ISO-connector of the tractor, al the information and operating functions appear at the tractors terminal. -
Page 6: Controlboxes
1. System overview 1.4 Controlboxes 1.4.1 IM Tellus GO The IsoMatch tellus GO can be delivered in 2 different configurations: 1: ISOBUS tractor configuration version. 2: Non ISOBUS Tractor version ISOBUS tractor configuration version Non ISOBUS Tractor version For more information about the Iso Match Tellus please check the operation manual of this Terminal. Or check the trainings manual Mechatronics “Most Important Cables KvG Mechatronics. -
Page 7: Iso Match Tellus And Tellus Pro
1. System overview 1.4 Controlboxes 1.4.2 IM Tellus and Tellus PRO The IsoMatch Tellus GO can be delivered in 2 different configurations: 1: ISOBUS tractor configuration version. 2: Non ISOBUS Tractor version ISOBUS tractor configuration version Non ISOBUS Tractor version For more information about the Iso Match Tellus please check the instruction manual of this Terminal. -
Page 8: Im Power (Isomatch Power)
1. System overview 1.5 IM power (IsoMatch Power) The three cables/connector can be ordered as separate spare parts. (see drawing below) IM power (IsoMatch Power) -
Page 9: Battery Cable
1. System overview 1.5.1 Battery cable... - Page 10 1. System overview 1.5.1 Battery cable Relay connections (Not available on spare parts)
-
Page 11: Im Tellus Connection Cable
1. System overview 1.5.2 IM Tellus connection cable... -
Page 12: Isobus Connector
1. System overview 1.5.3 ISOBUS connector... -
Page 13: Communication- And Power Cables (Machine Side)
1. System overview 1.6 Communication- and power cables (Machine side) -
Page 14: Sensor And Actuators
2. Sensors and actuators 2.1 EDW2 PCB (new generation) EDW2 PCB GEOSPREAD (new generation) On the next page is shown the difference between the old and new EDW2 PCB. - Page 15 2. Sensors and actuators Medio 2015 generation EDW2 PCB Click connectors 2014 generation EDW2 PCB Screw connectors The EDW 1 PCB (before 2010) not any longer available for spare parts. If you order the old one you will receive the new one with...
- Page 16 2. Sensors and actuators PCB Status LED’s Disc speed blinking if disc is turning OUT1 orange, actuator out Actuator left red, actuator in OUT2 orange, actuator out Actuator right red, actuator in ECU power 12 V+ red, power on Off, power off RUN LED Blinking green...
-
Page 17: Trimflow Sensor
2. Sensors and actuators 2.2 TrimFlow sensor (BSI box) If you have more than one sensor this ‘BSI’ box is needed. Connectionbox TrimFlow sensor Place of the BSI box on the spreader Cable Function Green/Yellow Signal Black Brown... - Page 18 2. Sensors and actuators Check the right voltage in IM Tellus Connectionbox TrimFlow sensor inside Sensor Sensor box Which TrimFlow Voltage TrimFlow not active 1000 4.90 V TrimFlow box L 3.80 V TrimFlow left TrimFlow right TrimFlow Box M 3.20 V TrimFlow Box M L 2.85 V Border spreading plate...
-
Page 19: Inductie Sensor (Rpm)
2. Sensors and actuators 2.3 Inductive (RPM) sensor The inductive sensor measures the rpm of the spreading disc. The sensor is placed on the right side between the middle gearbox and the right hand gearbox: and measure both sides of the steel bolt. Check the inductive sensor “Diagnostic screen”... - Page 20 (-): 12V = 2 LED’s active (sensor + PCB) Make with an small wire connection between the Brown (+) & Black (S) the LED on the PCB must burn. Also in diagnostic screen value must change from 0 to 1. Medio 2015 generation EDW2 PCB...
-
Page 21: Reference Sensor
2. Sensors and actuators 2.4 Reference sensor 2.4.1 Check the reference sensor Version number Reference sensor color Contact Blue - 0 V Black Green/Yellow signal Brown + 10 V The angle of the hopper has influence on the output of the load cells. The reference sensor is able to measure this angle. -
Page 22: Testing The Reference Sensor
2. Sensors and actuators 2.4.2 Testing the reference sensor Between: Brown (+) & Blue (-): 10 V Black (S) & Blue (-): 2.5 V; angle of reference sensor 0 (horizontal) (+/-33000) Black (S) & Blue (-): 2.1 V; angle of reference sensor 90 (vertical) (+/-27000) 1.95V version 1.05 Ref sensor version number 1.05... -
Page 23: Load Cells
2. Sensors and actuators 2.5 Load cells The load cells are placed between the hopper and the chassis. They are directly connected to the EDW2 PCB box. Load cell Color Contact Blue/black big Ground cable 10ton isolation Black - 0V... -
Page 24: Check Load Cells
2. Sensors and actuators 2.5.1 Check the load cells The signal of the load cells can be checked in screen “Diagnostics” (A) (See § 3.4) but also in screen “hopper & act calibration” (B). In this screen you will find, in the first column (Left), the actual value of the sensor and in the second column (Right) the stored value of the last calibration. -
Page 25: Test The Load Cells One By One
2. Sensors and actuators 2.5.2 Test the load cells one by one If the signal of the load cell is not correct, stable or is not responding on any weight changes in the hopper please follow the steps below. Step 1 Go to the diagnostic screen of the spreader (See §... -
Page 26: Actuators
2. Sensors and actuators 2.6 Actuators Depending on the configuration there are two or four actuators placed under the hopper of the spreader. Those actuators are take care of the opening and closing of the dosing unit. For GEOCONTROL machines, the actuators are also responsible for changing the discharge point Actuator Color... -
Page 27: Testing The Actuators
2. Sensors and actuators 2.6.1 Testing the actuators When calibration of the actuators is not possible or the values are not close to the 15 and 1015 after calibration, please check and measure the actuators. Step 1 The actuators can be checked in screen “diagnostic” by pressing ++ button, one of the actuators should open, by pressing the other ++ button the other actuator should open. -
Page 28: Measure The Actuators
2. Sensors and actuators 2.6.2 Measure the actuators Opening Closing Connect the green/white cable to the “+” and the Connect the green/white cable to the “-” and the red/yellow to the “+” the actuator will open. red/yellow to the “-” the actuator will open. Connect the green/white cable to the “-”... -
Page 29: Repairing The Actuators
2. Sensors and actuators 2.6.3 Repairing the actuator When the potential meter is not giving the correct signal. The potential meter has to be repaced. When the motor of the actuator is not moving anymore. Also not after direct For replacement repairkit VNB0566173 can be ordered in Metz spare parts voltage (See 2.7.2) warehouse. - Page 30 2. Sensors and actuators Step 2 Step 4 Remove the two faston plugs from the Potentiometer cover and the 5 screws It is now possible to replace the potentiometer. When installing the new which secure the cover on the motor housing. (Image 3) potentiometer place the metal ring under the potentiometer (Image 5).
-
Page 31: Software Screens
3 Software screens In the next paragraphs you can find a complete overview of the software screens. For more detailed information please also check the operation manual of your machine. • Colour screens showed below are from a IM Tellus terminal; •... -
Page 32: Machine Software Edw Iso
3 Software screens 3.1 Machine Software overview EDW ISO II 1.19... -
Page 33: Spreader Screens
3 Software screens 3.2 Spreader screens Screen 1: Main screen Letter setting (Only working when machine is GEOSPREAD) Input Working width Rate Actual speed (entering simulation Step size under/overdosing (% or kg,) speed as well) Remaining kg in the hopper Information Actual letter left and right Active working width... - Page 34 3 Software screens Screen 1: Main screen The main screen has different buttons Operation buttons electrical hopper cover The switch button for working width or application rate is only visible when machine is in spreading mode. Otherwise this button has the spanner function.
- Page 35 3 Software screens Screen 2: Curve Calibration Menu Start position Field registration only active without GEOCONTROL Kg/min values changing after auto Activate border spreading plate only for calibrations are done manual border spreading plate. Emptying the hopper Fil in the remain distance (left or right) (left, right or both) between the hart of the tractor and the border (see also capture 5)
- Page 36 3 Software screens Screen 4: Settings screen Choose between metric or imperial Hopper alarm (active + niveau) Hopper alarm 2 100% empty alarm. Hopper alarm 2 100% empty alarm. Electrical hopper cover Hopper level sensor Screen 5: Trimflow Settings Here you can choose for Yield, Eco or H2O.
- Page 37 Screen 6: Trimflow Settings Reducing Rate settings (only works if H2O is set on the page before and trimflow is active) Changing letter settings (works only if H2O is set on the page before and the trimflow is active) Screen 7: Field registration Menu Date &...
-
Page 38: Service Screens: Settings Behind Pin Code
3 Software screens 3.3 Service Screens: Settings behind PIN Code Screen 8: Pin code Pincode 5 (farmers) gives entry to the next fields and the first two Pincode 8 (service men) gives entry to steps of the calibration. the next field and the total hopper (for changing the empty hopper calibration can be done. - Page 39 3 Software screens Screen 10: Settings screen Setting for manual border spreading or hydraulic Field registration on measured Smart AUTO-calibration- weight or calculated (weigh Spreader makes also auto- multiply by hectare). calibration when working width or Default is calculated rate is not the same at each side of the spreader The screen below is primer information as soon if there are remarks regarding the weight system.
- Page 40 3 Software screens Screen 10: Settings screen Check VT storage (default on) After changing software un hook VT storage and do an restart. Afterwards hook this setting again. All other settings are not important...
-
Page 41: Virtual Terminal Setting And Geocontrol
3 Software screens 3.4 Virtual Terminal settings and GEOCONTROL Screen 1: Virtual Terminal Settings Ask how the screens are called Settings for changing from this to other screen Settings for changing from top to bottom screen Screen 2: TC Config & License Task controlling Storing field internally or externally Variable rate possibility... - Page 42 3 Software screens Screen 3: TC Implement Settings Adjustment trailed model or mounted. A. Distance of receiver to the (Always mounted on fertilizer hart of the implement. spreaders) For front mounted hook ‘Front hitched’ B. Distance from the connection point of the tractor to the hart of the spreading pattern.
-
Page 43: Dignostic Menu
3 Software screens 3.5 Diagnostic menu Screen 1: Software version Software version + Date Can High and Low voltage. (Must always be +/- 2.5 V Screen 2: System information ID nr of the PCB +10V, load cellss, value must be stable! Inductive sensor value. - Page 44 3 Software screens Screen 3: Software version I/O box Incoming signal hopper empty sensors Left Incoming signal hopper empty sensors Right...
- Page 45 3 Software screens Screen 4: System logbook Fault events This screen shows the logged events which occurred. Most of the time, an alarm has been shown to the user. Second page Date when fault happen last time Number of times fault happened Time when fault happen last time (65535 = not happened yet)
-
Page 46: Calibrations
4. Calibrations 4.1 Actuators calibration After changing/repair an actuator or PCB or after memory error on the system, the actuators most be calibrated again. For an good calibration process please follow the steps below: Step 1 Go to screen “hopper & act calibration Step 2 Select “CAL”... -
Page 47: Hopper Calibration (Pincode 5)
4. Calibrations 4.2 Hopper calibration (Pincode 5) The Pin 5 calibration has to be done after adding additional weight to the machine. (Like a hopper extension) Or if the weight offset to 0 is bigger than 25 kg. After adding an extra options like an ‘hopper extension’ the empty hopper weight will changed. For this reason the weighing system must know the new empty hopper weight. - Page 48 4. Calibrations Step 2 Navigate to the correct screen Go with the spanner in the mainscreen to menu Pin and enter the correct pin code in the screen (Pin 5). After this go to screen “Hopper&act Calibrations” Enter here Pin 5 For more detailed information regarding the screen follow up please check §...
- Page 49 4. Calibrations Step 4 Filling in correct empty hopper weight. Filling in correct Fill in the correct empty hopper weight in this screen. weight (use the information below) Hopper weight is the weight from the hopper plus all the extra available options together. On the next page you find al details about the different weights.
- Page 50 4. Calibrations Overview Calibration weights spreaders (3-7-2018) Manual hopper Eletrical hopper Hopper empty Level Hopper size: Basic hopper Extention Ladderset Side step cover cover indication RO-M GEOSPREAD 1100 VN257 not available not available EX-CL GEOSPREAD 1100 VN263 RO-M GEOSPREAD 1300 VN257 not available not available...
- Page 51 4. Calibrations Step 5 Setting weight cell counts. When entering the screen below wait till value A is stable. Wait till value A is stable Go with this arrow Value A to next screen Step 6 Checking weight. Automatically you are coming now in the screen below. Press the home button...
-
Page 52: Hopper Calibration: (Except Cl Ew And Ro-M Ew (Pincode 8)
4. Calibrations 4.3 Hopper calibration: (Except CL EW and RO-M EW) (Pincode 8) The Pin 8 calibration has to be done after changing a PCB weight sensor or reference sensor. During this calibration the following 5 steps will be done during this calibration 1. - Page 53 4. Calibrations Step 2 Navigate to the correct screen Go with the spanner in the mainscreen to menu Pin and enter the correct pin code in the screen. (Pin 8) After this go to screen “Hopper&act Calibrations” Enter here Pin 8 For more detailed information regarding the screen follow up please check §...
- Page 54 4. Calibrations Step 4 Filling in correct empty hopper weight. Step 4 Filling in correct empty hopper weight. Filling in correct Filling in correct Fill in the correct empty hopper weight in this screen. Fill in the correct empty hopper weight in this screen. weight weight (use the information below)
- Page 55 4. Calibrations Step 5 Setting weight cell counts. When entering the screen below wait till value A is stable. Wait till the value is stable Go with this arrow to next screen Step 6 Reference sensor value flat machine Wait till the value is stable Go with this arrow...
- Page 56 4. Calibrations Step 7 Filling hopper with calibration weight. Fill the hopper with a fixed weight Fill in the circled box Go with this arrow Wait till this value is This weight must have minimum 300 KG. the exact weight of the to next screen stable Make sure you know exactly how heavy the...
- Page 57 4. Calibrations Step 8 reference sensor under an angle. Bring the machine under an angle of By pressing this Wait till this value is min 15° (Forwards/Backwards/side button the stable wards) calibration is completed. The machine is now calibrated...
-
Page 58: Hopper Calibration: Ro-M Ew Cl Ew (Pincode 8)
4. Calibrations 4.4 Hopper calibration: RO-M EW CL-EW (Pincode 8) The Pin 8 calibration has to be done after changing a PCB, weight sensor or reference sensor. During this calibration the following 5 steps will be done during this calibration 1. - Page 59 4. Calibrations When the load cells has been unscrewed from the machine the adjustment of the load cells has to be adjusted again. For the adjustment, please follow up the steps below. Step 1 Assemble the load cells on the machine. (700Nm on the fixation bolts) Step 2 Unscrew fixation bolt A and adjust with bolt B that the load cells is touching the connection block on the frame...
- Page 60 4. Calibrations Step 5 Tight fixation screw A and start to shake the machine. (The reason for this is that all the play must be out of the bolt connections. Check again the counts in screen “ Service information” Step 6 Fill up the machine with +/- 250 kg and start to drive on the road for +/- 10 minutes.
- Page 61 4. Calibrations Load cell value empty hopper 9) Hopper must be completely horizontal, in both directions! 10) Wait until the left value is not fluctuating anymore. 11) Select the right arrow and press OK. Reference sensor value 12) Machine must still be level in both directions! 13) Wait until the left value is not fluctuating anymore.
-
Page 62: Speed Sensor Calibration
4. Calibrations 4.5 Speed sensor calibration The IM tellus can be connected to the gearboxsignal of the tractor or by a Kverneland/Vicon speed sensor. MT00001355 for tractor cabin speed signal MT00001509 for using KV speed sensor Select in the fertilizer spreader the correct speed source . - Page 63 4. Calibrations Go to the menu of the tractor ECU. Select wheel or radar. Depending on radar or Wheel connection. The system has to be calibrated. By press start the calibration process begin. After exact 100 meter push call. By pushing the diagnostic key The inputs can be checked if Radar or Wheel comes in.
-
Page 64: Diagnoctic Stored Calibrated Value Check
4. Calibrations 4.6 Diagnostic stored calibrated value check If the system is not working well after the calibrations please Check 1 Actuators check the follow values. Those values are also very Values (A) should after calibration approximately the 15 and 1015 important if you do not have any idea what it could be. -
Page 65: Border Spreading And Geocontrol
5. Border spreading and GEOCONTROL 5.1 Working with manual border spreading plate and GEOCONTROL Instruction spreading with manual border spreading plate with software from EDW 1.19 and GEOCONTROL (This only works with GEOSPREAD spreaders) 1. Go from main page, by pressing spanner, to the curve calibration page 2. - Page 66 5. Border spreading and GEOCONTROL 5. When you return to the main page the indication for the border spreading plate will blink. 6. Confirm the new section deviation. The 2 inner sections will now get the ”extra” working width of the border spreading plate...
- Page 67 5. Border spreading and GEOCONTROL 7. Mount the border spreading plate physical on the spreader and set it into the right position. 8. Go to GEOCONTROL and make an new task 9. If you record a new field, select that the border is on the opposite side of your border spreading plate (with manual border spreading plate this is the right side) 10.
- Page 68 5. Border spreading and GEOCONTROL 5.2 Working with hydraulic border spreading plate and GEOCONTROL Instruction spreading with hydraulic border spreading plate with software from EDW 1.19 (This only works with GEOSPREAD spreaders) 1. Go from main page, by pressing spanner, to the curve calibration page 2.
- Page 69 5. Border spreading and GEOCONTROL 4. Go back to main screen 5. Drop the border spreading plate by operating the hydraulics. In the main screen the indication for the border spreading plate will blink 6. Confirm the new section deviation. The 2 inner sections will now get the ”extra” working width of the border spreading plate...
- Page 70 5. Border spreading and GEOCONTROL Go to GEOCONTROL . If you record a new field, select that the border is on the opposite side of your border spreading plate Put section control on manual mode Start spreading on the outside of your field GEOCONTROL will now color half of the working width+ the additional working width which is filled in at step 3 11.
-
Page 71: Implement Setting Geocontrol
6. Implement setting GEOCONTROL For a good working of the machine in combination with GEOCONTROL there has to be done settings on the machine side. The information has to be filled in the screens below. Task controlling Storing field internally or externally Variable rate possibility Spreader control on/off(behind licence key) Licence key number... -
Page 72: Calculating B Distance
6. Implement setting GEOCONTROL 6.1 Calculating B distance (When not available in spreading chart) For a good calculation of the B distance we have to understand how the spreading pattern behavior. Check the examples below. Working width 18m B distance is 9m from hard of the spreading pattern and connection point Working width 24m B distance is 12m from hard of the... -
Page 73: B Setting Under Field Conditions
6. Implement setting GEOCONTROL 6.2 B setting under field conditions In the GEOCONTROL manual is mentioned 2 different formulas. B distance is 0.5X working width. B distance is 0.5 X working width -7. To explain the difference please check the examples below. Example 1. - Page 74 6. Implement setting GEOCONTROL Example 2.
- Page 75 6. Implement setting GEOCONTROL Example 3 Field 2. 5m B distance Theoretical lenght-7 Working width 24m meter from tractor Theoretical B distance is 12m 7m tractor lenght. Practical B distance is 5 meter 0.5 times working width -7 (tractor) Field boundery Tramline 1 Theoretical border and switch point...
-
Page 76: Troubleshooting
7. Troubleshooting 7.1 Alarms and errors PTO not started when start spreading Speed too low (dosing opening is too small or closed) Speed too high; dosing can not be opened more. Hopper reached empty hopper level. Hopper has reached it 100% empty level alarm cannot be switched off Battery voltage too low... - Page 77 7. Troubleshooting Left actuator dosing stuck while opening Left actuator dosing stuck while closing Right actuator stuck while opening Right actuator stuck while closing Left actuator letter stuck while closing Left actuator letter stuck while opening Right actuator letter stuck while closing Right actuator letter stuck while opening...
- Page 78 7. Troubleshooting Stored value of reference sensor is smaller then the stored value under an angle need to recalibrate Empty hopper value of the load cells is too low check calibration Stored calibration weight is not equal too the stored calibration weight under an angle recalibrate Empty hopper value of the sensor Right Empty hopper value of the sensor Left Load cell alarm.
-
Page 79: Trouble Should Flowchart Weighing System
7. Troubleshooting 7.2 Trouble should Flowchart weighing system Is the empty hopper weight Perform a filed in correctly ? pincode 5 cal. Page 47 Is the power supply stable Repair power and above 10 volt ? supply Are the values of the load Check the cells correctly and stable ? load cells... -
Page 80: Trouble Should Flowchart Actuators
7. Troubleshooting 7.3 Trouble should Flowchart actuators Is the actuator calibrated Perform a correctly ? calibration Finished Capture 4 Check if no mechanic part is Can you adjust the actuators Check actuator Check and Replace the blocking the actuator manually ? ++ power on the repair the actuator... -
Page 81: Electrical Hopper Cover
8. Electrical hopper cover 8.1 Adjustments The electrical hopper cover (tarpaulin) is an option on the bigger spreader range The maximum opening and closing position can be adjusted by the screw on the motor: 1. Remove the 2 stainless steel screws. These screws are plugs to prevent water and dirt can enter the motor. -
Page 82: Connection On Pcb And Software
8.2 Connection on PCB and software Software version The electrical hopper cover can only work with EDW2 1.19 or higher version. Connection to the PCB From the electrical motor to the PCB there is an direct connection with an 7.5 Ampr. Fuse... -
Page 83: Empty Hopper Sensor
9. Empty hopper sensor The empty hopper sensor is an option on all weighing spreaders. This sensor gives the driver an signal when one or both hoppers are empty. -
Page 84: Warnings
9. Empty hopper sensor 9.1 Warnings The hopper empty sensor is measuring if the hopper is empty (left, right or both). If the hopper is empty a warning show up in the main screen. Left side of hopper empty Right side of hopper empty... -
Page 85: Components
9. Empty hopper sensor 9.2 Components The Hopper Level Measurement is steered by one “Machine box HLM” which is mounted on the right side of the machine close behind the PCB box. Machinebox HLM Cables sensor HLM Power cable and CAN communication HLM... - Page 86 9. Empty hopper sensor 9.3 PCB connection and software Software version The electrical hopper cover can only work with EDW2 1.19 or higher version. Connection to the PCB The sensors are connected to the blackbox and this box is connected to the PCB...
- Page 87 9. Empty hopper sensor 9.4 Machine box HLM The hopper level management system ‘HLM’ has three components, the mini IO and two sensors. The mini IO is mounted on the right side of the spreader close behind the PCB and has two connectors. One connector is for the sensors and one for the signal which is connected to the EDW PCB Machinebox HLM Cable power CAN HLM...
- Page 88 9. Empty hopper sensor 9. Settings and diagnostics The empty hopper sensor alarm should be activated in the screen The hopper empty sensor is measuring if the hopper is empty (left, right or both). If the hopper is empty a warning show up in the main screen (see next page). Sensor HLM Machine box HLM (Mini IO)
- Page 89 9. Empty hopper sensor 9. Settings and diagnostics The sensor value can be checked in the diagnostic screen. Fertilizer in hopper Empty hopper...
Need help?
Do you have a question about the EDW2 and is the answer not in the manual?
Questions and answers