Table of Contents
Advertisement
Available languages
Available languages
Quick Links
Advertisement
Table of Contents

Related Manuals for Oster OTF301M


Summary of Contents for Oster OTF301M
- Page 1 OTF301M MODELO / MODEL Manual de Instrucciones VENTILADOR DE TORRE LEA TODAS LAS INSTRUCCIONES ANTES DE USAR ESTE APARATO Instruction Manual TOWER FAN READ ALL INSTRUCTIONS BEFORE USING THIS APPLIANCE OTF301M_20SEM2 (LA).indd 1 OTF301M_20SEM2 (LA).indd 1 12/17/20 11:00 12/17/20 11:00...
-
Page 2: Precauciones Importantes
PREC A U C IO N ES IM P ORTA NTES Para disminuir el riesgo de incendio, descarga eléctrica y lesiones personales, se deben seguir siempre las precauciones básicas de seguridad al utilizar artefactos eléctricos. Dichas precauciones comprenden: 1. Leer todas las instrucciones antes de utilizar este artefacto eléctrico. 2. Utilice el ventilador sólo para los fines que se describen en el manual de instrucciones. -
Page 3: Descripción Del Aparato
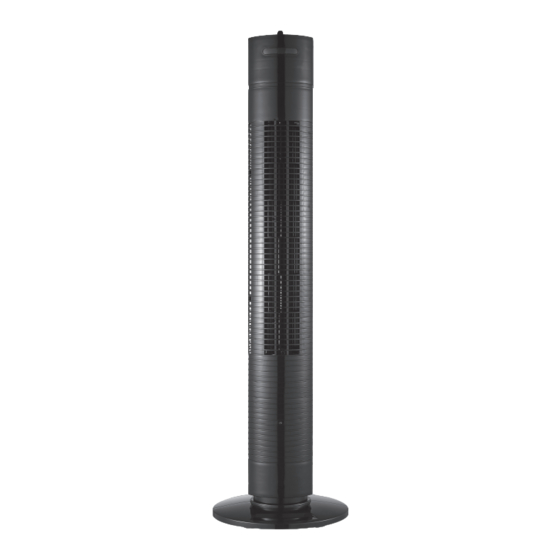
D ESC R IP CI ÓN DEL A PA R ATO Fig. 2 Botones de Control de Velocidad / Oscilación Perilla de Control de Temporizador Fig. 1 DESCRIPCIONES (CONSULTE LAS FIG. 1 & 2) Para encender la unidad (uso continuo): 1. Enchufe la unidad. 2. G ire la perilla de velocidad en el sentido de las agujas del reloj hasta la configuración de velocidad deseada 1 (baja), 2 (media), 3 (alta). 3. Presione botón de ajuste de velocidad 1 (baja), 2 (media), 3 (alta). NOTA: El temporizador debe estar en la posición (ENCENDIDO) para funcionar de forma continua. Para apagar la unidad: 1. -
Page 4: Instrucciones De Instalación
Tornillos (3) Fig. 7 Cable de alimentación 1. Coloque la Base (2 y 3) a la Carcasa del Ventilador con el cable introducido entre la base (2 y 3). Asegure la base y la carcasa con 3 tornillos (4). En la Fig. 7 se muestra la alineación correcta de la base instalada a la Carcasa del Ventilador. LI M PI EZ A Y A L M AC ENA M I ENTO Seguir estas instrucciones para cuidar correctamente con seguridad de su ventilador Oster ® Por favor recordar: 1. Desenchufar siempre el ventilador antes de su limpieza o montaje. 2. No permitir que entre agua en la carcasa del motor de ventilador. 3. Utilizar un paño suave humedecido en una solución de jabón suave. 4. No utilizar lo siguiente como producto de limpieza: gasolina, aguarrás o bencina. ALMACE N A M IE N TO DEL V ENTI L A D OR Su ventilador puede almacenarse montado o parcialmente desmontado. Es importante... -
Page 5: Important Safeguards
IM PO RTA N T SA F E GU A R D S When using electrical appliances, basic safety precautions should always be followed to reduce the risk of fire, electric shock, and injury to persons. These precautions include: 1. Read all instructions before using this appliance. 2. Use fan only for purposes described in the instruction manual. -
Page 6: Description Of The Appliance
D ESCR IPT I ON OF TH E A P P L I A NC E Fig. 2 Speed / Oscillation Control Knob Timer Control Knob Fig. 1 OPERATING INSTRUCTIONS (SEE FIG. 1 & 2) To turn unit ON (continuous use): 1. Plug in unit. 2. Turn speed knob clockwise to desired speed setting 1 (Low), 2 (Med), 3 (High). 3. Select speed setting button 1 (Low), 2 (Med), 3 (High). NOTE: Timer must be in (ON) position to run continuously. To turn unit OFF: 1. Turn speed/Oscillatoin knob to OFF. To use Oscillation Control: 1. T urn the Speed/Oscillation knob counter-clockwise to activate oscillation and select speed setting 1 (Low), 2 (Med), 3 (High) NOTE: Timer must be in (ON) position to run continuously. -
Page 7: Cleaning And Maintenance
Front base Screws (3) Power cord Fig. 7 Assemble Base (2 and 3) to Fan Housing (1) making sure the cord is enclosed between base (2 and 3). Secure together with 3 Screws (4). Refer to Fig. 7 for proper alignment of assembled Base to Fan Housing. CLE AN I N G A N D M A I NTENA NC E Follow these instructions to correctly and safely care for your Oster fan. Please remember: ® 1. Always unplug the fan before cleaning or assembly. 2. Do not allow water to drip on or into the fan motor housing. 3. Be sure to use a soft cloth, moistened with a mild soap solution. 4. Do not use any of the following as a cleaner: petrol, thinners or benzene. FA N S TO RA GE Your fan can be stored either partially disassembled or assembled. It is important to keep it in a safe, dry location. - Page 8 220 V 60 Hz 40 W 220 V 50 Hz 35 W XXX en donde X es cualquier numero entre 0 y 9 o cualquier letra entre A y Z. XXX where X is any number between 0 and 9 or any letter between A and Z. La siguiente información es para México solamente. The following information is intended for Mexico only. VENTILADOR DE TORRE OSTER ® MODELOS: OTF301M, OTF301M-LA013 LEA EL INSTRUCTIVO ANTES DE USAR EL APARATO LA SIGUIENTE INFORMACIÓN ES PARA MÉXICO: IMPORTADOR: NEWELL BRANDS DE MÉXICO S.A. DE C.V. AVE. JUÁREZ Nº 40-201, COLONIA EX HACIENDA SANTA MÓNICA, TLALNEPANTLA 54050, ESTADO DE MÉXICO TEL: 5366-0800 RFC SME570928G90 PAÍS DE ORIGEN: CHINA PAÍS DE PROCEDENCIA: CHINA, E.U.A.
Need help?
Do you have a question about the OTF301M and is the answer not in the manual?
Questions and answers