Lowrance LVR-880 EU Installation Instructions Manual
Lowrance electronics vhf radio installation instructions
Hide thumbs
Also See for LVR-880 EU:
- Operation instructions manual (76 pages) ,
- Operation instructions manual (76 pages) ,
- Operating instructions manual (113 pages)

Related Manuals for Lowrance LVR-880 EU


Summary of Contents for Lowrance LVR-880 EU
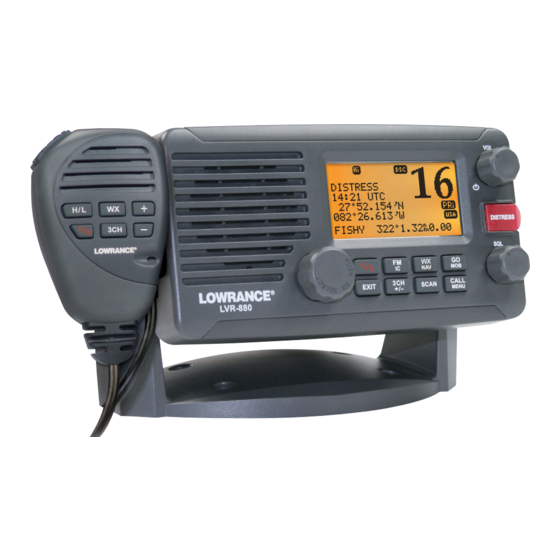
- Page 1 Pub. 988-0158-071 www.lowrance.com LVR-880 US LVR-880 EU VHF Radio Installation Instructions...
- Page 2 Lowrance® is a registered trademark of Navico No part of this manual may be copied, reproduced, republished, transmitted or distributed for any purpose, without prior written consent of Lowrance Electronics. Any unauthorized commercial distribution of this manual is strictly Lowrance Electronics may find it necessary to change or end our policies, regulations, and special offers at any time.
-
Page 3: Table Of Contents
Table of Contents Installation Options ...6 Checklist...6 Location Requirements ...7 Choose an Installation Type ...7 Mounting Bracket Installation ...8 Recessed Installation ...9 Microphone Wall hanger ... 10 Connect the Radio ... 10 1 VHF Antenna ...11 2 N2K Connectors ...11 3 GPS Connector ...12 4 Hailer Horn ...13 5 FM Antenna Jack ...13... -
Page 4: Important Safety Information
Important Safety Information FCC Statement This equipment has been tested and found to comply with the limits for a Class B digital device, pursuant to Part 15 of FCC Rules. These limits are designed to provide a reasonable protection against harmful interference in a residential installation. This equipment generates, uses and can radiate radio frequency energy and, if not installed and used in accordance with the instructions, may cause harmful interference to radio communications. - Page 5 IMPORTANT DSC functions will not operate until you have entered your user MMSI. The radio channels installed into the radio may vary from country to country, depending upon the model and government or national communications authority regulations. Lowrance recommends that you check the radio operating licensing requirements of your country before using the radio.
-
Page 6: Installation Options
Installation Options Checklist Check that you have all the following items BEFORE starting the installation. Contact your dealer if an item is missing. Note: A VHF antenna is NOT provided by Lowrance. Consult your Lowrance dealer for advice if necessary. •... -
Page 7: Location Requirements
Location Requirements Check these location requirements BEFORE doing any drilling or cutting. Whichever installation option you choose, check that the installation site: • is at least 39” (1 m) from the antenna location • allows easy connection to a 10 A fused 13.6 V DC electrical source and the antenna •... -
Page 8: Mounting Bracket Installation
Mounting Bracket Installation Hold the mounting bracket at the chosen location and use a soft pencil to mark the 4 screw hole positions onto the mounting surface. Drill the 4 screw holes where marked. Drill completely through the mounting surface. Note: If you are drilling into fiberglass, use a small drill bit to drill pilot holes before drill- ing the screw holes. -
Page 9: Recessed Installation
Recessed Installation Tape the mounting template to the chosen location. Ensure that the template is smooth and taut. Drill the 2 screw holes where marked. Drill completely through the mounting surface. Note: If you are drilling into fiberglass, use a small drill bit to drill pilot holes before drill- ing the screw holes. -
Page 10: Microphone Wall Hanger
Microphone Wall hanger Hold the microphone wall hanger at the chosen location and use a soft pencil to mark the 2 screw hole positions onto the mounting surface. If the mounting surface is: • non-metallic, use the 2 self-tapping screws and 2 plain washers to attach the microphone wall hanger to the mounting surface. -
Page 11: Vhf Antenna
1 VHF Antenna Not supplied. A suitable radio antenna must be mounted and connected before you can operate the radio. Consult your Lowrance dealer for advice, if necessary. ALWAYS mount the VHF antenna as high as possible and at least 37” (96 cm) from the base station. -
Page 12: Gps Connector
3 GPS Connector 8(Red) STEREO R-CH 4(Green) GPS IN - Shield(GND) 6(Black) NMEA OUT - Line up the arrow on the GPS connector with the arrow on the GPS cable and plug together. The pin details are shown for information. Pin /Socket Wire Color Shield... -
Page 13: Hailer Horn
4 Hailer Horn Wire Color White Shield IMPORTANT: Do not short these 2 wires. Install the hailer horn in a forward-facing location on the boat because the hailer horn will transmit the FOG horn sounds and will ‘listen back’ when not transmitting. Note: We recommend you use a hailer horn of 4 Ohms to obtain maximum 22 W audio output power. -
Page 14: Your User Mmsi
Your user MMSI The user MMSI (Marine Mobile Service Identity) is a unique 9 digit number, similiar to a personal telephone number. It is used on marine transceivers that are capable of using DSC (Digital Select Calling). If you are: •... -
Page 15: Enter Your Atis Mmsi (Lvr-880Eu Only)
Push ENTER (the center of the Channel Select knob) to show the DSC SETUP menu. The cursor is at USER MMSI. Push ENTER. A dashed line appears. Enter your MMSI along the dashed line, one number at a time, as follows: Press + or –... -
Page 16: Specify Your Fm Region
A dashed line appears. Enter your ATIS MMSI along the dashed line, one number at a time, using the same method that you used for your user MMSI. When you have entered the last number, push ENTER. Enter your ATIS MMSI again as a password check, then push ENTER to permanently store your ATIS MMSI and return to the menu. -
Page 17: Navico Full Two-Year Lowrance Vhf Warranty
Navico Full Two-Year Lowrance VHF Warranty “We, ” “our, ” or “us” refers to NAVICO, the manufacturer of this Lowrance VHF product. “You” or “your” refers to the first person who purchases this product as a consumer item for personal, family or household use. -
Page 18: How To Obtain Service
How to Obtain Service In the USA We back your investment in quality products with quick, expert service and genuine Low- rance replacement parts. If you’re in the United States and you have technical, return or repair questions, please contact the Factory Customer Service Department. Before any product can be returned, you must call customer service to determine if a return is necessary. -
Page 19: Shipping Information
Shipping Information If it becomes necessary to send a product for repair or replacement, you must first receive a return authorization number from Customer Service. Products shipped without a return authorization will not be accepted. When shipping, were commend you do the following: Please do not ship the knobs or mounting bracket with your unit. - Page 20 Copyright © 2008 Lowrance Pub. 988-0158-071 All Rights Reserved Printed in China - 080920 Navico 1177 MN000797B-G...
Need help?
Do you have a question about the LVR-880 EU and is the answer not in the manual?
Questions and answers