Advertisement
Quick Links
INSTRUCTION MANUAL
MICROWAVE LEVEL METER
(Code)
Liquid:MWLM-PR26H2G/F Ex
Powder:MWLM-PR26H3G/F/S/SP Ex
Safety precautions ・・・・・・・・・・・・・・・・・・・・1
1.Overview・・・・・・・・・・・・・・・・・・・・・・・2
2.Measurement principle・・・・・・・・・・・・・・・・・2
3.Specifications ・・・・・・・・・・・・・・・・・・・・2
4.System configuration・・・・・・・・・・・・・・・・・・4
5.Dimensions・・・・・・・・・・・・・・・・・・・・・・6
6.Installation ・・・・・・・・・・・・・・・・・・・・・ 9
7.Wiring・・・・・・・・・・・・・・・・・・・・・・・・14
8.Start-up・・・・・・・・・・・・・・・・・・・・・・・15
9.Troubleshooting・・・・・・・・・・・・・・・・・・・・16
※The operator should read this Instruction Manual carefully and handle the device correctly.
1-8-18 Norimatsu-Higashi,Yahatanishi-ku,Kitakyushu 807-0837 Japan
Phone No.(8193)691-3731 Fax No.(8193)691-3735
http://www.matsushima-m-tech.com
E-mail sales@matsushima-m-tech.com
TYPE:MWLM-PR26HEx
MWLM-PR26H7G/F/S/SP Ex
−Contents−
TMWLM-006E
Rev0:Sep.23,2016
FOR
Advertisement

Related Manuals for Matsushima MWLM-PR26HEx

Summary of Contents for Matsushima MWLM-PR26HEx
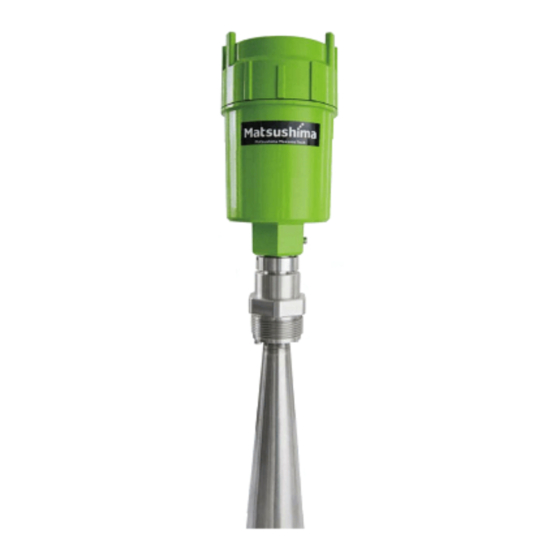
- Page 1 TMWLM-006E Rev0:Sep.23,2016 INSTRUCTION MANUAL MICROWAVE LEVEL METER TYPE:MWLM-PR26HEx (Code) Liquid:MWLM-PR26H2G/F Ex Powder:MWLM-PR26H3G/F/S/SP Ex MWLM-PR26H7G/F/S/SP Ex −Contents− Safety precautions ・・・・・・・・・・・・・・・・・・・・1 1.Overview・・・・・・・・・・・・・・・・・・・・・・・2 2.Measurement principle・・・・・・・・・・・・・・・・・2 3.Specifications ・・・・・・・・・・・・・・・・・・・・2 4.System configuration・・・・・・・・・・・・・・・・・・4 5.Dimensions・・・・・・・・・・・・・・・・・・・・・・6 6.Installation ・・・・・・・・・・・・・・・・・・・・・ 9 7.Wiring・・・・・・・・・・・・・・・・・・・・・・・・14 8.Start-up・・・・・・・・・・・・・・・・・・・・・・・15 9.Troubleshooting・・・・・・・・・・・・・・・・・・・・16 ※The operator should read this Instruction Manual carefully and handle the device correctly....
- Page 2 Cause for any peripheral equipment or device. d. Accident beyond control and force majeure (fire, earthquake, flood, riots, etc.). Lack of instructions to MATSUSHIMA for information or safety requirements that can be predicted only by customers’ side. This warranty conditions do not limit customers’ legal right.
- Page 3 The time difference between transmission and reception of microwave is processed by microcomputer to accurately determine level of stored materials. 3. Specifications 3-1.General Specifications Table1. Standard specification (For Liquid) Type MWLM-PR26HEx Code MWLM-PR26H2GEx MWLM-PR26H2FEx Explosion-proof construction (TIIS) Ex ia ⅡB T4 X Intrinsically safe circuit: ...
- Page 4 Table2. Standard specification (For Powder) MWLM-PR26HEx Type MWLM-PR26H3 MWLM-PR26H7 Code GEx/FEx/SEx/SPEx GEx/FEx/SEx/SPEx Ex ia ⅡB T4 X Explosion-proof construction (TIIS) Intrinsically safe circuit: Equipment Voltage 25.4V Equipment Current 86.8mA Rating Equipment Power 551mW Internal inductance 0.7mH Internal capacitance 5nF Housing...
- Page 5 4. System configuration This level measurement system is configured by the level meter and a safety barrier (referring to the following page). The level meter can be mounted at a dangerous place and a safety barrier can be mounted at a non-dangerous place.
- Page 6 ・Withstand voltage test Do not perform the withstand voltage test because the following withstand voltage test do not apply. A test point of the withstand voltage(between the terminal 1 and the earth terminal, beween the terminal 2 and the earth terminals) Test condition:Test voltage AC500V(effective value) must bemaintained for a mimute, leakage current must be less than...
- Page 7 5. Dimensions (Units : mm) 【Code:MWLM-PR26H2 series】 Lead outlet G1/2 Cable 8〜12mm Earth terminal(M4) Transparent window: PC Housing/Cover: ADC (82) Flange: Hex-head opposite side 50 SUS304(JIS5k50A Purge hole Protection G1/8 Measurement IP67 reference point PCD120 G1 1/2 Protection IP20 Antenna: SUS316L BOSS :SUS304...
- Page 8 【Code:MWLM-PR26H3 series】 Lead outlet G1/2 Cable 8〜12mm Earth terminal(M4) Transparent window: PC Housing/Cover: ADC (82) Max.10° Max.10° JIS10K100A Hex-head JIS5K65A flange with opposite side Swivelling SUS304 Purge hole mechanism Protection G1/8 SUS304 IP67 G1 1/2 PCD17 PCD130 Protection IP20 Measurement reference point Boss :SUS304...
- Page 9 【Code:MWLM-PR26H7 series】 Lead outlet G1/2 Cable 8〜12mm Earth terminal(M4) Transparent window: PC Housing/Cover: ADC (82) Max.10° Max.10° Hex-head JIS10K100A flange JIS10K100A opposite side with Swivelling SUS304 mechanism Purge hole Protection SUS304 G1/8 IP67 PCD175 PCD17 Protection IP20 Boss Measurement :SUS304 reference point G1 1/2 8- 19...
- Page 10 6. Installation 6-1. Division of the dangerous spot and temperature range Code:MWLM-PR26H series ( ) Division of the dangerous spot Zone1 Zone2 ( ) Ambient temp. ( ) Protection −20℃〜+50℃ IP67 ( ) Measured fluid temp. −40℃〜+100℃ ( ) Protection (...
- Page 11 6-2. Installation Blind sector Blind sector Blind sector 0.5m 0.5m 0.3m Fig. 4. Installation for liquid and for solid ・ If material surface enter to the blind sector, a stand pipe shall be used to ensure that material surface can not reach the blind sector of the level meter. But if the material surface will not enter the blind sector, then stand pipe should not be used.
- Page 12 6-3. Mounting direction ・At the application with repose angle and the mounting position near the sidewall etc, the reflection intensity of Level Meter may weaken or the noise reflection is likely to occur. As a countermeasure, the change of mounting direction can improve it in some cases. Level Meter has an marking at the reference position of electric field direction on Adapter If the direction of electric field is adjusted based on this marking, the reflection intensity may increase or the noise reflection may reduce.
- Page 13 ・Do not install instrument close to inlet of material under measurement. ・Do not install any interfering instruments within the side beam, because reflections from beams, pipes, and other supports within the tank will cause false echoes. Fig. 8. Installation precaution (2) ・Provide shielding to minimize noise or unwanted reflections, when crossbeams, and other supports are installed within the tank.
- Page 14 ・Install protection such as a simple roof above the Level Meter to avoid exposure to direct sunlight. Simple cover Fig. 10. Installation precaution (4) ・There is a structural equipment that the cone antenna goes out than the attaching portion when the horn antenna is detached by maintenance etc.
- Page 15 7. Wiring 7-1. Unscrew the cover. (Rotate counterclockwise) Cover 7-2. Open the wire entry of terminal block by pushing on the actuating lever with flat screwdriver. (Recommended flat screwdriver: Axis diameterφ3mm and blade tip size 2.6mm) 7-3. Insert wires as shown on the panel, positive (+) to terminal entry No.1 and negative (-) to terminal No.2.
- Page 16 ※ "LCD adj. unit" ,"Software for PC adjustment" and "HART modem" are optional products. ※ For the error code details, please refer to “Instruction manual for Ready to start LCD adjustment unit” and “Operating manual for adjustment level measurement software Matsushima DTM”. Fig.15. Start - up...
- Page 17 11.Troubleshooting If you encounter any problems, first check if they are described in this section, then execute suggested corrective actions. Table 3. Troubleshooting Problem Check the following Corrective actions ・Are wiring connections correct ? Powered ON the device, but ・Correct the wiring ・Check whether the power is supplied to screen is blank ・Supply power to the device...
Need help?
Do you have a question about the MWLM-PR26HEx and is the answer not in the manual?
Questions and answers