Table of Contents
Advertisement
Quick Links
Welcome to the N1 Guide
Welcome to the N1 Guide............................................................................................... 1
Elementary information ................................................................................................... 2
Insert the SIM card........................................................................................................... 3
Insert the SD card ............................................................................................................ 4
Charge the battery ........................................................................................................... 5
Turn on your Neonode .................................................................................................... 6
Enter PIN code ............................................................................................................. 6
Keylock........................................................................................................................... 7
Reboot your Neonode ................................................................................................. 7
Navigation Basics............................................................................................................. 8
The Keyboard ................................................................................................................. 11
General Settings............................................................................................................. 12
Connect your Neonode to a computer........................................................................ 13
Download new updates ................................................................................................. 14
Make calls........................................................................................................................ 16
Address book .................................................................................................................. 17
The Image Viewer ...................................................................................................... 19
The Messaging Application .......................................................................................... 21
SMS.............................................................................................................................. 21
MMS ............................................................................................................................. 23
The Media Player ........................................................................................................... 24
Internet Explorer............................................................................................................. 29
Transfer a favourite from your computer ................................................................ 31
Watch DVD films on your Neonode............................................................................. 32
BetaPlayer ................................................................................................................... 37
Podcast to your Neonode ............................................................................................. 38
Improve ring and alarm sound volume ....................................................................... 39
GPRS and MMS settings .............................................................................................. 41
Enter settings manually ............................................................................................. 41
Advertisement
Table of Contents

Related Manuals for NEONODE N1


Summary of Contents for NEONODE N1
-
Page 1: Table Of Contents
Welcome to the N1 Guide Welcome to the N1 Guide....................1 Elementary information ....................2 Insert the SIM card......................3 Insert the SD card ......................4 Charge the battery ......................5 Turn on your Neonode ....................6 Enter PIN code ......................6 Keylock........................... -
Page 2: Elementary Information
Important information before you start to use your Neonode: Your Neonode must be turned off when you insert and remove the SD card. Removing the SD card while the power is on may cause malfunction and loss of important settings and data. -
Page 3: Insert The Sim Card
Please note that neither SIM card nor any subscription is included when you buy a Neonode. Your Neonode should be turned off when you insert the SIM card. The main power switch must be in on-position. Insert the SIM card as shown in the picture below, with the chip facing upwards. Make sure the SIM card is fully inserted. -
Page 4: Insert The Sd Card
Release the SIM card Important! Your Neonode must be turned off when you release the SIM card. Releasing the SIM card when the mobile device is turned on may cause malfunction and loss of important settings and data. Turn off the Neonode by pressing the on/off button (the top button on the left side, just below the screen) for about two seconds. -
Page 5: Charge The Battery
Turn off your Neonode by pressing the on/off button (the top button on the left side, just below the screen) for about two seconds. When you have turned off your Neonode you remove the SD card by a light pressure on the lower part of the card. The SD card will be released and you can remove it. -
Page 6: Turn On Your Neonode
Turn on your Neonode To turn on your Neonode you press the power on/off button. It is situated on the left side of the mobile device, just below the screen. Make sure that the main power switch is in the on-position. -
Page 7: Keylock
If you need to reset or reboot your Neonode you use the main power switch, situated on the left side. First, turn off your Neonode by pressing the on/off button for about two seconds. Then pull the main power switch downwards to shut down the battery. -
Page 8: Navigation Basics
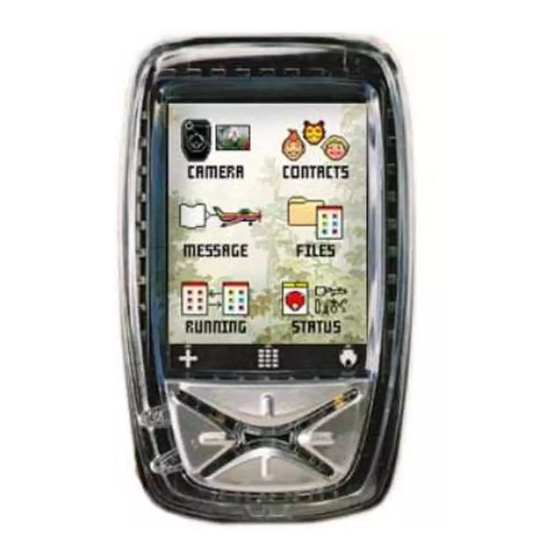
Navigation Basics To use a Neonode you have to learn a few basic navigation principles, which you use in the same way in every application. To learn how to navigate, you can think of the screen as being divided into three horizontal areas and three vertical areas. - Page 9 Please have in mind that you never have to press the optical screen; only a light touch is needed. Open the Start Menu To open the start menu, you sweep from the Neonode symbol in Start menu sweep area and upwards. The sweep should be about half the height of the screen.
- Page 10 Accept sweep Sweep from the left to the right at the bottom of the screen. An Accept sweep means accept, yes, forward, save, depending on the context. The Accept sweep is also used to answer incoming calls. Close view sweep Sweep from the right to the left at the bottom of the screen.
-
Page 11: The Keyboard
The Keyboard The keyboard is used to enter text and numbers into your Neonode. If the keyboard indicator at the bottom of the screen is visible, the keyboard is available in the application currently open. You open the keyboard with a Keyboard sweep. -
Page 12: General Settings
View and change settings Open the tools menu from the status screen. In the tools menu you can view and change general settings for your Neonode. Tap the icon that contains the kind of settings you want to view or change. Scroll the list and when the setting you want to change is marked, tap the screen to make your changes. -
Page 13: Connect Your Neonode To A Computer
Connect your Neonode to a computer Your Neonode can operate in two different modes while connected to a computer, either in phone mode or as a USB disk. When turned on, it operates in phone mode. Turned off, it operates as a USB disk. -
Page 14: Download New Updates
Transferring files is also slower than if the Neonode is connected as a USB disk. We therefore recommend you to connect your Neonode as a USB disk when you want to transfer several files or large amounts of data. - Page 15 Install Sample Web Links and Backup current N1 settings to the computer. To select any or both of them, check the box(es). In the Install Neno window you will also see what languages that will be installed, your active language, your regional settings and time zone.
-
Page 16: Make Calls
Contact and Calendar information will not be deleted during an update of your Neno version. After an update of the operating system, it is sometimes necessary to turn on your Neonode two times. If a blue progress bar appears when you turn on your Neonode, please wait for a while until the progress bar completes and your Neonode shuts down automatically. -
Page 17: Address Book
Make a Close view sweep to hang up. Make a call using the Call History. To call a number from the Call History, open the start menu and tap the Call History icon. You can also get the Call History by quickly pressing the on/off button. A Call History list will appear. Scroll the list to the number or contact you want to call. - Page 18 Copy contacts to the SIM card Open the address book tools menu and make one Change view sweep to the right. To copy contacts from your Neonode to the SIM card, tap the icon Export contacts to SIM card. Choose which contacts you want to export to your SIM card and make an Accept sweep to export them.
-
Page 19: The Image Viewer
Change settings Open the camera tools menu and tap the Settings icon. You can change resolution, scene type, contrast and brightness. Mark the setting you want to change and tap the screen. When you choose Resolution or Scene type a list of alternatives will appear. Mark the alternative you want and tap the screen to choose it. - Page 20 The second tab view allows you to view the picture in different modes. Please note that this gives you the possibility to view your picture in different modes, not to save/update the picture in these modes. View the picture as shown in Image Viewer View the picture in full-screen.
-
Page 21: The Messaging Application
SMS or MMS and start composing. NOTE! To be able to send MMS your subscription must include GPRS and MMS services. Contact your operator or visit their website for help on how to configure your Neonode for MMS. Add number to address book If you have received a message containing a phone number you want to add to the address book, you open the tools menu when viewing the message. - Page 22 Add a recipient In the Compose view you add a recipient to your message by marking To and tap the screen. This will take you to the Address Book. Scroll the list and when the wanted contact is marked, tap the screen to add him or her as the recipient of your SMS.
-
Page 23: Mms
• Make sure that your subscription include GPRS and MMS services. Contact your operator for help regarding this. • Follow the instructions on your operator’s website on how to configure your Neonode for MMS by using automatic configuration SMS messages. When you receive a configuration SMS, make an Accept sweep to accept the settings. -
Page 24: The Media Player
MMS by making an Accept sweep, your N1m will connect to your MMS centre to download the message. The Media Player The Media Player allows you to listen to music, audio books and watch videos on your Neonode. Open the Media Player Open the Start menu. - Page 25 The Media Player tools menu The Media Player tools menu has two tab views. The first tab view contains icons for play, stop, change the volume level and skip to the previous/next track. Play/Pause Stop Set position Choose from where in the present track you want to listen Change the volume level Skip to the previous track Skip to the next track...
- Page 26 To change the position of a track in the playlist, scroll the playlist until the track you want to move is marked. Tap the screen to select this track. To move the track to another position in the playlist you then scroll the list. When you have found the right place to put the track you tap the screen to put it there.
- Page 27 You can change usage for the navigation keys and Keyboard sweep for both the Now Playing view and the Playlist view. Mark an item and tap the screen to make your changes. Choose whether you want to use the Up/Down navigation keys for volume control or not and the Left/Right keys to skip to previous/next track or not.
- Page 28 Make an Accept sweep. Choose Alarm tone to select audio file. Any of the mp3, wav or wma files stored on your Neonode can be used as alarm tone. Mark the audio file you want to use and tap the screen.
-
Page 29: Internet Explorer
If your operator doesn’t supply any settings for mobile Internet then download settings for WAP. A yellow bar on the status screen shows GPRS availability. If this bar is not shown on your Neonode you cannot use the GPRS service. Either you don't have GPRS coverage or your subscription with your operator doesn’t include GPRS. - Page 30 The tools menu The Internet Explorer tools menu contains two tab views and several ways of navigating between web pages. The first tab view: Back Browse to previously shown web page Forward Takes you to the next web page Choose Text Size Choose the zoom level of the text on the web page Stop/ Refresh Stops loading or refreshes the current web page Favourites Shows a list of your favourite web links.
-
Page 31: Transfer A Favourite From Your Computer
Open the storage card on your phone and open the "Storage Card\Documents and Settings\Default\Favourites" folder. Copy the URL you want as a favourite from your computer and paste it in the Favourite folder on your Neonode. To do this you open Internet Explorer on your computer and choose the favourite you want to copy. -
Page 32: Watch Dvd Films On Your Neonode
Watch DVD films on your Neonode It is easy to rip a DVD (copy the DVD to your computer and save it on the hard disk) and convert it to a format that fits the Neonode screen. You do it in a few steps. - Page 33 In PGC Mode [AVI] you’ll see a number of files. The file you should mark is often the longest one (see image above). Mark the file and choose Options to the right. The following window will appear: Press the floppy disk to select where to put the file. Mark for example Local Disk (C:). Then choose Make new folder. In this example we have made the folder C:\ripp\.
- Page 34 Press Start/All Programs and open avi.NET. The following window will appear: Press Load File and enter the folder where you have saved the ripped DVD. Mark the file called xxxxxxx.VOB. When you press OK the index process will start. This will take a while, depending on your computer. When the index process is done the video will automatically start in a preview window.
- Page 35 Steg 4: Change image size to make the film fit the Neonode screen Now there’s only one thing left to do before you can transfer the file to the Neonode. That is to change the image size to make the film fit the Neonode screen.
- Page 36 BetaPlayer! To watch films in full screen on your Neonode you need a third party application called the BetaPlayer. If you haven't already downloaded and installed the Betaplyer on your Neonode you can read how to do it in our BetaPlayer guide.
-
Page 37: Betaplayer
BetaPlayer folder to your Neonode. Put it in Storage Card\Program Files. Disconnect your Neonode from the computer. Open Storage Card\Program Files\BetaPlayer and scroll down to and mark the file called player_ce3.exe. Tap the screen to start the BetaPlayer. -
Page 38: Podcast To Your Neonode
Please note: The BetaPlayer is a third party application, thus its navigation and functionalities aren’t consistent with other Neonode applications. Neonode can't take responsibility for or give support on third party applications you install on your mobile device. RedNeo is a forum created by Neonode users and is not connected to Neonode AB. -
Page 39: Improve Ring And Alarm Sound Volume
As new podcast files become available, Doppler will look at the podcast feed you’ve signed up to and download the new content. To get the new files you just have to open Doppler, click on Retreive now and then transfer the new content to your Neonode as described above. - Page 40 Now, your sound will probably not have the maximum amplitude possible. To edit the sound so it becomes a sound with maximum amplitude press Edit/Select…/All to mark the sound. Then press Effect/Amplify… A window that looks like this will open: The value that is automatically set in the Amplification (db): textbox (in this example 3.9) is the amplification value that will amplify the sound so that it becomes a sound with maximum amplification at some point.
-
Page 41: Gprs And Mms Settings
The settings for most new models will work on your Neonode. The best way to get settings for GPRS and MMS is to visit your operator’s website and send them to your Neonode with an automated configuration SMS. If you have tried that, but the settings for some reason don’t work, you can enter them manually. - Page 42 The best and easiest way to get settings for GPRS and MMS to your Neonode is to send them from the operator’s website with automated configuration SMS's.
Need help?
Do you have a question about the N1 and is the answer not in the manual?
Questions and answers