Table of Contents
Advertisement
Quick Links
Advertisement
Table of Contents

Related Manuals for Keurig Eccellenza touch


Summary of Contents for Keurig Eccellenza touch
- Page 1 January 27, 2022 3.1.0 Operation Manual VKI Publication #100308-001...
- Page 2 ® publication. Keurig is not responsible for misinterpretation of any information contained in this publication. Keurig is not responsible for injuries or damages resulting from incorrect or improper use of this equipment, unauthorized modifications to the equipment, the use of non- original replacement components in the equipment, or improper installation of the equipment.
-
Page 3: Table Of Contents
The Touch Screen .................................. 16 Selecting and Dispensing a Beverage Using the Touchscreen ..................16 Selecting and Dispensing a Beverage Using the Keurig® Remote Brew App (optional Touchless Kit required) ....17 Filling the Coffee Bean Dispensers ............................18 Adjusting the Coffee Dispenser Divider ..........................19 Filling the Powder Dispensers ............................... - Page 4 Operation Manual General Settings ..................................42 Installation..................................42 Waste Management (Waste Chute) ..........................42 Regional .................................... 42 Language ..................................42 Units of Measure ................................. 43 Date and Time ................................44 Display and Sound ................................45 Auto Rinsing ..................................45 Periodic Trigger................................45 Power Settings ..................................
- Page 5 Eccellenza Touch™ Operations Tab ................................102 Wiper Home Position ..............................102 Remove Filter ................................102 Calibrate Powder Level .............................. 102 Calibration ..................................103 Calibrate Coffee Gram Throw ............................ 103 Calibrate Powder Low Level Detection ........................104 Manual Activation ................................105 Coffee System ................................
- Page 6 Operation Manual VKI Publication #100308-001...
-
Page 7: Section 1 - Safety Information & Equipment Specifications
Eccellenza Touch™ E C T I O N Safety Information & Equipment Specifications Your safety is extremely important to us. To avoid personal injury or damage to the equipment and its surrounding areas, it is imperative that you read and understand the safety information outlined in this section before proceeding with the installation and operation of this equipment. -
Page 8: Important Safeguards And Precautions
Operation Manual Important Safeguards and Precautions This equipment is designed for indoor use ONLY and must never be installed outdoors. The installation of this equipment must comply with all municipal, state/provincial, and federal electrical and plumbing codes. Installation and servicing of this equipment must only be performed by qualified personnel. - Page 9 Eccellenza Touch™ Always switch the power off and disconnect the service cord when cleaning the interior of this equipment. Components inside this equipment can cause electrical shock resulting in personal injury. Use caution when servicing the water tank or any of its components - the water in the tank and the tank components may be extremely hot and can cause severe burns.
-
Page 10: Specifications
Operation Manual Specifications Voltage Rating 120 Volts AC @ 60hz (120 Volt Model) - 15 Amps Heater Wattage 1300 Watts Weight 80 lbs (36,3 kg kg) Cup Sizes 8-oz, 10-oz, 12-oz Cup Clearance 6.25” (15.9 cm) with cup stand; 7.5” (19.0 cm) without cup stand Temperature Electronic Probe Control... -
Page 11: Section 2 - Setting Up The Equipment
Eccellenza Touch™ E C T I O N Setting up the Equipment Unpacking Prior to signing for the delivery, check the shipping carton for damage. Indicate any damage on the delivery slip and have the delivery driver sign to acknowledge the damage. Damages during shipping must be claimed with the carrier, and not with VKI Technologies. -
Page 12: Counter Seal
When transporting the unit for installation, leave it on the base of the packaging to reduce the risk of damage to the levelers. Counter Seal In order to comply with NSF Certification requirements, the Eccellenza Touch™ must be installed on top of the provided counter seal. VKI Publication #100308-001... -
Page 13: Equipment Overview - Exterior
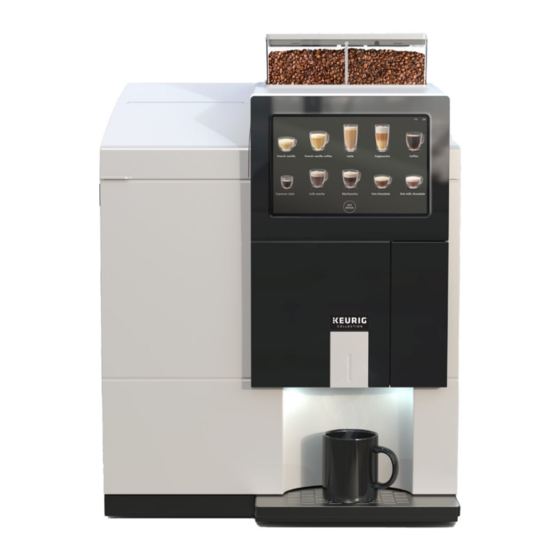
Eccellenza Touch™ Equipment Overview - Exterior Coffee Bean Dispensers USB Port *With Waste Powder Bin Removed Dispensers Touch Screen *With Waste (HMI) Bin Removed Door Lock Waste Bin Cup Stand Equipment Overview - Interior Coffee Bean Dispensers Powder Dispensers Bean Grinder... -
Page 14: Installation Precautions
(including water coolers), a separate in-line shut off valve must be installed onto each individual equipment unit. The Eccellenza Touch™ is factory-equipped with an integrated backflow prevention check valve. An additional external backflow prevention system is not necessary. -
Page 15: Water Filter
Starting the Equipment The main power switch for the Eccellenza Touch™ is located at the rear of the machine, on the right side. To switch the power ON, toggle the power switch to the " l " position. -
Page 16: The Touch Screen
Vending Price and Credit information (if applicable) QR Code for Keurig® Remote Brew App (Touchless) – Optional hardware kit required Selecting and Dispensing a Beverage Using the Touchscreen Place your cup or mug on the cup stand at the bottom of the door. -
Page 17: Selecting And Dispensing A Beverage Using The Keurig® Remote Brew App (Optional Touchless Kit Required)
Eccellenza Touch™ Selecting and Dispensing a Beverage Using the Keurig® Remote Brew App (optional Touchless Kit required) Place your cup or mug on the cup stand at the bottom of the door. Using your camera app on your iPhone or Android smart phone, scan the QR code that appears on the screen of the machine. -
Page 18: Filling The Coffee Bean Dispensers
Operation Manual Filling the Coffee Bean Dispensers The Eccellenza Touch™ comes pre-configured as follows: Coffee 1 - French Roast (bolder blend), Coffee 2 - Colombian Should you prefer a different configuration, you can reconfigure the coffee dispensers and blend names it in the 'Setup' menu (see page 75). -
Page 19: Adjusting The Coffee Dispenser Divider
Eccellenza Touch™ Adjusting the Coffee Dispenser Divider The coffee dispenser in the Eccellenza Touch™ can be reconfigured to increase the bean capacity for Coffee 1 by approximately 35% (note, however, that doing so decreases the bean capacity for Coffee 2). This is accomplished by changing the position of the center divider inside the coffee bean dispenser. -
Page 20: Filling The Powder Dispensers
Operation Manual Filling the Powder Dispensers The Eccellenza Touch™ comes pre-configured as follows: Powder 1 - Hot Chocolate Powder 2 - French Vanilla Powder 3 – Milk* Do NOT pack the powder into the dispensers! *Do NOT use coffee whitener instead of milk as it may create blockages in... -
Page 21: Checking Water Temperature
The date and time settings are found in the 'General Settings' menu (see page 42). Water Levels The Eccellenza Touch™ is factory preset to only dispense 8-oz, 10-oz, and 12-oz cups sizes. The water levels can be fine-tuned in the 'Setup' menu (see page 66). -
Page 22: Clearing Error And Reminder Messages
Operation Manual The following symbol is used to identify a "touch" location on the machine's touch screen. Clearing Error and Reminder Messages Should an error or reminder message be triggered, a notification is displayed at the lower right of the screen. In our example, there is only one notification message present, as indicated by the number "1"... - Page 23 Eccellenza Touch™ In this case, the 'Powder 2' dispenser is running low and must be refilled. Open the powder dispenser lid and refill the dispenser. Once done, tap the checkmark to clear this message. If you cannot immediately refill the dispenser, tap the 'X' to close this window without clearing the message.
-
Page 24: System Status Report Screen
Operation Manual System Status Report Screen The System Status Report screen provides a quick snapshot of the equipment’s serial number and other important information. If contacting VKI for technical assistance, you may be asked to send a photo of the System Status Report screen as it may prove useful during equipment troubleshooting. - Page 25 Eccellenza Touch™ The System Status Report screen opens to provide a quick snapshot of the machine’s most important information. This includes: • the serial number and other unique identifiers • current temperature • some maintenance information • active errors and logs •...
- Page 26 Operation Manual VKI Publication #100308-001...
-
Page 27: Section 3 - Configuring The Equipment
Eccellenza Touch™ E C T I O N Configuring the Equipment The following symbol is used to identify a "touch" location on the machine's touch screen. Accessing the Configuration System To access the equipment Configuration System: Touch and hold the upper left corner of the screen for 5 seconds and then release. - Page 28 Operation Manual If the correct PIN is entered, the 'System Status' screen shown below opens. If an incorrect PIN is entered, it remains on the keypad screen. If logging in as an Operator, all menus will be visible as you have full rights/access to the programming mode.
-
Page 29: Programming Menu Structure
Eccellenza Touch™ Programming Menu Structure The Setup menu drop-list can be viewed at any time by touching the triple-bar icon on the upper left side of the screen. When the drop-list is open, simply touch the required setting on the list to open the corresponding configuration menu. -
Page 30: Sub-Menu Tabs
Operation Manual Sub-Menu Tabs Some of the settings in the drop-down list also contain sub-menus. If you want to view a sub- menu, select (tap) one of the sub-menu tabs at the top of the screen. If multiple tabs are available, the currently active tab is identified by a green line directly beneath the sub-menu name, which also appears white instead of gray. -
Page 31: Dashboard
Eccellenza Touch™ Dashboard The Eccellenza Touch™ 'Dashboard' displays statistics on counters, consumption, and sales (vending). Counters The 'Counters' tab displays a view of the internal counters in the machine. The counters provide a snapshot of the machine's consumption and sales. Please note that these counters are displayed based on the time period chosen and are non-resettable. - Page 32 Operation Manual To specify the time period for which you want to view the data: Tap on the "From" field and enter the desired month, date and year and tap "Done". Tap on the "To" field and enter the desired month, date and year and tap "Done". VKI Publication #100308-001...
-
Page 33: Beverages Tab
Eccellenza Touch™ The screen now displays the statistics for the time period selected. Beverages Tab The 'Beverages' tab allows you to select and view the consumption (by cups) for a specific time period for each of the individual beverages the equipment dispenses. To specify the time period: Tap on the "From"... - Page 34 Operation Manual Tap on the "To" field and enter the desired month, date and year and tap "Done". The number of cups brewed and the amount of money collected (if applicable) are displayed for the time period that was selected. If you would prefer to view the results as a Daily, Weekly or Monthly average, you can change the parameter in the 'Show result by average' field.
- Page 35 Eccellenza Touch™ Tap on the green "down" arrow beside any of the beverages shown to expand the selections for a more thorough breakdown of the data shown. For example, the "Coffee" field shows 6 cups. Tapping on the green "down" arrow beside 'Coffee' shows you that of the 6 cups brewed, 4 were French Roast, 1 was Colombian and 1 was House Blend.
-
Page 36: Ingredients Tab
Emailing Data or Saving it to a USB Flash Drive All of the data available in the Eccellenza Touch™ Dashboard can either be saved to a USB flash drive, or sent to an email address as an attachment (if an email address has been set in the "Network"... -
Page 37: System Status
Eccellenza Touch™ System Status The 'System Status' screen displays the status of the machine (including current faults) and provides logs of previous faults. The equipment system info (such as serial number, firmware version, IP address, etc.) and maintenance functions are also found here. -
Page 38: Fault Codes
Operation Manual Fault Codes Should a fault be present, it is identified in the "Current Status" tab, under the "System Status" menu, using one of the codes from the list below. The right section of the screen shows the component code (and pending component codes) and a brief description of the fault. CODE COMPONENT CODE... -
Page 39: Logs
Eccellenza Touch™ Logs The 'Logs' tab shows the fault history of the equipment in list form (from newest to oldest). Codes marked in Red identify that servicing was required. Yellow-marked codes warn of potential faults. Codes in green identify that the fault was corrected, and when it was corrected. -
Page 40: Event Deactivation
Operation Manual Event Deactivation The Event Deactivation tab allows you to deactivate any of the error messages that can potentially appear should the system detect a fault. Deactivating error messages allows the equipment to continue to operate with a defective component, as a fault notification is not displayed. This, in turn, may cause further damage to the equipment and/or its surroundings. - Page 41 Eccellenza Touch™ 2. Under the "Turned Off / On" heading at the right, turn off the error to be deactivated using the slider (green slider = ON, gray slider = OFF). 3. Repeat the procedure for any other components, if necessary.
-
Page 42: General Settings
Regional Language The Eccellenza Touch™ comes pre-loaded with three different languages (English, French and Spanish), however only two can be active at one time. In this tab, you can define the Primary Language, which will be the default, and the Secondary Language, which will be selectable by the user. -
Page 43: Units Of Measure
Units of Measure The units of measure displayed by the Eccellenza Touch™ can be set in this tab. Liquid units can be set to either milliliters (ml) or ounces (oz), and the temperature can be set to either °C or °F. -
Page 44: Date And Time
Operation Manual Date and Time If the ‘Telemetry’ option is activated, the time and date will be set automatically. To manually adjust the date, time and time zone setting, first, set the 'Region' (Time Zone) in which you are located, and then select the 'Date and Time' feature to open the scroll list. ... -
Page 45: Display And Sound
Eccellenza Touch™ Display and Sound This screen is used to set the volume level (available only when speakers are used) and the brightness of the screen. Auto Rinsing This screen is used to set the frequency at which the notifications for mandatory Brewer Rinse and Powder Rinse cycles are triggered. -
Page 46: Power Settings
Operation Manual Power Settings The 'Power Settings' Menu is used to set the energy saving options available in the Eccellenza Touch™. Auto Dim Delay If the 'Auto-Dim Delay' feature is activated, the screen will dim slightly after the preset amount of time to reduce energy consumption. -
Page 47: Energy Saving
Eccellenza Touch™ Energy Saving To conserve energy, the Eccellenza Touch™ can be set to go into an 'Energy Saving' mode during preset periods of time. While in Energy Saving mode, only the machine screen functions to advise users that the machine is in Energy Saving mode. All other components are disabled, including the heating element. - Page 48 Operation Manual Select the 'Day' for which you want to enable the Energy Saving mode (in this example, Monday is selected). If using the Energy Saving mode, it must be activated and set individually for each day of the week. Tap the 'Enable Energy Saving' slider to enable the Energy Saving mode.
- Page 49 Eccellenza Touch™ To set the time that the machine turns ON (for Mondays in this example), tap on the 'Turn on machine time' setting. Adjust each of the fields by scrolling up or down to the required setting. Once all are set, press 'Done' to save the time setting.
- Page 50 Operation Manual Repeat this procedure for setting time that the machine turns OFF by tapping on the 'Turn off machine time' setting, and adjusting the time. Now that Monday is set, repeat the complete procedure to set the Energy Saving for every other day of the week.
-
Page 51: Vending (Coin Acceptor & Cashless)
, which when enabled, prevents people from using the Eccellenza Touch™ as a 'change maker'. This is usually done by inserting a $1 or $2 coin and then pressing the coin return button to have the machine dispense change in quarters. There are three possible configurations for this option: •... -
Page 52: Beverages Tab
Operation Manual Beverages Tab The main page displayed in this tab shows a list of all of the available beverages and the pricing set for each. To change the price of a beverage, tap the "Edit Pricing" button and the screen will change to the pricing menu. -
Page 53: Setting The Base Price
Eccellenza Touch™ Setting the Base Price Select the "Beverage Type" using the left/right arrows. Set the "Beverage Type" price using the '+' or '-' buttons. The default price setting is $1 for all selections. The base price of the product selected is shown in the "Base Price"... - Page 54 Operation Manual Select the cup size using the left/right arrows. Increase the cup size price using '+' or '-' buttons. The price displayed here is added to the beverage type pricing. The total price of the product and cup size selected is shown in the "Base Price"...
-
Page 55: Adjusting The Price For Exceptions
Eccellenza Touch™ Adjusting the Price for Exceptions This section allows you to create an exception and price a specific ingredient higher or lower than the base price. The images below show the available "Exception" pricing options, based on the type of beverage that is selected in the left section. -
Page 56: Pricing Hot Water
Operation Manual If you go back to the main screen of the Beverages tab, you can see the pricing changes that were made. The prices in blue indicate pricing exceptions. To change the pricing for other beverages that are listed, tap the "Edit Pricing" option. To reset the "Exception"... -
Page 57: Devices Tab
Eccellenza Touch™ Devices Tab This tab provides detailed information about the vending devices connected to the Eccellenza Touch™ (if this information is available on the device). The type of information displayed is shown in the image below. This information is useful when troubleshooting the vending devices with the manufacturer of these devices. -
Page 58: Network
WIFI Should you want to establish remote communication with the Eccellenza Touch™, you'll first need to enable the WiFi feature by tapping on the 'WiFi Connexion' slider. Once WiFi is enabled, the Eccellenza Touch™ begins scanning for any wireless networks in its vicinity. - Page 59 Without these credentials, it is not possible to connect to a network to use the machine's WiFi capabilities. Select the network to which you want the Eccellenza Touch™ to connect, and then tap on the 'Connect' button.
-
Page 60: Hidden Ssid
Operation Manual The Eccellenza Touch™ now communicates with the network server and if the correct credentials were used, network access is granted. Once connected to the network, a green indicator appears to the right of the network name/SSID. Telemetry and WiFi cannot be enabled at the same time – you must select one or the other, after rebooting the machine. -
Page 61: Smtp
62 for details). Only after obtaining network access, the Eccellenza Touch™ can then be configured to upload notifications concerning consumption, sales and faults/messages directly to your SMTP server. Tap on the 'Requires Authentication' slider to activate the SMTP feature. -
Page 62: Online Smpt Server Providers
Also note that the provider may impose limits and certain conditions. Notifications The 'Notifications' screen is used to configure the Eccellenza Touch™ to send notifications concerning ingredient consumption, beverage sales, counters and faults/messages directly into your email's Inbox. Fault and message notifications are sent immediately after they occur so that they can be addressed as soon as possible to minimize downtime. - Page 63 Eccellenza Touch™ Type the email address to which the notifications will be sent, and press 'Accept Change'. Set the time at which each you wish to receive each type of notification by tapping the respective time field and adjusting it accordingly.
- Page 64 Operation Manual The following are some examples of the types of reports that are sent to the email address(es) entered: VKI Publication #100308-001...
-
Page 65: Telemetry
VKI equipment using your computer Browser, without having to be on-site. Please note that the Telemetry feature on the Eccellenza Touch™ only works if you have subscribed to VKI’s Telemetry Management System. Please contact VKI Customer Service for pricing and details. -
Page 66: Setup
Operation Manual Setup The Setup screen is used to configure and rename products and beverages, set recipes and timings, set temperature, and perform product calibrations. Beverages Setting Coffee Strength The coffee strengths can be adjusted on the main screen of the ‘Beverages’ menu. In the example below, all three coffee strengths are enabled (green). -
Page 67: Setting The Default Coffee Blend
Eccellenza Touch™ Setting the Default Coffee Blend While in the 'Beverages' tab, you can set the default coffee type to be used for each beverage that uses coffee. By default, they are all set to “French Roast”, as you can see in the image below. -
Page 68: Disabling Beverages
Operation Manual Disabling Beverages While in the 'Beverages' tab, you can also disable one or multiple beverages, if required. To disable a beverages, simply touch the image of the beverage on the screen, and the image background changes to red, indicating that the beverage is disabled. To re-enable the beverage, touch it once more –... -
Page 69: Configuring Cup Sizes
Eccellenza Touch™ Configuring Cup Sizes Select the “Sizes” tab if you want to change the default cup size, select a pre-set cup size label, or customize the cup size label for a specific beverage or for multiple beverages. Setting the Default Cup Size The Medium cup size is the pre-set default cup size. -
Page 70: Selecting And Customizing Cup Size Labels
Operation Manual Selecting and Customizing Cup Size Labels If the “Units” option is selected, the cup size labels will display the cup size volume, either in millilitres or by ounces, depending on the units setting in the ‘Regional” tab under the ‘General Settings’... - Page 71 Eccellenza Touch™ Select the beverage whose label you would like to customize. Note that any changes made to this beverage can then be applied to multiple beverages at the end of this procedure. Select the existing label that you want to customize (cup size and language).
- Page 72 Operation Manual Using the keyboard, change the name of the cup size label and then press “Accept Change”. In this example, “Small” is being changed to “Regular”. The changes made will now be visible on the main label screen. Tap on “Apply” to apply this change to this particular beverage.
- Page 73 Eccellenza Touch™ To apply the change(s) you made to multiple beverage, tap on “Apply to Many”. The screen changes to show all of the available beverages. Tap all of the beverages for which you want the new labels you created to apply. The selected beverage backgrounds will change color to green (like the “Coffee”...
- Page 74 Operation Manual Once you are done, tap on “Apply” to apply the changes made. When you exit the programming mode, all of the custom labels that were created will be visible to the end-user.. VKI Publication #100308-001...
-
Page 75: Ingredients
Eccellenza Touch™ Ingredients Should you need to change the name of any of the coffee ingredients, it can be easily done in 'Ingredients' tab. When this tab is selected, a list of the coffee and powder names is displayed. Please note that only the coffee names can be changed (in each language), if required. - Page 76 Operation Manual With the cursor at the end of the Colombian text, press the 'backspace' button until all of the text is deleted. When the text is deleted, 'Coffee 2 English* Name' is displayed in this field instead of an actual blend name. Using the keyboard, type in the new name for Coffee 2 - which in this case changes to 'Mocha Java'.
- Page 77 Eccellenza Touch™ Tap the 'Accept Change' button to save your changes. Coffee 2 has now been renamed from Colombian to Mocha Java on the list of ingredients. NOTE: To restore the default ingredient names, tap the blue “Restore Defaults” button.
-
Page 78: Recipes
Operation Manual Recipes The product settings for every available beverage can be adjusted in the 'Recipes' tab of the setup. Please disregard any references to the Carafe feature and settings as the "Carafe" option is not currently available. Setting Coffees Tap on the 'Selected Beverage' location beside Line 1. - Page 79 Eccellenza Touch™ Swipe up or down to scroll through the list of beverages and then select the one that requires adjusting by tapping 'Done'. In this example, 'Coffee Colombian' is selected. On Line 2, select the cup size that needs to be adjusted. In this example, the 'Regular' cup size is selected.
- Page 80 Operation Manual Notice that the Colombian setting is now active (not grayed out) in the 'Ingredients Quantities' section of the screen. This indicates that this setting can now be adjusted. Also note the 'Intensity Customization' setting on Line 3. This is used to adjust the 'Mild' and 'Strong' strength coffee settings.
- Page 81 Eccellenza Touch™ In our example, we will increase the Colombian coffee setting for a medium cup size to 15 grams. We also want to adjust the 'Mild' strength setting so that it is -15% milder, than the actual Colombian setting of 15 grams, instead of -20% milder by increasing (+) the 'Mild' setting.
-
Page 82: Gourmet Mode
To brew a test beverage using the new settings, place a cup on the cup stand and tap on the blue 'Test Recipe' button on line 3. The Eccellenza Touch™ will now dispense the beverage so that you or your customer can perform a taste test. If further adjustments are required, make the changes and test the beverage again until you get the desired results. -
Page 83: Setting Specialty Beverages
Eccellenza Touch™ Setting Specialty Beverages Tap on the 'Selected Beverage' location beside Line 1. A scroll list of all the available beverages appears. Swipe up or down to scroll through the list of beverages, select the one that requires adjusting and then by tap 'Done'. In this example, 'Mochaccino French Roast' is selected. - Page 84 Operation Manual On Line 2, select the cup size that needs to be adjusted. In this example, the 'Small' cup size is selected. Notice that all of the ingredients required to make a Mochaccino French Roast are now active (not grayed out) in the 'Ingredients Quantities' section of the screen. This indicates that each of these ingredients can now be individually adjusted.
-
Page 85: Disabling "Press & Hold" Hot Water
To brew a test beverage using the new settings, place a cup on the cup stand and tap on the blue 'Test Recipe' button on line 3. The Eccellenza Touch™ will now dispense a Mochaccino French Roast that you or your customer can taste test. If further adjustments are required, make the changes and the test the beverage again until you get the required results. -
Page 86: Restore Defaults
Operation Manual Restore Defaults Should you need to restore the default settings of a certain beverage, select that beverage in the 'Recipes' tab, as well as a cup size, and then tap the 'Restore'Defaults' button. The Factory Settings for only that particular selection will be restored. When the factory settings are restored for a selection, any changes that were previously made to the settings will be overwritten. -
Page 87: Configuring For Decaf
Eccellenza Touch™ Configuring for Decaf Configuring the Eccellenza Touch™ to deliver a decaffeinated coffee, as well as decaffeinated specialty beverages, can be done quickly and easily by simply renaming one of the two coffee blend names. In the example below, Coffee 2 is renamed to 'Decaf' (see... -
Page 88: Water
The water settings for every available beverage can be adjusted in the 'Water' tab of the setup. The Eccellenza Touch™ is factory preset to only dispense 8-oz, 10-oz, and 12- oz cups sizes. These settings can be fine-tuned in this menu. - Page 89 Eccellenza Touch™ Select the specific beverage for which you want to adjust the water. In this example, 'Mochaccino' is selected. All three cup sizes are now displayed. To increase or decrease the quantity of water for a specific cup size, press the ' - ' or ' + ' buttons in the corresponding box.
- Page 90 Operation Manual Place a cup on the cup stand and tap on the 'Test Recipe' button to make a test vend with the new water settings. Make any adjustments, if necessary. To reset a specific setting back to its default, press the 'Reset Default' setting for the corresponding cup size.
- Page 91 Eccellenza Touch™ To return to the 'Specialty Coffees' screen, tap the 'Back to Specialty Coffees' button. From this screen, either select another specialty beverage to adjust, or tap the 'Back to Beverage Types' button to return to the main screen.
- Page 92 Operation Manual 10. The following screen appears if 'Coffees' is selected. 11. The following screen appears if 'Powder Beverages' is selected. 12. Should you need to reset all of the water settings back to their default settings at the same time, you can do so from the main 'Water' screen simply by tapping on the 'Reset all Defaults' button.
-
Page 93: Brewing
Eccellenza Touch™ Brewing All water temperature related settings are set in this tab. Water Temperature Vend Enable By activating and setting the 'Vend Enable' feature, you are setting the minimum temperature at which the machine will brew a beverage. Should the temperature drop below this setting, you will not be able to brew a beverage and the screen will display a 'Tank is Heating' message. -
Page 94: Advanced
Operation Manual Advanced In this tab, you can choose the beverage set (types of coffees and cup sizes) required by tapping the “Change Beverage Set” tab. Select the beverage set required from the list and tap ‘Save’. Beverage Set List (Default) Name Cup Sizes Left hopper... -
Page 95: Administrator
Eccellenza Touch™ Administrator The Administrator can set or change their own PIN number in this tab. The default pin for the Administrator is '234567'. We recommend that you change this pin on the machine's initial set-up. Store the new PIN information somewhere where it can easily be found (in your customer's file, for example)! Tap on 'New Pin' (or change PIN, if changing it) to open the numeric keypad. - Page 96 Operation Manual Tap on 'Confirm PIN', and re-enter the same PIN on the keypad, and then tap on 'Accept Change'. If the PINs matches, you will see a checkmark beside both entries to inform you that the new PIN has been accepted. After entering their PIN on the main screen, the Administrator will have access to the menus for which the Operator gave them the necessary permissions.
-
Page 97: Operator
Eccellenza Touch™ Operator The Operator can set or change their own PIN number in this tab, and can grant the necessary privileges (rights and access) to the Administrator. The default pin for the Operator is '345678'. We recommend that you change this pin on the machine's initial set-up. - Page 98 Operation Manual A checkmark appears beside the PIN if it was entered correctly. If you need to change the Operator PIN, tap 'New PIN', and follow the prompts. In the screenshot above, in the 'Administrator Privileges' section you'll notice that almost all of the options are green.
-
Page 99: Maintenance
Eccellenza Touch™ Maintenance Cleaning & Sanitizing Tab This tab provides access to maintenance-related options. The “Standard Rinsing” options are simply automated quick-rinse cycles for the brewer and for the three whippers. The “Cleaning & Sanitizing” cycles require the use of special cleaning products, therefore user intervention is required. -
Page 100: Cleaning & Sanitizing Section
Operation Manual Cleaning & Sanitizing Section Place a large cup on the cup stand prior to running these cycles as up to 16-oz of water will be dispensed once the cycle is activated. Brewer Cleaning The brewer cleaning cycle performs a thorough cleaning of the interior of the brewer, including the filter screen. -
Page 101: Grinder Cleaning
Eccellenza Touch™ Grinder Cleaning The grinder cleaning cycle removes coffee oils and buildup from the grinder heads (burrs). This cycle requires the use of a cap full of the Urnex SuperGrindz A01 cleaning pellets (26 grams / 115 pellets), and should be performed on a monthly basis, or more frequently if required. -
Page 102: Operations Tab
Operation Manual Operations Tab This tab provides access to maintenance-related options. Wiper Home Position This option reinitializes the brewer wiper to its home position (same procedure that occurs when the waste bin is removed and re-inserted). Remove Filter This option causes the brewer piston to cycle all the way to the bottom of the cylinder, which will "pop"... -
Page 103: Calibration
Eccellenza Touch™ Calibration The Calibration menu allows you to calibrate the coffee gram throws (individually for all coffee dispensers) and to calibrate the low powder detection level. Calibrate Coffee Gram Throw Select the coffee dispenser to be calibrated. VKI Publication #100308-001... -
Page 104: Calibrate Powder Low Level Detection
Operation Manual Follow the prompts and step-by-step instructions that are displayed on the screen. Touch ‘Setup Done’ once complete to return to the main Calibration screen. Repeat for the other coffee dispenser(s) if required. Calibrate Powder Low Level Detection This option automatically calibrates the powder motors and dispensers to detect when the powder lever is too low and requires refilling. -
Page 105: Manual Activation
The Manual Activation screen allows you to test individual components to ensure they are functioning properly. The main screen outlines all of the systems within the Eccellenza Touch™. Once the main system is selected, any of the components within this system can then be selected. - Page 106 Operation Manual A new screen now appears showing all of the components that are part of the Coffee System. Each component is identified by a unique component code. CODE COMPONENT Waste Bin Presence Detection Grinder Waste Bin Full Sensor Coffee 1 Motor Coffee 2 Motor Brewer Motor Brewer Wiper Motor...
- Page 107 Eccellenza Touch™ The testing options now appear on the right section of the screen. In this example, the only option available is to activate the grinder for 3 seconds. Tap the “Activate” button and the grinder (only) will energize for 3 seconds.
-
Page 108: Powder System
Operation Manual Powder System If the Powder System is selected from the main Engineering screen, the following component options appear for testing: CODE COMPONENT Blower (Powders) Powder 1 Motor Powder 2 Motor Powder 3 Motor Powder 1 Whipper Motor Powder 3 Whipper Motor Powder 2 Whipper Motor It is extremely important to note that when testing the powder motors (M1, M2 or M3), ONLY the powder motor will activate. -
Page 109: Water System
Eccellenza Touch™ Water System If the Water System is selected from the main Engineering screen, the following component options appear for testing: CODE COMPONENT Heating Element Coffee Valve Powder 3 Valve Powder 1 Valve Hot Water Valve Inlet Valve Powder 2 Valve... -
Page 110: Miscellaneous Components
Operation Manual Miscellaneous Components If Miscellaneous is selected from the main Engineering screen, the following component options appear for testing: CODE COMPONENT Exhaust Fan Cup Lighting VKI Publication #100308-001... -
Page 111: Multimedia
Eccellenza Touch™ Multimedia The Multimedia menu is used to configure the images or the videos that are played when a specific beverage is being prepared. Each beverage can be configured independently, if you so choose. System Default With this option selected, the factory pre-set default images and videos will be used during the beverage preparation process. - Page 112 Operation Manual 2. From the list, select the video you wish to play during the preparation of the selected beverage. 3. To select an image instead of a video, tap on the “Image” button and select the desired image from the list. If you have loaded custom videos or images that were created for you by VKI, they will be integrated into the Media Library and they will appear on the list(s) in steps #2 and #3 above.
-
Page 113: Copy From Media Set
Eccellenza Touch™ Copy from Media Set This option allows you to globally set the images and videos that appear during the beverage preparation process. It is normally set to use the ‘VKI Default’ media. However, If you have loaded any custom media, you can switch to it using this option. -
Page 114: Requesting Custom Images Or Videos
Operation Manual Requesting Custom Images or Videos To place an order for your custom image and/or video file, you need to send your image/video file (meeting the criteria outlined below) to tech.support@vkitech.com. We will configure the necessary files package that will enable you to load your custom image and/or video into the machine and we will provide you with a download link to access it. -
Page 115: Section 4 - Care And Maintenance
E C T I O N Care and Maintenance To keep the Eccellenza Touch™ running efficiently and at peak performance, the following maintenance procedures must be performed at their specified intervals. It is recommended that equipment maintenance be scheduled at a time that would be the least disruptive to your customers. -
Page 116: Every 3 Years
Thoroughly dry the dispenser before re-installing it. For detailed information about removing the coffee dispenser, consult the Eccellenza Touch™ Service Manual (VKI Publication #100309-001). ► Cleaning the Powder Dispensers - empty, remove, and clean the powder dispensers with warm water and dish soap. -
Page 117: Section 5 - Error And Reminder Messages
Eccellenza Touch™ E C T I O N Error and Reminder Messages Main Screen Message Displayed Condition Action(s) Required Backend Services Unreachable. Will reconnect automatically. If not, The connection was lost. Trying to reconnect... reboot the machine. • System Starting •... -
Page 118: System Status Screen
Operation Manual System Status Screen Code Message Displayed Condition Action(s) Required 1 - Press "Acknowledge" to reset Electronic Board Communication Lost Communication between the 2 - Reboot the machine. Please Call for Service or Press 3 - If message persists, check the control board and HMI is lost. - Page 119 Eccellenza Touch™ Code Message Displayed Condition Action(s) Required 1 - Inspect wiring and connections to the heater relay and heater element. Heater current is close to maximum 2 - Heater element may be drawing Heater's current is close to critical level operating level.
- Page 120 Operation Manual Code Message Displayed Condition Action(s) Required 1 - Check fan wiring and connection to the control board. 2 - Make sure that the software Fan is not present or has abnormal Fan is not present or operating version is 2.6.3 or higher. 3 - Clean any accumulation from fan.
- Page 121 Eccellenza Touch™ Code Message Displayed Condition Action(s) Required 1 - Check for clogging in the mixing bowls. 2 - Make sure the Impellers are Whippers current is close to critical Powder Whipper current is close to properly installed and not touching level maximum operating level.
- Page 122 Operation Manual Code Message Displayed Condition Action(s) Required 1 - The brewer may be seized/jammed. Brewer current has exceeded the Brewer current is over safety level 2 - The brewer motor may need to maximum operating level. be replaced. 1 - Check the wiring and Brewer current is under minimum Brewer current is below the connections to the brewer motor.
- Page 123 Eccellenza Touch™ Code Message Displayed Condition Action(s) Required 1 - The wiper may be jammed or The wiper motor current was over binding. Wiper current is over safety level the configured maximum operation 2 - The wiper motor may need to be level.
- Page 124 Operation Manual Code Message Displayed Condition Action(s) Required 1 - Clear the message. 2 - Check wiring and connections to Valves & Relay current is under Valves & Relay current is below the inlet and outlet valves. minimum operation level minimum operating level.
-
Page 125: Section 6 - Updating Firmware
HMI (touch screen) and void its warranty. Firmware updates may be released periodically for the Eccellenza Touch™. These updates may consist of fixes, new options and features, customizations, etc. This section guides you through the simple process of updating your equipment to the latest firmware. - Page 126 USB flash drive to reboot the machine (the prompt appears between two blue lines). Remove the flash drive and the Eccellenza Touch™ will reboot itself twice. While it is rebooting, re-install the plug onto the USB connector and re-install the waste bin.
-
Page 127: Section 7 - Product Warranty Information
Any removal of or tampering with the serial number or date code of a component will void warranty. Keurig Green Mountain, Inc. warrants to the original purchaser that its coffee maker will be free of defects in materials or workmanship under normal use for one-year from the date of purchase. Keurig,...
Need help?
Do you have a question about the Eccellenza touch and is the answer not in the manual?
Questions and answers