LG RD-JT91 Owner's Manual
Lg dlp projector owner's manual
Hide thumbs
Also See for RD-JT91:
- Service manual (34 pages) ,
- Owner's manual (31 pages) ,
- Service manual (34 pages)
Table of Contents
Advertisement
Quick Links
Please read this manual carefully before operating
your set.
Retain it for future reference.
Record model number and serial number of the set.
See the label attached on the bottom of the set and
quote this information to your dealer when you
require service.
Model number
:
Serial number
:
RD-JT91
RD-JT92
OWNER'S MANUAL
Advertisement
Table of Contents

Related Manuals for LG RD-JT91


Summary of Contents for LG RD-JT91
- Page 1 Retain it for future reference. Record model number and serial number of the set. See the label attached on the bottom of the set and quote this information to your dealer when you require service. Model number Serial number RD-JT91 RD-JT92 OWNER’S MANUAL...
- Page 2 Warning This is a class B product. In a domestic environment this product may cause radio interference, in which case the user may be required to take adequate measures. RD-JT91 RD-JT91 RD-JT92 RD-JT92...
-
Page 3: Table Of Contents
Projector Status Indicators...10 Accessories ...11 Optional Extras...11 Installing and Composition Installation Instructions ...12 Basic Operation of the Projector...13 Using Kensington Security System...14 Turning on the Projector ...15 Turning off the Projector ...15 Focus and Position of the Screen Image...16 Selecting source mode ...16 Connection Connecting to a Desktop PC ...17... -
Page 4: Safety Instructions
Outdoor Installation Do not use the projector in a damp place such as a bathroom where it is likely to get wet. This may cause a fire or an electric shock hazard ! Power Earth wire should be connected. - Page 5 This may cause a fire or an electric shock hazard ! Do not turn the projector On/Off by plugging-in or unplugging the power plug to the wall outlet. (Do not use the power plug for switch.) It may cause mechanical failure or could give an electric shock.
- Page 6 Others Do not attempt to service the projector yourself. Contact your dealer or service centre. This may cause damage to the projector and could give an electric Shock as well as invalidating the warranty ! Others Be sure to unplug if the projector...
-
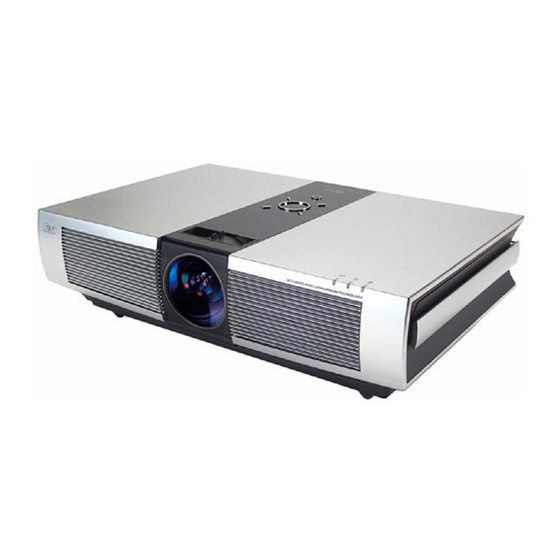
Page 7: Names Of Parts
Names of parts Main Body * The projector is manufactured using high-precision technology. You may, however, see on the Projector screen tiny black points and/or bright points (red, blue, or green). This can be a normal result of the manufacturing process and does not always indicate a malfunction. -
Page 8: Control Panel
Names of parts Control Panel MENU Button Selects or closes menus. AUTO Button POWER Button , KEYSTONE+/- Button MENU SOURCE KEYSTONE SOURCE Button Switches to RGB, DVI, Video,S-Video mode. VOLUME Button Adjusts volume level and functions of menus. KEYSTONE Checks present mode and AUTO saves the change of functions. -
Page 9: Remote Control
Remote Control POWER Button MENU Button VOL-/+, Button AUTO Button (Refer to p.24) BLANK Button (Refer to p.22) MUTE Button *Switches the sound on or off. Installing Batteries • Open the battery compartment cover on the back of the remote control and insert the batteries with correct polarity, match “+”... -
Page 10: Projector Status Indicators
Names of parts Projector Status Indicators * Lamp Indicator, operation indicator and temperature indicator at the top of the projector show the user the operating status of the projector. Orange Green(flashing) Operation Indicator Green Orange(flashing) Lamp Indicator Red(flashing) Green(flashing) Orange... -
Page 11: Accessories
* When applying a ceiling installer, use only the ceiling installer for projector. * Contact your service personnel for replacing a new lamp. * Projector lamp is reaching the end of its life and needs to be replaced with a new lamp. Projection Screen... -
Page 12: Installing And Composition
Don’t place the projector where it can be covered with dust. This may cause overheating of the projector. Do not obstruct the slots and openings of the projector. This may cause overheating and create a fire hazard. The projector is manufactured using high-precision technology. You may, however, see tiny black points and/or bright points (red, blue, or green) that continuously appear on the projector Screen. -
Page 13: Basic Operation Of The Projector
3.Position the projector so that the lens is set at a right angle to the screen. If the projector is not set at a right angle, the screen image will be crooked. If this is so then the keystone adjustment may correct this (Refer to page 22.) -
Page 14: Using Kensington Security System
Installing and Composition Using Kensington Security System G The projector has a ‘Kensington’ Security System Connector on the back panel. Connect the ‘Kensington’ Security system cable as below. G For the detailed installation and use of the Kensington Security System, refer to the user’s guide attached to the Kensington Security System set. -
Page 15: Turning On The Projector
(Green operation indicator flashes during cooling of the lamp.) G It will take about 5 second to display the picture after power on because the projector lamp has to warm up. G An image will appear after the operation indicator light turns (Green). -
Page 16: Focus And Position Of The Screen Image
1. While pressing the foot adjuster button, raise or lower the projector to place the screen image in the proper position. 2. Release the button to lock the foot in its new position. -
Page 17: Connection
Connecting to a Desktop PC * You can connect the projector to a computer of VGA, SVGA, XGA and SXGA output. * You can use ARC function for the RGB signals of the Aspect Ration 4:3. (For HD wide input signals, you cannot use ARC function.) * Fundamentally, HD wide input signal is not included in the Spec, so the set may not support HD signal perfectly. -
Page 18: Connecting To A Video Source
Connection Connecting to a Video Source * You can connect a VTR, a camcorder, a LDP or any other compatible video image source to the projector. < How to connect 1 > a. Connect the Audio and Video input jacks of the projector to the output jacks of the A/V source with RCA to PC Audio cable, Video cable. -
Page 19: Function
Function * In this manual, the OSD(On Screen Display) may be different from your Projector’s because it is just example to help with the Projector operation. * If there is no input signal present, the Menu will not be displayed on the screen. -
Page 20: Auto Color Temperature Control
Function Video Menu Options Auto Color Temperature Control 1. Press the MENU button and then use 2. Press the OK ( ) button and then use 3. Press the button to make appropriate adjustments. F, G Each press of the button changes the screen as shown below. -
Page 21: Special Menu Options
Flip Vertical Function * This function reverses the projected image vertically. * When you hang the projector upside down from the ceiling , you will need to reverse the image vertically and horizontally. 1. Press the MENU button and then use 2. -
Page 22: Using Keystone Function
Using Keystone function * Use this function when the screen is not at a right angle to the projector and the image is a trapezoid shape. * Only use the Keystone function when you can’t get the best angle of projection, because it may cause a blazing fire of the screen. -
Page 23: Lamp Mode Function
1. Press the MENU button and then use G The used lamp time is displayed. G When projector lamp is reaching the end of its life (over 2000 hours), the lamp indicator will be turned red. G The lamp warning LED illuminates red continuously in the case of excessive lamp time. -
Page 24: Screen Menu Options
*If the image size does not fit the screen in accordance with the input source, set the position of the image by selecting Horizontal / Vertical position. (RD-JT91:RGB, RD-JT92:RGB, RGB-DTV, DVI-DTV) 1. Press the MENU button and then use 2. Press the OK (... -
Page 25: Information
1280X1024 60.020Hz * If the projector does not support the input signal, “Out of Range” message appears on the screen. * The projector supports DDC1/2B type as Plug & Play function. (Auto recognition of PC monitor) * The Synchronization input form for horizontal and vertical frequencies are Separate, Composite and SOG. -
Page 26: Maintenance
Cleaning the Projector Case To clean the projector case, first unplug the power cable. To remove dirt or dust, wipe the casing with a soft, dry, lint-free cloth. To remove stubborn dirt or stains, moisten a soft cloth with water and a neutral detergent and then wipe the casing. -
Page 27: Specifications
In operation : 32~104°F(0°C~40°C) In storage and transit : -4~140°F(-20°C~60°C) humidity In operation : 0~ 80% relative humidity by dry hygrometer Not in operation : 0 ~ 90% relative humidity by dry hygrometer RD-JT91 4:3(horizontal:vertical) 0.55 inches 1.01~5.08m(40~200 inches) 1W(mono) 1:1.2... - Page 28 P/NO : 3828VA0482B b (373-026H)
Need help?
Do you have a question about the RD-JT91 and is the answer not in the manual?
Questions and answers