Advertisement
Advertisement

Subscribe to Our Youtube Channel
Related Manuals for JTX Fitness Cyclo 5

Summary of Contents for JTX Fitness Cyclo 5
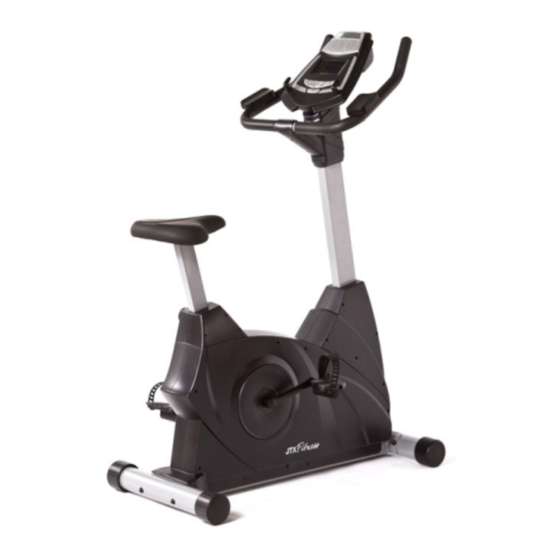
- Page 1 JTX Cyclo 5 User Guide...
-
Page 2: Table Of Contents
CONTENTS 1. Introduction & Safety 2. Safety & Maintenance Summary 3. Exploded Assembly Diagram 4. Main Parts List 5. Assembly 6. Operation 7. Training Notes... -
Page 3: Introduction & Safety
PHYSICAL LIMITATION ON YOUR ABILITY TO EXERCISE IT IS STRONGLY RECOMMENDED THAT YOU CONSULT A DOCTOR IN ORDER TO AVOID POSSIBLE INJURY. IF, AT ANY TIME WHILE USING A JTX FITNESS EXER- CISE BIKE YOU EXPERIENCE ANY DIZZINESS, FAINTNESS, SHORTNESS OF BREATH, OR OTHER PAIN YOU SHOULD STOP YOUR WORKOUT IMMEDIATELY AND CONSULT A DOCTOR. -
Page 4: Safety & Maintenance Summary
3. If the user experiences dizziness, nausea, chest pain or any other abnormal symptoms, stop the workout at once and consult a Doctor. 4. Position the Cyclo 5 on a clear, level surface. Do not store near water or outdoors. -
Page 5: Exploded Assembly Diagram
EXPLODED DIAGRAM... -
Page 6: Main Parts List
MAIN PARTS LIST MAIN FRAME FRONT STABILISER REAR STABILISER TRANSPORT ROLLER CAPS REAR STABILISER END CAPS 9L/R PEDALS LEFT & RIGHT SEAT POST SADDLE SEAT ADJUSTOR HANDLEBAR POST 18L/R FRONT COLLAR CONSOLE ELBOW PADS HANDLEBAR EXTENSION WIRE SENSOR WIRE PEDAL CRANKS (L/R) HANDLEBAR COVER (L/R) 36a/b. -
Page 7: Assembly
ASSEMBLY It is recommended that all parts are removed from the box before commencing assembly. It is also recommended that two people as- semble the JTX Cyclo 5. Step 1 First attach the stabilisers (2, 3) to the main frame (1). Please... - Page 8 ASSEMBLY Step 3 The pedals (9L/9R) and pedal straps are labelled right and left. The pedals screw directly into the cranks (33L/R) on either side of the bike. Please note to attach the right hand pedal you should turn the nut clockwise.
- Page 9 ASSEMBLY Step 5 Remove the two screws from the front of the handle bar post and the three screws and nuts which run through the centre of the post. Attach the cables a the bottom of the handlebar support post (17) to the cables in the main frame (1) before in- serting the post into the frame.
- Page 10 ASSEMBLY Step 7 Thread the cables from the handlebar up through the hole in the front of the post (17) and temporarily secure in place using the elastic band at the top of the post. Then secure the handlebar (30) to the post (17) using the nuts and bolts provided.
- Page 11 ASSEMBLY Step 9 Remove the screws from the back of the console (22) be- fore connecting the cables at the top of the handlebar support post (17) to the cables on the back of the console. Be sure to feed the cables back into the post to avoid them being caught before securing the console using...
- Page 12 CONSOLE CONSOLE BUTTONS START/STOP Use this button to start or stop the program chosen. Hold for 2 sec- onds to reset the computer. ENTER Use this button to select from PROGRAMS, GENDER, TIME, HEIGHT, WEIGHT, DISTANCE, WATT, TARGET HEART RATE and AGE. MODE Use this button to change the data on display.
- Page 13 PROGRAMS The JTX Cyclo 5 has 16 programs. Every program will be displayed by a graph which consists of 10 columns. Each column is 8 blocks tall with each block representing 2 resistance levels. When the time is counting upwards, each column will represent 3 minutes.
- Page 14 PROGRAMS Program 3 - Valley Program Program 4 - Fat Burn Program Program 5 - Climb and Descent Program Program 6 - Mountain Climb Progam...
- Page 15 PROGRAMS Program 7 - Interval Program Program 8 - BMI Program Program 9 - Target Heart Rate Program Program 10 - 60% Heart Rate Program...
- Page 16 PROGRAMS Program 11 - 75% Heart Rate Program Program 12 - 85% Heart Rate Program Program 13 - User 1 Program 14 - User 2...
- Page 17 PROGRAMS Program 15 - User 3 Program 16 - User 4...
-
Page 18: Operation
OPERATION Manual Program Program 1 allows you to manually adjust all the parameters for your workout. • Press the ENTER button to select TIME, DISTANCE and AGE. Use the UP or DOWN buttons to adjust any of these values. The default level of resistance is 6. • Press START/STOP to begin your exercise. • During your exercise you can continue to make adjustments to the resistance using the UP and DOWN buttons. - Page 19 OPERATION BMI Program Program 8 allows users to calculate their BMI and the computer will then design a specific program to suit this individual. • Press the ENTER button to select GENDER, HEIGHT, WEIGHT and AGE. Use the UP or DOWN buttons to adjust any of these values. •...
- Page 20 OPERATION There are 4 heart rate programmes: Program 9 – Target heart rate Program 10 - 60% of maximum heart rate Program 11 - 75% of maximum heart rate Program 12 - 85% of maximum heart rate When using the ‘target heart rate’ program, users may set up a target heart rate over a period of time or a specified distance.
- Page 21 OPERATION It is normal for chest straps and pulse sensors to be temperamental and/or less reliable when the hands or body have additional moisture due to perspiration through exercise. The chest strap and hand pulse sensors provide data to be used as a guideline only.
- Page 22 OPERATION Pulse recovery test program The pulse recovery test is to compare your heart rate before and after exercise. If you are fit and in good shape, your heart rate should recover quickly. Normal heart rate recovery is defined as a decrease in your pulse of 15 to 25 beats per minute.
- Page 23 OPERATION The JTX Cyclo 5 can help improve your cardiovascular fitness, tone your muscles and in conjunction with a calorie controlled diet, help you to lose weight. It is important that an exercise routine begins with a warm up and stretch and finishes with a cool down and stretch.
- Page 24 OPERATION EXERCISE PHASE This is the stage where you put the effort in. After regular use, the muscles in your legs will become stronger and more flexible. Work at your own pace and be sure to maintain a steady tempo throughout. The rate of work should be sufficient to raise your heartbeat into the target zone shown on the graph below.
-
Page 25: Training Notes
TRAINING NOTES... - Page 26 TRAINING NOTES...
- Page 27 TRAINING NOTES...
- Page 28 JTX Fitness Unit 3 Harbour Way Industrial Eastate Shoreham-by-Sea BN43 5HZ 01273 453855 info@jtxfitness.com www.jtxfitness.com...
Need help?
Do you have a question about the Cyclo 5 and is the answer not in the manual?
Questions and answers