FILTERMIST FX Series Installation And Maintenance Manual
Hide thumbs
Also See for FX Series:
- Installation and maintenance manual (32 pages) ,
- Installation and maintenance manual (25 pages) ,
- Installation and maintenance manual (13 pages)
Advertisement
Quick Links
Installation and Maintenance
Installation et Maintenance
Installation und Wartung
Installation and Maintenance
Installazione e Manutenzione
Installation et Maintenance
Instalación y Mantenimiento
Installation und Wartung
Installazione e Manutenzione
Instalación y Mantenimiento
Models : Modèles : Modelle : Modelli : Modelos : 型号
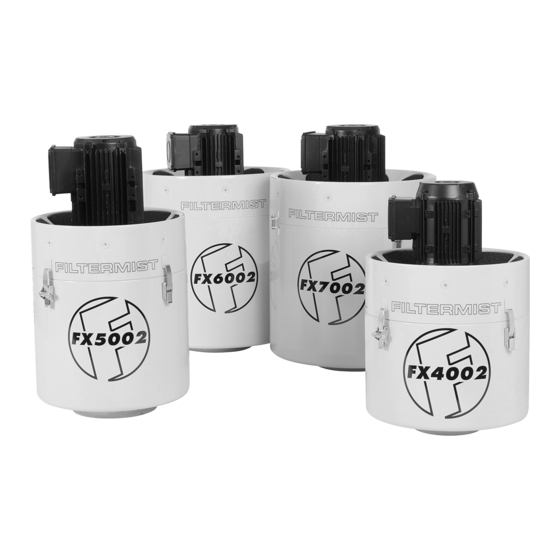
S200 : S400 : S800 : FX4002 : FX5002 : FX6002 : FX7002
Models : Modèles : Modelle : Modelli : Modelos : 型号
S200 : S400 : S800 : FX 4002 : FX5002 : FX6002 : FX7002
安装与维护
安装与维护
Advertisement

Related Manuals for FILTERMIST FX Series


Summary of Contents for FILTERMIST FX Series
- Page 1 Installation and Maintenance Installation et Maintenance Installation und Wartung Installation and Maintenance Installazione e Manutenzione Installation et Maintenance Instalación y Mantenimiento Installation und Wartung 安装与维护 Installazione e Manutenzione Instalación y Mantenimiento Models : Modèles : Modelle : Modelli : Modelos : 型号 安装与维护...
-
Page 2: Mounting The Unit
(GB) General Information A Filtermist unit is an oil mist collector that use centrifugal impaction to remove or reclaim oil mist, coolant, fume and steam from manufacturing operations. This manual describes how to install and maintain your Filtermist unit. Please read all instructions before commencing any installation or maintenance work. Original instructions are in English, all other languages are translations of this. - Page 3 3. Il faut attendre au moins 60 secondes pour que le tambour interne cesse de tourner avant que le carter ne soit enlevé. 4. Les fuites d’huile peuvent constituer un danger. Le système Filtermist doit être vérifié régulièrement pour dé tecter d’éventuelles fuites d’huile. Des contrôles visuels quotidiens de l’unité et du conduit d’extraction sont recommandés.
- Page 4 3. Debe dejar al menos 60 segundos para que el tambor interno deje de girar antes de abrir la carcasa. 4. Las fugas de aceite pueden ser un peligro. El sistema Filtermist completo debe ser revisado regularmente para detectar posibles fugas de aceite. Se recomiendan controles visuales diarios tanto de la unidad como del conducto de evacuación.
- Page 5 Mounting the Unit (GB) Installation Information The following are typical installations and cover the majority of applications. For more advice on these or other installation methods please contact your local supplier. Always try to position the extraction point as far as practically possible from the cutting area of the machine and so that mist is drawn away from the operator’s working area.
- Page 6 WARNING! Always ensure that the machine can support the weight of the unit (see table 1 on page 15) Montage vertical directement sur la machine outil. ATTENTION! Toujours vérifier au préalable que la machine peut supporter le poids du système FILTERMIST. (Voir tableau page 15). Direkte Montage auf die Werkzeugmaschine - senkrecht ACHTUNG!: Achten Sie stets darauf, daß...
- Page 7 Mounting the Unit (GB) Drill 4 x case stud fixing holes (see table on page 15 for hole size and case stud hole PCD). Percer 4 trous pour les goujons de fixation. (Voir tableau page 15 pour la taille des trous et l’écartement). 4 x Löcher zur Aufnahme der Gehäusebolzen bohren (siehe Tabelle auf Seite 15 für Lochgröße und Gehäusebolzenloch-PCD).
- Page 8 Mounting the Unit (GB) Floor Stand Mount (S Series) Montage sur socle (Série S) Ständermontage (S Serie) Montaggio su supporto (Serie S) Montaje en pedestal (Serie S) (GB) Fit case studs as for Direct Mount (8Nm). Monter les goujons de fixations comme pour le montage vertical (8Nm). Gehäusebolzen wie bei der direkten Montage anbringen (8Nm).
- Page 9 Mounting the Unit (GB) IMPORTANT! There must be no kinks or ‘U’ bends in the return tube. The end of the tube must not be submerged. IMPORTANT! Il ne doit y avoir aucun coude en U dans le tube de retour. L ’extrémité du tube ne doit pas être immergée. WICHTIG! Es dürfen keine Knickstellen oder “U”-Krümmungen im Rückführschlauch vorhanden sein.
- Page 10 Mounting the Unit (GB) Floor Stand Mount (FX Series) Montage sur socle (Série FX) Ständermontage (FX Serie) Montaggio su supporto (Serie FX) Montaje en pedestal (Serie FX) (GB) Remove 4 x insert screws in top of unit at 90° intervals.
- Page 11 Mounting the Unit (GB) Position unit in stand and secure unit with bolts (supplied with unit). Positionner l’unité dans le support et fixer avec les boulons. (Fournis avec l’unité). Gerät auf Ständer setzen und mit (gelieferten) Bolzen absichern. Posizionare l’unità nel supporto e fissare con i bulloni (forniti con l’unità). Posicionar la unidad en el pedestal y fijar la unidad con las tuercas (suministradas con la unidad).
-
Page 12: Electrical Connection
IMPORTANT! The unit must run in the direction indicated by the arrow on the upper section and must run continuously. To change rotation, swap any two supply wires. It must not be wired to switch on and off with the machine cycle. The Filtermist unit can only be started by using the control device provided for that purpose. - Page 13 Electrical Connection (GB) Recommended Overload Setting and Terminal Connection. Overloads to be set no higher than 125% of the motors full load current. Réglage de la surtension et connection. Le réglage du disjoncteur pour les surcharges ne doit pas excéder 125% du courant nominal du moteur.
- Page 14 The overload starter must be selected to suit different sized units or voltage (see table on page 13). Speak to your local Filtermist distributor for more information. If an isolator is not requested, the motors must be connected via a direct – on –...
- Page 15 Electrical Connection (GB) IMPORTANT! Ensure when connecting power to the unit that excess electrical cable is NOT wrapped around the motor. IMPORTANT! Assurez-vous lors de la connexion de l’appareil que l’excès de câble électrique n’est PAS enroulé autour du moteur. WICHTIG! Vergewissern Sie sich beim Anschließen der Stromversorgung an das Gerät, dass das überschüssige Stromkabel nicht um den Motor gewickelt ist.
-
Page 16: Maintenance Information
Maintenance Information (GB) Every 1000 Hours Running Time (Use Filter Kit 4; see page 24&25) Toutes les 1000 heures d’utilisation (utiliser kit maintenance filtre 4; voir page 24&25) Alle 1000 Betriebsstunden (Filterkit 4 verwenden; siehe Seite 24&25) Ogni 1000 ore di funzionamento (utilizzare kit manutenzione filtro 4;... - Page 17 Maintenance Information (GB) Remove old drum pads, clean inside of drum and inspect drum for signs of damage. IMPORTANT! Damaged drums should be replaced Retirez les mousses tambour usagées, nettoyez l’intérieur du tambour et vérifiez qu’il n’y ait aucun dommage IMPORTANT! Les tambours endommagés doivent être remplacés Entfernen Sie die alten Filtereinsätze, reinigen Sie die Innenseite der Trommel und überprüfen Sie die Trommel nach Anzeichen von Beschädigungen (innen und außen)
- Page 18 Maintenance Information (GB) Every 2000 Hours Running Time (use Spares Kit 5; see page 24&25) Toutes les 2000 heures d’utilisation (utiliser kit maintenance pièces 5; voir page 24&25) Alle 2000 Betriebsstunden (Wartungskit 5 verwenden; siehe Seite 24&25) Ogni 2000 ore di funzionamento (utilizzare kit pezzi di ricambio 5;...
- Page 19 Maintenance Information (GB) Remove drum. Démonter le tambour. Trommel entfernen. Smontare il tamburo. Desmontar el tambor. (GB) Remove old drum pads. Oter les vieux tampons du tambour. Alte Filtermatten entfernen. Togliere i tamponi vecchi del tamburo. Quitar almohadillas usadas. (GB) Clean inside and outside of drum.
- Page 20 Volver a colocar el motor sobre la carcasa. (GB) IMPORTANT! Fit new motor mounting nuts & tighten (5Nm S Series or 8Nm FX Series). IMPORTANT! Montez les nouveaux écrous de montage du moteur et les serrez (5Nm S Series ou 8Nm FX Series).
- Page 21 Ensure bush, shaft and drum hub are clean and free from debris before re-fitting drum. Tighten drum bush (20Nm S Series or 8Nm FX Series). Assurez-vous que le manchon, l’arbre et le moyeu du tambour sont propres et exempts de débris avant de remonter le tambour.
- Page 22 Maintenance Information (GB) Clean the swarf arrestor (where fitted). Nettoyer l’écran anti-copeaux (selon modèles). Das Spänesieb (falls montiert) reinigen. Pulire il dispositivo di arresto degli sfridi (se in dotazione). Limpiar la trampa de virutas (si la hay montada). Check any ducting for damage or blockage. Vérifier que les tuyaux ne sont pas endommagés ou bloqués.
- Page 23 In condizioni gravose di utilizzo, per es. rettifica o lavorazione a macchina di pezzi in ghisa, è necessario controllare e pulire le unità più spes- so, secondo l’utilizzo. Per informazioni dettagliate sulla manutenzione programmata e i kit di pezzi di ricambio rivolgersi al proprio fornitore FILTERMIST. IMPORTANTE! – Usare solo ricambi originali FILTERMIST – l’uso di ricambi di diversa provenienza invaliderà la garanzia.
- Page 24 Maintenance Information (GB) Item (GB) Item (GB) Item (GB) Item Pièce Pièce Pièce Pièce Artikel Artikel Artikel Artikel Articolo Articolo Articolo Articolo Pieza Pieza Pieza Pieza (GB) Motor S200 20-213-30-052 (F) Moteur S400 20-213-30-053 (D) Motor S800 20-213-30-0 (I) Motore (E) Motor (GB) Drum S200...
- Page 25 Maintenance Information (GB) Item (GB) Item (GB) Item (GB) Item Pièce Pièce Pièce Pièce Artikel Artikel Artikel Artikel Articolo Articolo Articolo Articolo Pieza Pieza Pieza Pieza (GB) Motor FX4002 20-213-30-054 (F) Moteur FX5002 20-213-30-055 (D) Motor FX6002/FX7002 20-213-30-056 (I) Motore (E) Motor (GB) Drum FX4002...
- Page 26 TF3 3AL TF3 3AL TF3 3AL Type: Type: S & FX series S & FX series S & FX series supplied with isolator S200, S400, S800, FX4002, S200, S400, S800, FX4002, Authorised S200, S400, S800, FX4002, Authorised Authorised Absolent AB...
- Page 27 Telford oil & coolant mist oil & coolant mist Shropshire Shropshire TF3 3AL TF3 3AL Type: S & FX series Type: S & FX series S200, S400, S800, FX4002, S200, S400, S800, FX4002, Model: Model: FX5002, FX6002, FX7002 FX5002, FX6002, FX7002 Serial No.: See unit...
- Page 28 Filtermist International Limited Telford 54 Business Park Supplied by: Nedge Hill Telford Shropshire TF3 3AL England Tel: +44 (0)1952 290500 Email: sales@filtermist.com 20-218-10-034/Rev09/January 2022 www.filtermist.com...
Need help?
Do you have a question about the FX Series and is the answer not in the manual?
Questions and answers