Table of Contents
Advertisement
Quick Links
Advertisement
Table of Contents

Related Manuals for HOT WATER HEAT PUMPS TH-260D1


Summary of Contents for HOT WATER HEAT PUMPS TH-260D1
- Page 1 TH-260D1 All in One Heat Pump Manual 14042022...
- Page 2 TH-260D1 All in One Heat Pump Manual...
-
Page 3: Table Of Contents
3.3 Base Requirements _____________________________ 11 3.4 Air Flow ______________________________________ 13 3.5 Noise Considerations ____________________________ 14 4.0 Plumbing Schematics ________________________________ 15 4.1 TH-260D1 Connection Dimensions and Components ___ 15 5.0 Plumbing Installations ________________________________ 16 6.0 Electrical Connection _________________________________ 20 6.1 Electrical Schematic _____________________________ 20 6.2 Regulations and Preparation ______________________ 21... -
Page 4: Safety Warning
TH-260D1 All in One Heat Pump Manual 1.0 SAFETY WARNINGS INSTALLATION & OPERATION WARNING –This unit stores hot water up to 60°C that can cause scalding. DO NOT touch any of the hot water pipes or fittings. Children MUST always be supervised around the unit to avoid serious injuries. - Page 5 DO NOT place the unit near any ignition sources. • DO NOT use a flammable spray such as hair spray, paint, etc. near this unit as this may cause a fire. For any inquiries, please contact Hot Water Heat Pumps Ltd (HWHP) at 0800 33 66 33...
-
Page 6: Parts And Construction Schematic
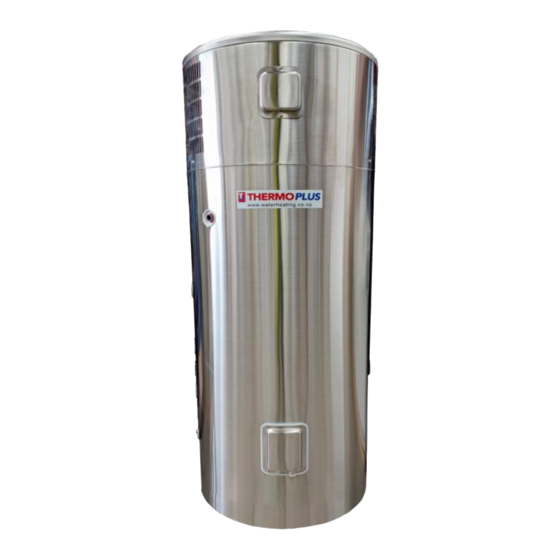
TH-260D1 All in One Heat Pump Manual 2.0 PARTS AND CONSTRUCTION 2.1 Dimensions TH-260D1 Figure 1 Labelled TH-260D1 (Exterior) The unit uses R290 (propane) refrigerant, a class 3 flammable gas according to AS/NZS ISO 817. The refrigerant can only be handled by a refrigeration technician with the appropriate refrigerant handling license. -
Page 7: Schematic Th-260D1
TH-260D1 All in One Heat Pump Manual 2.2 Schematic TH-260D1 Figure 2 Labelled TH-260D1 (Interior) -
Page 8: Installation Instructions
TH-260D1 All in One Heat Pump Manual 3.0 INSTALLATION INSTRUCTIONS All TH-260D1 heat pumps are designed for installation by a licensed plumber in accordance with standards set out in AS/NZS 3500.2. Figure 3: TH-260D1 delivery position... -
Page 9: Delivery
TH-260D1 All in One Heat Pump Manual 3.1 Delivery • The TH-260D1 heat pump water heater MUST always maintain a near-vertical position with no more than a 30° tilt from vertical. Moving or storing the unit in a horizontal position will void the warranty. -
Page 10: Installation Location Requirements
TH-260D1 All in One Heat Pump Manual 3.2 Installation Location Requirements • The TH-260D1 is for OUTDOOR USE ONLY. According to AS/NZS 5149, its’ outdoor installation site shall be positioned to avoid refrigerant leaking into the building or endangering people. -
Page 11: Base Requirements
TH-260D1 All in One Heat Pump Manual 3.3 Base Requirements Fixture Requirements • Install the unit on a stable structure that can carry 400 kg or more. The supporting structure must not shift over time (due to water drainage etc.). If using a concrete plinth, a minimum thickness of 50 mm is required. - Page 12 TH-260D1 All in One Heat Pump Manual Figure 4: TH-260D1 installation base requirements and concrete base example...
-
Page 13: Airflow
TH-260D1 All in One Heat Pump Manual 3.4 Airflow Airflow Requirements • The TH-260D1 heat pump is designed for open air operation only. It requires sufficient air supply to maintain high operating efficiency. • Allow for sufficient clearances during installation according to Figure 4. -
Page 14: Noise Considerations
The built-in TIMER function can be used to limit the unit’s operating hours to the owner’s desired hours to reduce noise concerns. Should the TH-260D1 be audible from within the residence when operating, the unit should be run in TIMER mode. -
Page 15: Plumbing Schematics
TH-260D1 All in One Heat Pump Manual 4.0 PLUMBING SCHEMATICS The following plumbing instructions and schematics reference standards covered under G9 and G12 of the Building Code and represent an ideal installation procedure for the unit. Where applicable, other local regulations should be considered. -
Page 16: Plumbing Installations
TH-260D1 All in One Heat Pump Manual 5.0 PLUMBING INSTALLATION Plumbing Connections • All required plumbing should be installed and fitted by an authorised plumber. The unit must be installed according to building code G12 water supplies. Cold water inlet •... - Page 17 TH-260D1 All in One Heat Pump Manual INSULATE ALL HOT WATER LINES with a minimum of 13 mm closed cell insu- lation to minimise heat losses. This includes all water fittings. If the ambient temperature at the installation location can drop below 0°C, insulate all water pipes and connections with a minimum of 13 mm closed cell insulation to prevent freezing.
- Page 18 TH-260D1 All in One Heat Pump Manual IMPORTANT A discharge pipe connected to the TPR valve must be installed in a vertical position and in a frost-free environment. Warning: • The discharge line connected to the TPR valve SHOULD NOT be connected to the condensate drainage line.
- Page 19 The isolation valve can be combined with a PRV valve. Filling the System • Once the TH-260D1 has been connected in accordance to sections 3.0 and 4.0 of the manual, the tank can be filled and pressurized. • Ensure at least one hot water tap is open inside the property to allow air to escape from the tank.
-
Page 20: Electrical Connection
TH-260D1 All in One Heat Pump Manual 6.0 ELECTRICAL CONNECTION Installation of the TH-260D1 heat pump to the power supply should only be carried out by qualified electricians in accordance with the following instructions. 6.1 Electrical Schematic Figure 6 Electrical Schematic... -
Page 21: Regulations And Preparation
6.2 Regulations and Preparation Ensure the unit is electrically isolated from the power supply before starting work. The TH-260D1 heat pump is designed to be permanently wired to a single-phase 220- 240 V 50 Hz AC supply. All work must comply with AS/NZS 3000 and any local supply authority regulations. - Page 22 TH-260D1 All in One Heat Pump Manual If the power cord is damaged, it must be replaced by either The unit installation must the manufacturer, a service comply with AS/NZS 3000 agent or similarly qualified wiring regulations person in order to prevent an...
-
Page 23: Commissioning Th-260D1
TH-260D1 All in One Heat Pump Manual 7.0 COMMISSIONING TH-260D1 Pre-Commissioning Checks and Procedures • Once electrical and plumbing connections have been completed by a qualified tradesperson, the system is prepared for operation. • Ensure the storage tank is full before turning on the system. - Page 24 (see section 3.4 Air Flow). A minimum of 600 mm distance on the fan discharge side and 250 mm mini- mum on the air intake side of the TH-260D1 is provided for air flow (see sec- tion 3.4 Air Flow).
-
Page 25: Operation Panel Instructions
TH-260D1 All in One Heat Pump Manual 8.0 OPERATION PANEL Key Factors: • The unit’s TIMER MODE is strongly recommended to save energy and reduce noise. Set-up the TIMER MODE according to section 8.5 and your hot water usage pattern. If your household has a large hot water demand, turn TIMER MODE off. -
Page 26: Control Interface
TH-260D1 All in One Heat Pump Manual 8.2 Control Interface The control interface of the TH-260D1 is located at the front of the unit as shown in the below figure. The control interface is used to operate your TH-260D1 hot water system. -
Page 27: Control Interface Icons
TH-260D1 All in One Heat Pump Manual 8.3 Control Interface Icons The TH-260D1 control interface displays various icons to help you identify the status of your unit. The figure below shows the meaning of all the icons. All following instructions in the manual will refer to these icons. - Page 28 TH-260D1 All in One Heat Pump Manual ICON STATUS FEATURE Electric Heater is ON to support the heat pump. Flashing Electric Heater is ON to disinfect the water. Displays the water temperature. Currently showing Celsius temperature Displays the internal system clock time.
- Page 29 TH-260D1 All in One Heat Pump Manual ICON STATUS FEATURE Ready to set START and END times for “ON” period 3. If not setting up TIMER MODE, the unit is in heating period 3. The control panel is LOCKED. Unlit...
-
Page 30: Unlocking And Turning The Unit On
TH-260D1 All in One Heat Pump Manual 8.4 Unlocking and Turning the Unit On Press the ON/OFF button once to unlock the control interface. The screen will brighten and the “LOCK” icon will turn off to indicate that the control interface is unlocked. -
Page 31: Setting Up The Timer
TH-260D1 All in One Heat Pump Manual 8.5 Setting the Internal Clock The TH-260D1 unit relies on the internal clock to operate the TIMER MODE. Please set the internal clock correctly to ensure the unit operates correctly. Every step will hold for 5 seconds before returning to the home screen. -
Page 32: Setting The Internal Clock
TH-260D1 All in One Heat Pump Manual 8.6 Setting Up the Timer The unit comes with a built-in TIMER MODE that is easy to set up. It is highly recommended for the following reasons: The TIMER MODE can reduce electricity consumption significantly. The heat pump water heater operates more efficiently during the day when the ambient temperature is higher. - Page 33 TH-260D1 All in One Heat Pump Manual To set up and use the TIMER MODE: Press and hold the CLOCK button for 4 seconds to start setting up the TIMER MODE. The “clock” and “1” icons will illuminate. The “ON” icon will start flashing to indi- cate that the TIMER MODE settings are ready to be edited.
- Page 34 TIMER mode. The “clock” and “ON” or “OFF” icons will stay lit, indicating that the unit is in TIMER NOTE: The TH-260D1 unit will turn on the heating mode in TIMER mode when the following conditions are met.
-
Page 35: Error Handling
TH-260D1 All in One Heat Pump Manual 8.7 Error Handling The TH-260D1 unit will display an error code on the bottom right corner when a fault has occurred. The error message will show where the time is usually displayed as well as the error symbol. -
Page 36: Troubleshooting
TH-260D1 All in One Heat Pump Manual 9.0 TROUBLESHOOTING No Hot Water at Tap Possible Checks Solution The unit is not Check the If there is a blank screen, check that the power heating the control screen supply switch is turned on and that the house fuses... - Page 37 TH-260D1 All in One Heat Pump Manual Hot Water Runs out Possible Checks Solution Causes Either check with plumber to Shower heads confirm shower Arrange with a plumber to install low flow shower are high flow heads or heads or flow valves to reduce hot water usage...
- Page 38 The water pressure at the taps is dependent on the incoming water mains pressure and any tempering or pressure reducing valves installed by the plumber. The TH-260D1 does not affect the water pressure. If the hot water pressure is significantly lower than the cold water pressure at the taps, contact the plumber who installed the system.
-
Page 39: Frequently Asked Questions
600 ppm) this service should happen every 3 years. In all other cases, this should be every 5 years. What are the safety features of the TH-260TD1? When correctly installed, the TH-260D1 has the following safety features: • A high temperature cut-out thermostat. - Page 40 TH-260D1 All in One Heat Pump Manual WARNING: Any Hot Water Cylinder with an anode can produce flammable hydrogen gas when it was left running for an extended time without using the hot water. For example, this can occur after a holiday where the property was not occupied for an extended period.
-
Page 41: Warranty Information
Please contact Hot Water Heat Pumps Ltd at 0800 33 66 33 or info@waterheating.co.nz for all warranty issues. Please prepare your invoice number for a quick and easy call. WARRANTY PERIOD The TH-260D1 is covered by a parts and labour warranty for the duration listed in the table below. Component... - Page 42 11. Harsh environmental conditions such as salty, sulphurous and corrosive air, 12. Any other issues not directly attributed to defects in THD260-D1. The owner will be liable for any repair and replacement costs required by the TH-260D1 if the damages are caused by the events listed in this section.
-
Page 43: Warranty Declaration
WARRANTY REGISTRATION INSTALLATION DECLARATION Installer to complete for customer warranty record Owner’s Name Product Serial Number Installation Date Installation Address Declaration: I have installed and commissioned this Econergy eater heater at the above address in compliance with the manufacturer’s instruction manual. COC NO: Installer Company Name/ Trading Name Installer Name... - Page 44 TH-260D1 All in One Heat Pump Manual...
Need help?
Do you have a question about the TH-260D1 and is the answer not in the manual?
Questions and answers