Table of Contents
Advertisement
Available languages
Available languages
Quick Links
Before you start insert the provided microSD
the card is latched.
Do not force the card into the slot!
Charge the scanner battery using the power adapter.
Using the scanner
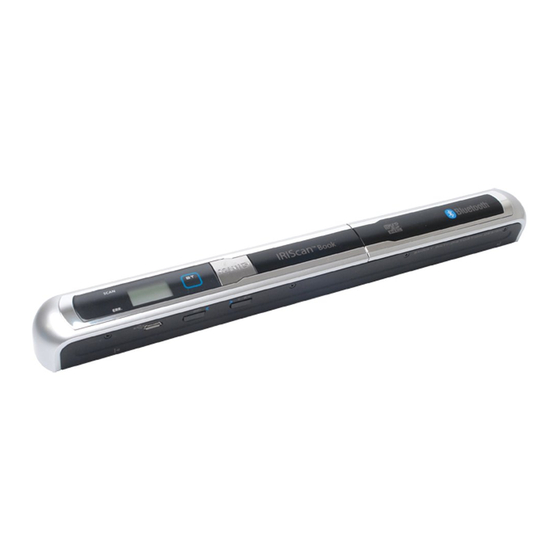
STEP 1: Choose the scanner settings
A. To power on the scanner, set the switch button to Scan.
B. Press the C/BW button to choose between color and mono (black‐and‐white)
scanning.
C. Press the DPI button to choose between a high (600 dpi) or low (300 dpi)
resolution.
1/6
Getting Started
Getting Started – English
TM
card gently into the card slot until
Advertisement
Table of Contents

Related Manuals for IRIScan Book 2 Executive


Summary of Contents for IRIScan Book 2 Executive
- Page 1 Getting Started Before you start insert the provided microSD card gently into the card slot until the card is latched. Do not force the card into the slot! Charge the scanner battery using the power adapter. Using the scanner STEP 1: Choose the scanner settings A. To power on the scanner, set the switch button to Scan. B. Press the C/BW button to choose between color and mono (black‐and‐white) scanning. C. Press the DPI button to choose between a high (600 dpi) or low (300 dpi) resolution. 1/6 Getting Started – English ...
- Page 2 STEP 2: Scan your documents A. Place your scanner at the top of the page you want to scan. Tip: Make sure the IRIScan Book is still powered on. Tip: Make sure your scanner covers the entire surface you want to scan. The arrows on the scanner mark the covered scan width. B. Press the Scan button. The SCAN led lights up green. C. Slide the scanner slowly and steadily over the page. Tip: Hold the document steady with one hand while scanning. D. To stop scanning, click the Scan button again. If the ERR. led lights up red a scan error occurred. See Troubleshooting information on page 6. STEP 3: Transfer the documents to your computer Using the mini USB cable Using the microSD card adapter Plug the provided USB cable in both Press the microSD card to unlatch it. the IRIScan Book and your Then remove it from the card slot. computer. Insert it in the provided microSD card IRIScan adapter. Tip: Make sure the Book is still powered on. Insert the adapter into the SD card slot on your computer. 2/6 Getting Started – English ...
- Page 3 The card memory containing your documents is displayed on your computer. PC Mac® Open the card memory and drag and drop your documents to your computer. The documents are located in the folder DCIM\100MEDIA of the removable disk. Once you’ve transferred your documents to your PC or Mac, they can be processed with Readiris™. For information on how to process your documents with Readiris™ on a PC or a Mac, see the Readiris™ Quick User Guide you find on the Readiris™ cd‐rom. Step 4: Transfer the documents via Bluetooth® to compatible devices To transfer documents via Bluetooth, you must first pair your Bluetooth device with the IRIScan™ Book. The IRIScan™ Book is compatible with devices using the following operating systems (OS): Windows XP, Vista®, 7 Windows Mobile *Mac OS® X Blackberry® OS Android OS ® *iOS operating systems are not supported. The pairing instructions vary depending on the operating system. For the instructions corresponding to your device, consult our website at www.irislink.com\iriscanbookexecutive. ...
- Page 4 Tips Adding a timestamp to your images Your IRIScan™ Book 2 scanner adds a timestamp to the images you scan. This way, you know exactly when they where scanned. To get a correct timestamp the Time Settings need to be set: To power on the scanner, set the switch button to Scan. Insert a pointy object, like a paper clip, into the Time set button: Then press C/BW or DPI to change the (1) year. Press Scan to confirm and move on to the (2) month. Repeat step 1 for the (2) month, (3) date, (4) hour and (5) minutes. Scanning small, thick books When you’re scanning a small, thick book it may occur that the margin is too narrow and you’re not able to scan the entire text. You can solve this problem by scanning the pages horizontally and rotating your images with Readiris™. Another solution is to place the scanner at the bottom of the page, turn it upside down and scan upwards. You’ll notice that the scanner’s right margin is smaller than the left. Formatting the microSD card To power on the scanner, set the switch button to Scan. Insert a pointy object, like a paper clip, into the Format button. The letter F appears on the screen. Now click the Scan button to format the card. The card icon on the ...
-
Page 5: Technical Note
Technical Note Minimum System Requirements Operating system Windows® 7, Vista®, XP and Mac OS® 10.4 or above (no driver installation required) CPU Pentium® III or above RAM 256 MB Interface USB port Scanner Specifications Image sensor Color Contact Image Sensor Resolution Low resolution: 300x300 dpi (default) High resolution: 600x600 dpi Maximum scanning speed for A4‐ Color High resolution: 8.0 seconds size document Mono High resolution: 6.0 seconds Color Low resolution: 3.0 seconds Mono Low resolution: 2.0 seconds Capacity (based on 1GB microSD 600 dpi color: 220 images (minimum) card. Scan A4 size file, the quantity 600 dpi mono: 290 images (minimum) of scans varies depending on the 300 dpi color: 780 images (minimum) content complexity) 300 dpi mono: 1280 images (minimum) Scan width 8.34” Scan length 300 dpi: 53” (maximum) 600 dpi: 26” (maximum) File format JPEG LCD ... -
Page 6: Troubleshooting Information
Troubleshooting information Problem Cause Solution I cannot turn on the Low battery power. Recharge the battery by scanner. connecting the scanner to the computer via the USB cable. Battery not inserted Insert the battery properly. correctly. Pictures cannot be There’s no microSD Insert a microSD card (with saved after I’ve card in the card slot. metal side facing upwards). scanned them. The microSD card is Move the images from the full. microSD card to your computer to clear storage space on the card. Format the card if necessary. ... -
Page 7: Guide De Démarrage Rapide
Guide de démarrage rapide Avant de commencer, insérez délicatement la carte microSD fournie dans la fente prévue à cet effet jusqu'à ce que la carte soit verrouillée. Enfoncez la carte sans forcer ! Chargez la batterie du scanner au moyen de l'adaptateur de courant. Utilisation du scanner ÉTAPE 1 : Choisissez les paramètres du scanner A. Pour allumer le scanner, positionnez l'interrupteur sur Scan. B. Appuyez sur le bouton C/BW pour choisir entre numérisation couleur et mono (noir et blanc). C. Appuyez sur le bouton DPI pour choisir entre une résolution haute (600 dpi) ou basse (300 dpi). 1/7 Guide de démarrage rapide – Français ... - Page 8 ÉTAPE 2 : Scannez vos documents A. Placez votre scanner en haut de la page que vous voulez scanner. Astuce : Assurez‐vous que l’IRIScan Book est bien allumé. Astuce : Vérifiez que votre scanner couvre bien toute la surface que vous voulez scanner. Les flèches sur le scanner indiquent la largeur de numérisation couverte. B. Appuyez sur le bouton Scan. La lumière verte SCAN s’allume. C. Faites glisser le scanner doucement et régulièrement sur la page. Astuce : Maintenez le document fermement avec une main pendant que vous scannez. D. Pour arrêter la numérisation, appuyez de nouveau sur le bouton Scan. Si la lumière ERR. rouge s’allume, cela signifie qu’une erreur s’est produite lors de la numérisation. Référez‐vous au Diagnostic des anomalies à la page 6. ÉTAPE 3 : Transférez les documents vers votre ordinateur Au moyen du mini‐câble USB Au moyen de l'adaptateur de carte microSD Branchez le câble USB fourni à l’IRIScan Book ainsi qu’à votre Appuyez sur la carte microSD pour la ordinateur. déverrouiller. Retirez‐la ensuite de la fente. l'IRIScan Astuce : Assurez‐vous que Book Insérez‐la dans l'adaptateur de carte est bien allumé. microSD fourni. Insérez l'adaptateur dans la fente prévue à cet effet sur votre ordinateur. 2/7 Guide de démarrage rapide – Français ...
- Page 9 La carte mémoire contenant vos documents s’affiche sur votre ordinateur. PC Mac® Ouvrez la carte mémoire, glissez et déposez vos documents dans votre ordinateur. Les documents se trouvent dans le répertoire DCIM\100MEDIA du disque amovible. Dès que vos documents sont transférés sur votre PC ou Mac, ils peuvent être traités avec Readiris™. Pour toute information concernant le traitement de documents avec Readiris™ sur un PC ou un Mac, référez‐vous au Guide de démarrage rapide de Readiris™ fourni sur le CD‐ROM de Readiris™. Étape 4 : Transférez les documents via Bluetooth® vers des appareils compatibles Pour transférer des documents via Bluetooth, vous devez tout d'abord appairer votre appareil Bluetooth à l'IRIScan Book. L'IRIScan Book est compatible avec des appareils qui utilisent les systèmes d'exploitation (OS) suivants : Windows XP, Vista®, 7 Windows Mobile *Mac OS® X Blackberry® OS Android OS ® *Les systèmes iOS ne sont pas supportés. Les instructions d'appairage varient d'un système d'exploitation à l'autre. Pour les instructions correspondant à votre appareil, consultez notre site Internet à ...
- Page 10 Astuces Ajouter une date sur vos images Votre scanner IRIScan™ Book 2 permet d’ajouter une estampille temporelle sur les images scannées. Cela vous permet de savoir à quel moment précis elles ont été scannées. Pour définir l’estampillage, les Paramètres de Temps doivent être définis : Pour allumer le scanner, positionnez l'interrupteur sur Scan. Insérez un objet pointu, comme un trombone par exemple, dans le bouton Time set : Appuyez ensuite sur C/BW ou DPI pour changer l’année (1). Appuyez sur Scan pour confirmer et passer au mois (2). Répétez l’étape 1 pour le mois (2), la date (3), l'heure (4) et les minutes (5). Scanner de petits livres épais Lorsque vous scannez un petit livre épais, il peut arriver que les marges soient trop étroites et que vous ne puissiez pas scanner le texte tout entier. Vous pouvez résoudre ce problème en numérisant les pages horizontalement et en effectuant une rotation de l’image avec Readiris™. Une autre solution est d’utiliser le scanner en le faisant glisser du bas vers le haut de la page. Vous remarquerez que la marge de droite du scanner est plus petite que la marge de gauche. ...
- Page 11 Pour formater la carte microSD Pour allumer le scanner, positionnez l'interrupteur sur Scan. Insérez un objet pointu, comme par exemple un trombone, dans le bouton Format. La lettre F apparaît à l’écran. Cliquez ensuite sur le bouton Scan afin de formater la carte. L’icône de la carte affichée sur l’écran clignote jusqu’à ce que le formatage soit terminé. Note technique Configuration minimum requise Système d’exploitation Windows® 7, Vista®, XP et Mac OS® 10.4 ou supérieur (pas d’installation de pilote requise) CPU Pentium® III ou supérieur RAM 256 MB Interface Port USB Spécifications du scanner Capteur d'image Capteur d'image par contact en couleur Résolution Basse résolution : 300x300 ppp (valeur par défaut) Haute résolution : 600x600 ppp Vitesse maximum de numérisation Haute résolution couleur : 8 secondes pour documents A4 Haute résolution monochrome: 6 secondes Basse résolution couleur : 3 secondes Basse résolution monochrome : 2 secondes Capacité (basée sur une carte ...
- Page 12 600 ppp : 26’’ (maximum) Format de fichier JPEG Écran LCD Affichage de l'état de numérisation Mise hors tension automatique 3 minutes Port USB USB 2.0 haute vitesse Mémoire externe Carte MicroSD Batteries standard Batterie lithium polymère 4,2V rechargeable Diagnostic des anomalies Problème Cause Solution Je n’arrive pas à Puissance de batterie Rechargez la batterie en allumer le scanner. trop faible. connectant le scanner à l'ordinateur grâce au câble USB. Batterie mal installée. Insérez la batterie correctement. Impossible Il n’y a pas de carte Insérez une carte microSD d’enregistrer les microSD dans la fente (avec la face métallique images après les avoir ...
- Page 13 Bluetooth (vérifiez la connexion). Redémarrez votre ordinateur/appareil si nécessaire. Mon scanner génère La lentille du scanner Nettoyez les lentilles avec des images floues. n’est probablement un tissu sec et doux. pas propre. Les images générées Le scanner n’a pas Calibrez le scanner en vous par le scanner sont été correctement servant de la feuille de inclinées. calibré. calibrage fournie avec le scanner. La lumière ERR. Vous faites glisser le Appuyez sur le bouton s’allume lorsque l’on scanner trop vite sur Scan pour numériser à numérise un les documents. nouveau votre document document. de façon plus lente et plus régulière. 7/7 Guide de démarrage rapide – Français ...
-
Page 14: Erste Schritte
Erste Schritte Schieben Sie zuerst vorsichtig die mitgelieferte microSD ‐Karte in den Kartensteckplatz, bis die Karte eingerastet ist. Schieben Sie die Karte nicht mit Gewalt in den Steckplatz! Laden Sie den Akku des Scanners über das Netzteil auf. Verwenden des Scanners SCHRITT 1: Wählen Sie die Scanner‐Einstellungen aus A. Zum Einschalten des Scanners bringen Sie den Schalter in die Position Scan. B. Drücken Sie die Taste C/BW, um zwischen Scannen in Farbe oder Mono (schwarzweiß) zu wählen. C. Drücken Sie die Taste DPI, um zwischen hoher Auflösung (600 dpi) oder niedriger Auflösung (300 dpi) zu wählen. 1/7 Erste Schritte ‐ Deutsch ... - Page 15 SCHRITT 2: Scannen Sie Ihre Dokumente A. Legen Sie den Scanner oben auf der Seite, die Sie scannen möchten, auf. Tipp: Vergewissern Sie sich, dass der IRIScan Book noch eingeschaltet ist. Tipp: Achten Sie darauf, dass der Scanner die gesamte Fläche abdeckt, die Sie scannen möchten. Die Pfeile auf dem Scanner markieren die abgedeckte Scanbreite. B. Drücken Sie auf die Taste Scan. Die SCAN‐Lampe leuchtet grün auf. C. Schieben Sie den Scanner langsam und gleichmäßig über die Seite. Tipp: Halten Sie das Dokument während des Scannens mit einer Hand fest. D. Zum Beenden des Scanvorgangs drücken Sie erneut die Taste Scan. Wenn die Fehler‐LED ERR rot aufleuchtet, ist beim Scannen ein Fehler aufgetreten. Informationen zur Fehlerbehebung finden Sie auf Seite 6. SCHRITT 3: Übertragen Sie die Dokumente auf Ihren Computer Mit dem Mini‐USB Kabel Mit dem microSD‐Kartenadapter Stecken Sie das mitgelieferte Drücken Sie zum Lösen der USB‐Kabel am IRIScan Book und Arretierung auf die microSD‐Karte. an Ihrem Computer ein. Dann nehmen Sie die Karte aus dem Steckplatz heraus. Tipp: Vergewissern Sie sich, dass der IRIScan Book noch eingeschaltet ist. Schieben Sie sie in den mitgelieferten microSD‐Kartenadapter ein. 2/7 Erste Schritte ‐ Deutsch ...
- Page 16 Auf Ihrem Computer wird dann der Kartenspeicher mit Ihren Dokumenten angezeigt. PC Mac® Öffnen Sie den Kartenspeicher und kopieren Sie Ihre Dokumente auf den Computer. Die Dokumente befinden sich im Ordner DCIM\100MEDIA des Wechseldatenträgers. Nachdem Sie die Dokumente auf Ihren PC oder Mac übertragen haben, können diese mit Readiris™ bearbeitet werden. Informationen zur Bearbeitung Ihrer Dokumente mit Readiris™ auf einem PC oder Mac finden Sie in der Kurzanleitung für Readiris™ auf der Readiris‐CD‐ ROM. Schritt 4: Übertragen Sie die Dokumente per Bluetooth® auf kompatible Geräte Um Dokumente per Bluetooth übertragen zu können, müssen Sie Ihr Bluetooth‐ Gerät zuerst mit dem IRIScan Book verbinden. Der IRIScan Book ist mit Geräten kompatibel, auf denen folgende Betriebssysteme (OS) ausgeführt werden: Windows XP, Vista®, 7 Windows Mobile *Mac OS® X Blackberry® OS Android OS ® *iOS ‐Betriebssysteme werden nicht unterstützt. ...
- Page 17 Tipps Hinzufügen eines Zeitstempels zu Bildern Ihr Scanner IRIScan™ Book 2 fügt den von Ihnen gescannten Bildern einen Zeitstempel hinzu. So wissen Sie immer genau, wann sie gescannt wurden. Damit der Zeitstempel die richtige Zeit anzeigt, müssen Sie die Zeiteinstellungen einrichten: Zum Einschalten des Scanners bringen Sie den Schalter in die Position Scan. Stecken Sie ein spitzes Objekt, wie z. B. eine Büroklammer, in die Taste Time set: Dann drücken Sie die Taste C/BW oder DPI, um unter (1) das Jahr zu ändern. Drücken Sie zur Bestätigung die Taste Scan und fahren Sie unter (2) mit dem Monat fort. Wiederholen Sie Schritt 1 unter (2) für den Monat, unter (3) für das das Datum , unter (4) für die Stunden und unter (5) für die Minuten. Scannen kleiner, dicker Bücher Wenn Sie ein kleines, dickes Buch scannen, kann es passieren, dass die Ränder zu schmal sind und Sie nicht den ganzen Text scannen können. Sie können dieses Problem lösen, indem Sie die Seiten horizontal scannen und die Bilder anschließend in Readiris™ drehen. Eine andere Lösung wäre es, den Scanner am unteren Rand der Seite aufzusetzen und nach oben zu scannen. Die Möglichkeit beruht darauf, dass der rechte Rand des Scanners schmaler ist als der linke. ...
- Page 18 Formatieren der microSD‐Karte Zum Einschalten des Scanners bringen Sie den Schalter in die Position Scan. Stecken Sie ein spitzes Objekt, wie z. B. eine Büroklammer, in die Taste Format. Auf dem Display wird der Buchstabe F angezeigt. Drücken Sie nun die Taste Scan, um die Karte zu formatieren. Während der Formatierung blinkt auf dem Display das Kartensymbol. Technischer Hinweis Mindestsystemanforderungen Betriebssystem Windows 7®, Vista®, XP und Mac OS® 10.4 oder höher (keine Treiberinstallation erforderlich) CPU Pentium® III oder höher RAM 256 MB Schnittstelle USB‐Anschluss Scanner‐Spezifikationen Bildsensor Contact Image Sensor Farbe Auflösung Niedrige Auflösung: 300 x 300 dpi (Standard) Hohe Auflösung: 600 x 600 dpi Maximale Scangeschwindigkeit für Hohe Auflösung, Farbe: 8 Sekunden A4‐Dokumente Hohe Auflösung, Schwarzweiß: 6 Sekunden Niedrige Auflösung, Farbe: 3 Sekunden Niedrige Auflösung, Schwarzweiß: 2 Sekunden Kapazität (basierend auf einer 1 GB 600 dpi Farbe: 220 Bilder (Minimum) ...
-
Page 19: Fehlerbehebung
Scanbreite 8,34" (21,2 cm) Scanlänge 300 dpi: 134.5 cm (Maximum) 600 dpi: 66 cm (Maximum) Dateiformat JPEG LCD Scanstatusanzeige Ausschaltautomatik 3 Minuten USB‐Anschluss USB 2.0 Highspeed Externer Speicher MicroSD‐Karte Standardbatterie 4,2 V Lithium‐Polymer‐Akku Fehlerbehebung Problem Ursache Lösung Ich kann den Scanner Akku ist schwach. Laden Sie den Akku auf, nicht einschalten. indem Sie den Scanner über das USB‐Kabel an einen Computer anschließen. Akku ist nicht richtig Legen Sie den Akku richtig eingelegt. ein. Die Bilder können ... - Page 20 Scanner nicht, wenn Kabels richtig eingesteckt ich ihn anschließe (der sind. Wechseldatenträger wird nicht angezeigt). Ihr Bluetooth‐Gerät: Vergewissern Sie sich, dass Sie die Bluetooth‐ Anweisungen befolgt haben (siehe Link). Starten Sie Ihren Computer/Ihr Gerät ggf. neu. Mein Scanner erzeugt Wahrscheinlich ist Reinigen Sie das Objektiv verschwommene das Objektiv des mit einem weichen Bilder. Scanners trockenen Tuch. verschmutzt. Mein Scanner erzeugt Der Scanner wurde Kalibrieren Sie den Scanner schiefe Bilder. nicht richtig mit der im Paket kalibriert. enthaltenen Kalibrierungskarte. Die Fehler‐LED Sie gleiten mit dem Drücken Sie die Taste Scan leuchtet beim Scannen Scanner zu schnell und scannen Sie Ihre ...
-
Page 21: Van Start Gaan
Van start gaan Plaats de microSD ‐kaart voor u begint voorzichtig in de kaartgleuf tot ze vastklikt. Forceer de kaart niet in de gleuf! Laad de scannerbatterij op met behulp van de stroomadapter. De scanner gebruiken STAP 1: Kies de scannerinstellingen A. Stel de schuifknop in op de stand Scan. B. Druk op de knop C/BW om te kiezen tussen scannen in kleur (color) of zwart‐ wit (mono). C. Druk op de knop DPI om te kiezen tussen een hoge (600 dpi) of lage (300 dpi) resolutie. 1/7 Van start gaan – Nederlands ... - Page 22 STAP 2: Scan uw documenten A. Plaats uw scanner bovenaan de pagina die u wil scannen. Tip: Zorg ervoor dat uw IRIScan Book nog steeds ingeschakeld is. Tip: Zorg ervoor dat uw scanner de volledige oppervlakte bedekt die u wil scannen. De pijltjes op de scanner duiden de scanbreedte aan. B. Druk op Scan. De SCAN‐led licht groen op. C. Schuif de scanner langzaam en met vaste hand over de pagina. Tip: Houd het document met 1 hand vast terwijl u scant. D. Om het scannen te stoppen, druk opnieuw op Scan. Als de ERR.‐led oplicht, dan is er een fout gebeurd. Zie Troubleshooter op pagina 6. STAP 3: Zet de documenten over op uw computer Met de mini‐USB‐kabel Met de microSD‐kaart adapter Steek de USB‐kabel zowel in de Druk op de microSD‐kaart om ze los IRIScan Book als in uw computer. te klikken. Verwijder de kaart daarna uit de gleuf. IRIScan Tip: Zorg ervoor dat de Book nog Plaats ze in de bijgeleverde microSD‐ steeds ingeschakeld is. kaart adapter. Plaats de adapter in de SD‐kaartgleuf van uw computer. 2/7 Van start gaan – Nederlands ...
- Page 23 Het kaartgeheugen dat uw documenten bevat wordt getoond op uw computer. PC Mac® Open het kaartgeheugen en sleep uw documenten naar uw computer. De documenten bevinden zich in de map DCIM\100MEDIA van de verwisselbare schijf. Zodra u uw documenten hebt overgebracht naar uw PC of Mac kunt u ze verwerken met Readiris™. Voor meer informatie over het verwerken van documenten met Readiris op een PC of Mac, raadpleeg de Beknopte Gebruiksaanwijzing op de Readiris™ cd‐ rom STAP 4: Breng uw documenten via Bluetooth® over naar compatibele apparaten Om uw documenten via Bluetooth over te brengen moet u eerst uw Bluetooth‐ apparaat aan de IRIScan Book koppelen. De IRIScan Book is compatibel met apparaten die de volgende besturingssystemen (OS) gebruiken: Windows XP, Vista®, 7 Windows Mobile *Mac OS® X Blackberry® OS Android OS ® *iOS besturingssystemen worden niet ondersteund. De koppelingsinstructies verschillen naargelang het besturingssysteem. Voor ...
- Page 24 Tips Een tijdstempel toevoegen aan uw afbeeldingen Uw IRIScan™ Book 2 voegt een tijdstempel toe aan de afbeeldingen die u scant. Zo weet u exact wanneer u ze gescand hebt. Om de juiste tijdstempel te verkrijgen, moeten de Tijdsinstellingen worden geconfigureerd: Om de scanner in te schakelen, stel de schuifknop in op stand Scan. Breng een puntig voorwerp, zoals een paperclip, in in het Time set‐gaatje: Druk daarna op C/BW of DPI om het (1) jaar te wijzingen. Druk op Scan om te bevestigen en naar de (2) maand over te gaan. Herhaal stap 1 voor de (2) maand, (3) datum, (4) uur en (5) minuten. Kleine, dikke boeken scannen Wanneer u kleine, dikke boeken scant is het mogelijk dat de marge te smal is en u niet de hele tekst kan scannen. Deze kwestie kunt u oplossen door de pagina’s horizontaal te scannen en de afbeeldingen achteraf te draaien met Readiris . Een andere oplossing is om de scanner onderaan de pagina te plaatsen, hem om te draaien en van onder naar boven te scannen. U zal merken dat de rechtermarge van de scanner kleiner is dan de linker. De microSD‐kaart formatteren Om de scanner in te schakelen, stel de schuifknop in op stand Scan. Breng een puntig voorwerp, zoals een paperclip, in in het Format‐gaatje. De letter F verschijnt op het scherm. ...
-
Page 25: Technische Fiche
Technische fiche Minimum Systeemvereisten Besturingssysteem Windows® 7, Vista®, XP en Mac OS® 10.4 or later (geen stuurprogramma nodig) CPU Pentium® III of hoger RAM 256 MB Interface USB‐poort Scannerspecificaties Afbeeldingssensor Kleur Contactafbeeldingssensor Resolutie Lage resolutie: 300x300 dpi (standaard) Hoge resolutie: 600x600 dpi Maximale scansnelheid voor A4‐ Kleur, hoge resolutie: 8,0 seconden document Mono, lage resolutie: 6,0 seconden Kleur, lage resolutie: 3,0 seconden Mono, lage resolutie: 2,0 seconden Capaciteit (op basis van een 1GB 600 dpi, kleur: 220 afbeeldingen microSD‐kaart) (minimum) Het aantal A4‐scans kan variëren 600 dpi, mono: 290 afbeeldingen naargelang de complexiteit van de (minimum) inhoud 300 dpi, kleur: 780 afbeeldingen (minimum) 300 dpi, mono: 1280 afbeeldingen (minimum) Scanbreedte 8.34” Scanlengte 300 dpi: 53” (maximum) ... - Page 26 Troubleshooter Probleem Oorzaak Oplossing Ik kan de scanner niet Laag batterijniveau Herlaad de batterij door de inschakelen. scanner met uw computer te verbinden via de USB‐ kabel. Batterij is niet correct Plaats de batterijen op de geplaatst. juiste manier. De afbeeldingen Er zit geen microSD‐ Plaats een microSD‐kaart kunnen niet worden kaart in de kaartgleuf. (met de metalen zijde naar opgeslagen nadat ik ze boven gericht). gescand heb. De microSD‐kaart is Verplaats de afbeeldingen vol. van de microSD‐kaart naar uw computer om opslagruimte vrij te maken ...
- Page 27 De ERR.‐led licht op U glijdt de scanner te Druk op Scan om uw tijdens het scannen. snel over uw document opnieuw, traag documenten. en met vaste hand te scannen. 7/7 Van start gaan – Nederlands ...
-
Page 28: Guida Introduttiva
Guida introduttiva Prima di iniziare, inserire delicatamente la scheda microSD fornita nell'apposito slot fino a farla scattare in posizione. Non forzare la scheda nello slot! Caricare la batteria dello scanner usando l'adattatore di alimentazione. Uso dello scanner FASE 1: scelta delle impostazioni dello scanner A. Per accendere lo scanner porre il pulsante di accensione su Scan. B. Premere il pulsante C/BW per selezionare la modalità di scansione color o mono (in bianco e nero). C. Premere il pulsante DPI per selezionare la risoluzione high (600 dpi) o low (300 dpi). 1/7 Guida introduttiva ‐ Italiano ... - Page 29 FASE 2: acquisizione dei documenti A. Posizionare lo scanner nella parte superiore della pagina che si desidera acquisire. Nota: verificare che IRIScan Book sia ancora in funzione. Nota: verificare che lo scanner copra l'intera superficie che si desidera acquisire. Le frecce sullo scanner indicano la larghezza di acquisizione coperta. B. Premere il pulsante Scan. Il led SCAN diventa verde. C. Far scorrere lo scanner lentamente e in modo regolare sulla pagina. Nota: tenere il documento ben fermo con una mano durante l’acquisizione. D. Per interrompere l'acquisizione premere nuovamente il pulsante Scan. Se il led ERR. diventa rosso si è verificato un errore. Fare riferimento alla sezione Risoluzione dei problemi riportata a pagina 6. FASE 3: trasferimento dei documenti al computer Uso del cavo USB mini Uso dell'adattatore per scheda microSD Collegare il cavo USB fornito sia a Premere la scheda microSD per IRIScan Book che al computer. sbloccarla. Quindi rimuoverla dallo slot. IRIScan Nota: verificare che Book sia ancora in funzione. Inserirla nell'adattatore per scheda microSD in dotazione. Inserire l'adattatore nello slot della 2/7 Guida introduttiva ‐ Italiano ...
- Page 30 La scheda di memoria con i documenti acquisiti viene visualizzata sul computer. PC Mac® Accedere alla scheda di memoria e trascinare i documenti nel computer. I documenti vengono salvati nella cartella DCIM\100MEDIA del disco rimovibile. Una volta trasferiti al PC o su Mac i documenti possono essere elaborati con Readiris™. Per ulteriori informazioni sull'elaborazione dei documenti con Readiris™ su PC o Mac, consultare la Guida rapida per l'uso di Readiris™ presente nel cd‐rom Readiris™. Fase 4: trasferimento dei documenti via Bluetooth® verso periferiche compatibili Per trasferire i documenti tramite Bluetooth è necessario prima eseguire il pairing tra il dispositivo Bluetooth e IRIScan™ Book. IRIScan™ Book è compatibile con le periferiche su cui sono installati i seguenti sistemi operativi (OS): Windows XP, Vista®, 7 Windows Mobile *Mac OS® X Blackberry® OS Android OS ® *I sistemi operativi iOS non sono supportati. Le istruzioni per il pairing variano in base al sistema operativo. Per avere le istruzioni relative alla propria periferica consultare il sito www.irislink.com\iriscanbookexecutive. ...
- Page 31 Suggerimenti Aggiunta di una marca temporale (timestamp) alle immagini Lo scanner IRIScan™ Book 2 aggiunge un timestamp alle immagini acquisite. Questo permette all’utente di conoscere esattamente l’orario di acquisizione. Per ottenere un timestamp corretto è necessario effettuare alcune impostazioni: Per accendere lo scanner porre il pulsante di accensione su Scan. Premere con un oggetto appuntito, ad es. una graffetta, il pulsante Time set: Premere C/BW o DPI per modificare (1) l'anno. Premere Scan per confermare e spostarsi su (2) mese. Ripetere il passaggio 1 per (2) mese, (3) data, (4) ora e (5) minuti. Acquisizione di libri di piccole dimensioni con molte pagine Durante l’acquisizione di libri di piccole dimensioni con molte pagine può succedere che i margini siano troppo stretti e che non sia possibile acquisire l'intero testo. Il problema può essere risolto acquisendo le pagine in orizzontale e ruotando le immagini con Readiris™. In alternativa si può posizionare lo scanner in fondo alla pagina, capovolgerla e acquisire verso l'alto. Il margine destro dello scanner è ridotto rispetto al margine sinistro. ...
-
Page 32: Note Tecniche
Formattazione della scheda microSD Per accendere lo scanner porre il pulsante di accensione su Scan. Premere con un oggetto appuntito, ad es. una graffetta, il pulsante Format. La lettera F viene visualizzata sul video. Fare clic sul pulsante Scan per formattare la scheda. L’icona della scheda sul video lampeggia durante la formattazione. Note tecniche Requisiti minimi di sistema Sistema operativo Windows® 7, Vista®, XP e Mac OS® 10.4 o superiore (non richiede l'installazione di alcun driver) CPU Pentium® III o superiore RAM 256 MB Interfaccia Porta USB Specifiche dello scanner Sensore immagine Color Contact Image Sensor Risoluzione Bassa risoluzione: 300x300 dpi (impostazione predefinita) Alta risoluzione: 600x600 dpi Velocità massima di acquisizione Alta risoluzione a colori: 8 secondi per documenti in formato A4 Alta risoluzione in bianco e nero: 6 secondi Bassa risoluzione a colori: 3 secondi Bassa risoluzione in bianco e nero: 2 secondi Capacità (basata su scheda ... -
Page 33: Risoluzione Dei Problemi
Larghezza di acquisizione 8.34” Lunghezza di acquisizione 300 dpi: 53” (massimo) 600 dpi: 26” (massimo) Formato file JPEG LCD Display indicatore dello stato di acquisizione Spegnimento automatico 3 minuti Porta USB USB 2.0 high speed Memoria esterna Scheda MicroSD Batteria standard Batteria al litio polimero ricaricabile da 4,2V Risoluzione dei problemi Problema Causa Soluzione Lo scanner non si Batteria scarica. Caricare la batteria accende. collegando lo scanner al computer tramite il cavo USB. Batteria non inserita Inserire la batteria in modo correttamente. corretto. Non è possibile salvare ... - Page 34 riconosce lo scanner siano correttamente collegato (il disco inserite. rimovibile non viene visualizzato). Dispositivo Bluetooth: verificare di aver seguito le istruzioni relative al Bluetooth (consultare il link). Riavviare il computer/dispositivo, se necessario. Lo scanner genera La lente dello scanner Pulire la lente con un immagini sfocate. probabilmente è panno morbido e asciutto. sporca. Lo scanner genera Lo scanner non è Calibrare lo scanner immagini inclinate. stato calibrato usando il foglio di correttamente. calibrazione disponibile nella confezione dello scanner. Il led ERR. è accesso Lo scanner viene Premere il pulsante Scan durante l’acquisizione fatto scorrere troppo per acquisire nuovamente dei documenti. ...
-
Page 35: Primeiros Passos
Primeiros passos Antes de iniciar, insira cuidadosamente o cartão microSD fornecido na respectiva ranhura até o cartão encaixar. Não force o cartão na ranhura! Carregue a bateria do scanner utilizando o adaptador de alimentação. Utilizar o scanner FASE 1: Escolha as definições do scanner A. Para ligar o scanner, defina o botão para Scan. B. Prima o botão C/BW para escolher entre digitalização a cores e mono (preto e branco). C. Prima o botão PPP para escolher entre uma resolução alta (600 ppp) ou baixa (300 ppp). 1/7 Primeiros passos – Português ... - Page 36 FASE 2: Digitalize os seus documentos A. Coloque o scanner na parte superior da página que pretende digitalizar. Conselho: Certifique‐se de que o IRIScan Book ainda está ligado. Conselho: Certifique‐se de que o scanner abrange toda a superfície que pretende digitalizar. As setas no scanner marcam a largura de digitalização abrangida. B. Prima o botão Scan. O LED SCAN acende‐se a verde. C. Deslize o scanner de forma lenta e estável sobre a página. Conselho: Segure bem o documento com uma mão enquanto digitaliza. D. Para parar a digitalização, clique novamente no botão Scan. Quando ocorre um erro, o LED ERR. acende‐se a vermelho. Consulte Informações de resolução de problemas na página 6. FASE 3: Transferir os documentos para o computador Utilizar o cabo mini USB Utilizar o adaptador do cartão microSD Ligue o cabo USB fornecido ao Prima o cartão microSD para IRIScan Book e ao computador. desencaixá‐lo. De seguida, retire‐o da ranhura. IRIScan Conselho: Certifique‐se de que o Book ainda está ligado. Insira‐o no adaptador do cartão microSD fornecido. Insira o adaptador na ranhura do cartão SD no computador. 2/7 Primeiros passos – Português ...
- Page 37 O cartão de memória com o seus documentos é apresentado no computador. PC Mac® Abra o cartão de memória e arraste e largue os documentos para o computador. Os documentos estão situados na pasta DCIM\100MEDIA do disco amovível. Quando tiver transferido os documentos para o PC ou Mac, estes podem ser processados utilizando Readiris™. Para obter mais informações sobre como processar os documentos com Readiris™ num PC ou Mac, consulte o Guia rápido de utilizador Readiris™ que encontra no CD‐ROM Readiris™. Fase 4: Transfira os documentos por Bluetooth® para dispositivos compatíveis Para transferir documentos por Bluetooth, em primeiro lugar, deve emparelhar o dispositivo Bluetooth com o IRIScan™ Book. O IRIScan™ Book é compatível com dispositivos que utilizam os seguintes sistemas operativos (OS): Windows XP, Vista®, 7 Windows Mobile *Mac OS® X Blackberry® OS Android OS ® *Os sistemas operativos iOS não são suportados. As instruções de emparelhamento variam consoante o sistema operativo. Para obter instruções correspondentes ao seu dispositivo, consulte o nosso website www.irislink.com\iriscanbookexecutive. ...
- Page 38 Sugestões Adicionar uma marca de tempo às imagens O scanner IRIScan™ Book 2 adiciona uma marca de tempo às imagens que digitaliza. Desta forma, sabe exactamente quando foram digitalizadas. Para obter uma marca de tempo correcta, as Definições de data e hora necessitam de ser definidas: Para ligar o scanner, defina o botão para Scan. Introduza um objecto pontiagudo, como um clip, no botão Time set. De seguida, prima C/BW ou DPI para alterar o (1) ano. Prima Digitalizar para confirmar e avance para o (2) mês. Repita o passo 1 para o (2) mês, (3) data, (4) hora e (5) minutos. Digitalizar livros pequenos e grossos Quando está a digitalizar um livro pequeno e grosso, a margem pode ser demasiado estreita e não poderá digitalizar o texto todo. Pode solucionar este problema digitalizando as páginas horizontalmente e rodando as imagens com Readiris™. Outra solução é colocar o scanner no fundo da página, virá‐lo ao contrário e digitalizar para cima. Irá reparar que a margem direita do scanner é mais pequena do que a da esquerda. Formatar o cartão microSD Para ligar o scanner, defina o botão para Scan. Introduza um objecto pontiagudo, como um clip, no botão Format. A letra F aparece no ecrã. ...
- Page 39 Nota técnica Requisitos mínimos do sistema Sistema operativo Windows® 7, Vista®, XP e Mac OS® 10.4 ou superior (sem necessidade de instalação de controlador) CPU Pentium® III ou superior RAM 256 MB Interface Porta USB Especificações do scanner Sensor de imagem Sensor de imagem contacto de cor Resolução Resolução baixa: 300x300 ppp (predefinição) Resolução alta: 600x600 ppp Velocidade máxima de digitalização Resolução alta a cores: 8,0 segundos para documentos A4 Resolução alta mono: 6,0 segundos Resolução baixa a cores: 3,0 segundos Resolução baixa mono: 2,0 segundos Capacidade (com base num cartão Cor 600 ppp: 220 imagens (mínimo) microSD 1GB) Digitalizar ficheiro de Mono 600 ppp: 290 imagens (mínimo) tamanho A4, a quantidade de Cor 300 ppp: 780 imagens (mínimo) digitalizações varia consoante a Mono 300 ppp: 1280 imagens (mínimo) complexidade dos conteúdos) Largura de digitalização 8,34” Comprimento de digitalização 300 ppp: 53” (máximo) 600 ppp: 26” (máximo) Formato de ficheiro ...
- Page 40 Informações de resolução de problemas Problema Causa Solução O scanner não liga. Carga fraca da Carregue a bateria ligando bateria. o scanner ao computador através do cabo USB. A bateria não está Introduza a bateria bem introduzida. correctamente. As imagens não podem Não está nenhum Insira um cartão microSD ser guardadas após tê‐ cartão microSD na (com o lado metálico las digitalizado. ranhura de cartões. virado para cima). O cartão microSD Mova as imagens do está cheio. cartão microSD para o computador para disponibilizar espaço no cartão. Formate o cartão, ...
- Page 41 encontra na caixa do scanner. O LED ERR. está aceso Está a deslizar o Prima o botão Scan para ao digitalizar um scanner demasiado digitalizar novamente o documento. rápido sobre os documento, de forma documentos. estável e lenta. 7/7 Primeiros passos – Português ...
-
Page 42: Начало Работы
Начало работы Перед началом работы осторожно вставьте карту microSD из комплекта в соответствующий слот (до щелчка). Не применяйте силу! Зарядите аккумулятор сканера с помощью адаптера. Использование сканера ШАГ 1: настройте параметры сканера A. Чтобы включить сканер, переведите переключатель в положение Scan. B.Нажмите кнопку C/BW, чтобы выбрать между режимами сканирования color и mono (цветное и черно‐белое соответственно). C.Нажмите кнопку DPI, чтобы выбрать разрешение — high (600 dpi) или low (300 dpi). 1/7 Начало работы – английский ... - Page 43 ШАГ 2: отсканируйте документы A. Поместите сканер в верхнюю часть страницы, которую следует отсканировать. Совет. Убедитесь, что сканер IRIScan Book включен. Совет. Убедитесь, что сканер полностью покрывает сканируемую поверхность. Стрелки на сканере отмечают ширину сканирования. B.Нажмите кнопку Scan. Индикатор SCAN загорится зеленым цветом. C.Медленно и ровно проведите сканером по странице. Совет. Удерживайте документ неподвижным одной рукой во время сканирования. D. Чтобы остановить сканирование, нажмите кнопку Scan еще раз. Если индикатор ERR. загорится красным цветом, значит произошла ошибка сканирования. См. раздел Устранение неполадок на стр. 6. ШАГ 3: передайте документы на компьютер Использование miniUSB‐кабеля Использование адаптера microSD Подключите USB‐кабель к IRIScan Book и компьютеру. Нажмите на карту microSD™, чтобы освободить ее, и вытащите карту IRIScan Совет. Убедитесь, что сканер из слота. Book все еще включен. Вставьте ее в адаптер microSD. Вставьте адаптер в слот SD на компьютере. 2/7 Начало работы – английский ...
- Page 44 Карта памяти с документами появится на компьютере. ПК Mac® Откройте карту памяти и перетащите документы на компьютер. Документы находятся в папке DCIM\100MEDIA на съемном диске. После передачи документов на ПК или Mac их можно будет обработать в Readiris™. См. дополнительные сведения по обработке документов в Readiris для PC и Mac в кратком руководстве пользователя Readiris на компакт‐диске Readiris™. Шаг 4: Передайте документы на совместимые устройства с помощью Bluetooth® Для передачи документов через Bluetooth необходимо связать устройство Bluetooth с IRIScan Book. Сканер IRIScan Book совместим с устройствами под управлением следующих ОС: Windows XP, Vista®, 7 Windows Mobile *Mac OS® X Blackberry® OS Android OS ® *Операционные системы iOS не поддерживаются. Процесс связывания меняется в зависимости от ОС. См. инструкции к своему устройству на веб‐сайте по адресу www.irislink.com\iriscanbookexecutive. ...
- Page 45 Советы Добавление временной метки к изображениям Сканер IRIScan™ Book 2 добавляет временную метку к сканируемым изображениям. Таким образом, вы узнаете, когда они были отсканированы. Для получения правильной временной метки необходимо настроить параметры времени: Чтобы включить сканер, переведите переключатель в положение Scan. Вставьте острый предмет, например скрепку, в отверстие с меткой Time set. Затем нажмите кнопку C/BW или DPI чтобы изменить значение (1) года. Нажмите кнопку Scan, чтобы подтвердить параметр и перейти к значению (2) месяца. Повторите шаг 1 для значений (2) месяца, (3) даты, (4) часа и (5) минут. Сканирование толстых книг малого формата При сканировании толстых книг малого формата поля могут оказаться слишком узкими, что сделает сканирование полного текста невозможным. Эту проблему можно решить, отсканировав страницы по горизонтали и повернув изображения в Readiris™. Кроме того, можно перевернуть сканер, поместить его в нижнюю часть страницы и отсканировать ее снизу вверх. Обратите внимание, что правое поле сканера больше, чем левое. 4/7 Начало работы – английский...
- Page 46 Форматирование карты microSD Чтобы включить сканер, переведите переключатель в положение Scan. Вставьте острый предмет, например скрепку, в отверстие с меткой Format. На экране появится буква F. Нажмите кнопку Scan, чтобы отформатировать карту. Значок карты на экране будет мигать до окончания форматирования. Техническое примечание Минимальные системные требования Операционная Windows 7, Vista, XP и Mac OS® 10.4 или более система поздние версии (установка драйверов не требуется) ЦП Pentium® III или более мощный ОЗУ 256 Мбайт Интерфейс USB‐порт Характеристики сканера Датчик изображения A4 Color Contact Разрешение Низкое разрешение: 300x300 dpi (по умолчанию) Высокое разрешение: 600x600 dpi Максимальная скорость Высокое разрешение (цветное): 8 сканирования для документа секунд формата A4 Высокое разрешение (черно‐белое): 6 секунд ...
- Page 47 содержимого) (минимум) 300 dpi, черно‐белое: 1280 изображений (минимум) Ширина сканируемого 21,2 см изображения Длина сканируемого 300 dpi: 134,6 см (максимум) изображения 600 dpi: 66 см (максимум) Формат файлов JPEG ЖК Экран статуса сканирования Автоматическое отключение 3 минуты USB‐порт USB 2.0 (высокоскоростной) Внешняя память Карта MicroSD Стандартная батарея Литий‐полимерный аккумулятор 4,2 В с возможностью перезарядки Устранение неполадок Проблема Причина Решение Сканер не Низкий заряд Зарядите аккумулятор, включается. аккумулятора. подключив сканер к компьютеру с помощью USB‐кабеля. ...
- Page 48 устройство Bluetooth подключения. Убедитесь, что оба не распознает сканер разъема USB‐кабеля при подключении подключены должным (съемный диск не образом. отображается). Ваше устройство Bluetooth: Убедитесь, что инструкции для Bluetooth выполнены (см. ссылку). При необходимости перезагрузите компьютер или устройство. Сканер создает Линза сканера Очистите линзу сухой размытые загрязнена. тряпкой. изображения. Сканер создает Сканер не Откалибруйте сканер, повернутые откалиброван используя изображения. должным образом. калибровочный лист, который можно найти в упаковке. Индикатор ERR. Вы слишком быстро ...
-
Page 49: Primeros Pasos
Primeros pasos Antes de empezar, introduzca la tarjeta microSD incluida con el producto, empujándola suavemente hasta que quede bloqueada. No intente introducirla por la fuerza. Cargue la batería del escáner utilizando el adaptador. Utilizar el escáner PASO 1: Defina los parámetros de escaneado A. Para encender el escáner, coloque el conmutador en la posición Scan. B. Pulse el botón C/BW para escoger entre escanear en color y o en blanco y negro (mono). C. Pulse el botón DPI para escoger entre alta (600 ppp) o baja (300 ppp) resolución. 1/7 Primeros pasos – Español ... - Page 50 PASO 2: Escanee los documentos A. Coloque el escáner en la parte superior de la página que desee escanear. Consejo: Asegúrese de que el IRIScan Book siga encendido. Consejo: Asegúrese de que el escáner cubre toda la superficie que desea escanear. Las flechas del escáner marcan la cobertura a lo ancho. B. Pulse el botón Scan. El LED correspondiente se pondrá en verde. C. Deslice el escáner lentamente y a un ritmo constante por encima de la página. Consejo: Sujete el documento con una mano mientras lo escanee. D. Para parar de escanear, vuelva a pulsar el botón Scan. Si se produce algún error durante el escaneado, el LED ERR. aparecerá iluminado en rojo. Consulte el apartado Resolución de problemas, en la página 6. PASO 3: Transfiera los documentos a su ordenador Utilizando el cable mini‐USB Utilizando el adaptador de tarjetas microSD Conecte el cable USB al IRIScan Book y al ordenador. Presione la tarjeta microSD para liberarla. A continuación, sáquela de IRIScan Consejo: Asegúrese de que el la ranura. Book siga encendido. 2/7 Primeros pasos – Español ...
- Page 51 Introduzca el adaptador en la ranura para tarjetas SD de su ordenador. El ordenador muestra la tarjeta de memoria que contiene sus documentos. PC Mac® Acceda a la tarjeta de memoria y, a continuación, arrastre y suelte los documentos en su ordenador. Los documentos se encuentran en la carpeta DCIM\100MEDIA de la unidad extraíble. Una vez haya transferido los documentos a su PC o Mac, podrá procesarlos con Readiris™. Para saber cómo puede procesar documentos con Readiris™ en un PC o un Mac, consulte la Guía rápida del usuario de Readiris™, que encontrará en el CD‐ROM de Readiris™. PASO 4: Transfiera los documentos a dispositivos compatibles mediante Bluetooth® Para transferir documentos a través de Bluetooth®, primero deberá aparear su dispositivo Bluetooth con el IRIScan™ Book. El IRIScan™ Book es compatible con cualquier dispositivo que utilice los siguientes sistemas operativos: Windows XP, Vista®, 7 Windows Mobile *Mac OS® X Blackberry® Android ® *No compatible con sistemas operativos iOS 3/7 Primeros pasos – Español...
- Page 52 Las instrucciones para aparear varían en función del sistema operativo. Para obtener las instrucciones correspondientes a su dispositivo, visite nuestro sitio web www.irislink.com\iriscanbookexecutive. Consejos Añadir una marca de tiempo a las imágenes El escáner IRIScan™ Book 2 añade una marca de tiempo a las imágenes que escanea. De este modo, sabrá exactamente cuando las escaneó. Para que la marca de tiempo sea correcta, deberá haber ajustado la fecha y la hora: Para encender el escáner, coloque el conmutador en la posición Scan. Introduzca un objeto terminado en punta, como un clip sujetapapeles extendido, en el botón Time set. A continuación, pulse C/BW o DPI para cambiar el valor del (1) año. Pulse Scan para confirmar el valor seleccionado y pase al (2) mes. Repita el primer paso para (2) el mes, (3) el día, (4) la hora y (5) los minutos. Escanear libros pequeños y gruesos Cuando escanee un libro pequeño y grueso, es posible que el margen sea demasiado estrecho y resulte imposible escanear todo el texto. Este problema se puede solucionar escaneando las páginas en sentido horizontal y luego girando las imágenes con Readiris™. Otra solución es colocar el escáner en la parte inferior de la página, girarlo del revés y escanear en sentido ascendente. Observe que el margen derecho del escáner es más pequeño que el izquierdo. ...
- Page 53 Formatear la tarjeta microSD Para encender el escáner, coloque el conmutador en la posición Scan. Introduzca un objeto terminado en punta, como un clip sujetapapeles extendido, en el botón Format. La letra F aparece en la pantalla. A continuación, haga clic en el botón Scan para formatear la tarjeta. El icono de la tarjeta parpadea en la pantalla hasta que termina el proceso de formateo. Apuntes técnicos Requisitos mínimos del sistema Sistema operativo Windows® 7, Vista®, XP and Mac OS® 10.4 o superior (no hay que instalar controladores) CPU Pentium® III o superior RAM 256 MB Interfaz Puerto USB Especificaciones del escáner Sensor de imagen Sensor de imagen de contacto en color Resolución Baja resolución: 300x300 ppp (por defecto) Alta resolución: 600x600 ppp Velocidad máxima de escaneado Alta resolución, color: 8,0 segundos para documentos de tamaño A4 Alta resolución, blanco y negro: 6,0 segundos Baja resolución, color: 3,0 segundos Baja resolución, blanco y negro: 2,0 segundos ...
-
Page 54: Resolución De Problemas
contenido) (mínimo) Ancho de escaneado 8,34" / 21,2 cm Longitud de escaneado 300 ppp: 53" / 134,6 cm (máximo) 600 ppp: 26" / 66 cm (máximo) Formato de archivo JPEG LCD Visualización de estado de escaneado Apagado automático 3 minutos Puerto USB USB 2.0 de alta velocidad Memoria externa Tarjeta microSD Pilas estándar Batería recargable de polímero de litio de 4,2 V Resolución de problemas Problema Causa Solución No puedo encender el Las pilas están casi Recargue la batería escáner. descargadas. conectando el escáner a un ordenador por medio del cable USB. Las pilas no se han Introduzca la batería introducido correctamente. ... - Page 55 conecto (no aparece el disco extraíble). En el dispositivo Bluetooth: Asegúrese de que ha seguido las instrucciones de Bluetooth (compruebe el enlace). Si fuese necesario, reinicie el ordenador o dispositivo. El escáner genera Es probable que la Limpie la lente con un imágenes borrosas. lente del escáner esté paño suave y seco. sucia. El escáner genera El escáner no se ha Calibre el escáner imágenes torcidas. calibrado utilizando la hoja de correctamente. calibración que encontrará en la caja. El LED ERR. se Hace pasar el escáner Pulse el botón Scan para enciende al escanear demasiado rápido por volver a escanear el un documento. encima de los documento, más documentos. lentamente y a un ritmo más constante. ...
- Page 56 التشغيل بدء المزودة برفق في فتحة البطاقة حتى تستقر في موضعھا microSD قبل البدء قم بإدخال بطاقة . ال تستخدم العنف إلدخال البطاقة في الفتحة . قم بشحن بطارية الماسح الضوئي باستخدام محول الطاقة استخدام الماسح الضوئي ...
- Page 57 ترغب التي الصفحة أعلى الضوئي الماسح بوضع قم . أ . التشغيل قيد يزال ال أن من تأكد تلميح IRIScan™ Book على الموجودة األسھم تشير بالكامل مسحه في ترغب الذي السطح يغطي الضوئي الماسح أن من تأكد تلميح . ...
- Page 58 الخطوة Bluetooth® ً أو ال مع بك الخاص جھاز بإقران تقوم أن يجب ، عبر مستندات لنقل Bluetooth Bluetooth . IRIScan Book : التالية التشغيل أنظمة تستخدم التي األجھزة مع يتوافق IRIScan Book Windows XP, Vista®, 7 ...
- Page 59 إضافة ضوئ ي ًا بمسحھا تقوم التي الصور على الزمني الطابع بإضافة الضوئي ماسح يقوم IRIScan™ Book 2 تحدي د ً ا . ضوئ ي ًا مسحھا تم متى معرفة يمكنك ،الطريقة بھذه : الوقت إعدادات ضبط...
- Page 60 فنية مالحظة النظام متطلبات من األدنى الحد نظام التشغيل أحدث أو أو أو أو Mac OS® 10.4 Vista® Windows® 7 تشغيل برنامج تثبيت يلزم ) ال المعالجة المركزية وحدة أو أعلى Pentium® III ذاكرة الوصول العشوائي ميجا بايت ...
- Page 61 معلومات استكشاف األخطاء وإصالحھا الحل السبب المشكلة خالل من البطارية شحن إعادة طاقة البطارية منخفضة ال يمكنني تشغيل الماسح بالكمبيوتر الضوئي الماسح توصيل . الضوئي . كابل عبر البطارية غير مركبة بشكل . صحيح...
Need help?
Do you have a question about the Book 2 Executive and is the answer not in the manual?
Questions and answers