
Related Manuals for audemat DIGIPLEXER 246


Summary of Contents for audemat DIGIPLEXER 246
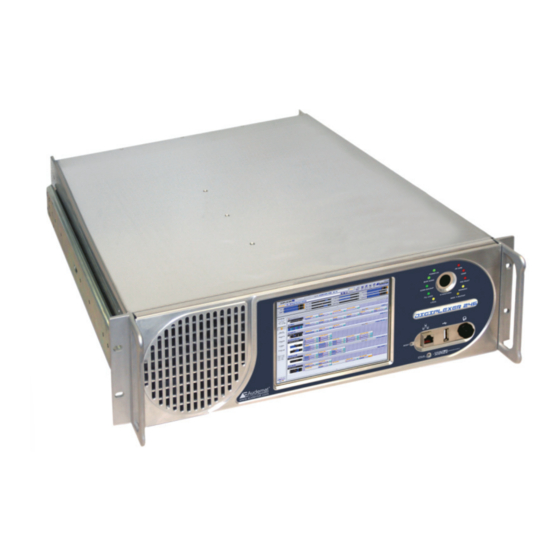
- Page 1 DIGIPLEXER 246 USER MANUAL V.2.5.x Date: 2010/11/26 Audemat® is a registered trademark audemat WordCast Systems Group web: www.audemat.com - e-mail: contact@audemat.com...
-
Page 2: Table Of Contents
Digiplexer 246 v2.5.x User Manual – 11/2010 TABLE OF CONTENTS 1. INTRODUCTION ..........................4 1.1. General information ........................4 1.1.1. About Audemat ........................4 1.1.2. About the Digiplexer ....................... 4 1.1.3. A few words about RDS ......................5 ... - Page 3 Digiplexer 246 v2.5.x User Manual – 11/2010 7. RDS SETUP ............................46 7.1. Encoder configuration ....................... 47 7.2. RDS Data ..........................49 7.2.1. DSN management........................ 49 7.2.2. PSN management ........................ 50 ...
-
Page 4: Introduction
General information 1.1.1. About Audemat Created in 1980, Audemat designs, develops and offers a complete line of products for Radio and TV broadcasters, stations, and telecommunication operators as well as regulation authorities. The Audemat product line includes RF and data monitoring equipment for analog and digital radio (HD, DAB/DMB, AM, FM) and analog and digital TV (DVB T/H/SH, ATSC, PAL/SECAM, NTSC). -
Page 5: A Few Words About Rds
Use of pre-select buttons on radios to memorize a station instead of its frequency. The RDS system transmits the data via a 57 kHz sub-carrier. Audemat’s reputation has grown due to its specialization in the RDS field which makes it a preferred supplier for numerous public and private operators using RDS. -
Page 6: Licenses And Options
Analog inputs: this module provides 8 analog inputs on a female SUB-D 25. Five slots are available on the Digiplexer 246, to set up to 4 digital input modules, up to 5 relay output modules and up to 1 analog input module. -
Page 7: Product Presentation
1 dust filter • Fuses • 1 box including 1 CD-Rom, 1 quick start, 1 I/O configuration notice, 1 sticker: #2 for a 2-band Digiplexer 246 or #4 for a 4-band Digiplexer 246, 1 quality control form. 2.2. Front panel 2.3. -
Page 8: Technical Specifications
Digiplexer 246 v2.5.x User Manual – 11/2010 2.4. Technical Specifications Main features Dimensions (WxHxD) 485 x 135 x 535 mm (3 U high) Weight ≈14 kg Operating temperatures Nominal performance +5°C to +45°C Storage -20°C to +70°C Electrical specifications Voltage 90 to 265 VAC. - Page 9 Digiplexer 246 v2.5.x User Manual – 11/2010 Connector XLR male balanced and EMI suppressed Stereo Generator Output 1 output which can deliver MPX or 19kHz pilot (software Quantity selectable) Level 2 ranges : +6 or +18 dBu Jumper selectable Impedance Minimum load : 35 Ω...
-
Page 10: Installation And Configuration
Greater than 30 W for a 20 W transmitter. Greater than 150 W for a 100 W transmitter. When you acquired your Digiplexer 246, the RF amplifier is deactivated and power is set to 0. These settings will then be adjusted using the front panel application. -
Page 11: Connections
Digiplexer 246 v2.5.x User Manual – 11/2010 3.3. 3.3. Connections Connections Digiplexer 246’s rear panel Digiplexer 246’s rear panel RF amplifier Slots for relay outputs Audio/MPX Audio/MPX Connect power (option) and digital inputs (option) Inputs Outputs supply RF antenna output... -
Page 12: Configuration Using The Front Panel Application
Configuration using the front panel application Configuration using the front panel application The front panel screen gives access to the Digiplexer 246’s The front panel screen gives access to the Digiplexer 246’s various applications; however, it is first used to configure the various applications;... - Page 13 14. You just finished setting your Digiplexer 246 for basic use. Now, you can: Turn off the Digiplexer 246: touch the “System” icon, select “Support” in the left menu and use the “Shutdown” button.
-
Page 14: Connecting To The Network To Access Remote Applications
Connecting to the network to access remote applications Connect network cable B for a direct connection * between your PC and the Digiplexer 246 IP Connect network cable B for a direct connection * between your PC and the Digiplexer 246 IP connector. - Page 15 Digiplexer 246 v2.5.x User Manual – 11/2010 5. Click on “Application portal installer”, select "Open" to install directly the installation portal or "Save" to install from the hard drive (recommended option). Once saved, launch the installer and follow the wizard’s instructions.
-
Page 16: Web Site
Digiplexer 246 v2.5.x User Manual – 11/2010 4. WEB SITE 4. WEB SITE 4.1. Product Id’s Set: Product name: this name can be used when connecting with the remote application. It is therefore recommended to use a unique and easily identifiable name. -
Page 17: Network
Digiplexer 246 v2.5.x User Manual – 11/2010 4.2. 4.2. Network Network • IP configuration definition: Ethernet configuration mode The application can be configured for use with a static or dynamic IP address (DHCP). DHCP mode is only recommended if the IP address given by the server is know (for instance if the server gives an IP address to the MAC address). -
Page 18: Download
4.3. Download Download This page enables you to download the installer software for the Digiplexer 246 applications. The installer will install: Radio all in one, for RDS Configuration + Audio Backup + System Configuration + Transmitter Configuration + Unit Status. -
Page 19: Main Application Presentation
Digiplexer 246 v2.5.x User Manual – 11/2010 5. MAIN APPLICATION PRESENTATION 5.1. Introduction The main remote application gives access to: Transmitter configuration, Basic or advanced Audio backup management, Status and logs, System configuration, RDS configuration, The Digiplexer Sound Process application. -
Page 20: From The Remote Application
Digiplexer 246 v2.5.x User Manual – 11/2010 When the cursor is in a text box, a keyboard automatically appears. Enter the value and touch ENTER When the cursor is in a text box, a keyboard automatically appears. Enter the value and touch ENTER to validate and hide the keyboard. - Page 21 Digiplexer 246 v2.5.x User Manual – 11/2010 Or: click on the magnifying glass to display a list of equipment connected to the subnet. The green indicators show units whose embedded version is compatible with the remote application version; the red indicators show units that are not compatible with the application.
-
Page 22: Accessing Various Functions
Digiplexer 246 v2.5.x User Manual – 11/2010 5.3. Accessing various functions When the application is launched, the status page opens up. Use the icons on the tool bar to: View the status and logs. See chapter 10. Configure the optional transmitter. See chapter 9. -
Page 23: System Configuration And Configuration Management
Digiplexer 246 v2.5.x User Manual – 11/2010 6. SYSTEM CONFIGURATION AND CONFIGURATION MANAGEMENT 6. SYSTEM CONFIGURATION AND CONFIGURATION MANAGEMENT To access system settings, click in the tool bar, or the ‘View’ ‘System’ (remote application only). 6.1. System configuration Click the corresponding tab to select it. -
Page 24: Product Identifiers
Digiplexer 246 v2.5.x User Manual – 11/2010 You will then need to click in the left panel on the item you wish to view or modify. Some system pages are only available in the remote application: • PPP Dial-Out •... -
Page 25: Date/Time
Digiplexer 246 v2.5.x User Manual – 11/2010 6.1.2. Date/Time Set system date: The user may update both date (year/month/day) and time (hour/minute/second). Set system time zone: The user selects the geographical zone from the list. Important to have this set correctly when using an NTP server. -
Page 26: Status
Digiplexer 246 v2.5.x User Manual – 11/2010 6.1.3. Status The ‘Status’ page gives a summary of the unit’s vital parameters: temperature, available memory, CPU load and available disk space. This information may be requested to establish a diagnosis in case of malfunction. -
Page 27: Users
Digiplexer 246 v2.5.x User Manual – 11/2010 6.1.4. Users The “Users” link opens up a page from which to set user access to the different sections of the Digiplexer. Web & Software accounts: there are 3 user levels to access the website and software application, Administrator, Guest and Local Administrator. -
Page 28: Network
Digiplexer 246 v2.5.x User Manual – 11/2010 6.1.5. Network IP Configuration: Ethernet configuration mode Both interfaces (primary and secondary) can be configured with a static or dynamic IP address (DHCP). DHCP mode is only recommended if the IP address given by the server is know (for instance if the server gives an IP address to the MAC address). -
Page 29: Ppp Dialout
Digiplexer 246 v2.5.x User Manual – 11/2010 6.1.6. PPP Dialout This page is not available on the front panel. The Digiplexer has the capability to make a network connection over a standard dial-up telephone line. This protocol is known as PPP. The unit can make the connection autonomously to send alerts via e- mail, or it can accept incoming PPP connections as well. - Page 30 Digiplexer 246 v2.5.x User Manual – 11/2010 The user can limit the number of daily outgoing calls. He/she should put 0 if this limitation is not required. The user can limit the number of hourly outgoing calls. He/she should put 0 if this limitation is not required.
-
Page 31: Ppp Dial-In
Digiplexer 246 v2.5.x User Manual – 11/2010 6.1.7. PPP Dial-in This page is not available on the front panel. To configure incoming calls from a PPP server: Dial-in configuration: activation of “incoming calls" function. Account: account and access settings. Modem configuration: the user selects the modem (if necessary) and its features. -
Page 32: Ip Router And Port Translation
Digiplexer 246 v2.5.x User Manual – 11/2010 6.1.8. IP Router and Port translation This page is not available on the front panel. Local port redirection: The port redirection allows the user to set specific, non-standard IP Ports to be used by various functions of the Digiplexer. - Page 33 Digiplexer 246 v2.5.x User Manual – 11/2010 To configure the unit as a router on a local network: To configure the unit as a router on a local network: This function allows a user to communicate with all of the equipment on the local network shared by This function allows a user to communicate with all of the equipment on the local network shared by the Digiplexer (Ethernet) from a PC connected to the Digiplexer by modem (PPP).
-
Page 34: Support
Digiplexer 246 v2.5.x User Manual – 11/2010 6.1.9. Support Stop / Restart: ‘Restart’ enables the user to restart the application to reinitialize the parameters. “Reboot equipment”: restarts the entire unit. “Power off equipment”: enables the unit to be switched off remotely. -
Page 35: Smtp Client Mail
Digiplexer 246 v2.5.x User Manual – 11/2010 6.1.10. SMTP Client mail This page is not available on the front panel. Configuration des e-mails: Enter the SMTP server address, account information (“From”), and destination e-mail addresses (“To”, “CC 1” and “CC 2”) to enable sending of e-mail alerts. Ask your network administrator for the SMTP parameters: server address, authentication, login and password. -
Page 36: Snmp Agent
Digiplexer 246 v2.5.x User Manual – 11/2010 6.1.11. SNMP Agent This page is not available on the front panel. SNMP configuration The equipment supports multiple destination addresses for notifications. However, only the Main Manager has the authority to acknowledge notifications. With “INFORM” type messages, automatic answers from secondary managers are ignored by the unit. - Page 37 Digiplexer 246 v2.5.x User Manual – 11/2010 Automatic acknowledgement for sending with INFORM. These notifications are only available with the version 2c of the protocol. This protocol checks that the manager responds to the notification sent by the SNMP transmitter. This process is simple and reliable, no specific configuration is required for the manager.
-
Page 38: Notifications
Digiplexer 246 v2.5.x User Manual – 11/2010 6.1.12. 6.1.12. Notifications Notifications This page is not available on the front panel. This page is not available on the front panel. SNMP Actions The user may replay traps that have not been acknowledged yet. - Page 39 Digiplexer 246 v2.5.x User Manual – 11/2010 Principles of Re-transmission / Acknowledgment In the “Resend until acknowledged” mode, it is possible to set the maximum number of tries and the acknowledgment timeout. As long as an acknowledgement has not been received, the notification is re-transmitted at the rate of once every <d>...
-
Page 40: I/O Log
Digiplexer 246 v2.5.x User Manual – 11/2010 • One PSU is ON (identifier1620013): sent when the power supply unit starts working again. 6.1.13. I/O Log Set parameters for the I/O log that the user can view from the application (‘Status’ button, ‘Event log’... -
Page 41: I/O Layout
Scriptlet debug: do not use. UECP: to send UECP commands. Text Commands: to send ASCII commands. Before adding serial ports, please check with Audemat for compatibility. Page 41 Head Office : Parc d’activites Kennedy - 20, avenue Neil Armstrong – F-33700 Bordeaux-Merignac (France) Tel +33 (0)5 57 928 928 –... -
Page 42: I/O State
Digiplexer 246 v2.5.x User Manual – 11/2010 6.1.15. I/O State On this page, view the state of inputs/outputs present in the system. It is refreshed automatically every 60 seconds, though you may use the “Refresh” button to do it manually. -
Page 43: Application Options
Digiplexer 246 v2.5.x User Manual – 11/2010 6.1.16. Application options language The default application language is English unless the language of your computer operating system is French. Before you start, you may want to switch the application language. The change will go into effect after restarting the application. -
Page 44: Configuration Management: Backing Up And Restoring
Digiplexer 246 v2.5.x User Manual – 11/2010 6.2. Configuration management: backing up and restoring Digiplexer settings can be saved so as to be applied to a different unit, for instance. In that case, once connected to the other unit, simply “restore”. - Page 45 Digiplexer 246 v2.5.x User Manual – 11/2010 To restore an existing backup file, click “Restore” at the top of the page. Select the file you wish to restore and click the button at the bottom of the page. Page 45 Head Office : Parc d’activites Kennedy - 20, avenue Neil Armstrong –...
-
Page 46: Rds Setup
Digiplexer 246 v2.5.x User Manual – 11/2010 7. RDS SETUP 7. RDS SETUP To access the RDS configuration, click in the tool bar, or the ‘View’ ‘RDS’ (remote application only). Page 46 Head Office : Parc d’activites Kennedy - 20, avenue Neil Armstrong – F-33700 Bordeaux-Merignac (France) Tel +33 (0)5 57 928 928 –... -
Page 47: Encoder Configuration
Digiplexer 246 v2.5.x User Manual – 11/2010 7.1. Encoder configuration Encoder configuration Select the corresponding tab. Select the corresponding tab. Settings on this page will allow you to configure the encoder. Grayed out sections are not available with the basic version of the Digiplexer: TA, EON TA, reference tables, etc. - Page 48 Digiplexer 246 v2.5.x User Manual – 11/2010 Reference Table Reference Table Only 1 table is available in the basic version. Only 1 table is available in the basic version. Set the RDS Level in millivolts, Set the RDS Level in millivolts,...
-
Page 49: Rds Data
Digiplexer 246 v2.5.x User Manual – 11/2010 7.2. 7.2. RDS Data RDS Data Select the corresponding tab. Select the corresponding tab. Select the ‘RDS Data’ tab to configure up to 2 DSNs in standard mode or up to 10 in Full RDS, each with a main PSN, and up to 9 EON PSN in Full RDS. -
Page 50: Psn Management
Digiplexer 246 v2.5.x User Manual – 11/2010 7.2.2. PSN management In Full RDS, 9 EON PSN may be added to the principal PSN. ▪ main PSN. ▪ deactivated EON PSN activated EON PSN. ▪ To add a PSN, right-click (remote application) or using the stylus, touch twice (front panel application) the DSN of your choice, and select ‘Add PSN’. -
Page 51: Dsn Parameters
Digiplexer 246 v2.5.x User Manual – 11/2010 7.2.3. DSN Parameters 7.2.3. DSN Parameters DSN Properties You can set the current DSN as the active one. In that case, On Air RDS data are The DSN will automatically be numbered those defined in this DSN. - Page 52 Digiplexer 246 v2.5.x User Manual – 11/2010 Group sequence parameters Group sequence parameters Choose the order in which you want groups to be sent. You must have at least one 0A group in the list. Use the arrow on the right to make your selection.
- Page 53 Digiplexer 246 v2.5.x User Manual – 11/2010 TNGD (Transmitter Network Group Designation) The first three bits of the five last bits of block 2 of type 1A Group (radio paging codes) are used to designate the transmitter network to a group of pager group codes. Pagers not belonging to the designated group codes will not lock on the transmitter.
- Page 54 Digiplexer 246 v2.5.x User Manual – 11/2010 Radiotext Radiotext Radiotext content. (64 characters max). Up to 8 lines of text can be entered. Select if A/B flag should Number of repetitions before sending the next radiotext. be sent. Between 1 and 15, choose ‘Inf.’ for a never-ending loop.
-
Page 55: Main Psn Parameters
Digiplexer 246 v2.5.x User Manual – 11/2010 7.2.4. Main PSN Parameters 7.2.4. Main PSN Parameters PSN Properties PSN default number is 1. A new value may be assigned: it must be between 1 and 253 and be unique for the DSN. - Page 56 Digiplexer 246 v2.5.x User Manual – 11/2010 Main settings Main settings Program Check ‘Traffic identifier Program’ and ‘Traffic (4 characters). Announcement’ if applicable. Station name (max 8 characters). Transmission Program type and day and time. program type name. 4 characters: linkage info to link several encoders for a common configuration.
- Page 57 Digiplexer 246 v2.5.x User Manual – 11/2010 With the A method, up to 25 alternative frequencies may be added. With the A method, up to 25 alternative frequencies may be added. AM frequencies are multiples of 9 kHz. AM frequencies are multiples of 9 kHz.
-
Page 58: Oda (Open Data Applications)
Digiplexer 246 v2.5.x User Manual – 11/2010 7.3. 7.3. ODA (Open Data Applications) ODA (Open Data Applications) This tab is only available with Full RDS. This tab is only available with Full RDS. Handling of ODA data Handling of ODA data... - Page 59 Digiplexer 246 v2.5.x User Manual – 11/2010 RDS resource allocation The transmission of data according to the group sequence and extended group sequence does not offer the timing constraints necessary for certain Open Data Applications, so two additional mechanisms have been included to increase the flexibility of the RDS resource allocation: "Burst Mode"...
- Page 60 Digiplexer 246 v2.5.x User Manual – 11/2010 The insertion of ODA groups is governed by the following rules: The insertion of ODA groups is governed by the following rules: • • No ODA group should start outside the activity window.
-
Page 61: Enhanced Rds
Digiplexer 246 v2.5.x User Manual – 11/2010 7.4. Enhanced RDS This tab is only available with Full RDS. Scrolling PS configuration When scrolling is done word by word, the encoder Set the number of scrolling characters. Scrolling may may center each word in the receiver screen. Only be done by word. - Page 62 Digiplexer 246 v2.5.x User Manual – 11/2010 Automation commands Automation commands It is possible to define text strings that are filled out It is possible to define text strings that are filled out automatically automatically external external software software (music (music automation).
- Page 63 Digiplexer 246 v2.5.x User Manual – 11/2010 Telnet port protocol Each command is validated when sending the following characters: <CR> <LF> (0x0A, 0x0D) Responses Command is recognized and executed. Command is not recognized and not executed. Commands are listed in the following table: General commands DSN.CURR=1/2...
- Page 64 Digiplexer 246 v2.5.x User Manual – 11/2010 PTY Code RDS Program Types (EU) RBDS Program Types (USA) No program type or undefined No program type or undefined News News Current affairs Information Information Sports Sport Talk Education Rock Drama Classic Rock...
- Page 65 Digiplexer 246 v2.5.x User Manual – 11/2010 Text command COM port configuration Text command COM port configuration First set COM ports on the "I/O Layout" page (System configuration). When set for text commands, it First set COM ports on the "I/O Layout" page (System configuration). When set for text commands, it is then necessary to set the speed.
-
Page 66: Uecp
Digiplexer 246 v2.5.x User Manual – 11/2010 7.5. 7.5. UECP UECP Select the corresponding tab. Select the corresponding tab. A DSN can only be configured in UECP if it is not the current DSN. To send a configuration A DSN can only be configured in UECP if it is not the current DSN. To send a configuration requires switching to another DSN;... - Page 67 Digiplexer 246 v2.5.x User Manual – 11/2010 Setting a configuration Setting a configuration Select the port associated with the configuration. You Select the port associated with the configuration. You must first set it the “I/O layout” page (system must first set it the “I/O layout” page (system configuration.
-
Page 68: Rds Status
Digiplexer 246 v2.5.x User Manual – 11/2010 7.6. 7.6. RDS Status RDS Status Select the corresponding tab. Select the corresponding tab. Encoder general information When using the scrolling PS, When using radiotext, the complete current text is the complete current text displayed. - Page 69 Digiplexer 246 v2.5.x User Manual – 11/2010 • Red: error, no information has been received within the allocated timeframe. ed: error, no information has been received within the allocated timeframe. ODA TMC and immediate buffers ODA TMC and immediate buffers...
-
Page 70: Audio Backup Management
Digiplexer 246 v2.5.x User Manual – 11/2010 8. AUDIO BACKUP MANAGEMENT 8. AUDIO BACKUP MANAGEMENT It is possible to choose priority levels among the three possible audio source types: analog input, AES input, and the PCI input. You can decide which one will be the primary source, the first backup and even the second backup if necessary. -
Page 71: Basic Audio Backup
Digiplexer 246 v2.5.x User Manual – 11/2010 8.1. 8.1. Basic Audio Backup Basic Audio Backup 8.1.1. Backup management 8.1.1. Backup management Audio backup file The following formats can be used: • WAVE audio files The audio file can • MP3 compressed... -
Page 72: Status
Digiplexer 246 v2.5.x User Manual – 11/2010 MP3 stream input MP3 stream input An IP MP3 stream In order to activate input can serve as it, check the box. audio backup. The stream format must ‘Shoutcast’ and enter the ‘Icecast’ (MP3 type ‘Shoutcast’... -
Page 73: Advanced Audio Advanced
Digiplexer 246 v2.5.x User Manual – 11/2010 8.2. 8.2. Advanced Audio Advanced Advanced Audio Advanced Use the remote application to configure the audio backup; the "Status tab is the only one that is Use the remote application to configure the audio backup; the "Status tab is the only one that is available on the front panel. - Page 74 Digiplexer 246 v2.5.x User Manual – 11/2010 Available playlists Available playlists Use the icons to: Use the icons to: : create a new playlist. Double-click on its name to rename it. : delete the current playlist. : export the current playlist and the associated audio files to the unit.
-
Page 75: Playlist Order
Digiplexer 246 v2.5.x User Manual – 11/2010 Available files Available files Refresh the display of Update the list from the remote directory set in the available files. “File transfer” tab. The update status can be read in the text zone. - Page 76 Digiplexer 246 v2.5.x User Manual – 11/2010 Playlist play order Playlist play order In case of failure of the analog or AES inputs, the Digiplexer will play playlists set here. In case of failure of the analog or AES inputs, the Digiplexer will play playlists set here.
-
Page 77: File Transfer
Digiplexer 246 v2.5.x User Manual – 11/2010 8.2.3. File transfer Select the corresponding tab. On this tab, select audio files available on the local PC to upload them to unit so they can be included e on the local PC to upload them to unit so they can be included in playlists. -
Page 78: Stream Management
Digiplexer 246 v2.5.x User Manual – 11/2010 Remote files Remote files Manage files and directories saved on the unit. Manage files and directories saved on the unit. They can be downloaded to the hard drive They can be downloaded to the hard drive or deleted. -
Page 79: Parameters
Digiplexer 246 v2.5.x User Manual – 11/2010 8.2.5. Parameters 8.2.5. Parameters Select the corresponding tab. Select the corresponding tab. Set the duration of the crossfade between two pieces in seconds. Set the stream timeout in seconds. Set the sampling frequency. Choose 44.1 or 48 depending on your audio backup files. -
Page 80: Transmitter Configuration
Digiplexer 246 v2.5.x User Manual – 11/2010 9. TRANSMITTER CONFIGURATION 9. TRANSMITTER CONFIGURATION This page is only available with the FM modulator/RF amplifier hardware option. To access the Transmitter Configuration page, click in the tool bar or the ‘View’ ‘Transmitter’ (remote application only). -
Page 81: Viewing The Status
Digiplexer 246 v2.5.x User Manual – 11/2010 10. VIEWING THE STATUS 10. VIEWING THE STATUS To view the Status pages, click in the tool bar or the ‘View’ ‘Status’ (remote application only). 10.1. Status The Status tab gives an overview of the unit status. -
Page 82: Event Log
Digiplexer 246 v2.5.x User Manual – 11/2010 10.2. Event log Three logs are available: • Realtime Log: current event list. The following information is listed: sub-system, start and end time, severity, event type and description. The list is refreshed automatically; it is however possible to pause using •... -
Page 83: About
Digiplexer 246 v2.5.x User Manual – 11/2010 When selecting the history log or the I/O log, the filter configuration window is available: When selecting the history log or the I/O log, the filter configuration window is available: It is then possible to filter by date, to select the number of line per page, and by clicking ‘Advanced’, to add a... -
Page 84: Appendix A: Software Options
Contact the sales department in order to obtain the software key to activate the option, then follow the procedure: Insert the CD sent by Audemat upon purchase of the option, the following screen will pop up. Click on the link and copy the product key. -
Page 85: Upgrade To 2 Or 4 Bands
Digiplexer 246 v2.5.x User Manual – 11/2010 Upgrade to 2 or 4 bands A.2. First contact the sales department to get a copy of the CD containing the upgrade files. Follow then the procedure: Note: file names vary whether the upgrade is in 2 or 4 bands (number symbolized by n in file names below). -
Page 86: Appendix B: Optional Input / Output Configuration
Digiplexer 246 v2.5.x User Manual – 11/2010 APPENDIX B: OPTIONAL INPUT / OUTPUT CONFIGURATION OPTIONAL INPUT / OUTPUT CONFIGURATION Digital inputs B.1. This module provides 16 digital inputs and can work in 2 different modes depending on jumper configuration: Schematic diagram: ‘Internal power supply’... - Page 87 Digiplexer 246 v2.5.x User Manual – 11/2010 ‘External power supply’ mode: Install one jumper only in the middle of the pins. 1 jumper in the middle Digital input module external connection diagram: External connections on SUB-D 25pts female connector situated at the end of the board.
-
Page 88: Relay Outputs
Digiplexer 246 v2.5.x User Manual – 11/2010 Relay outputs B.2. This module provides 8 bistable relays. Each relay has one com input (common) and two ys. Each relay has one com input (common) and two outputs: NC (normally closed) and NO (normally opened). - Page 89 Digiplexer 246 v2.5.x User Manual – 11/2010 Relay output module external connection diagram: External connections on SUB-D 25pts male connector situated at the end of the board. Each circuit can support 5A at 125 V. A +12 V power supply with a max current of 250 mA is available on pin 13.
-
Page 90: Analog Input Module
Digiplexer 246 v2.5.x User Manual – 11/2010 Analog input module Analog input module B.3. B.3. This module provides 8 analog inputs designed to measure voltages up to 50 V. It is possible This module provides 8 analog inputs designed to measure voltages up to 50 V. It is possible to select the measurement range for a better accuracy while converting. -
Page 91: Appendix C: Rds Accronyms
Digiplexer 246 v2.5.x User Manual – 11/2010 APPENDIX C: RDS ACCRONYMS Alternative Frequency: transmitter frequencies from an encoded station in digital list form. Two transmission methods are possible: method A (a single list of 25 frequencies) or method B (list of frequency pairs) Clock Time. - Page 92 Digiplexer 246 v2.5.x User Manual – 11/2010 Program TYpe: a function for identifying types of programs broadcast by an RDS station. PTYN Program TYpe Name: a supplement to program type (PTY), specifying its nature using an 8 character alphanumeric string.
-
Page 93: Appendix D: For More Information
Digiplexer 246 v2.5.x User Manual – 11/2010 APPENDIX D: FOR MORE INFORMATION Please contact: Audemat Head office: 20, avenue Neil Armstrong - Parc d'Activités J.F. Kennedy 33700 BORDEAUX – MERIGNAC FRANCE Tel: +33 (5)57 928 928 | Fax: +33 (5)57 928 929 Hotline: support@audemat.com...
Need help?
Do you have a question about the DIGIPLEXER 246 and is the answer not in the manual?
Questions and answers
Hi. I just replaced the FSP220-60LE PSU of the Audemat Digiplexer and i have measured the 5V standby voltage of the PSU. The PSU needs the commands from the Unit to start up and cant find the information pertaining to that. Can you kindly assist with that information.